#
Payment, Wallet and Tax Management
#
Description
This document outlines the procedures for managing payment methods, wallet settings, and tax management within the Configuration module.
#
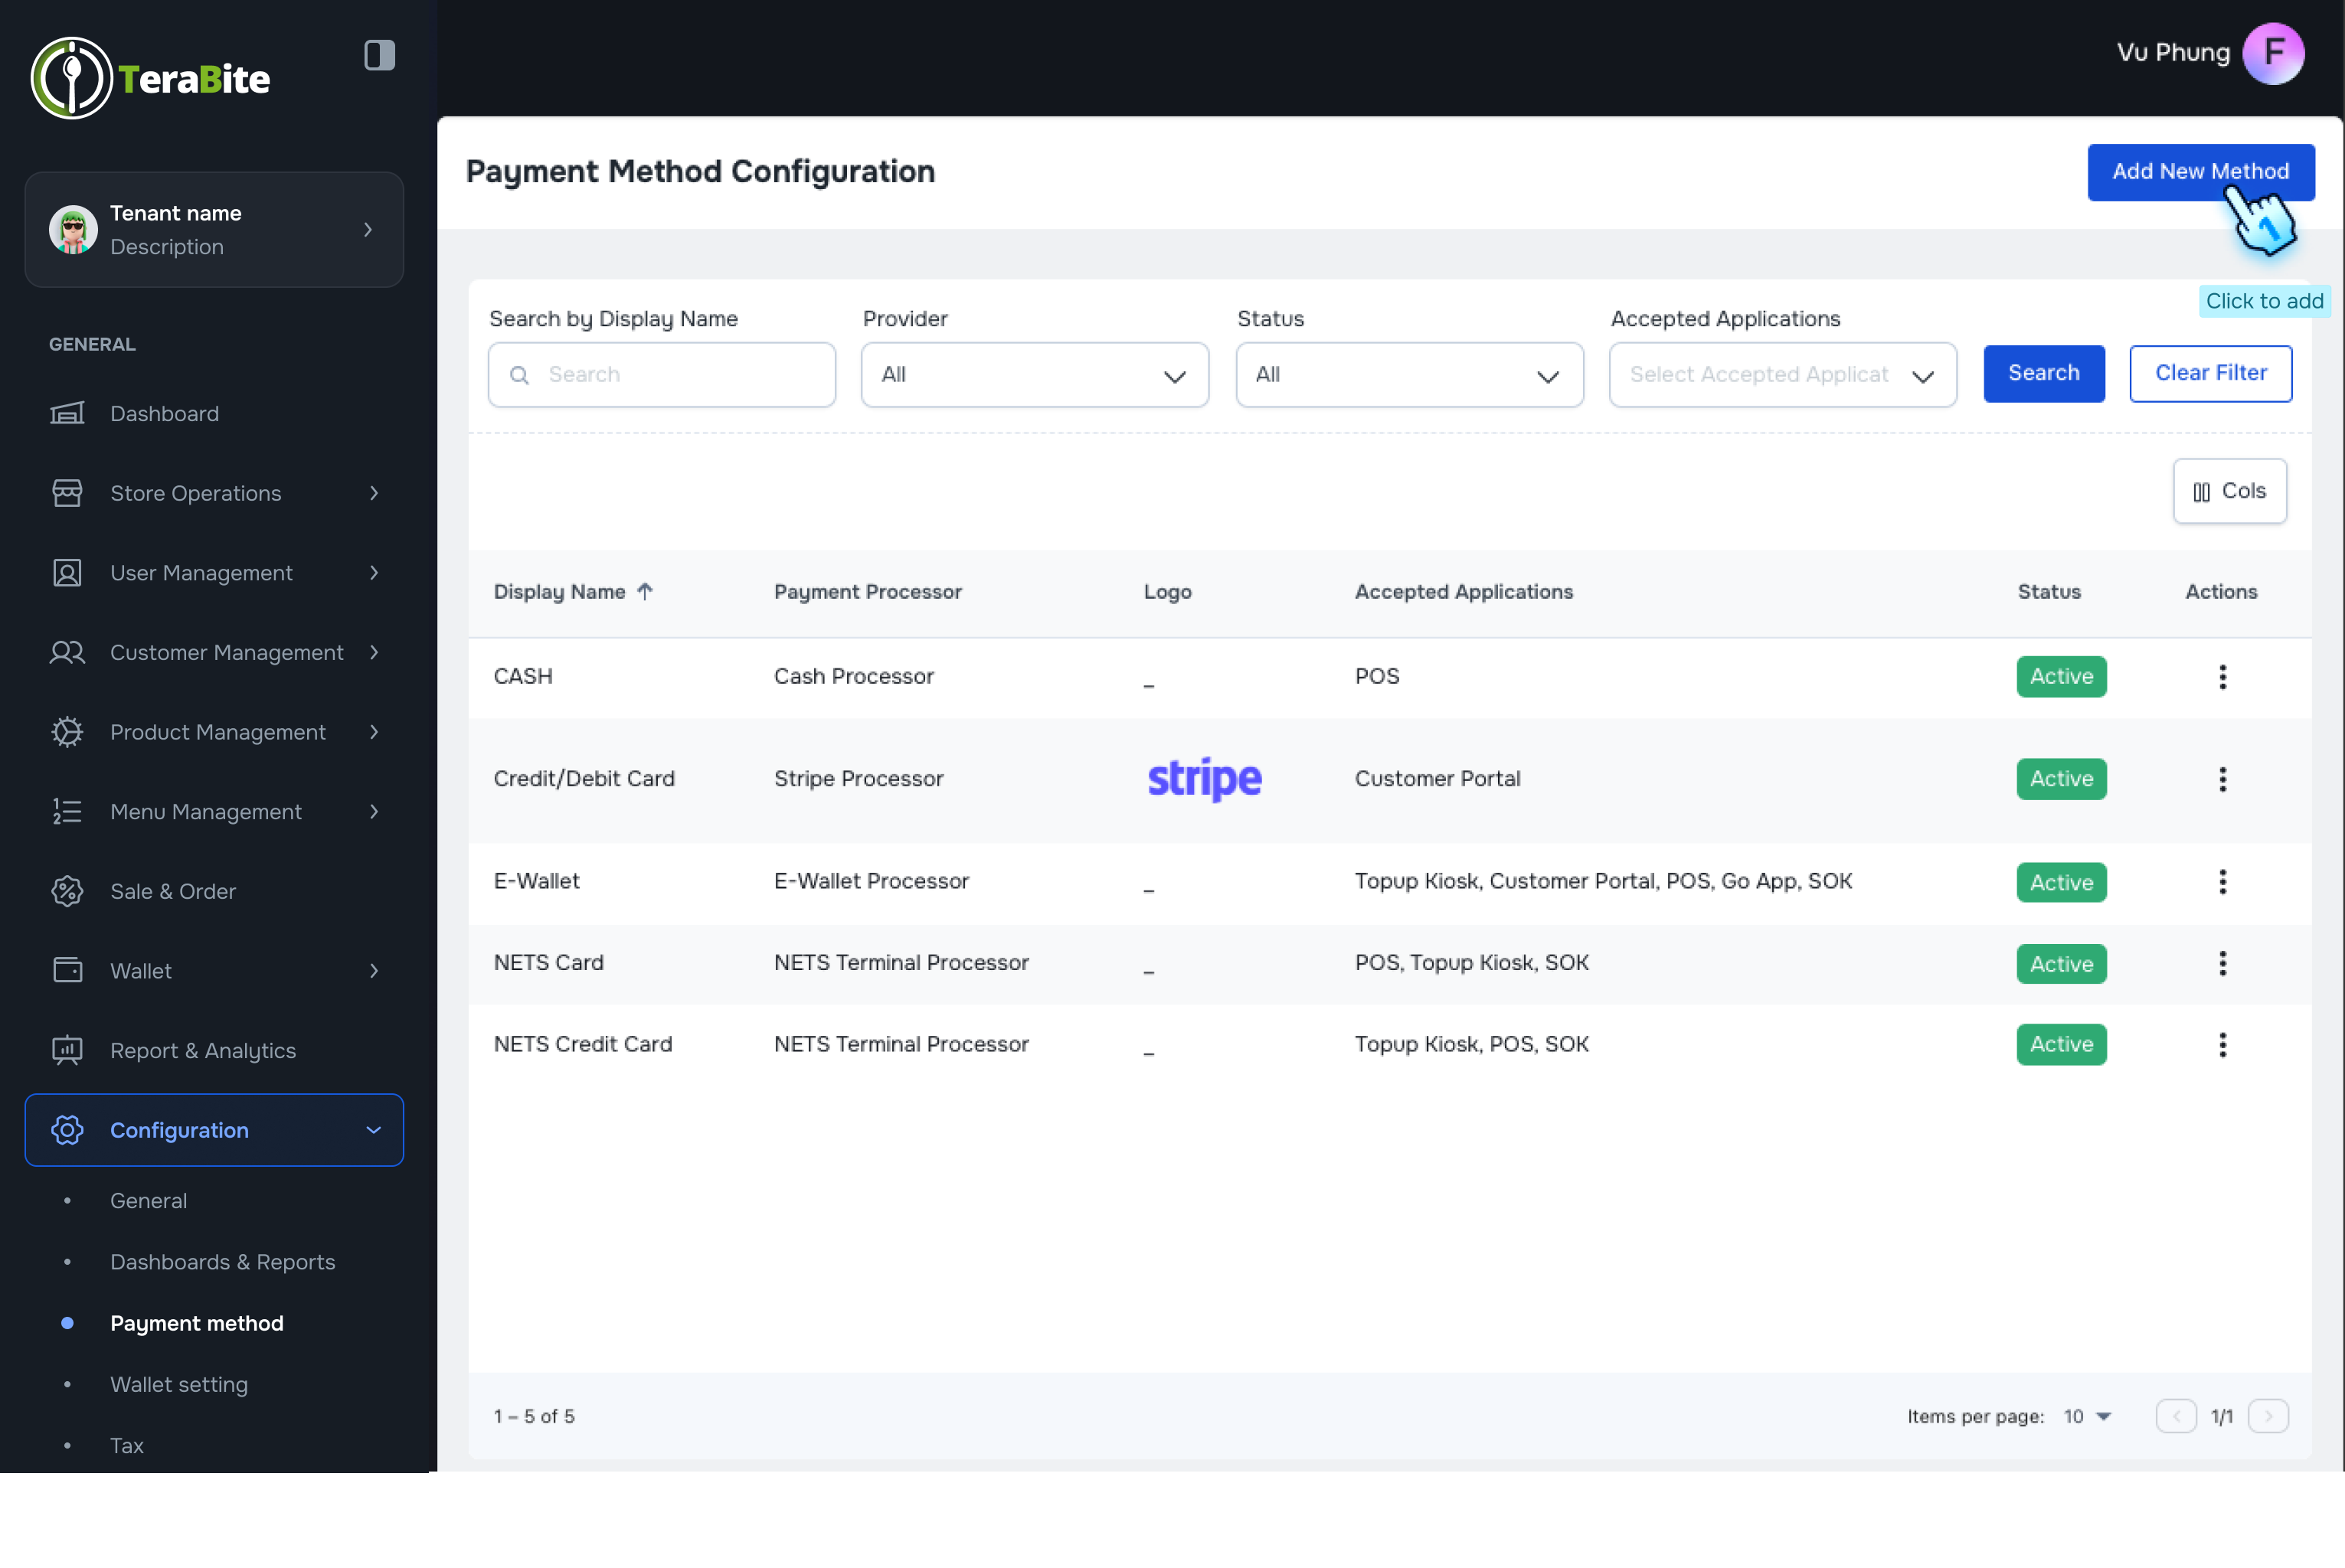
Manage Payment Methods
- Access Payment Method Section
- Navigate to the Payment Method section in the Configuration module.
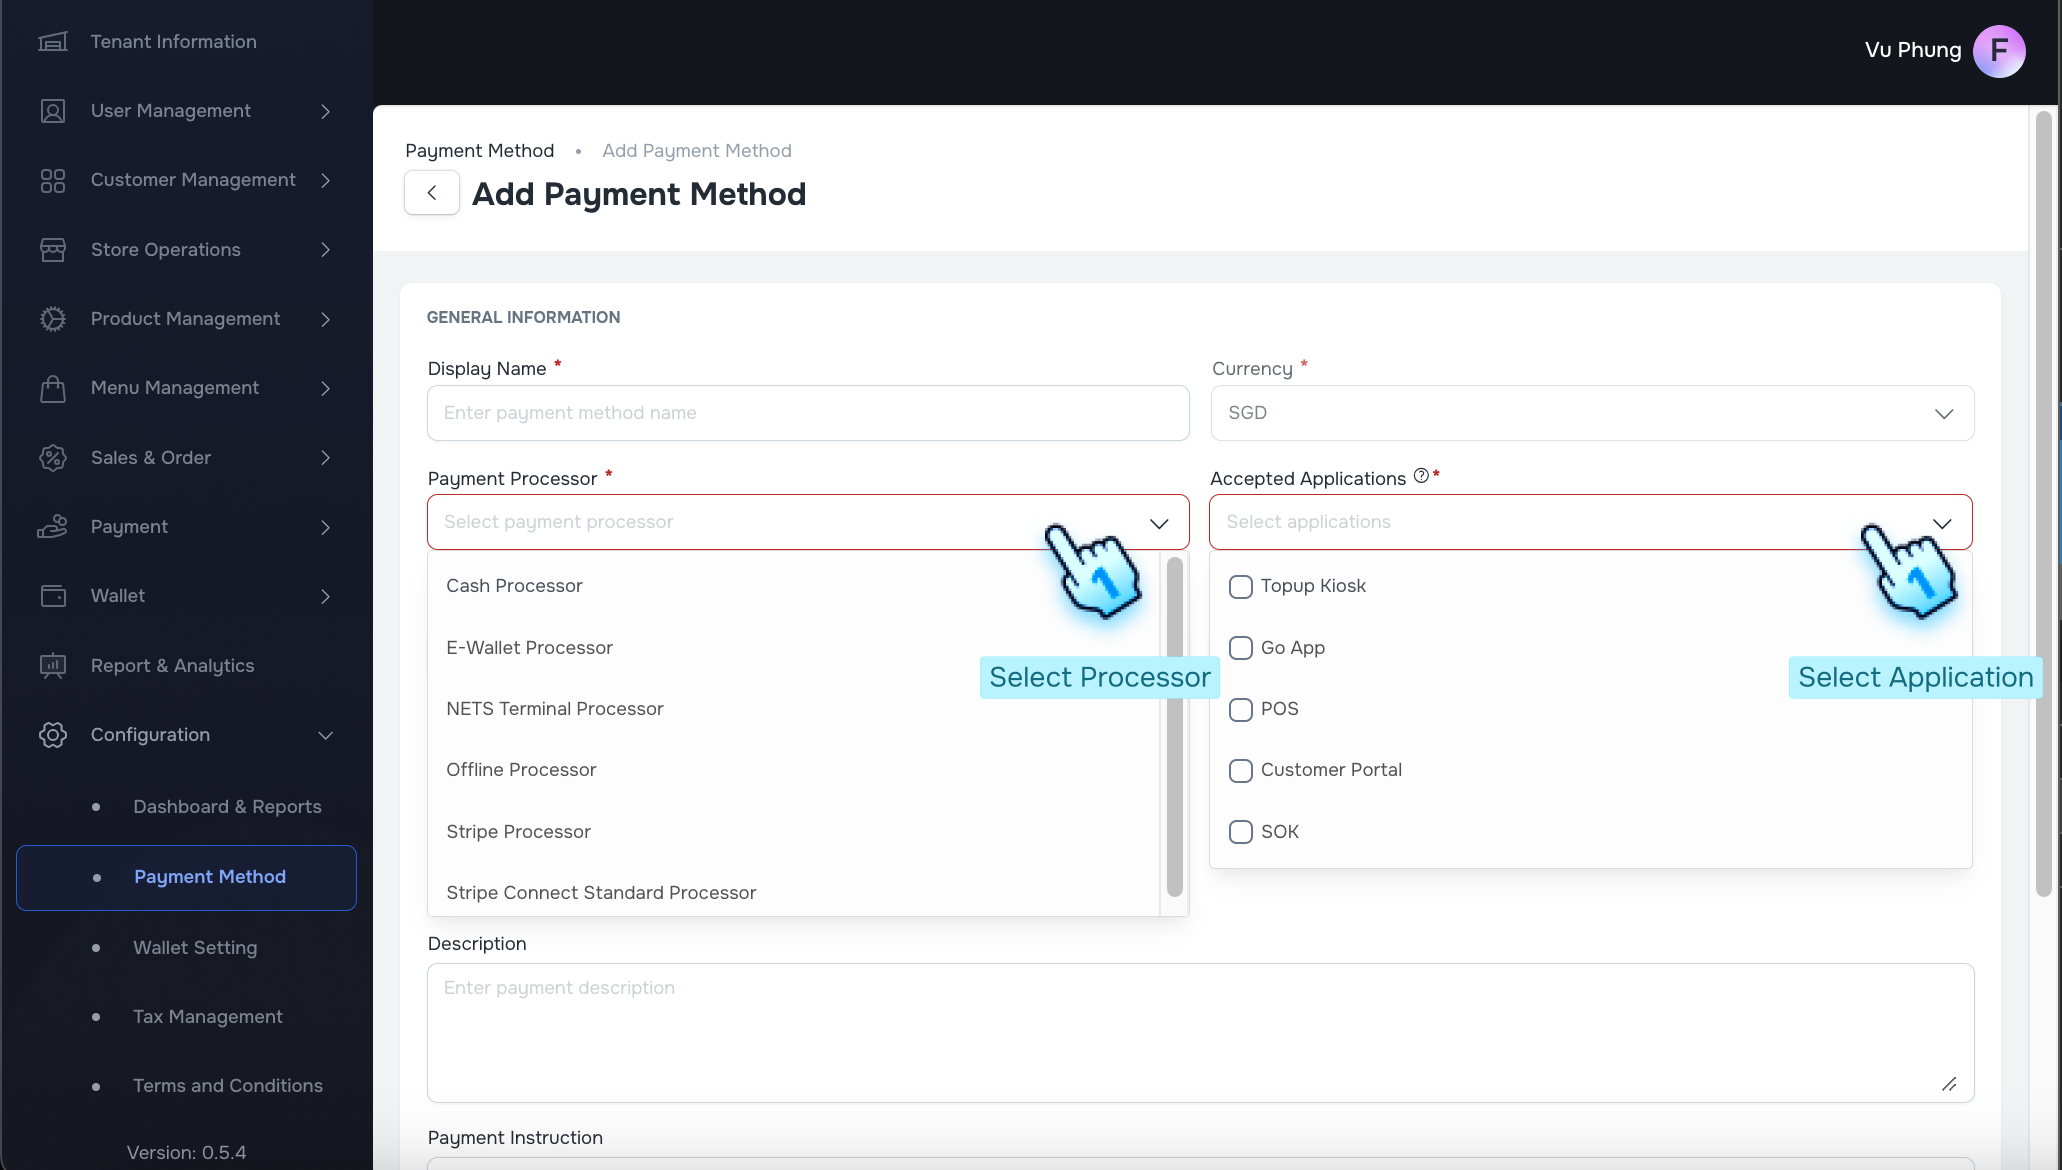
- Initiate Addition of New Payment Method
- Click the "Add New Method" button.
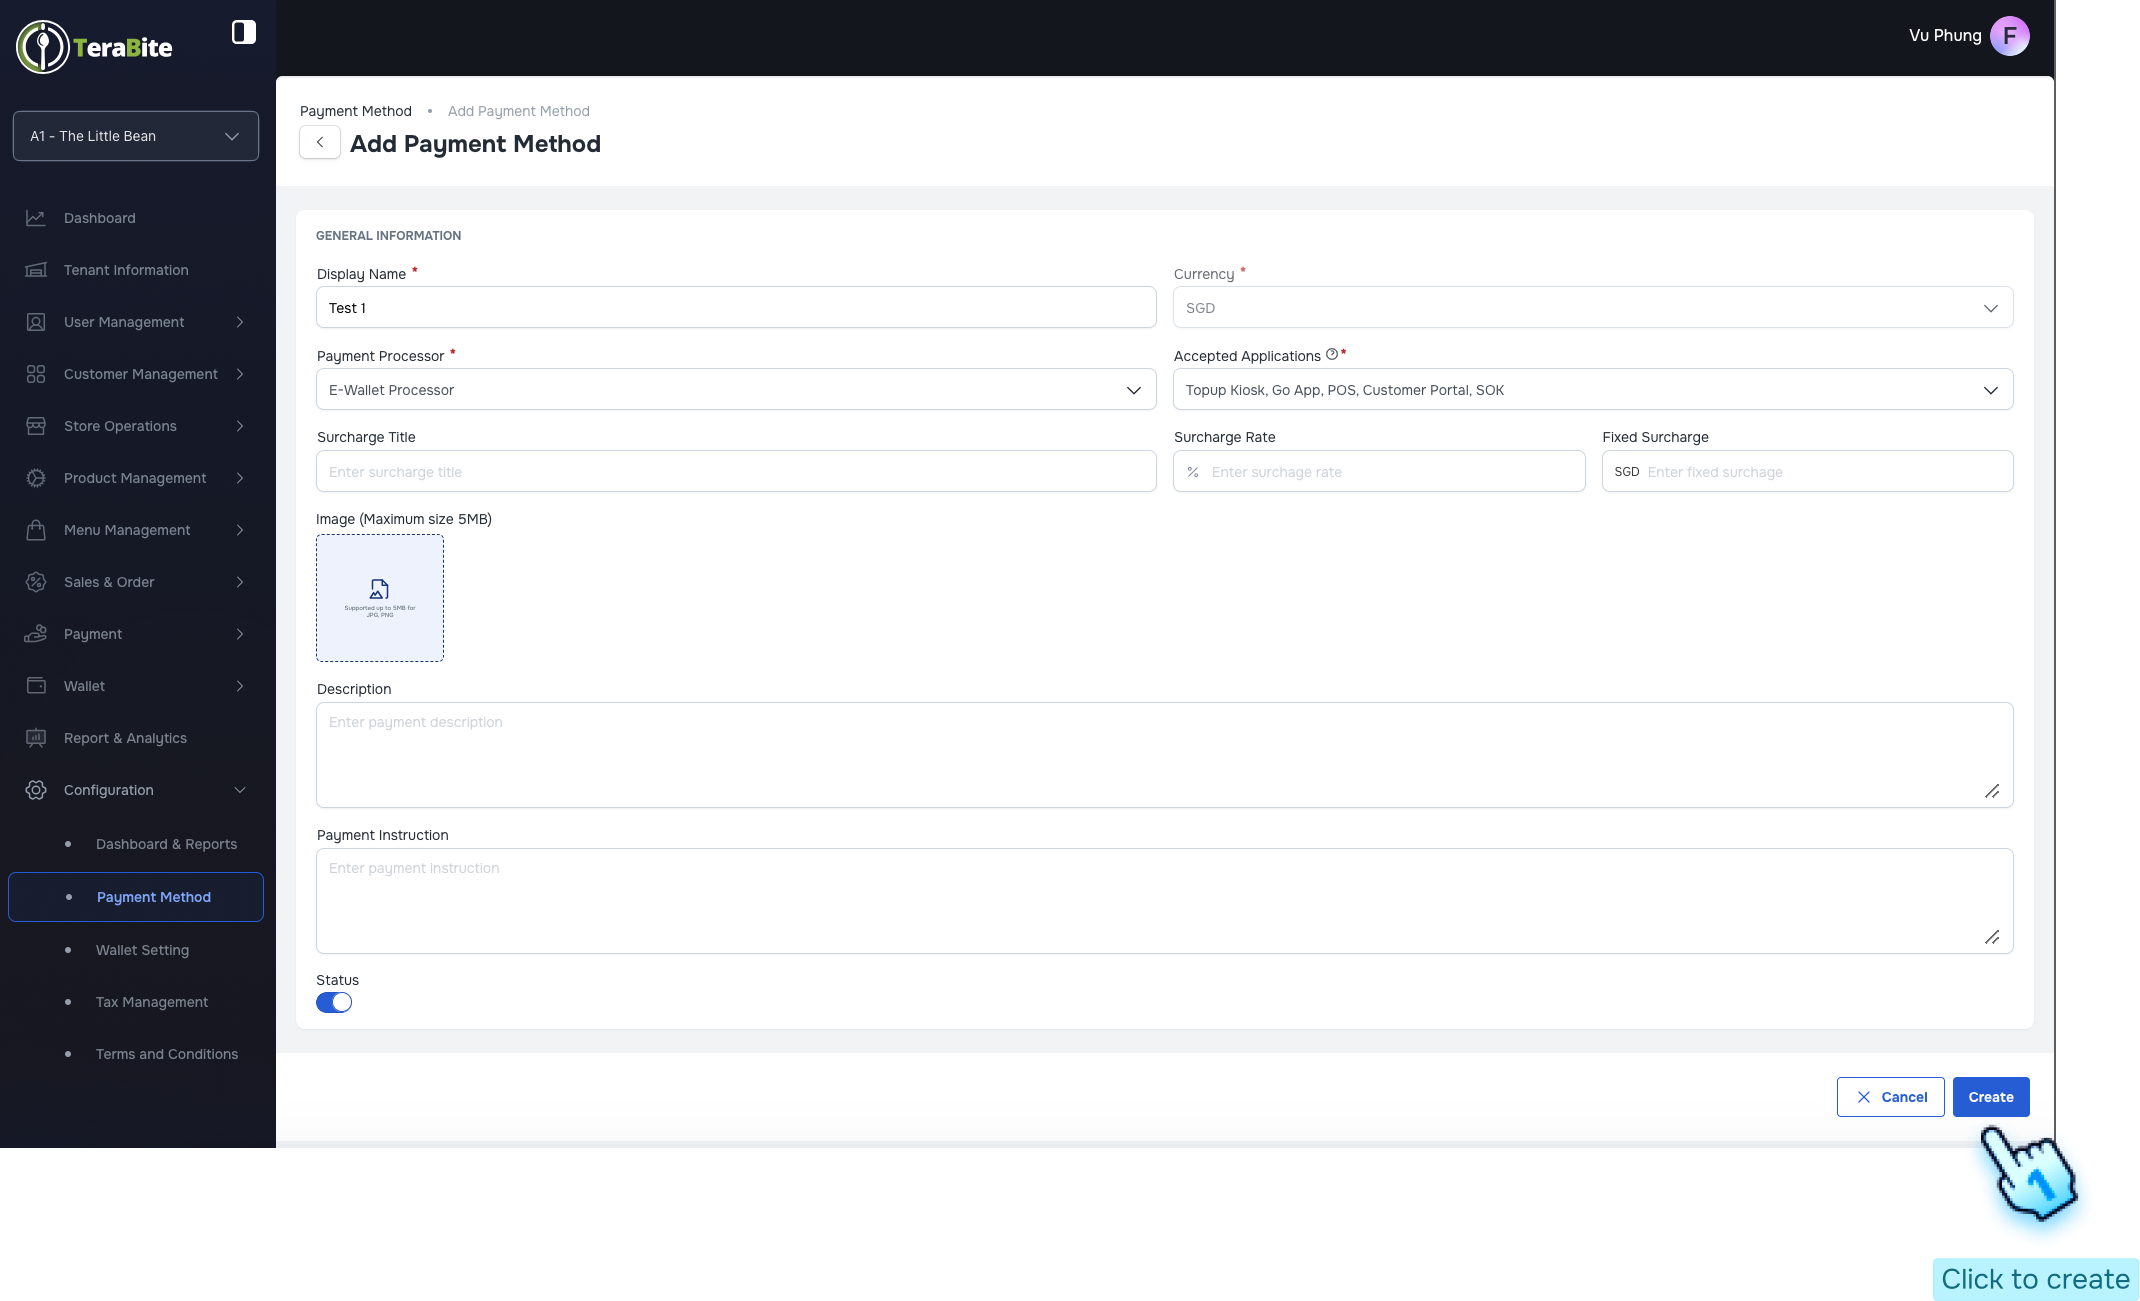
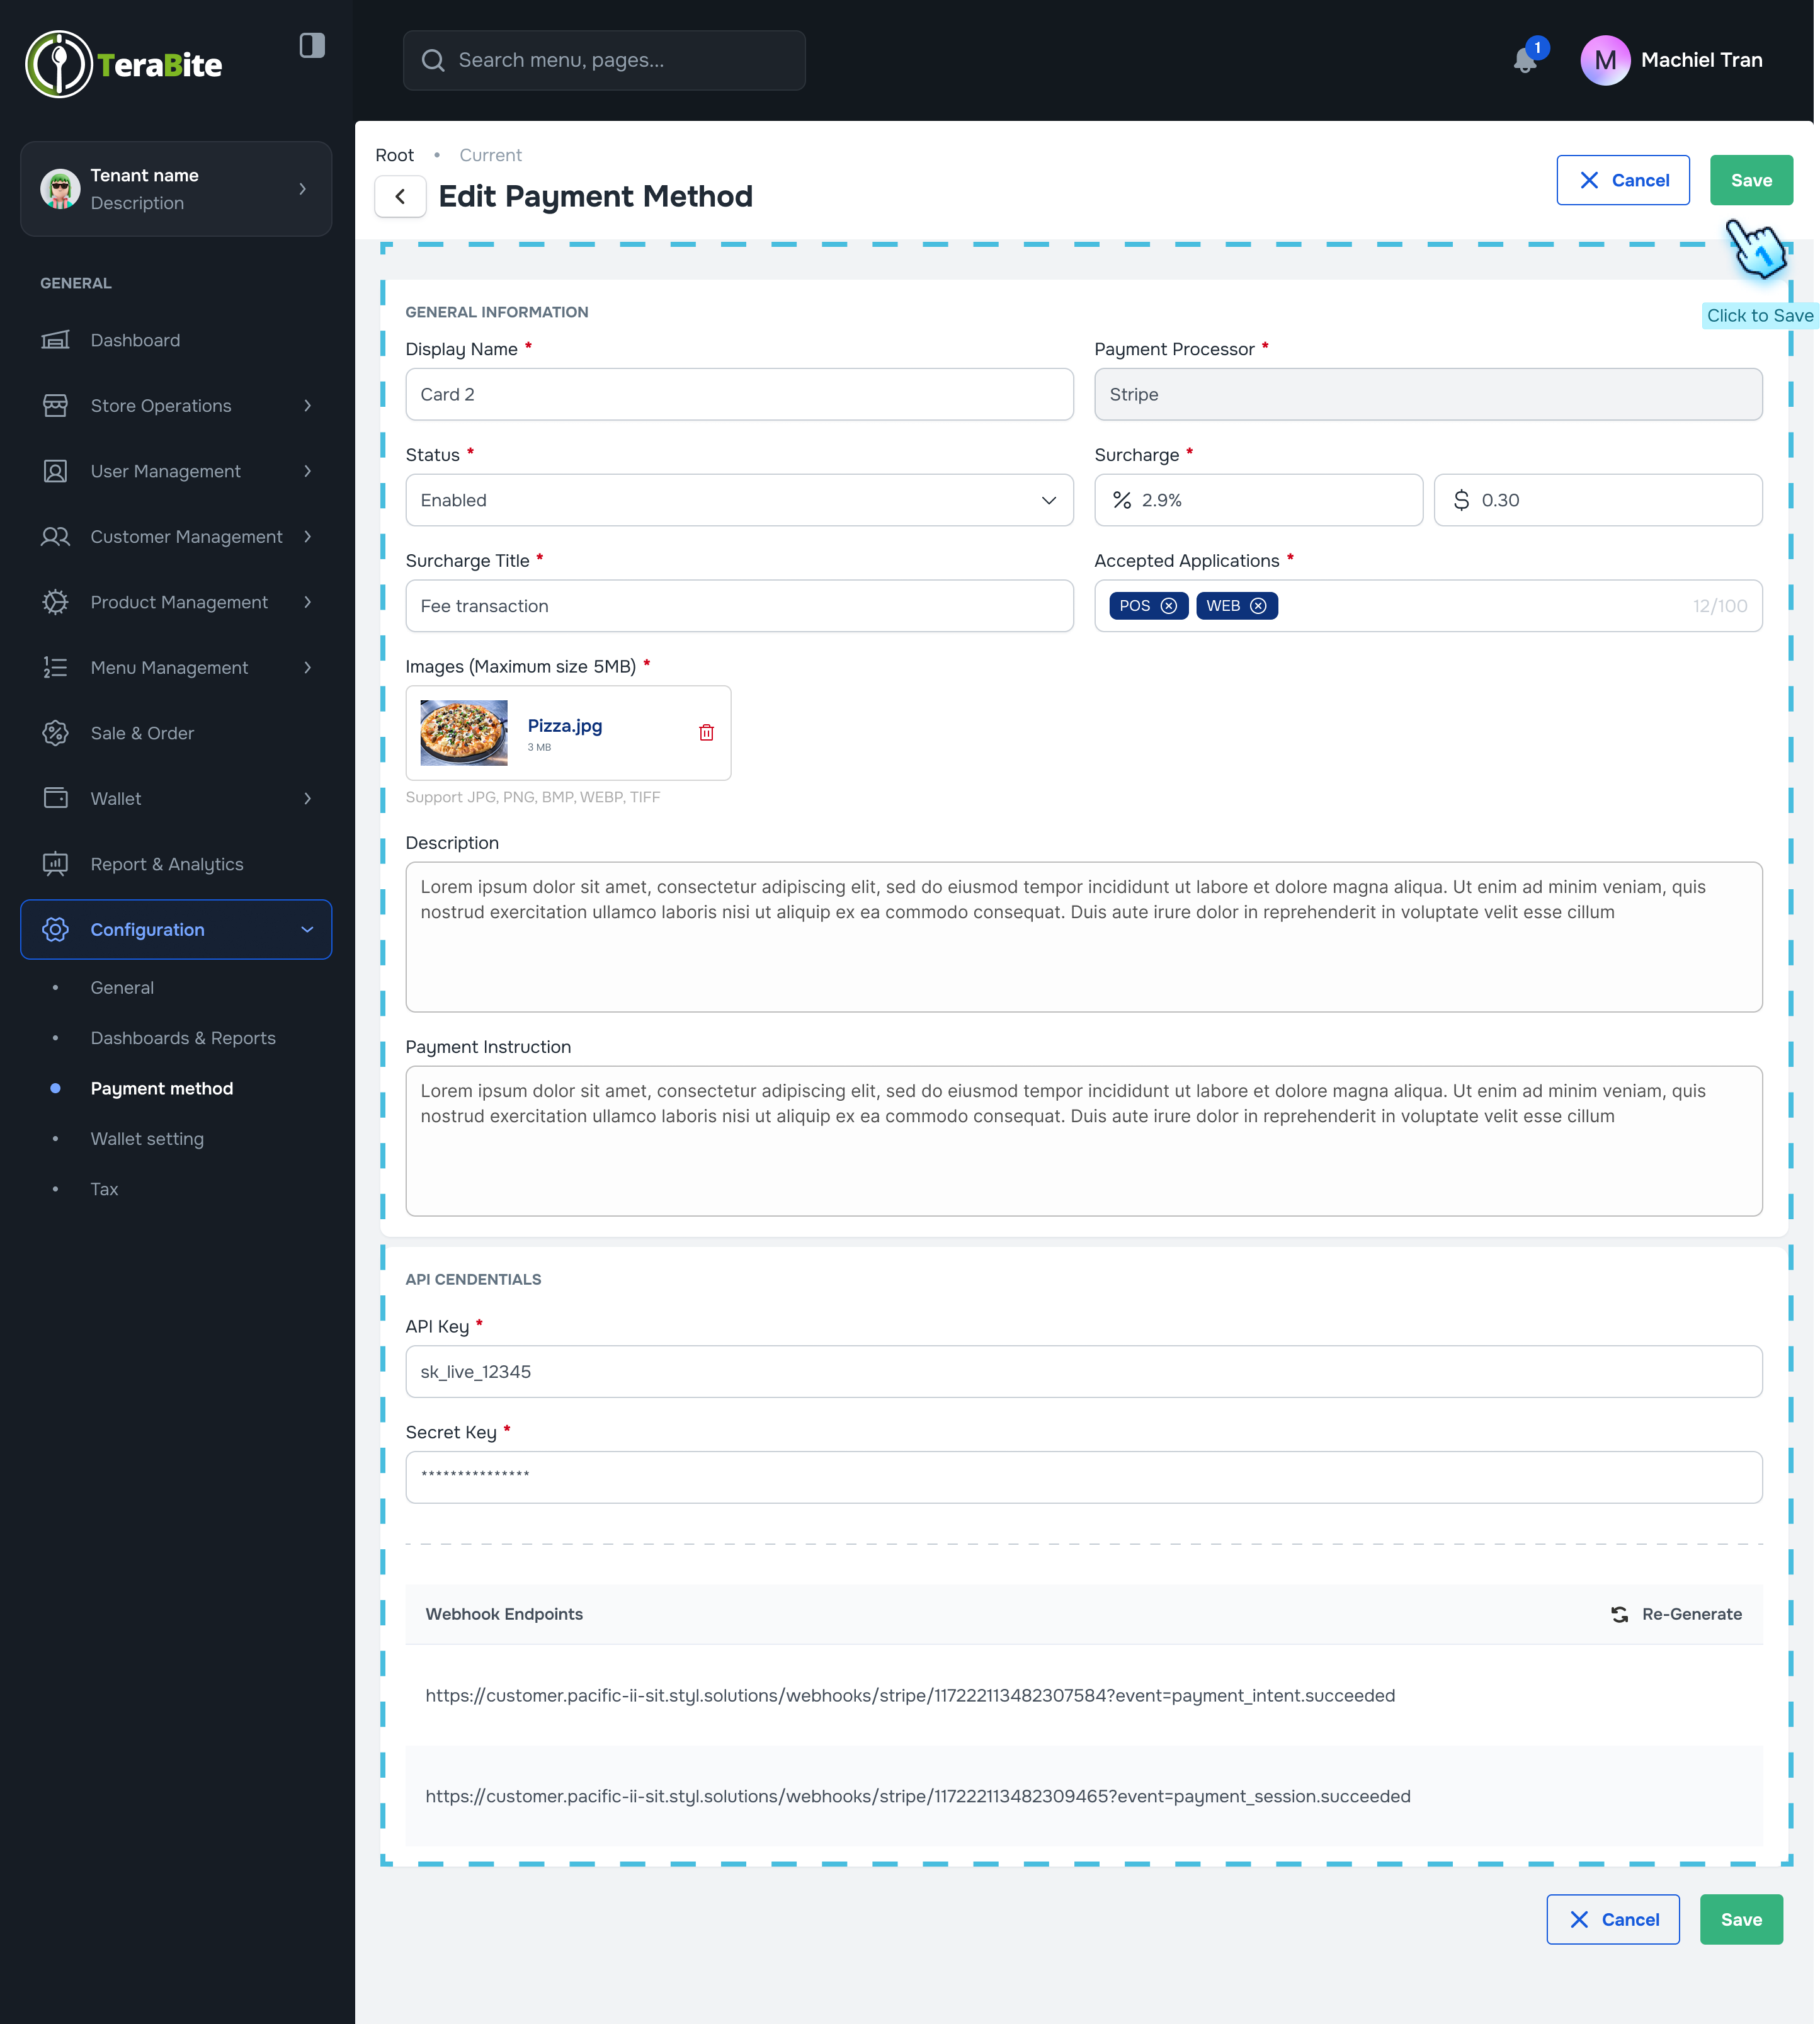
- Fill Required Information
- Complete all mandatory fields with the necessary information for the payment method.
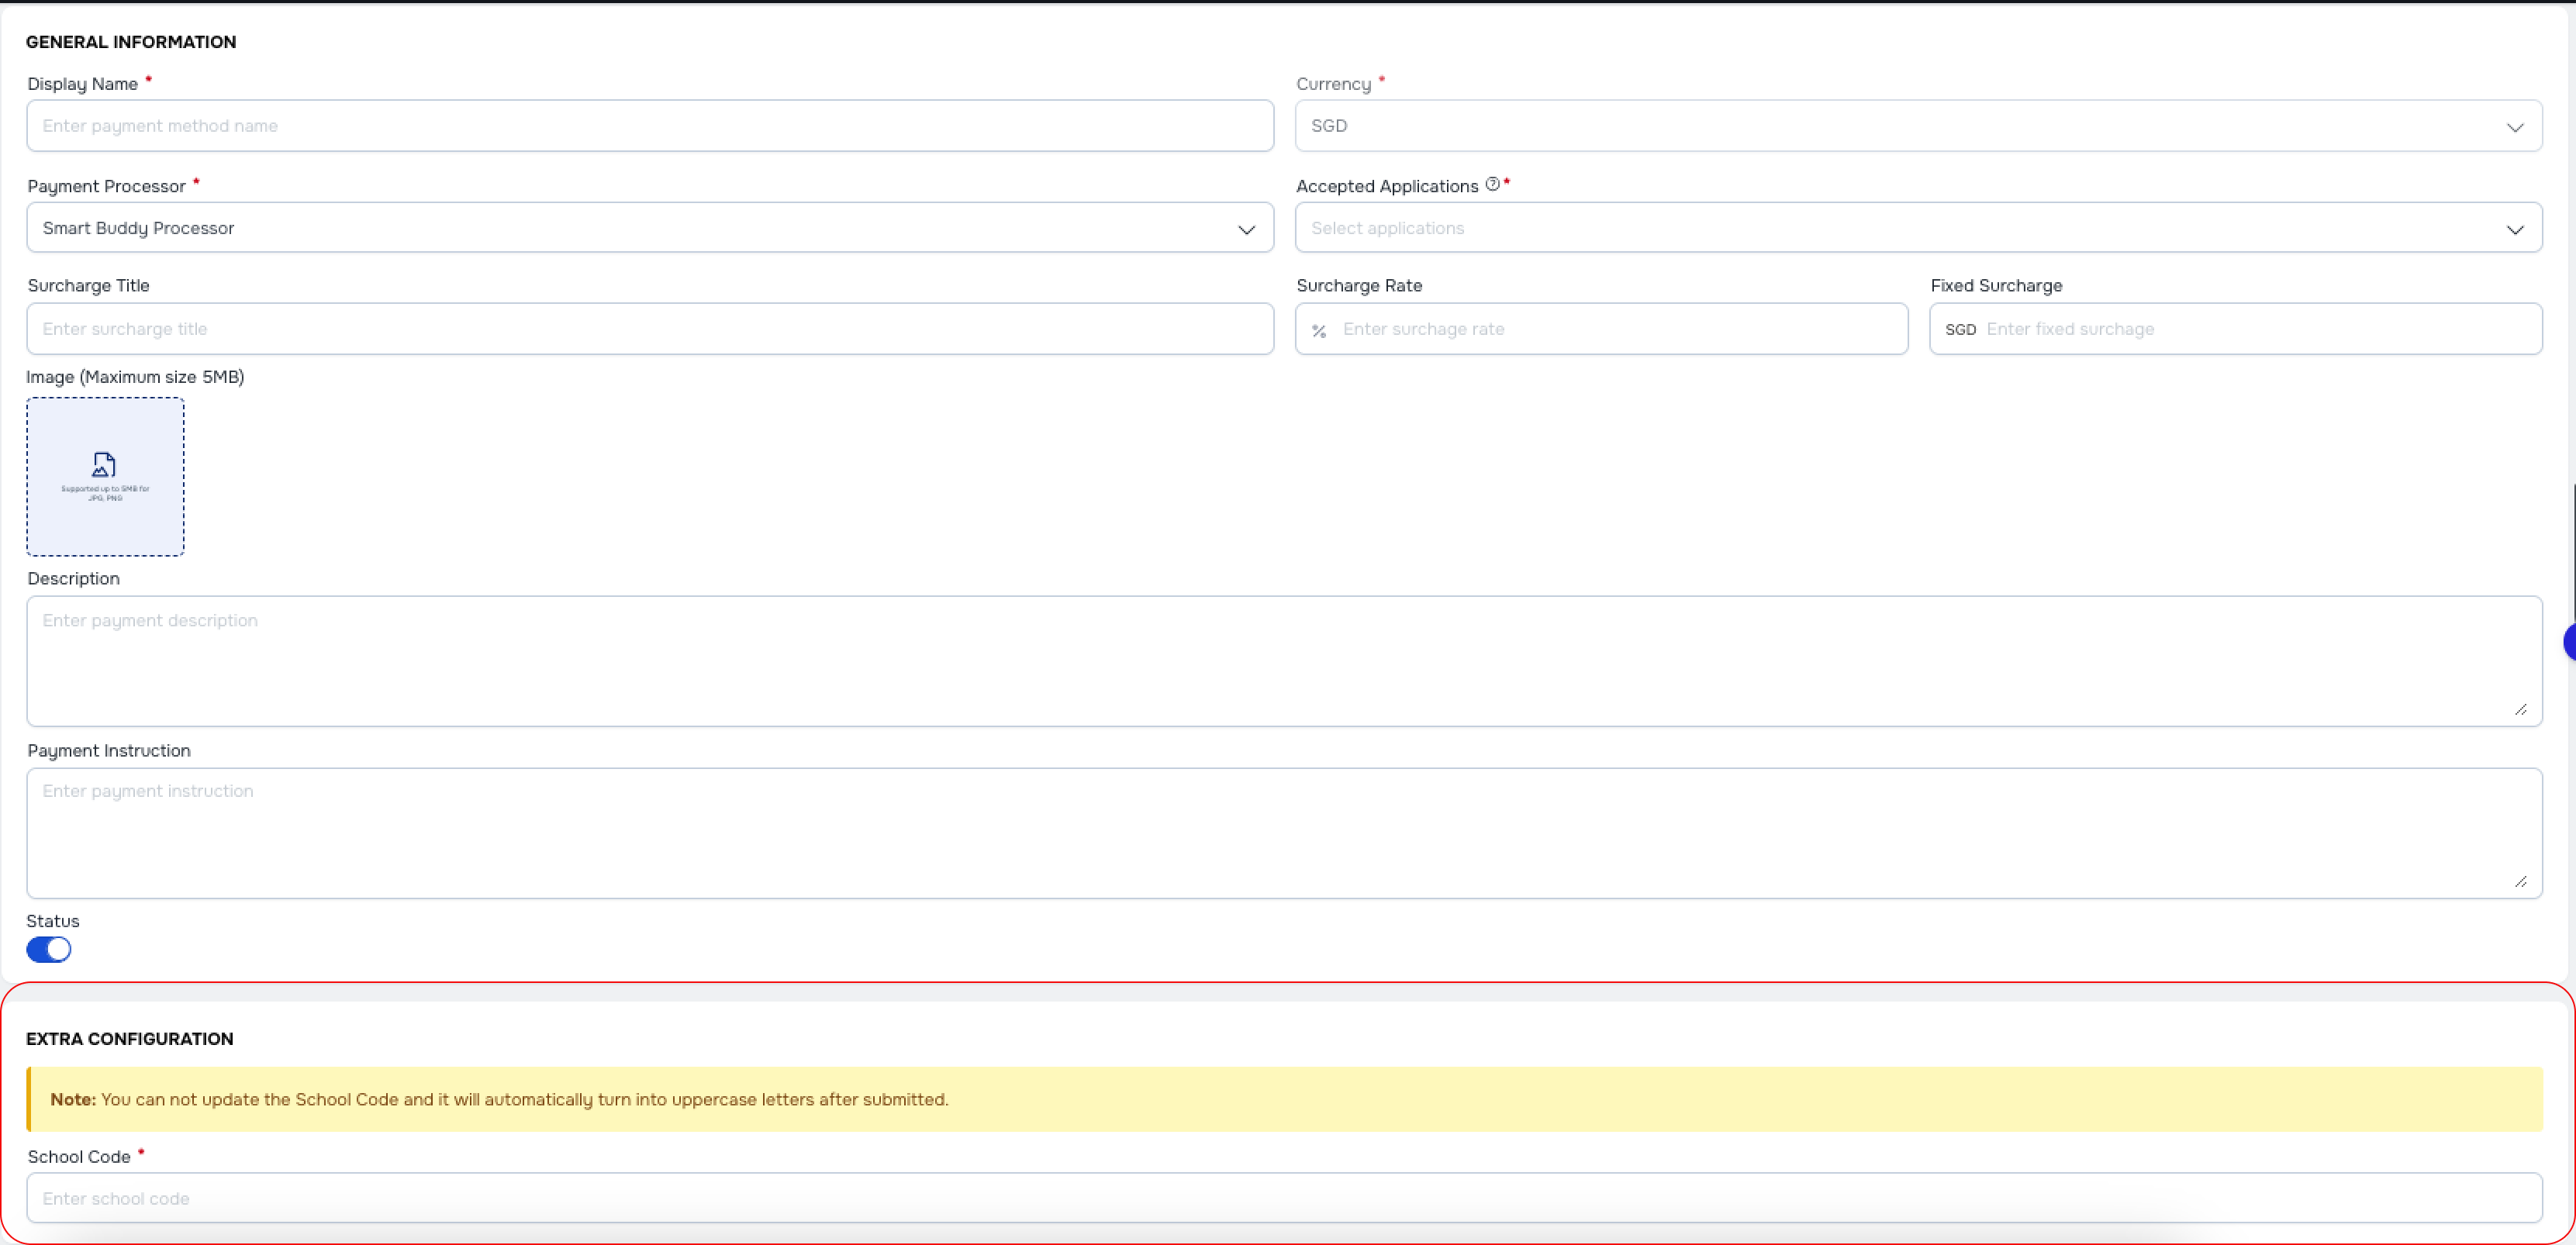
- Select Payment Processor
- Choose the appropriate payment processor. Each processor has specific accepted applications:
- Cash Processor: Top-up Kiosk, POS
- E-wallet Processor: Top-up Kiosk, POS, Go app, Customer Portal, SOK
- NETS Terminal Processor: Top-up Kiosk, POS, SOK. Note: NETS Family Car must be provided
- Stripe Processor: Top-up Kiosk, Customer Portal. Note: API key must be provided
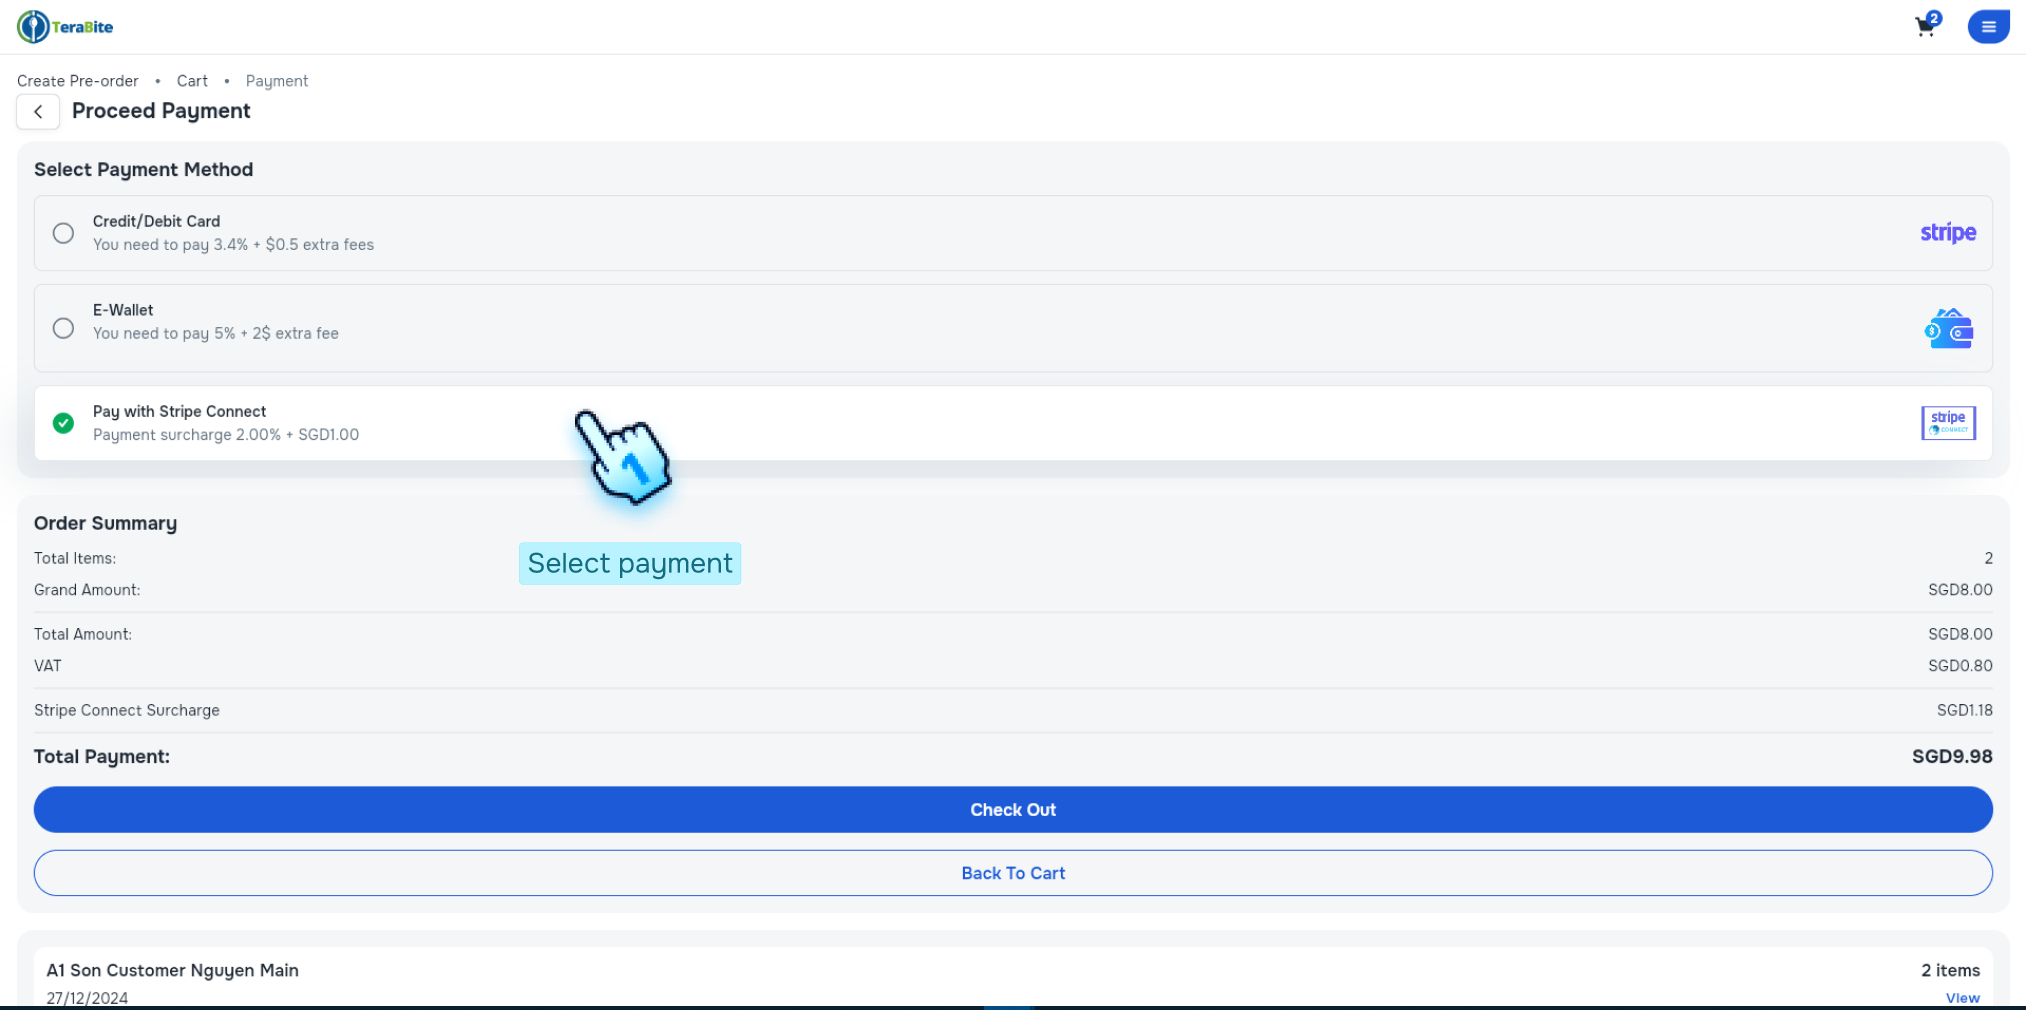
- Stripe Connect Standard Processor: Top-up Kiosk, Customer Portal
- SB processor: POS Note: When Smart Buddy Processor is selected. The Extra Configuration display for "School Code" Input. This will be entered the correct school code from Caleb system.
- Toggle the Status On
- Activate the payment method by toggling the status to "On."
- Click Create Button to Finish
- Finalize the setup by clicking the Create button.
- Actions per Status:
- Active: Options are View, Edit, Disable, and Delete.
- Click the "Disable" button in the three-dot menu and confirm by clicking the "Disable" button in the confirmation dialog.
- Disable: Options are View, Edit, Activate, and Delete.
- Click the "Activate" button in the three-dot menu and confirm by clicking the "Activate" button in the confirmation dialog.
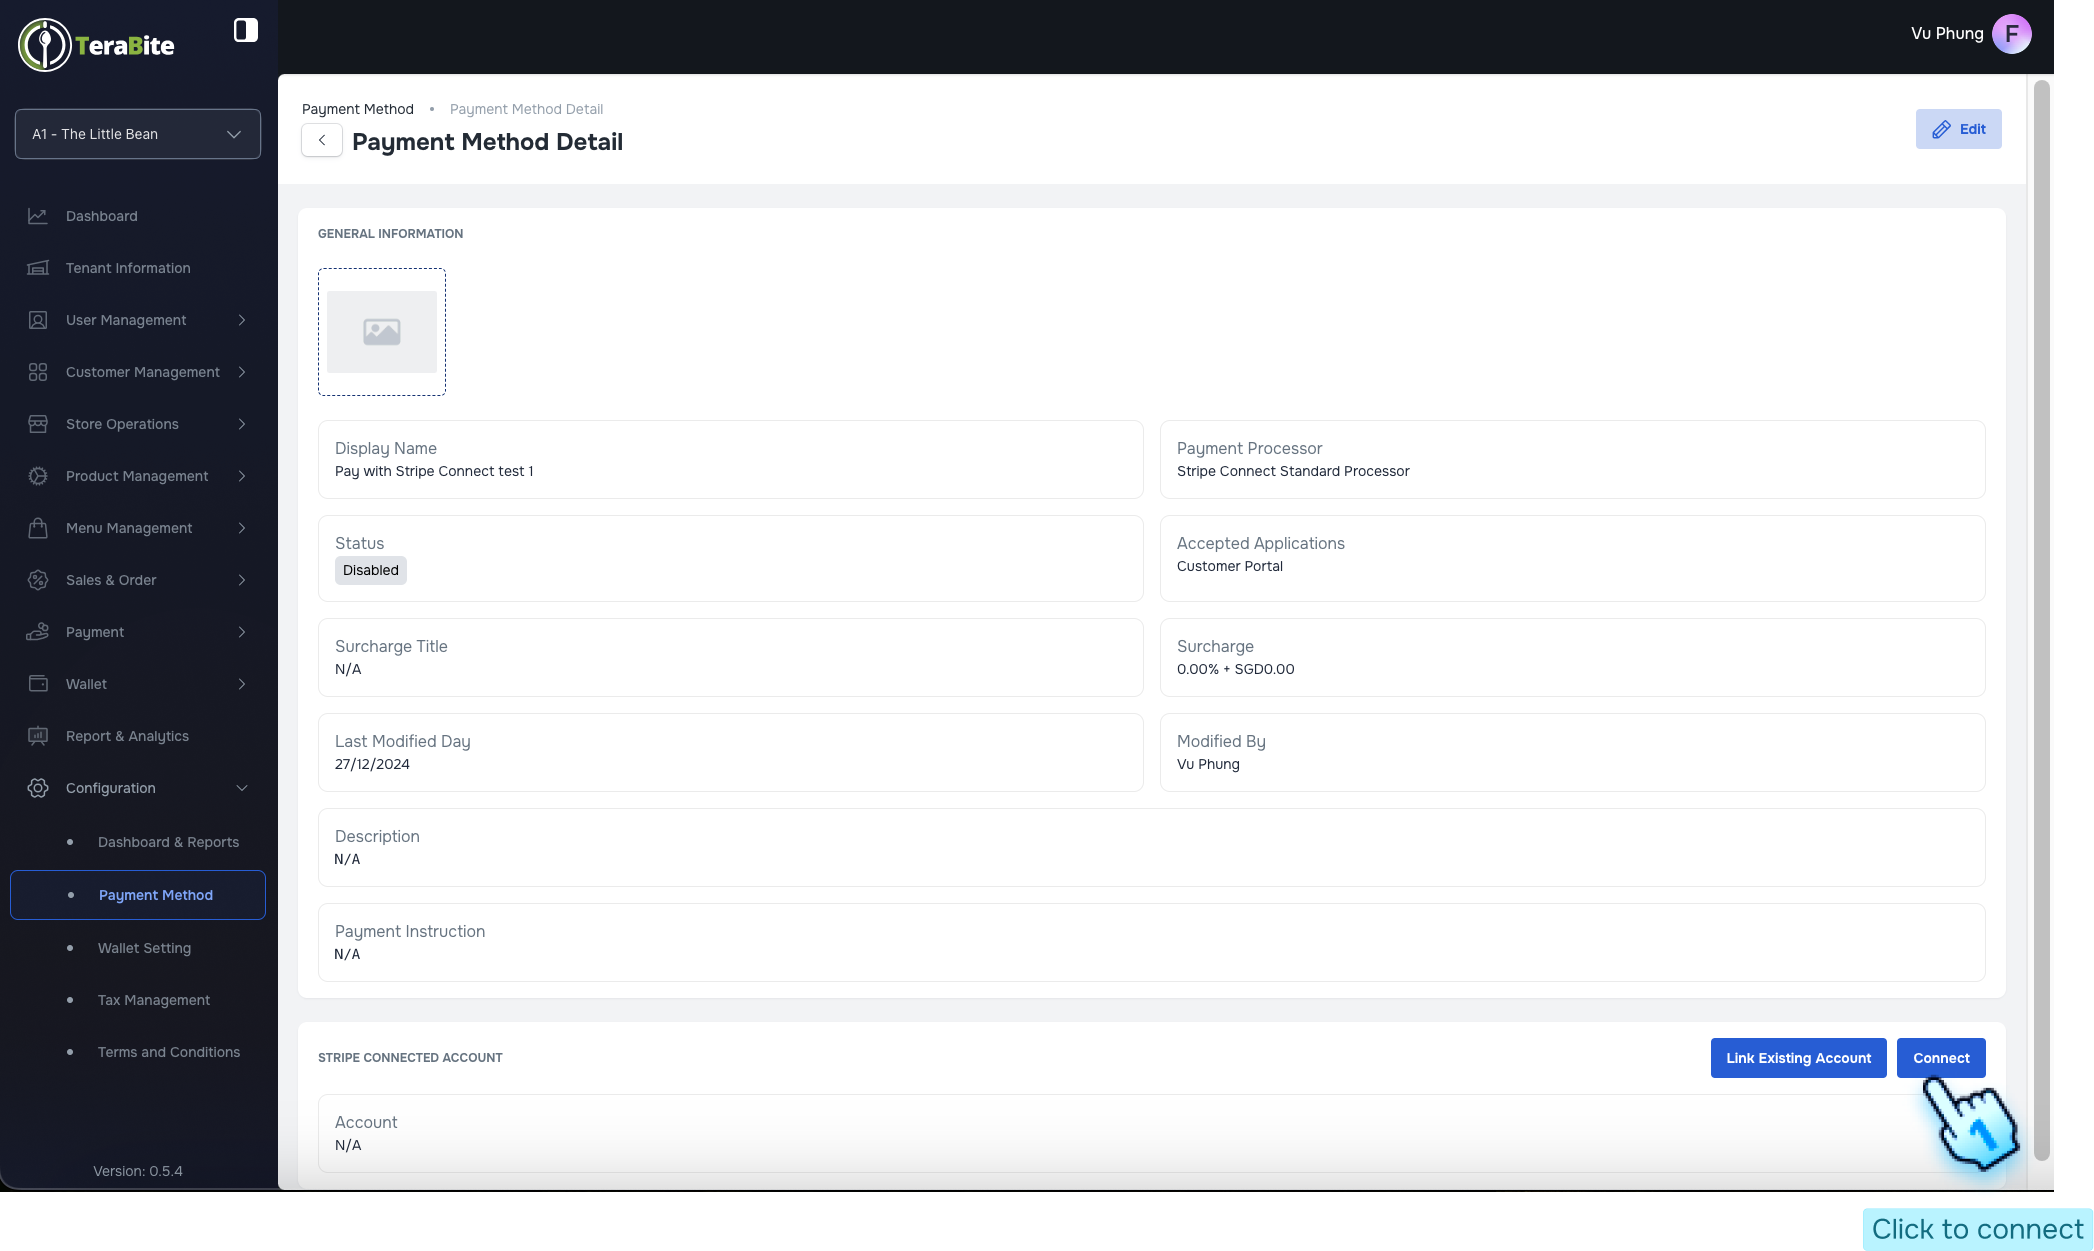
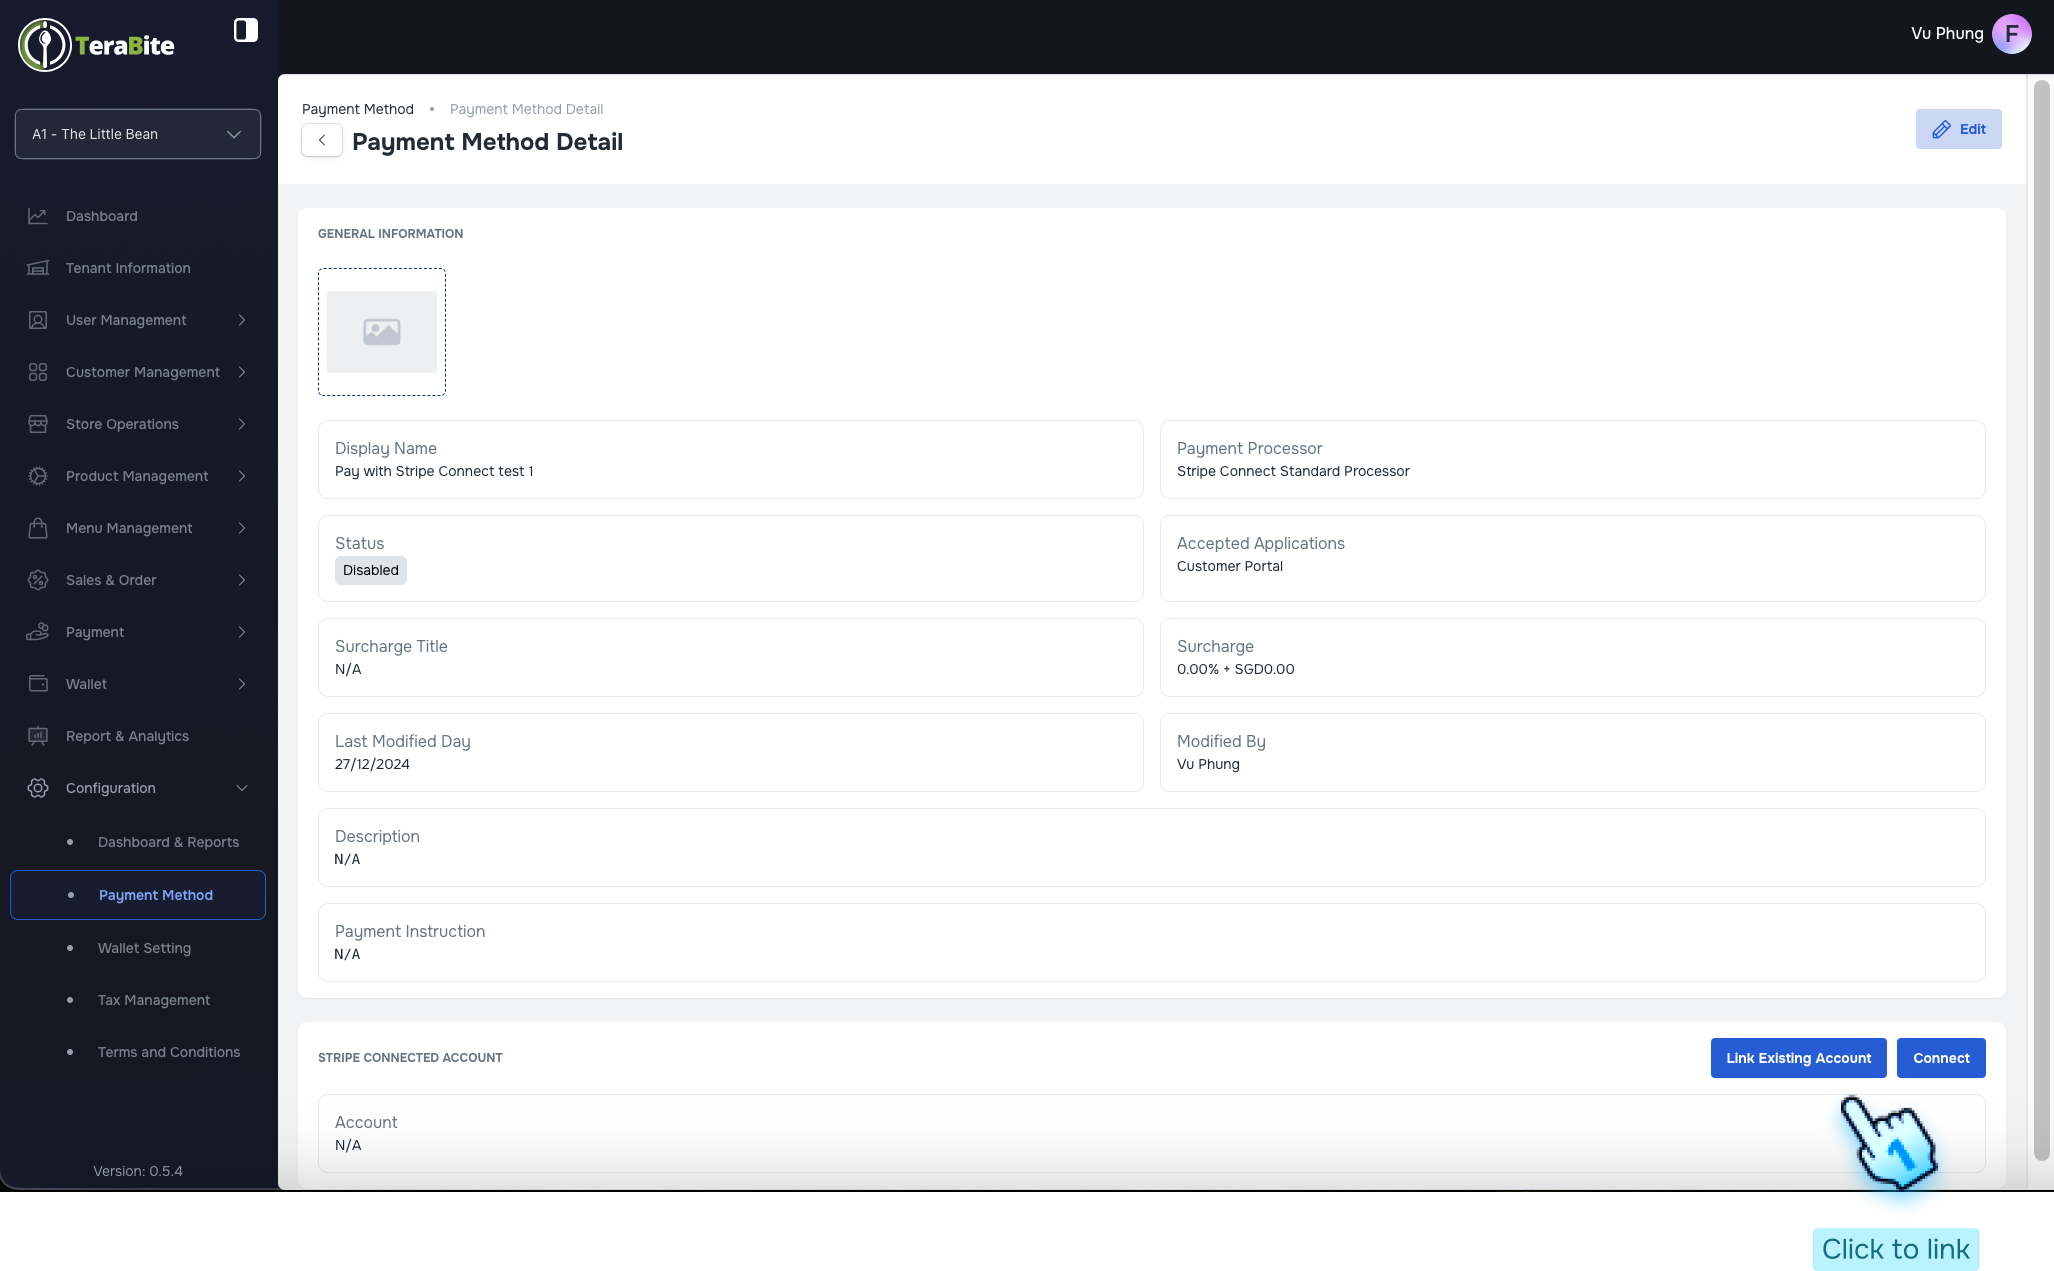
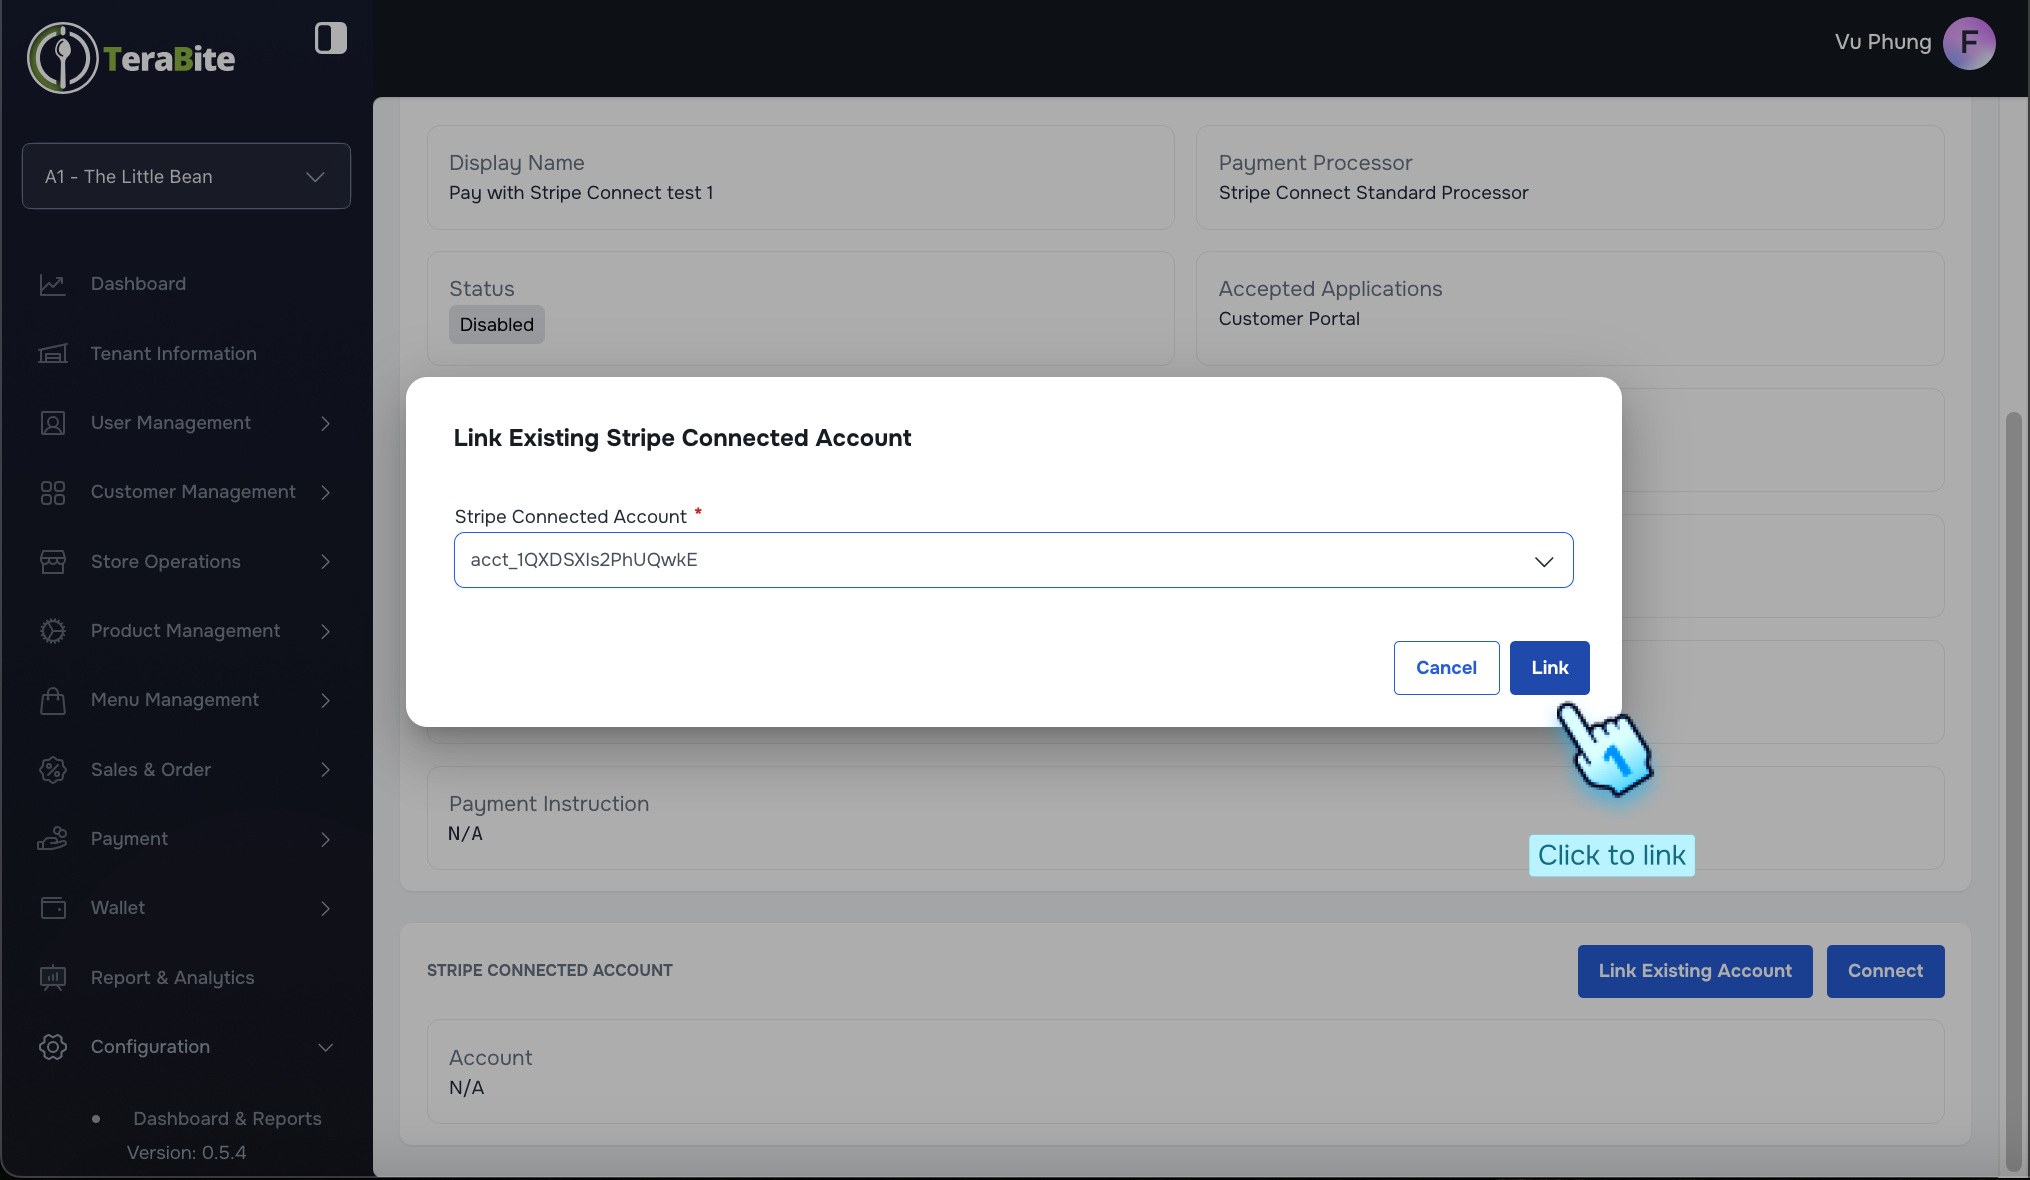
- Accessing Stripe Connect Standard Processor
- For the Stripe Connect Standard Processor, click the View button in the three-dot menu of the created payment method to access transaction details.
- Click Connect Button to Navigate to Stripe
- Click the Connect button to be redirected to the Stripe platform.
- Enter Email Address to Create Stripe Account
- Provide the required email address to initiate the creation of a new Stripe account.
- Follow Registration Steps of Stripe
- Complete the registration process as prompted by Stripe.
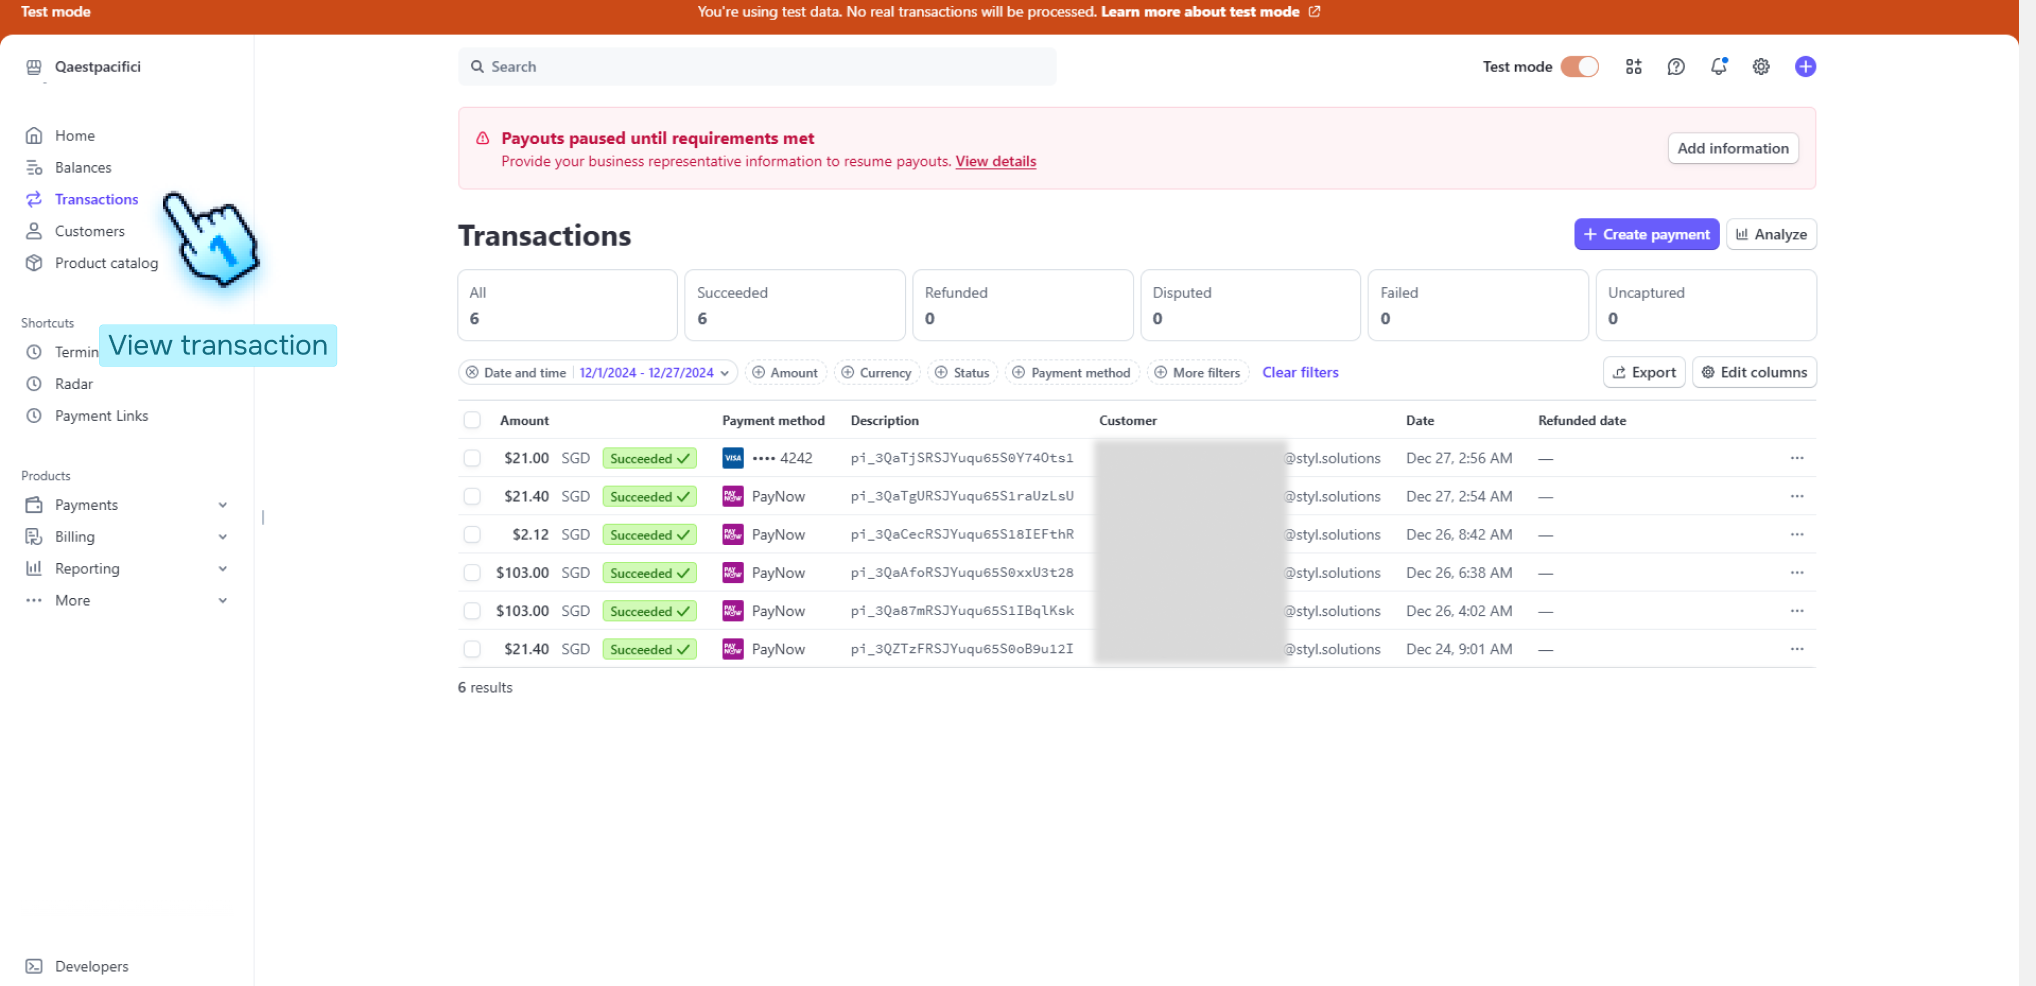
- Login to Stripe
- Access your Stripe account by logging in with your credentials.
- Access Transactions to View History
- Navigate to the Transactions section to review the transaction history.
#
Configure Wallet Settings
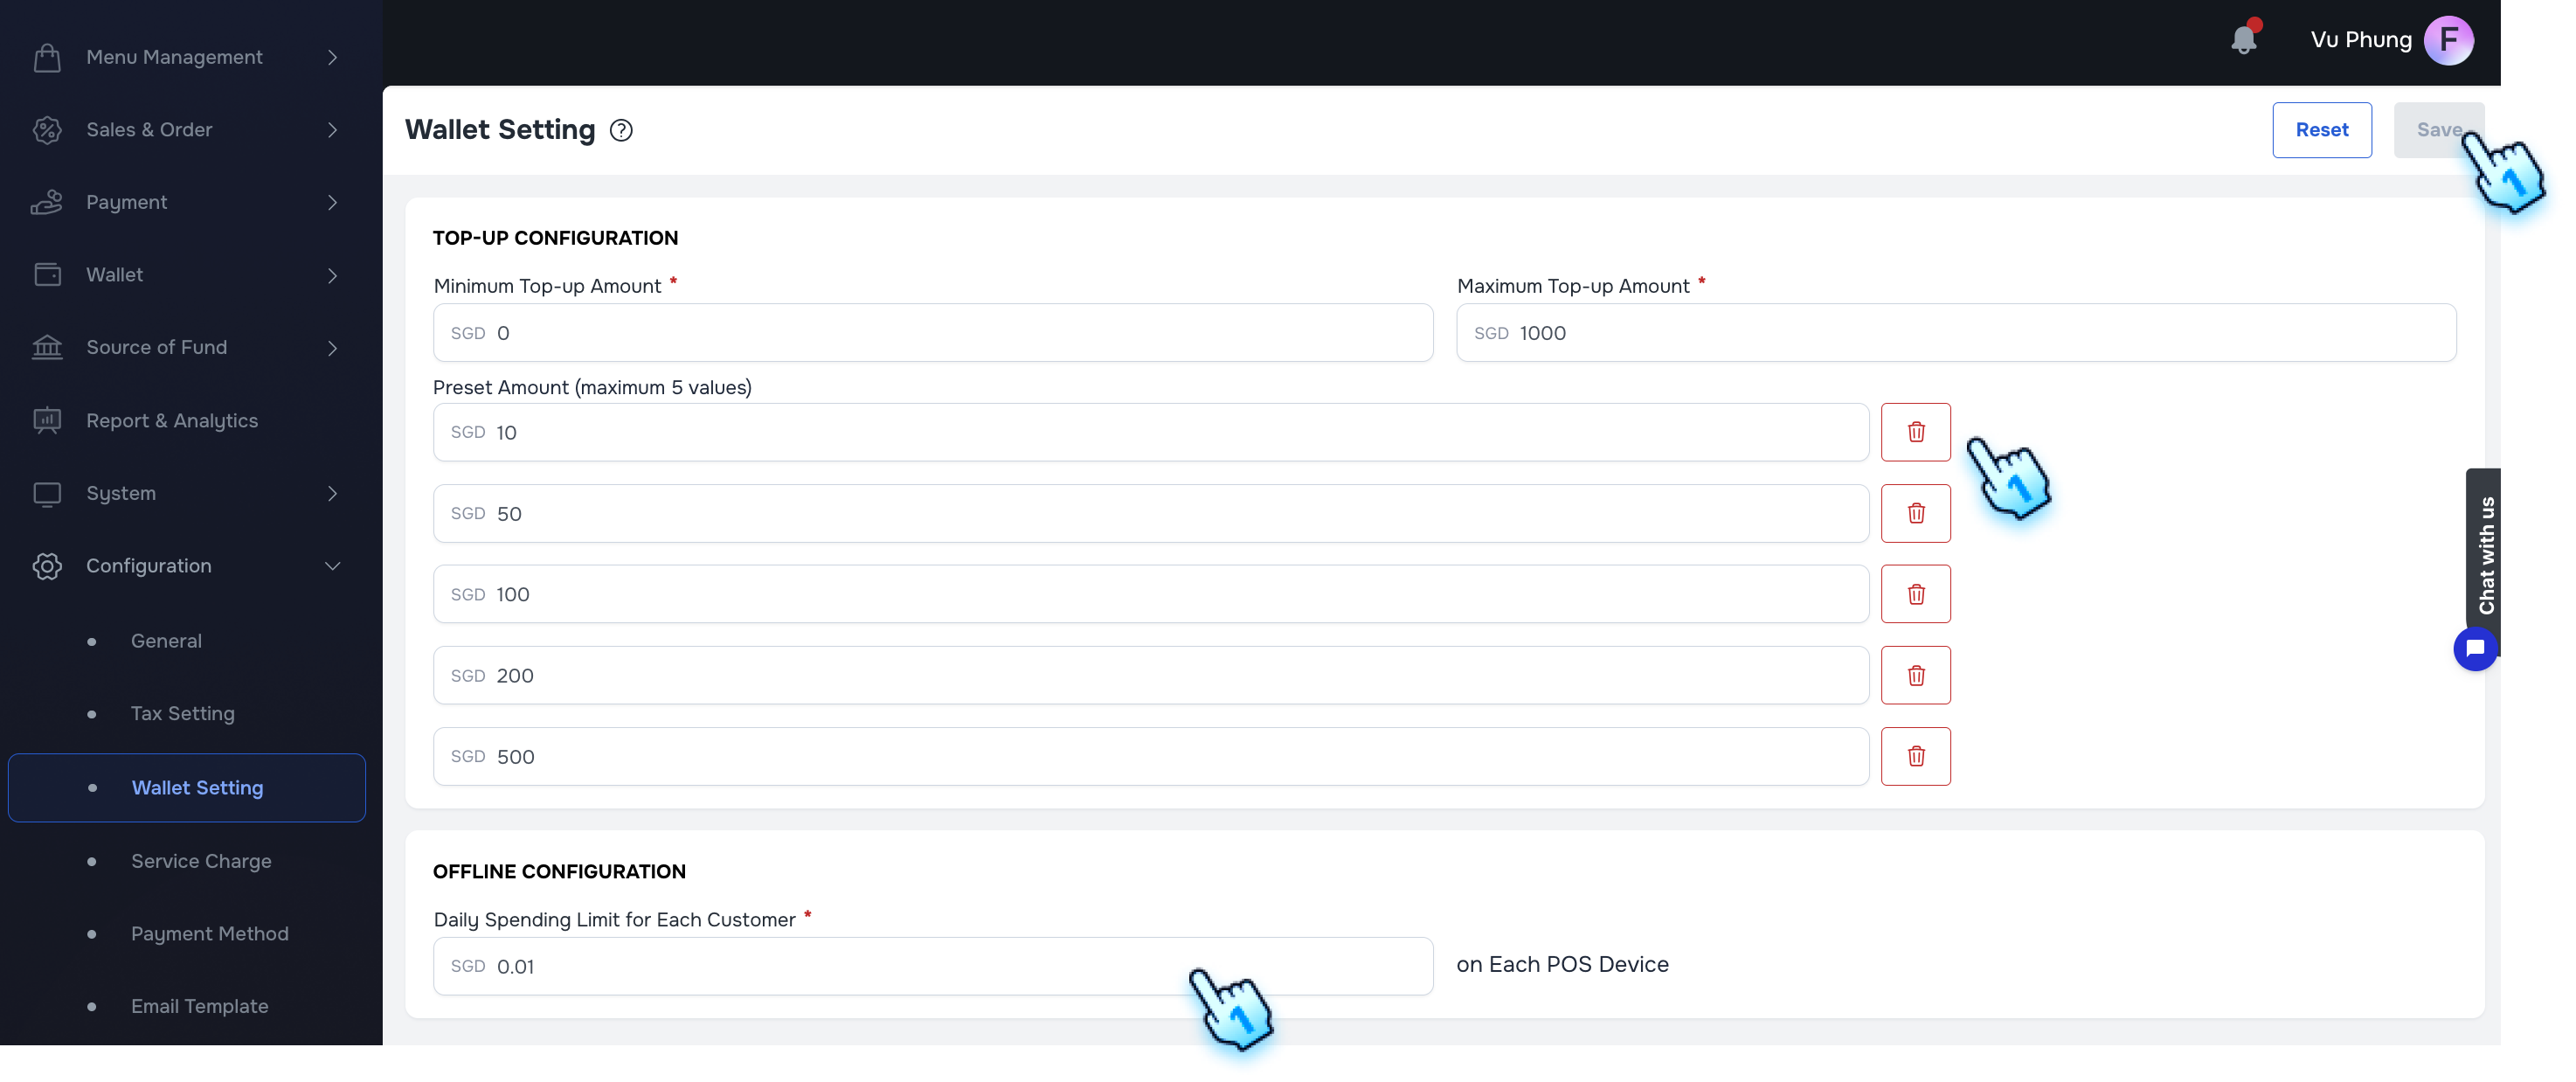
- Access Wallet Settings Section
- Navigate to the Wallet Settings section in the Configuration module.
- Adjust Wallet Fields
- Modify related fields, including:
- Minimum Top-up Amount
- Maximum Top-up Amount
- Preset Amount
- Delete Preset Amounts (if necessary)
- Click the Delete button next to each preset amount if applicable.
- Offline Configuration
- Enter the amount of Daily Spending Limit for Each Customer when making payment with Wallet in Offline mode. Note: Exceeding this limit, the payment cannot be processed.
- Save Wallet Settings
- Click the Save button to finalize your changes.
#
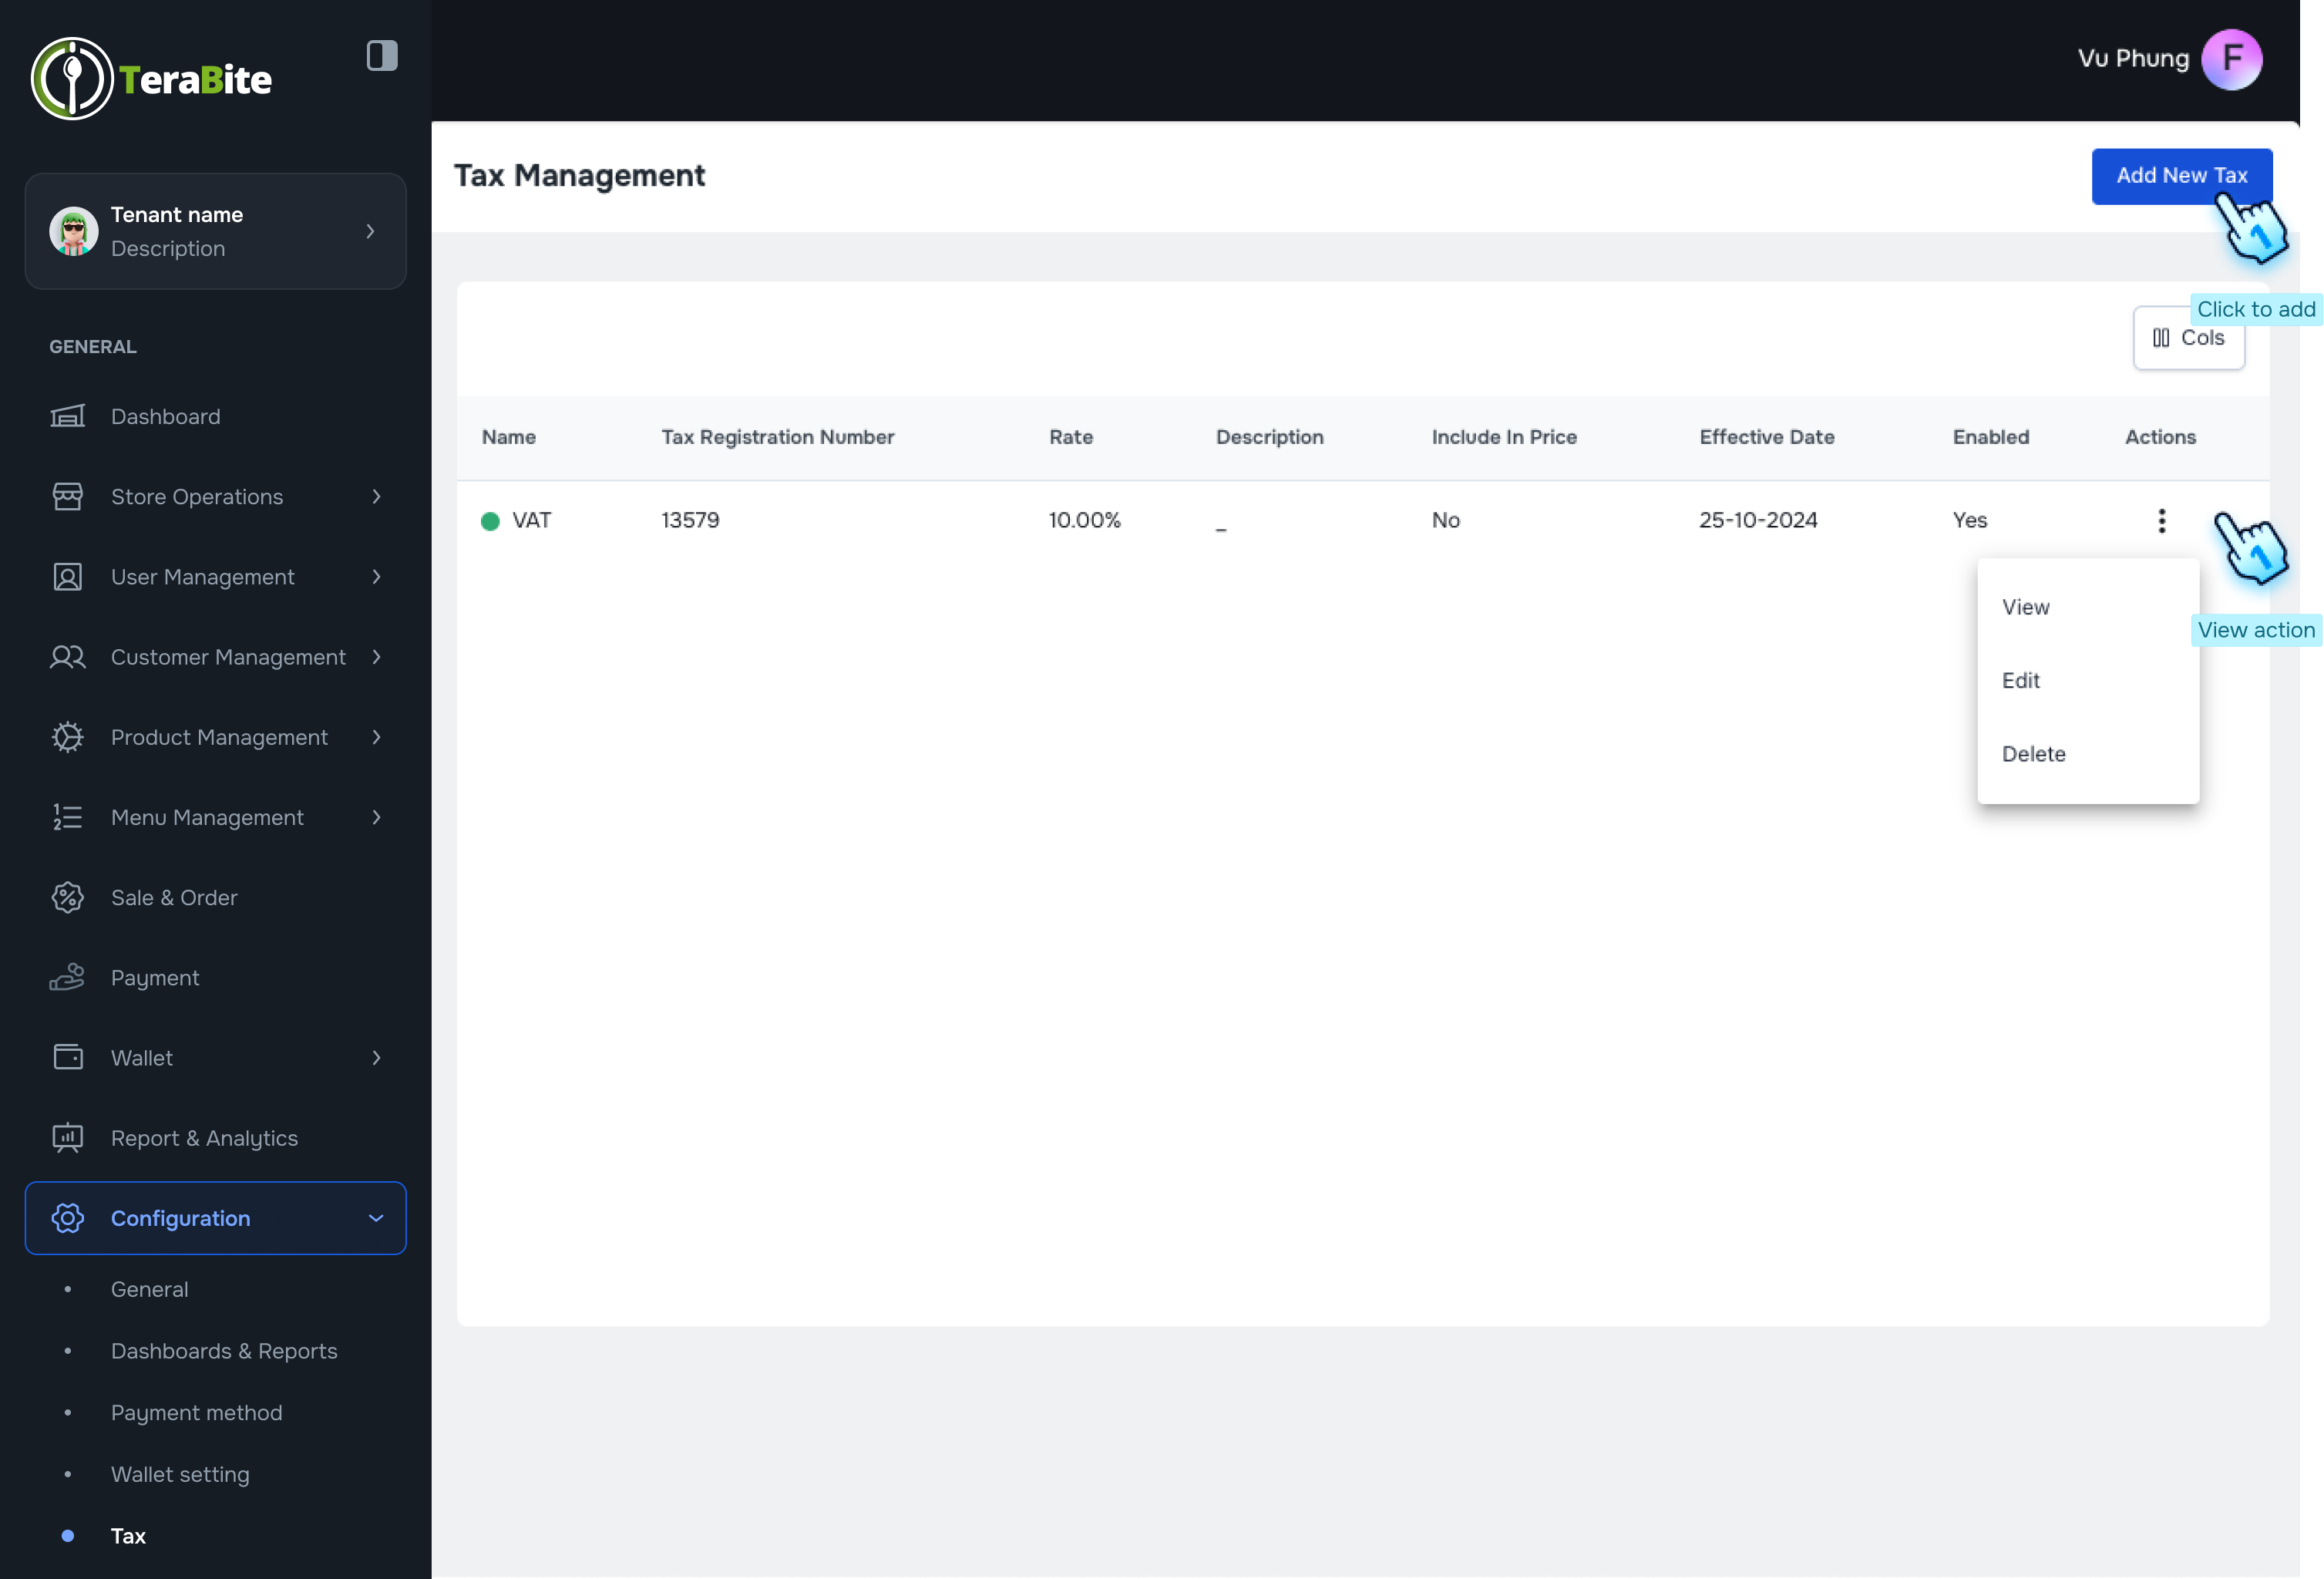
Manage Taxes
- Access Tax Management Section
- Navigate to the Tax Management section in the Configuration module.
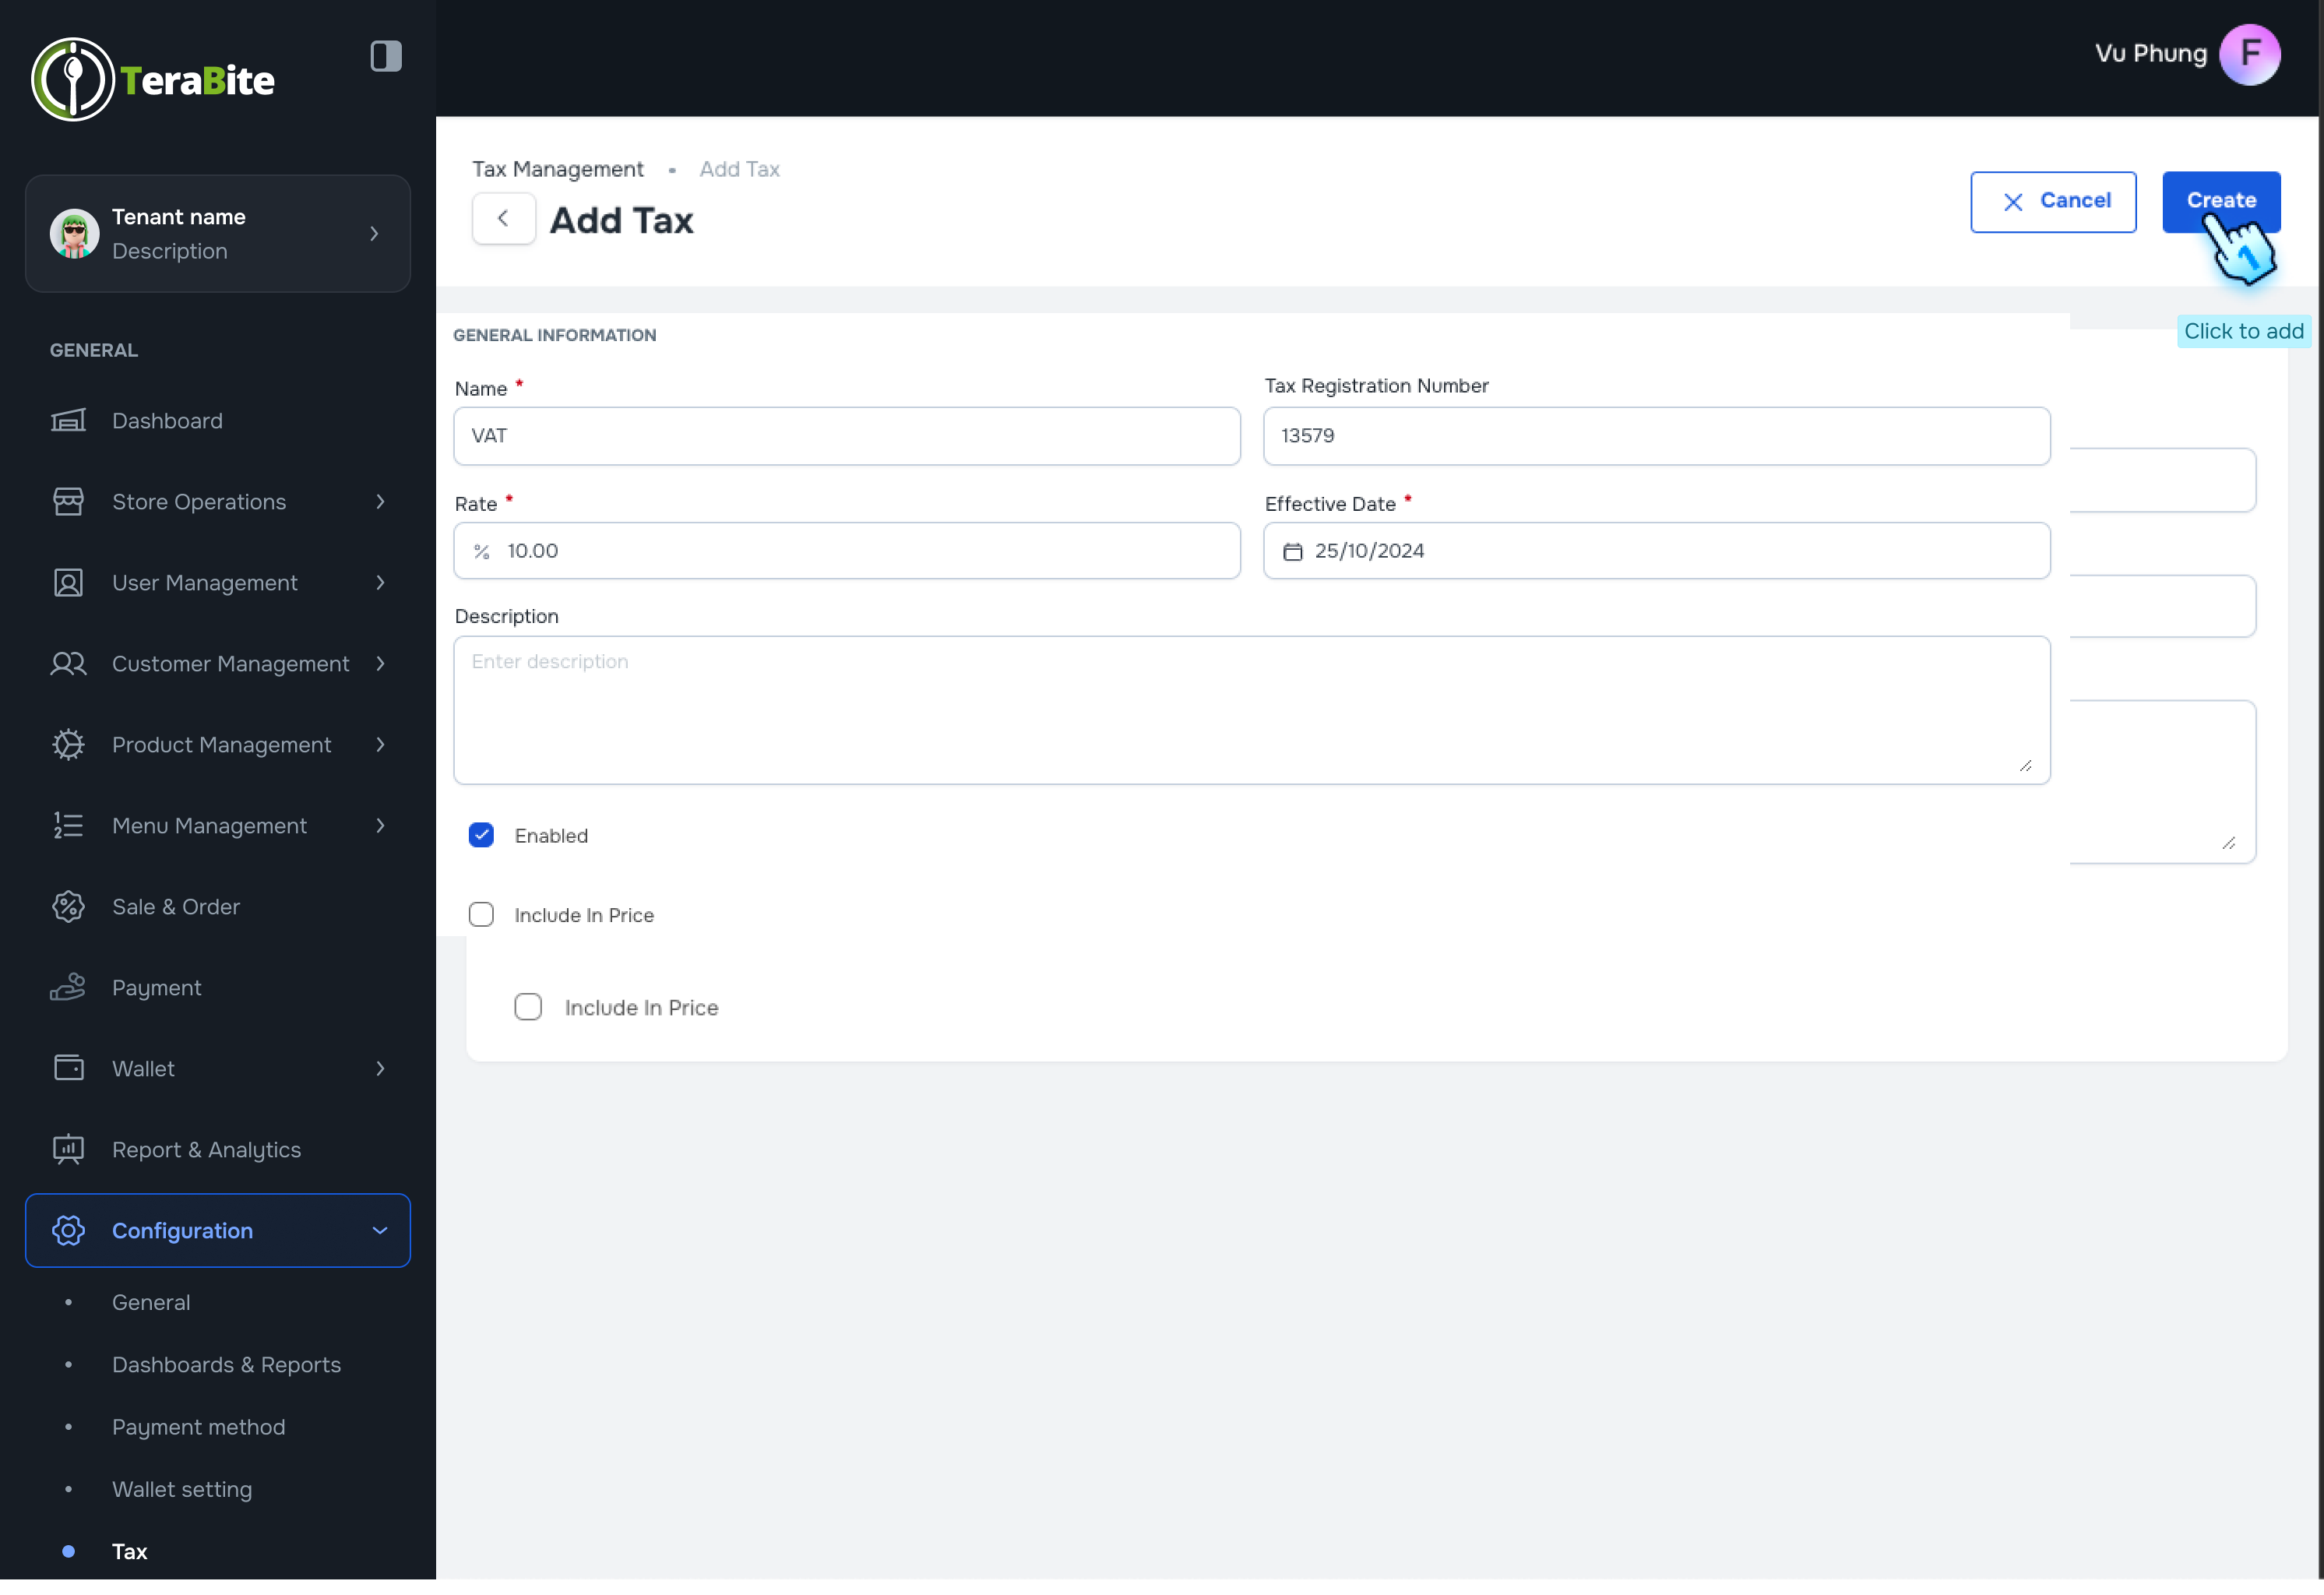
- Initiate Addition of New Tax
- Click the "Add New Tax" button.
- Enter Tax Information
- Fill in the required information and check the checkboxes for the following options:
- Enabled
- Include in Price
- Finalize Tax Creation
- Click the "Create" button to complete the tax addition.
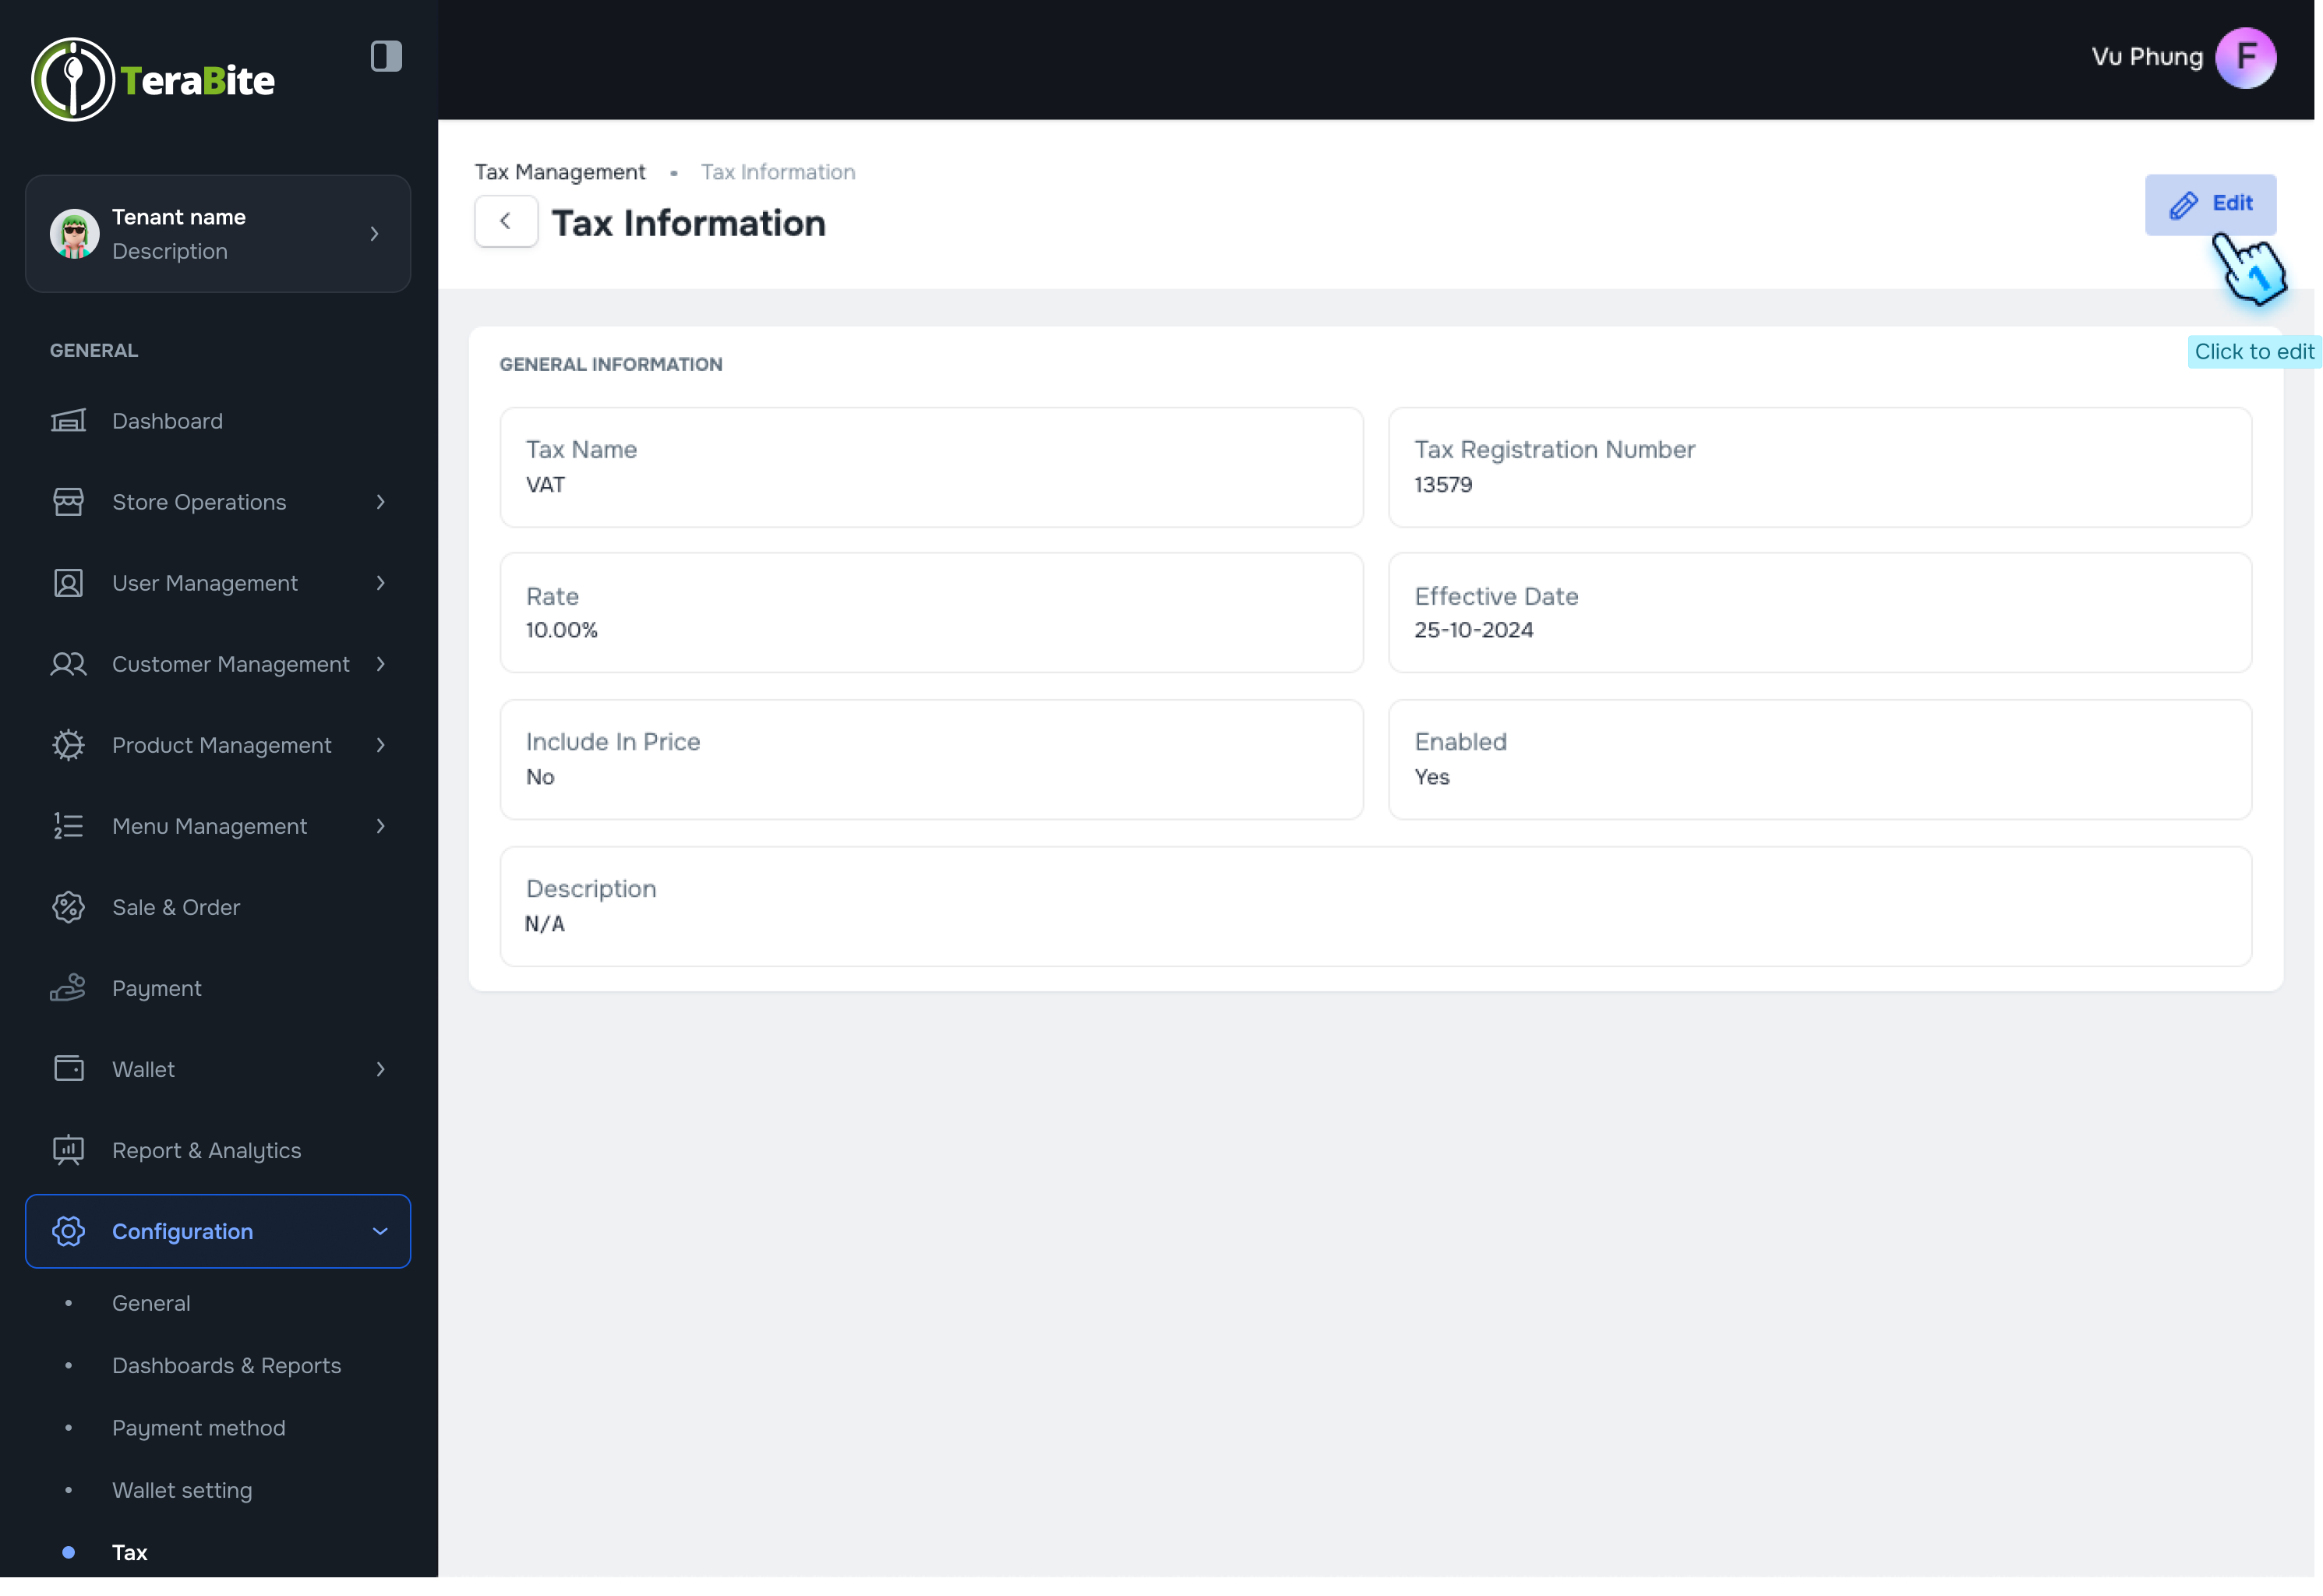
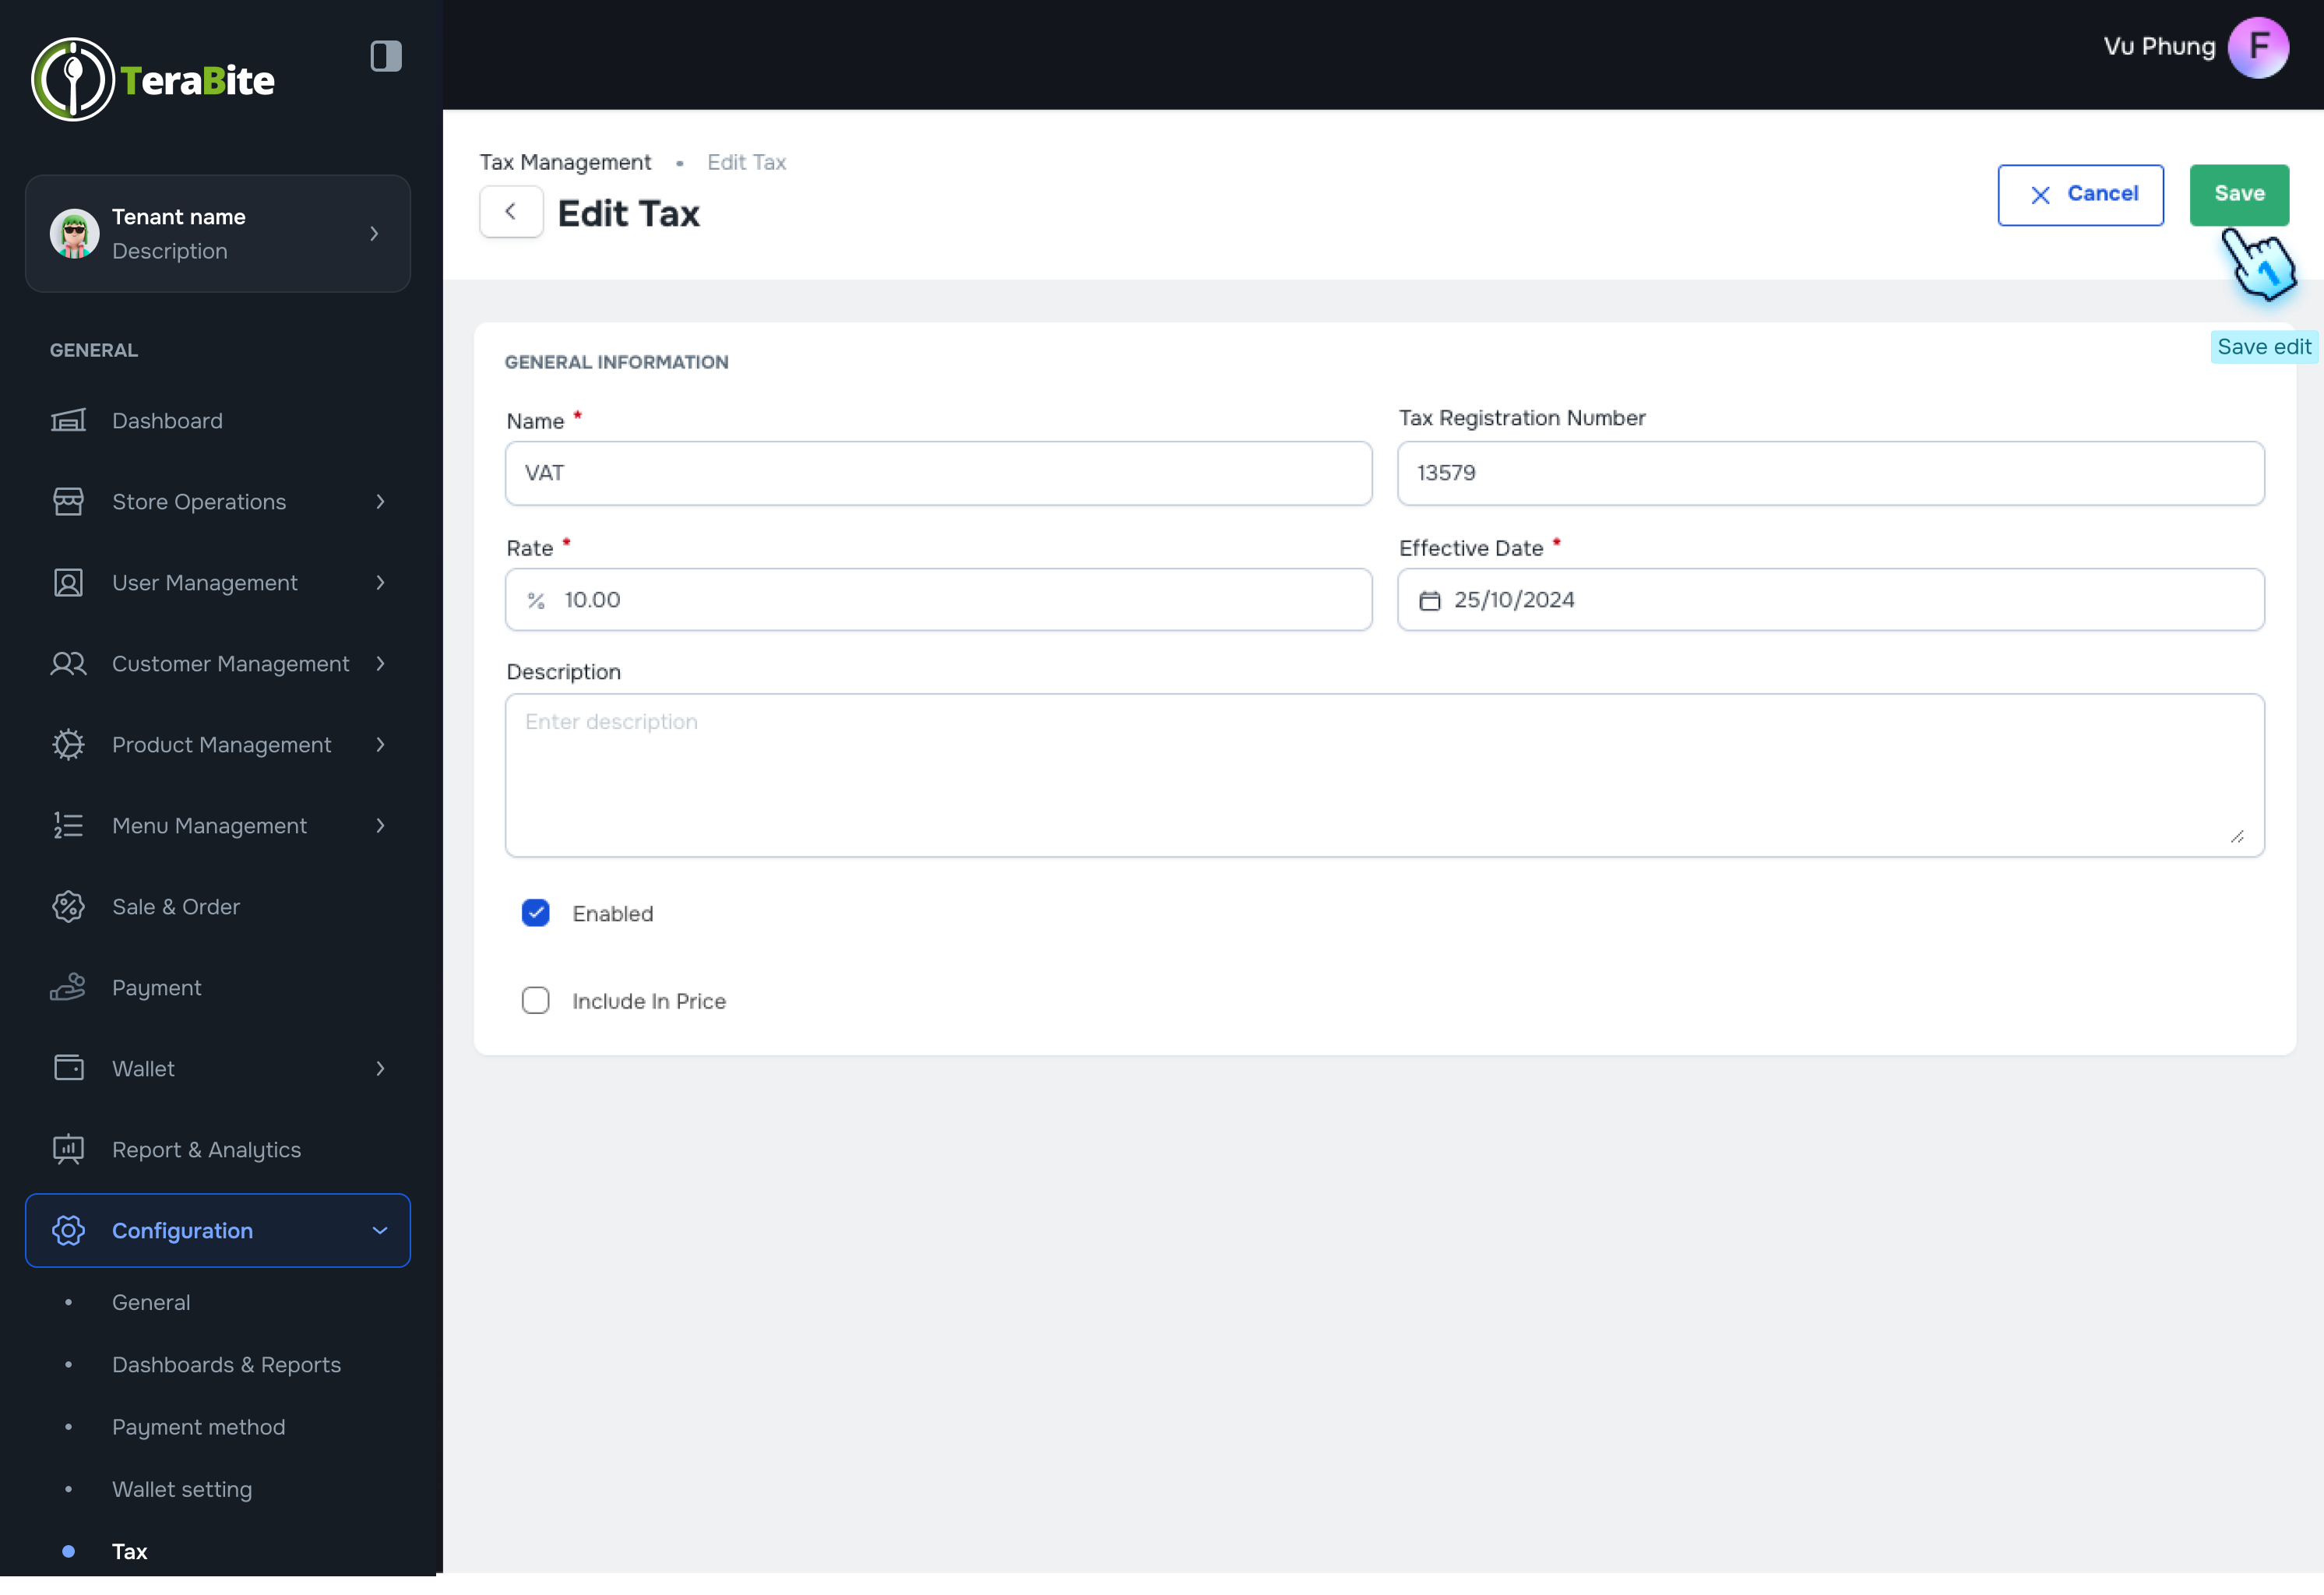
- Manage Existing Taxes
- Click on View, Edit, or Delete in the three-dot menu for each tax as needed.
#
Conclusion
This document provides a structured approach for managing payment methods, wallet settings, and tax configurations within the Configuration module, ensuring efficient financial operations and compliance.
#
Screen flow
#
Payment method


#
Wallet
#
Tax management