#
Customer Management
#
Description
This section outlines the procedures for adding customers, importing customer lists, viewing and editing customer information including sub-account management and card management
#
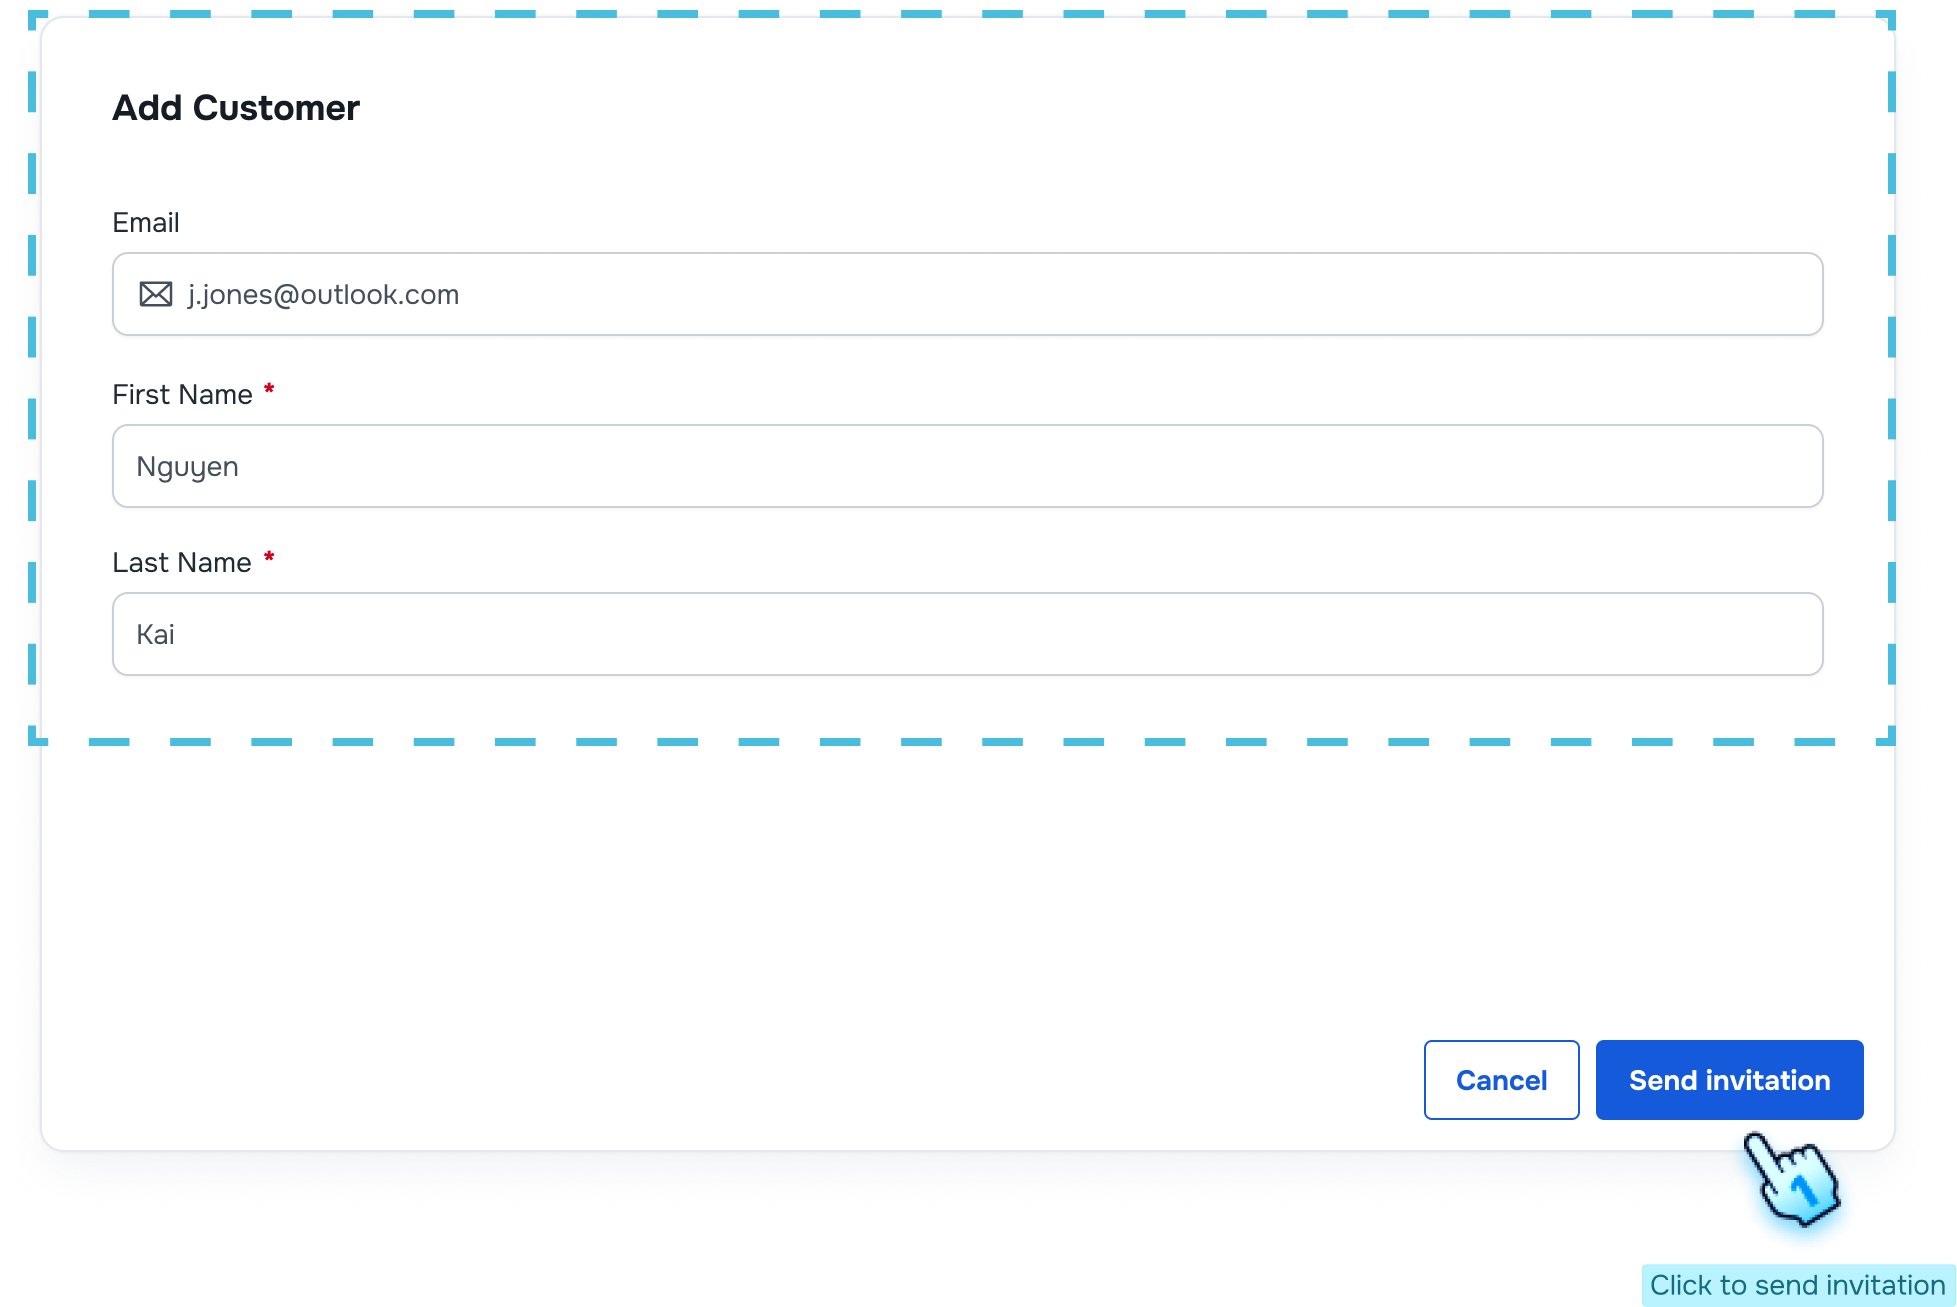
Add a Customer
- Initiate Customer Addition
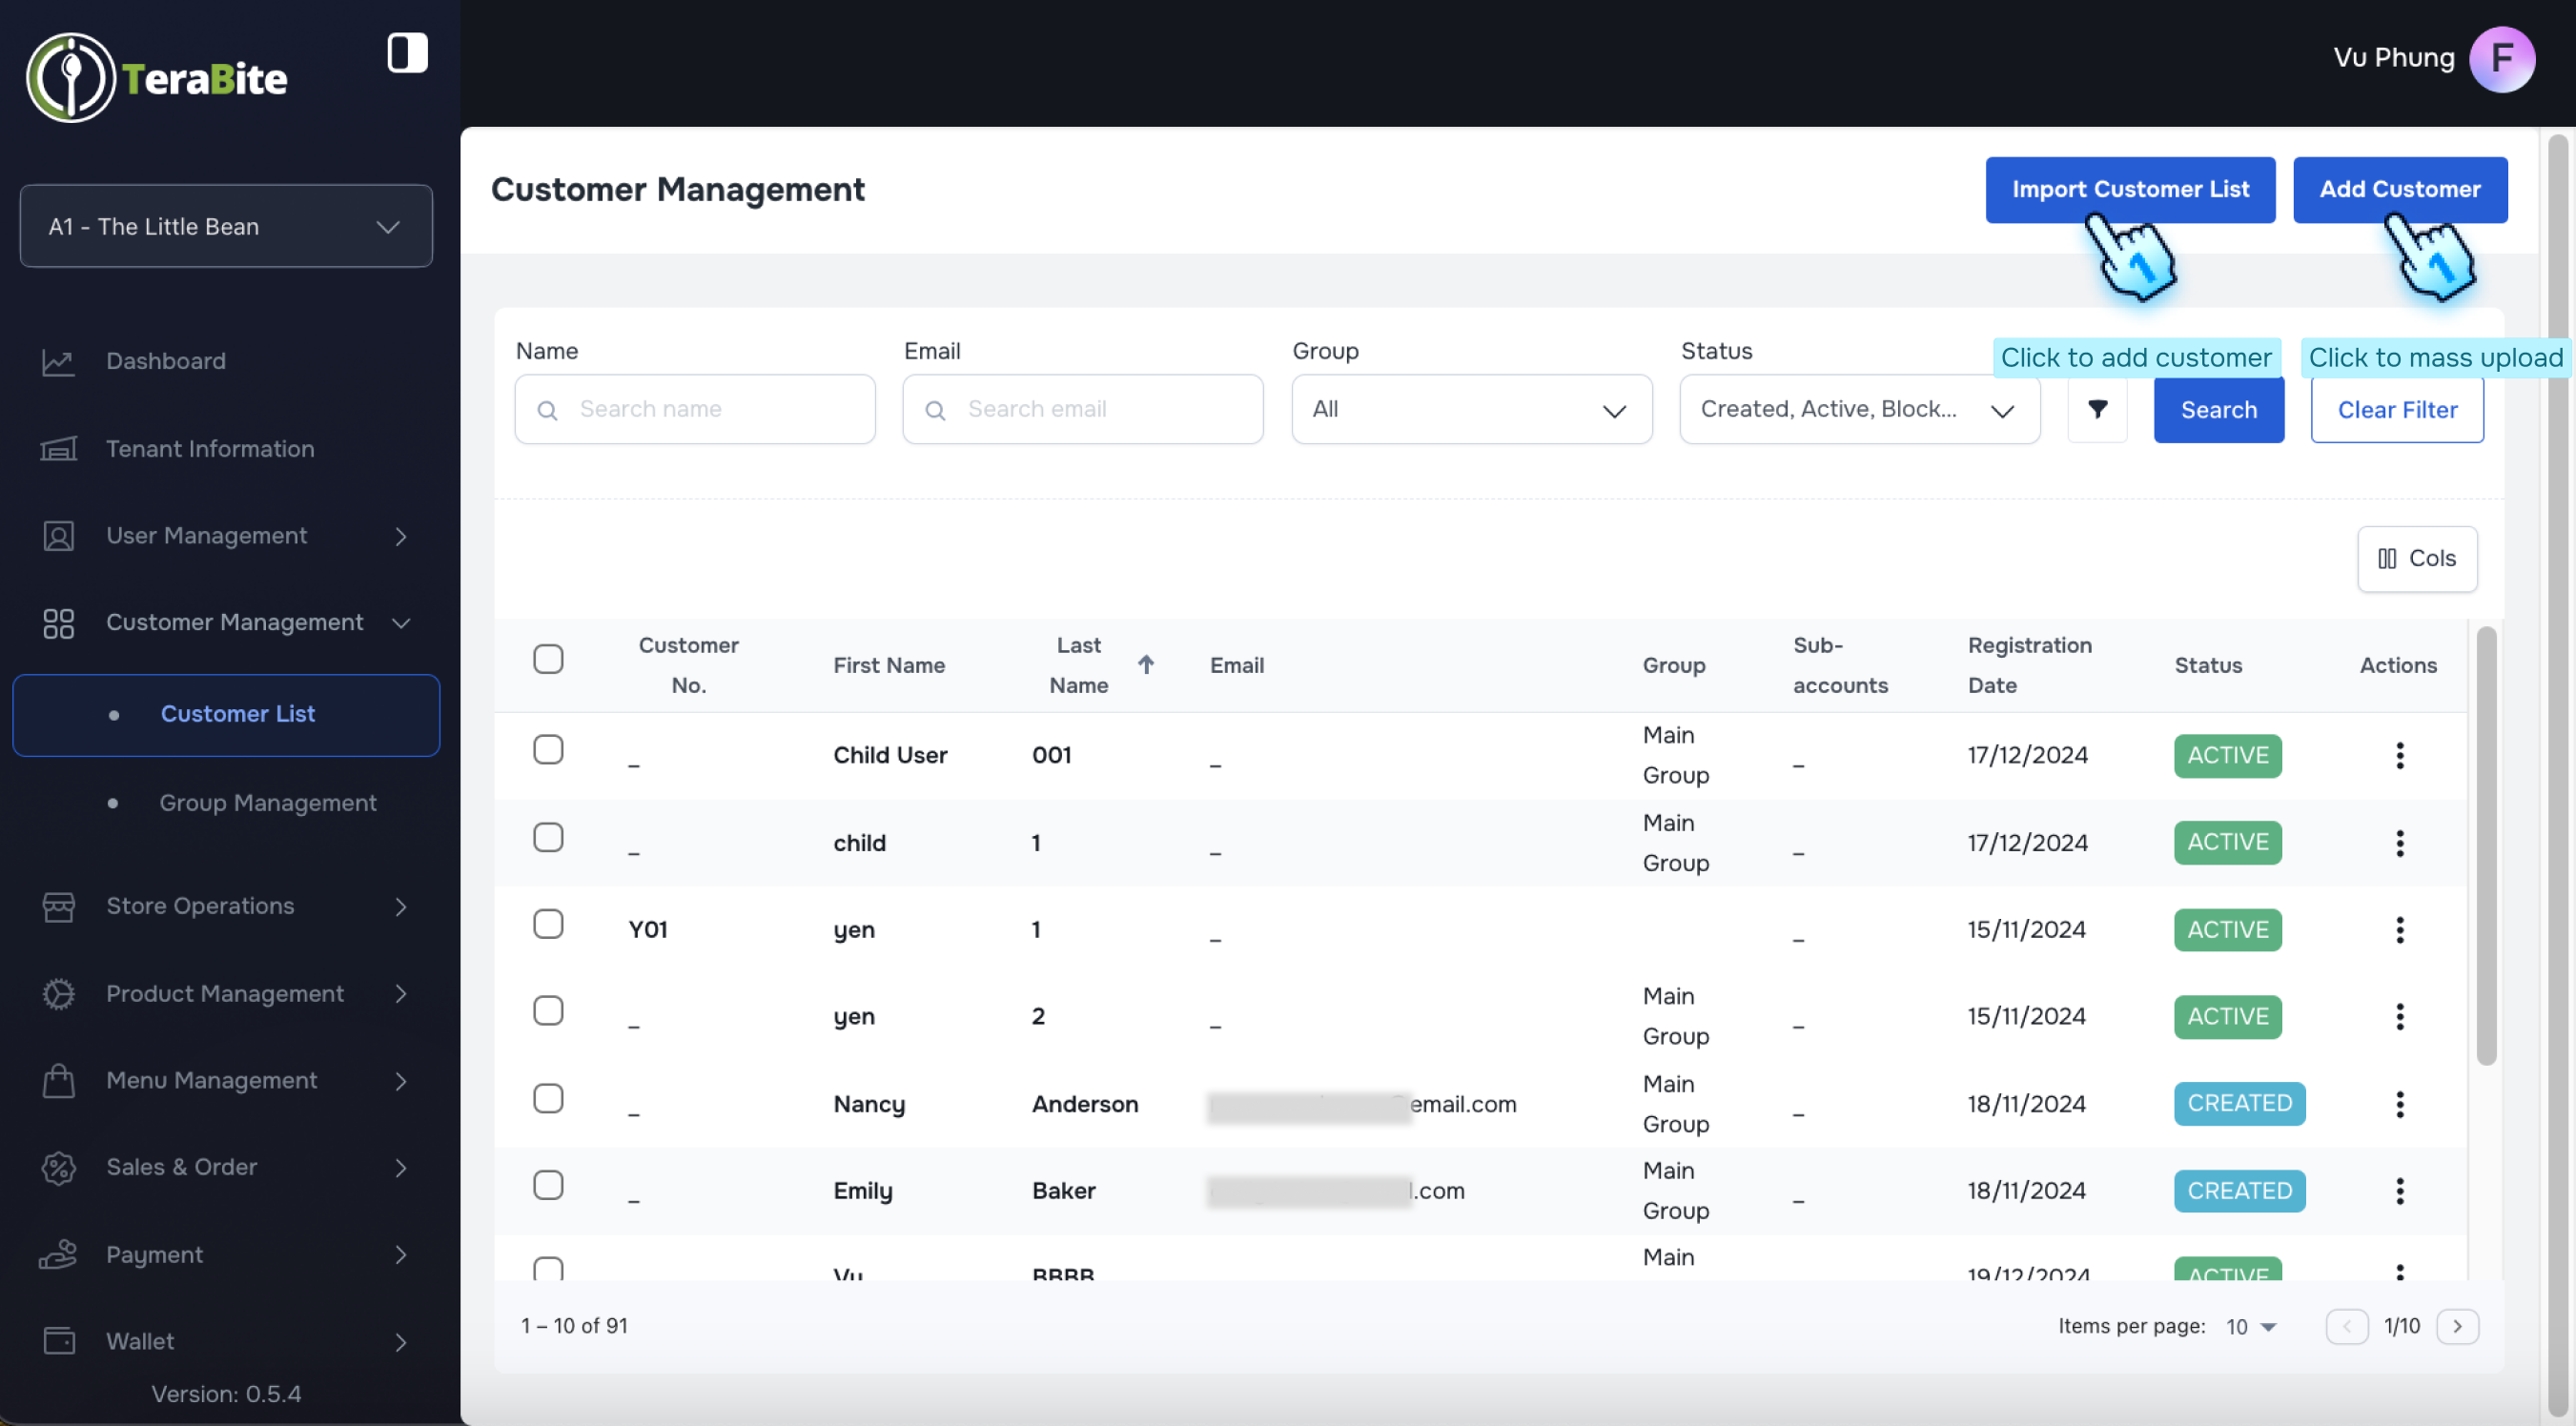
- Click the "Add Customer" button.
- Enter Customer Information
- Fill in the required fields:
- Email (for signing in)
- First Name
- Last Name
- Send Invitation
- Click the "Add" button to dispatch the invitation to the customer.
#
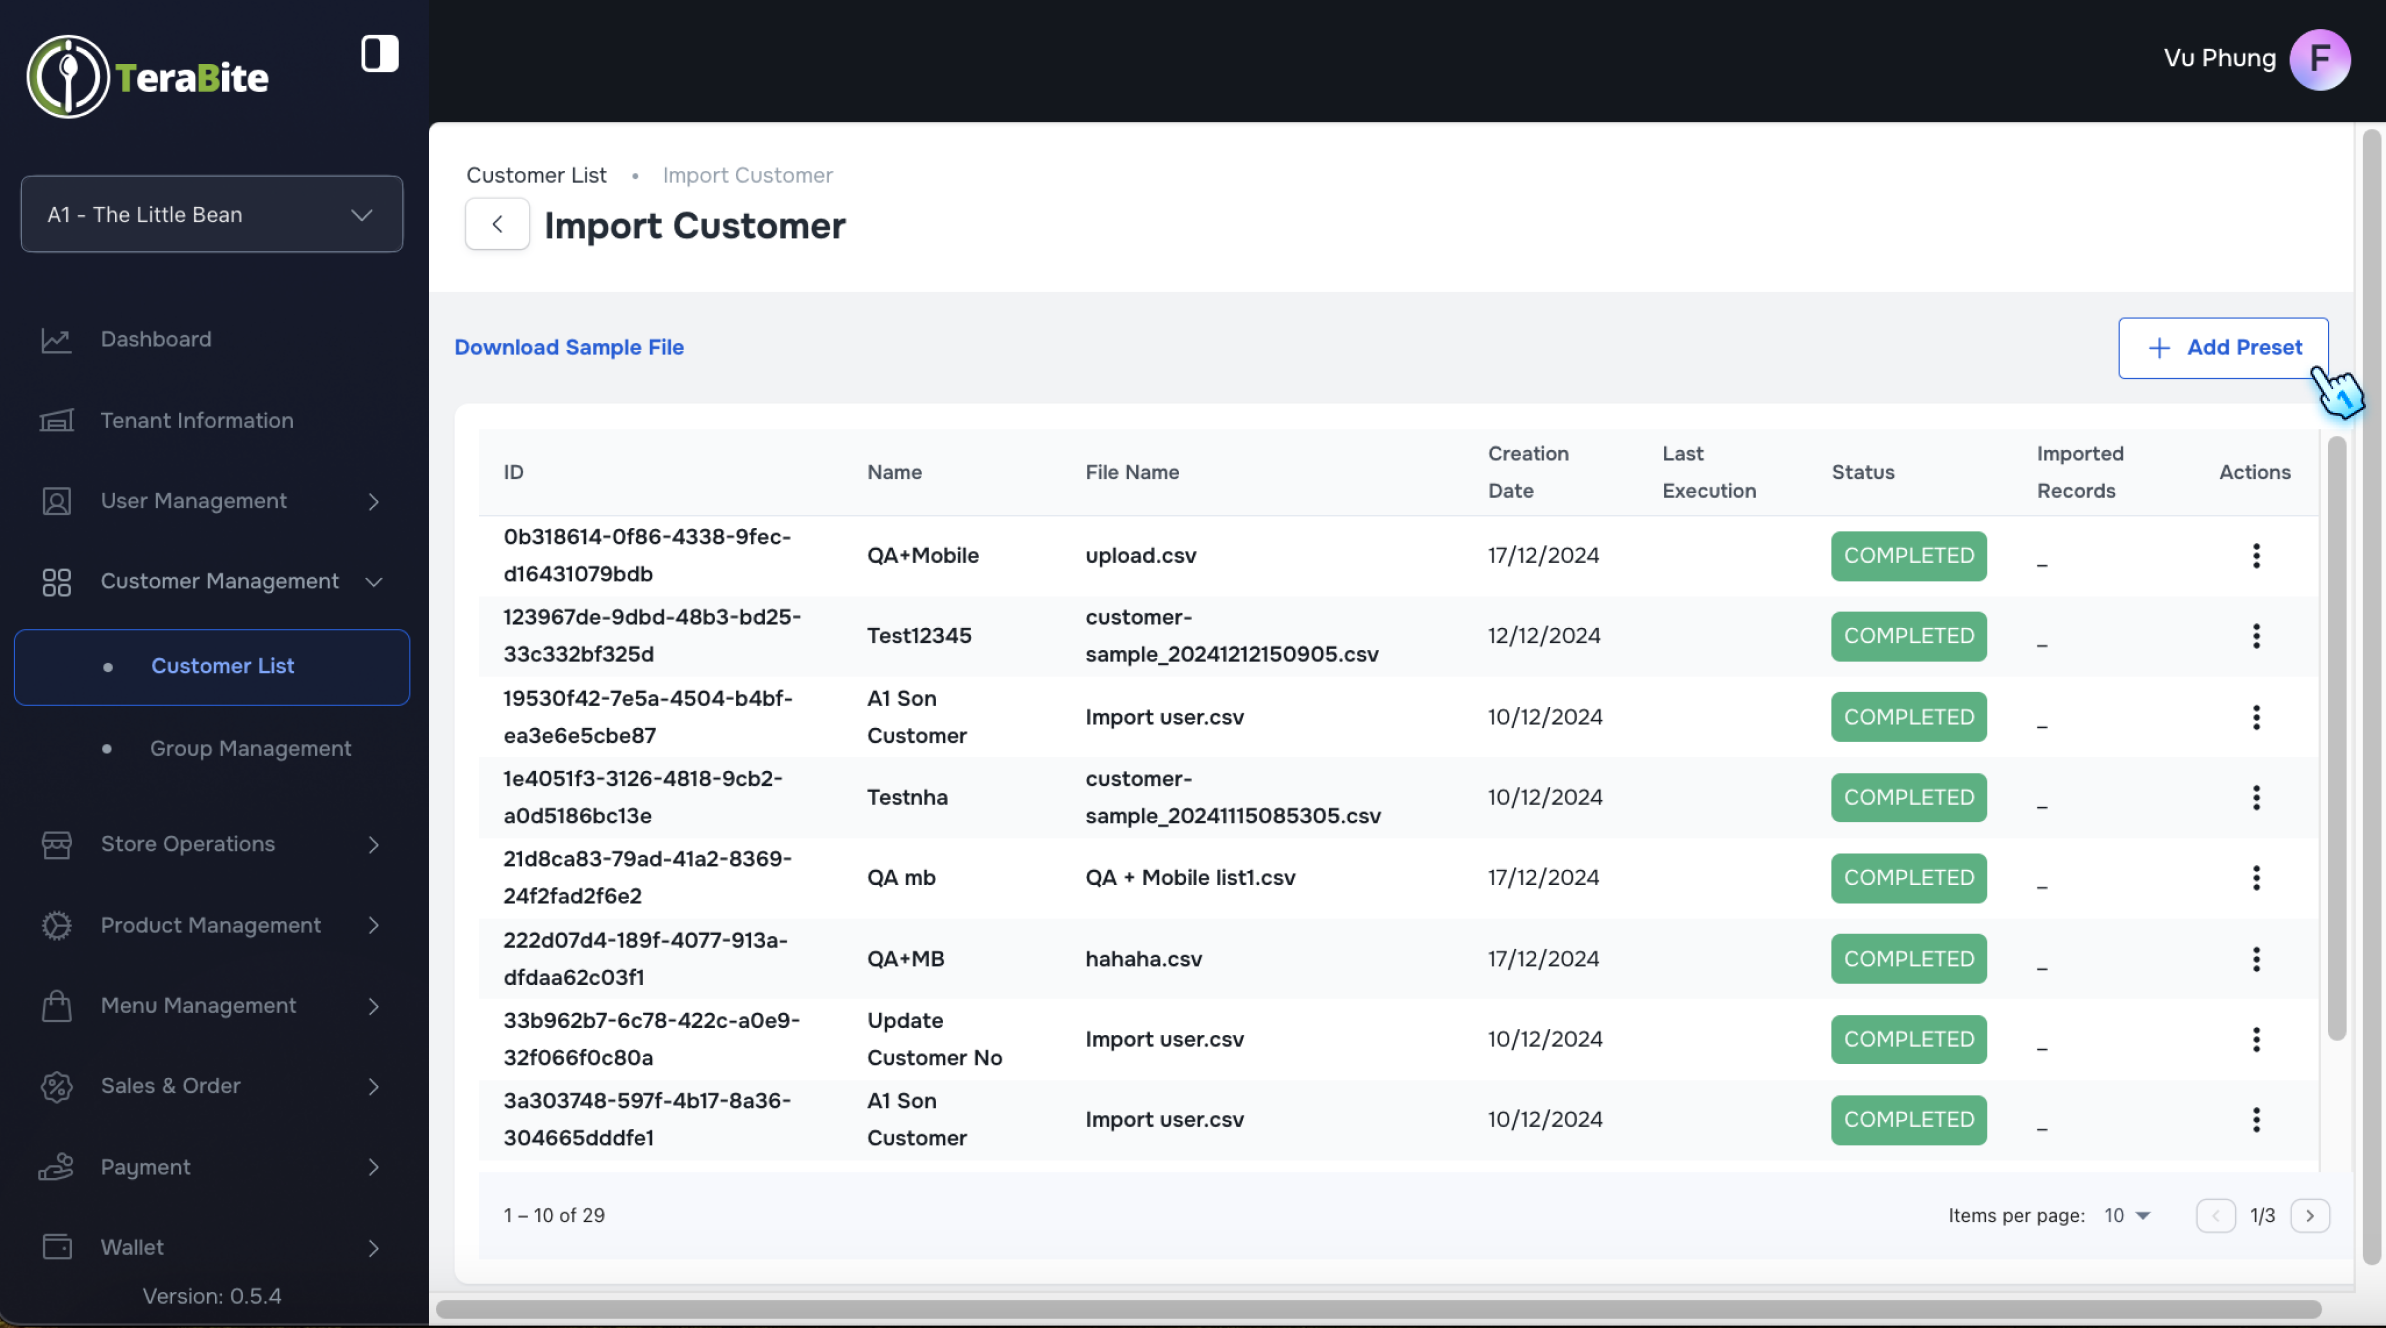
Import a Customer List
- Access Import Functionality
- Click on the "Import Customer List" option.
- Download Sample File
- Click on Download Sample File to fill required information as a Preset:
- customer_no (* Unique identifier *): The input data used for indentifying account
- first_name: Account information
- last_name: Account information
- email: Email to create the account which is used to log in Customer Portal
- parent_email: Can leave it blank. If it is valued, the created account will be considered as the subaccount of the main account with this parent_email as the identifier of the main account
- group_name: "Main group" is the default value. Make sure a group must be created before entering into this field
- allergens: Can leave it blank. If it is valued, make sure an allergen(s) must be created before entering into this field. Each value separate by ";" mark.
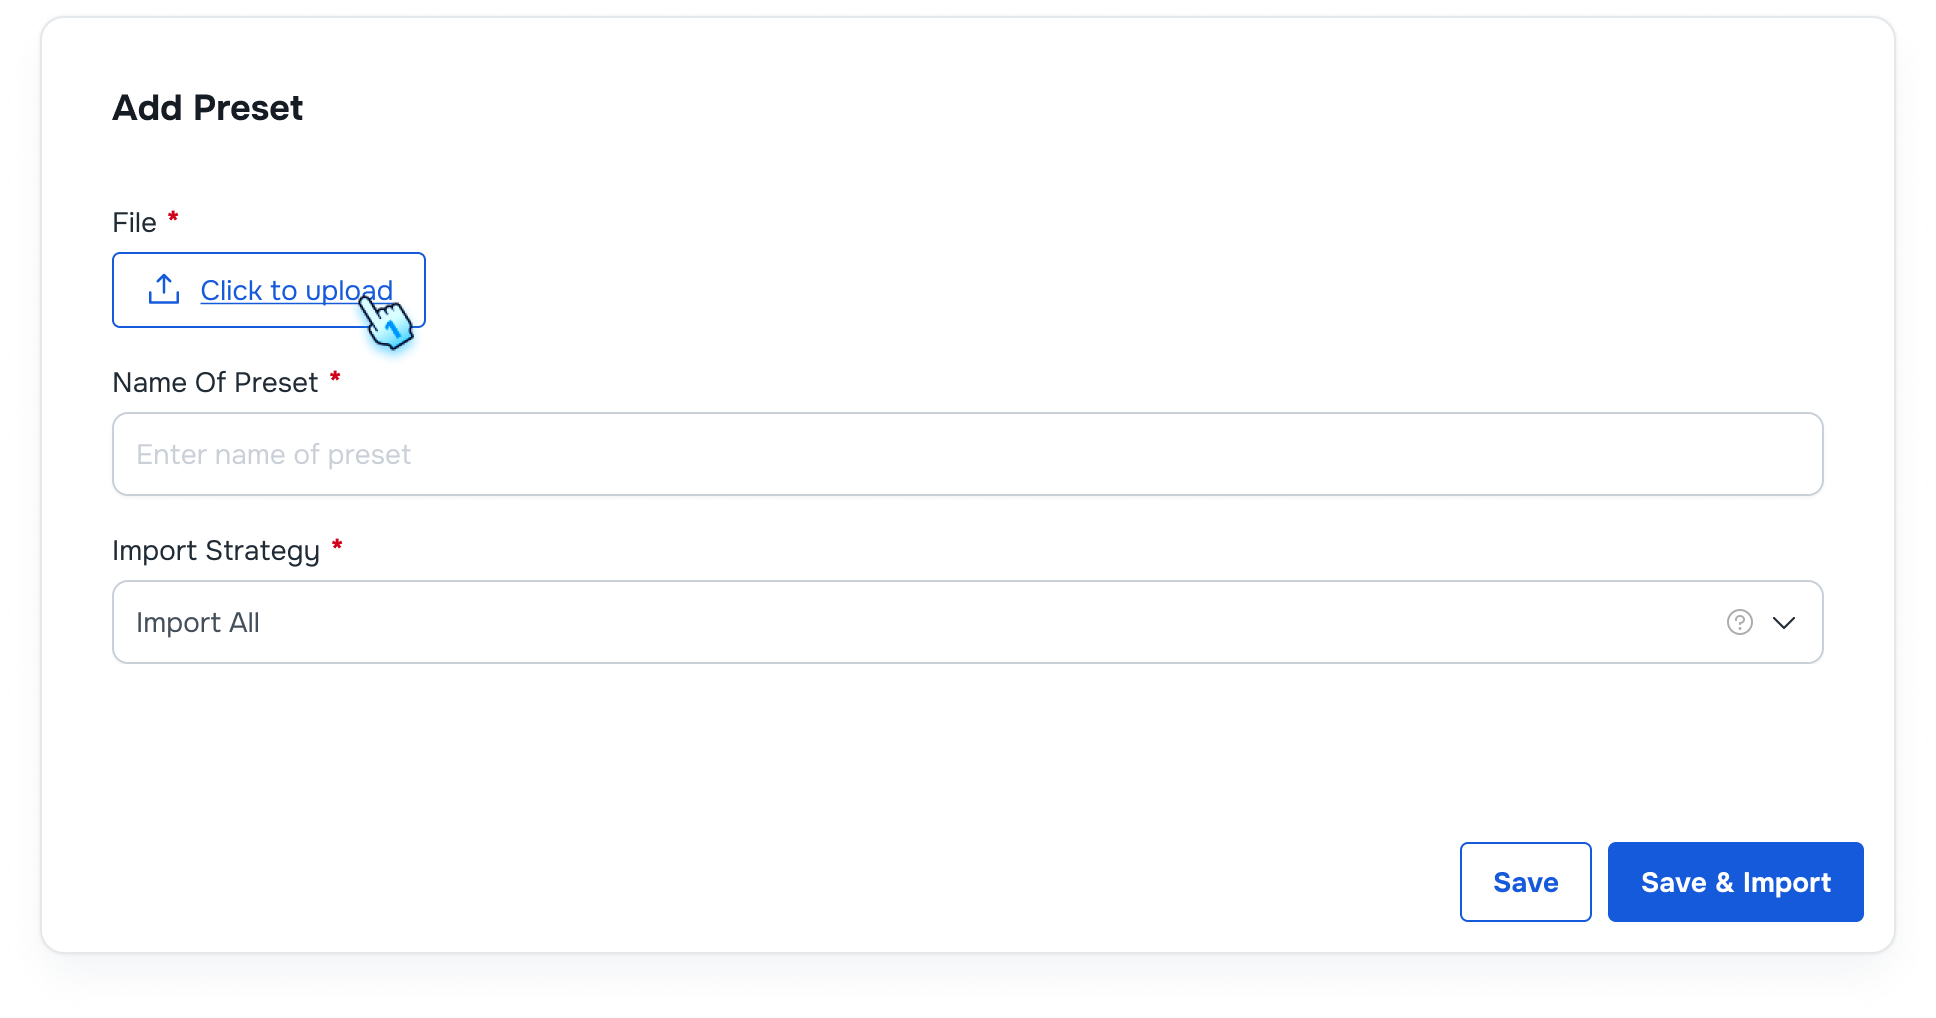
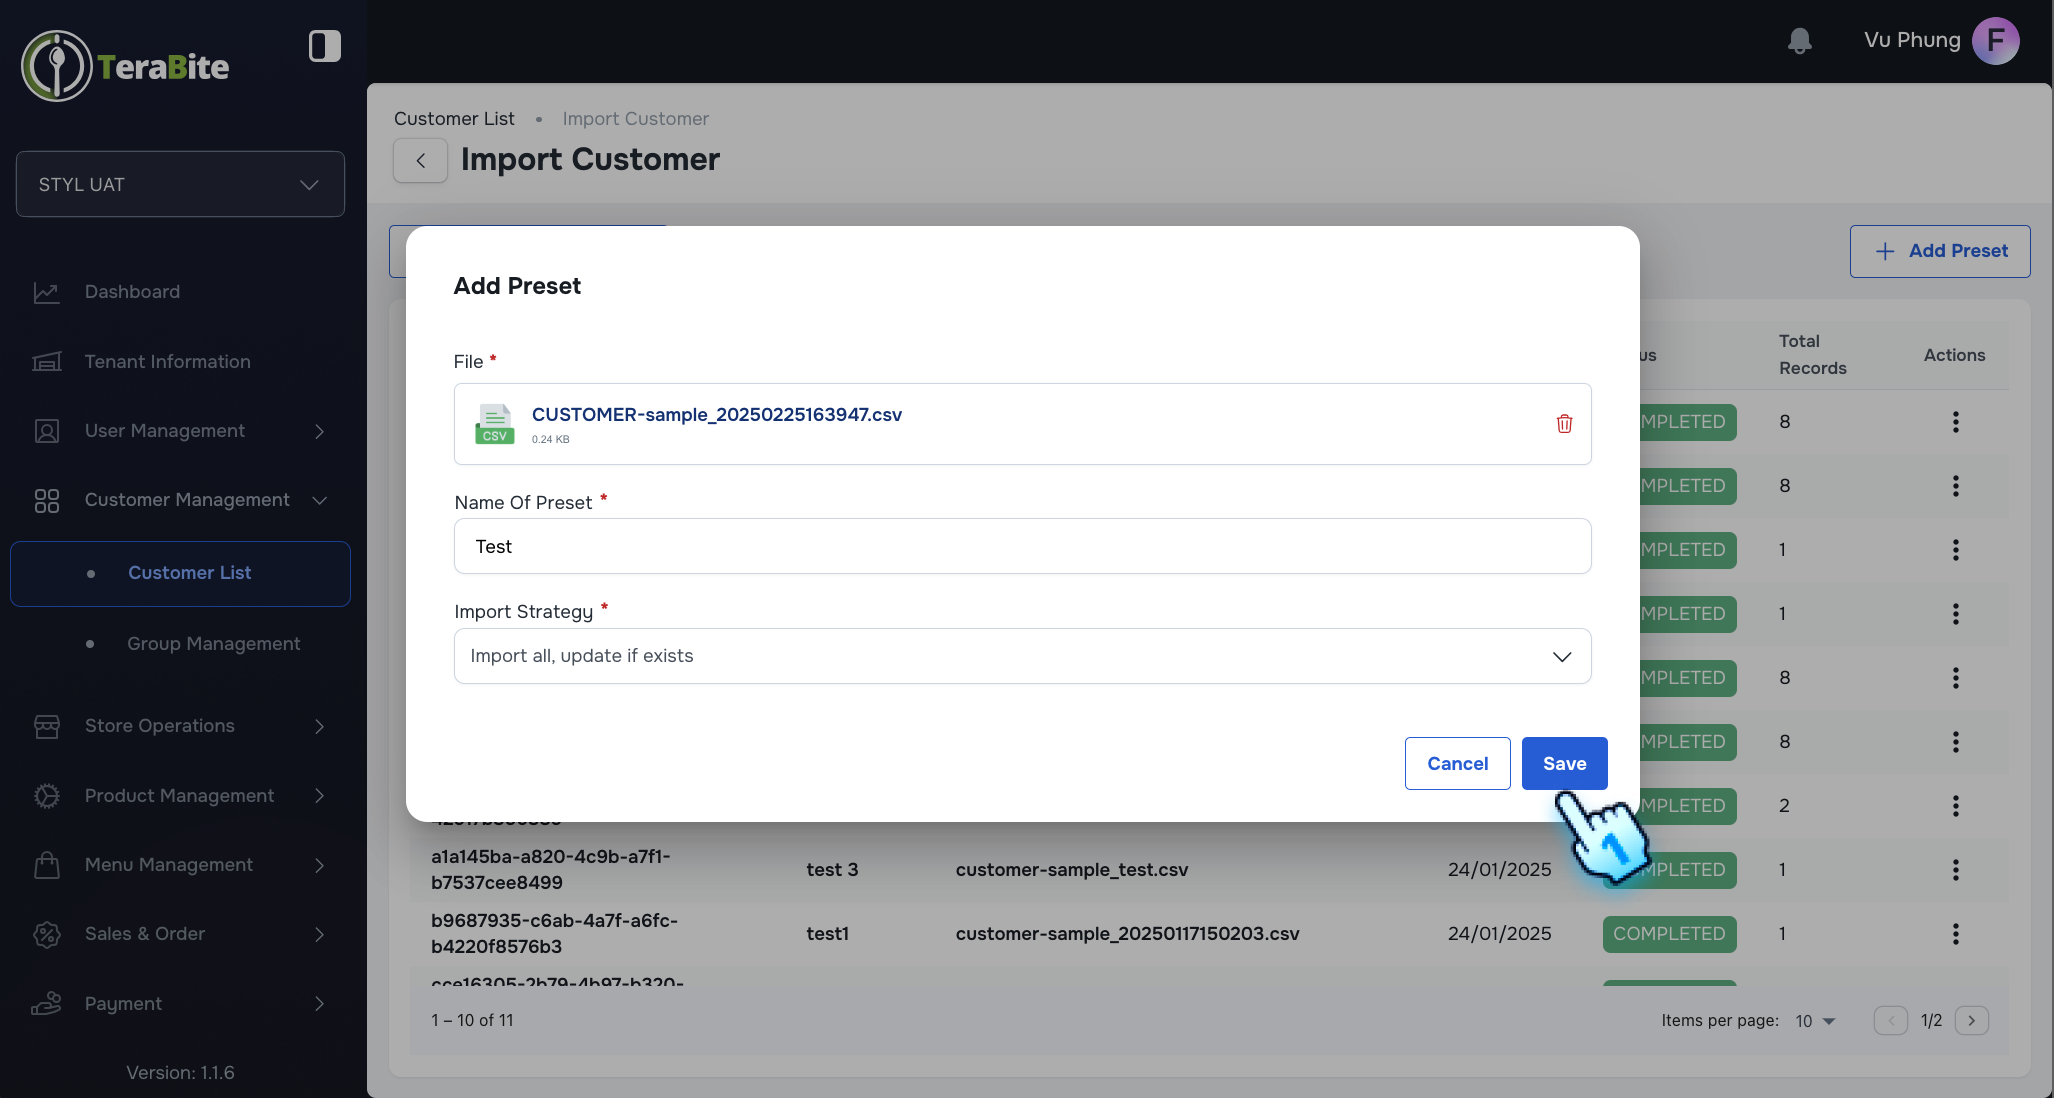
- Add Preset
- Click on "Add Preset" button
- Upload File
- Click on the "Upload" button.
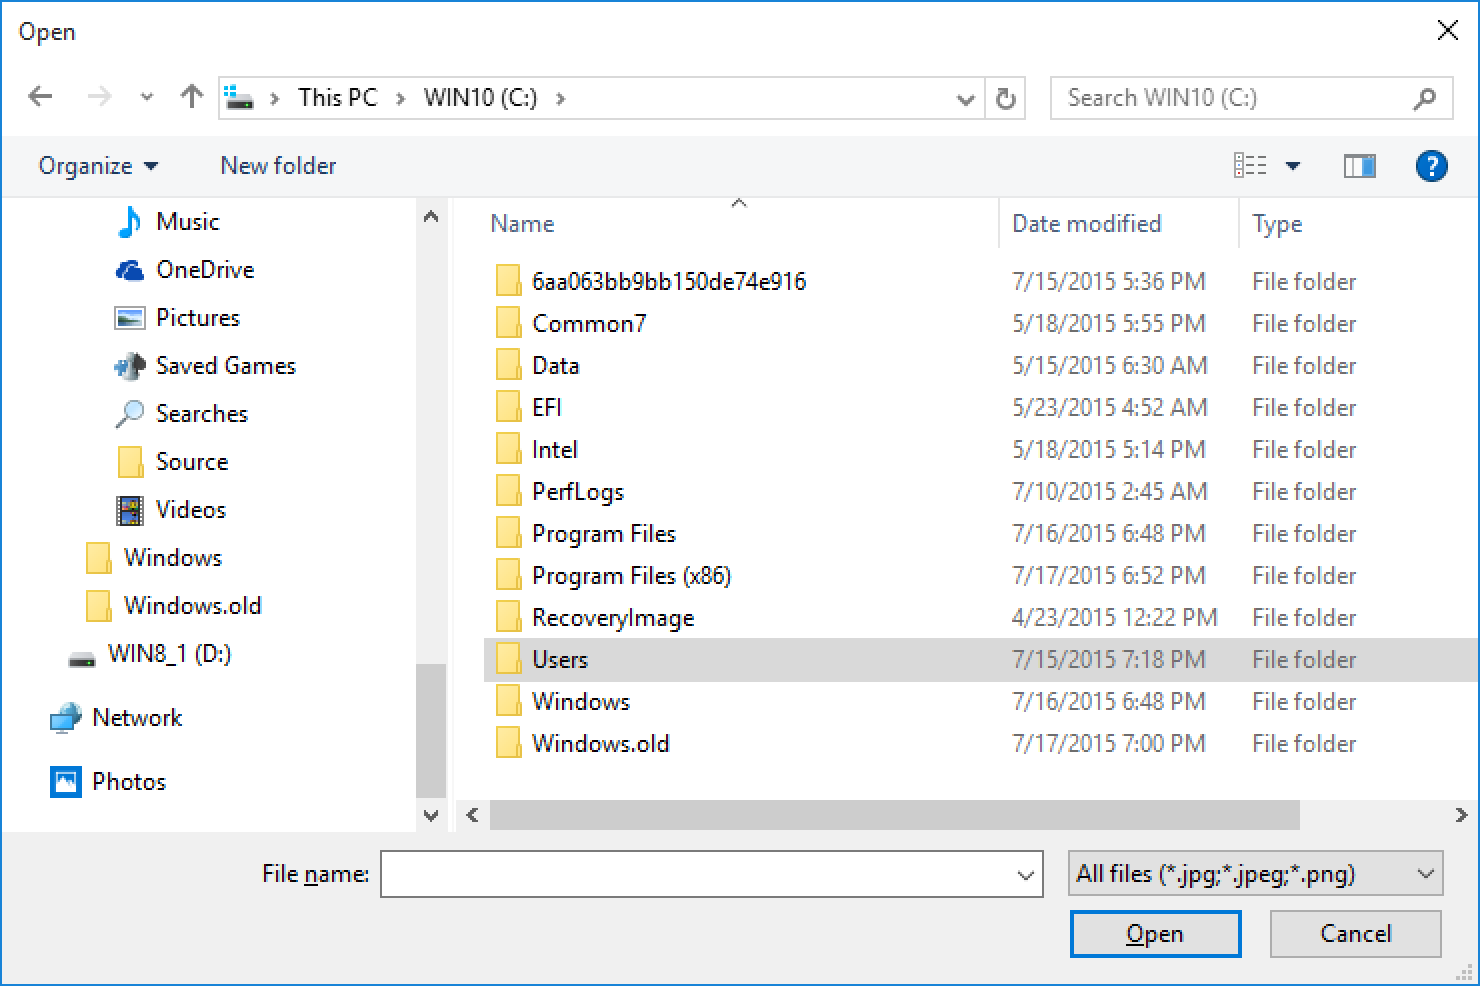
- Select File
- Choose the preset file from your device that contains the customer information.
- Name and Select Import Strategy
- Name the preset and select an import strategy from the following options:
- Import All, Update if Exists
- Create New Only
- Update Existing Only
- Save and Review
- Click the "Save" button to upload the preset
- Preview the uploaded preset after oploading successfully
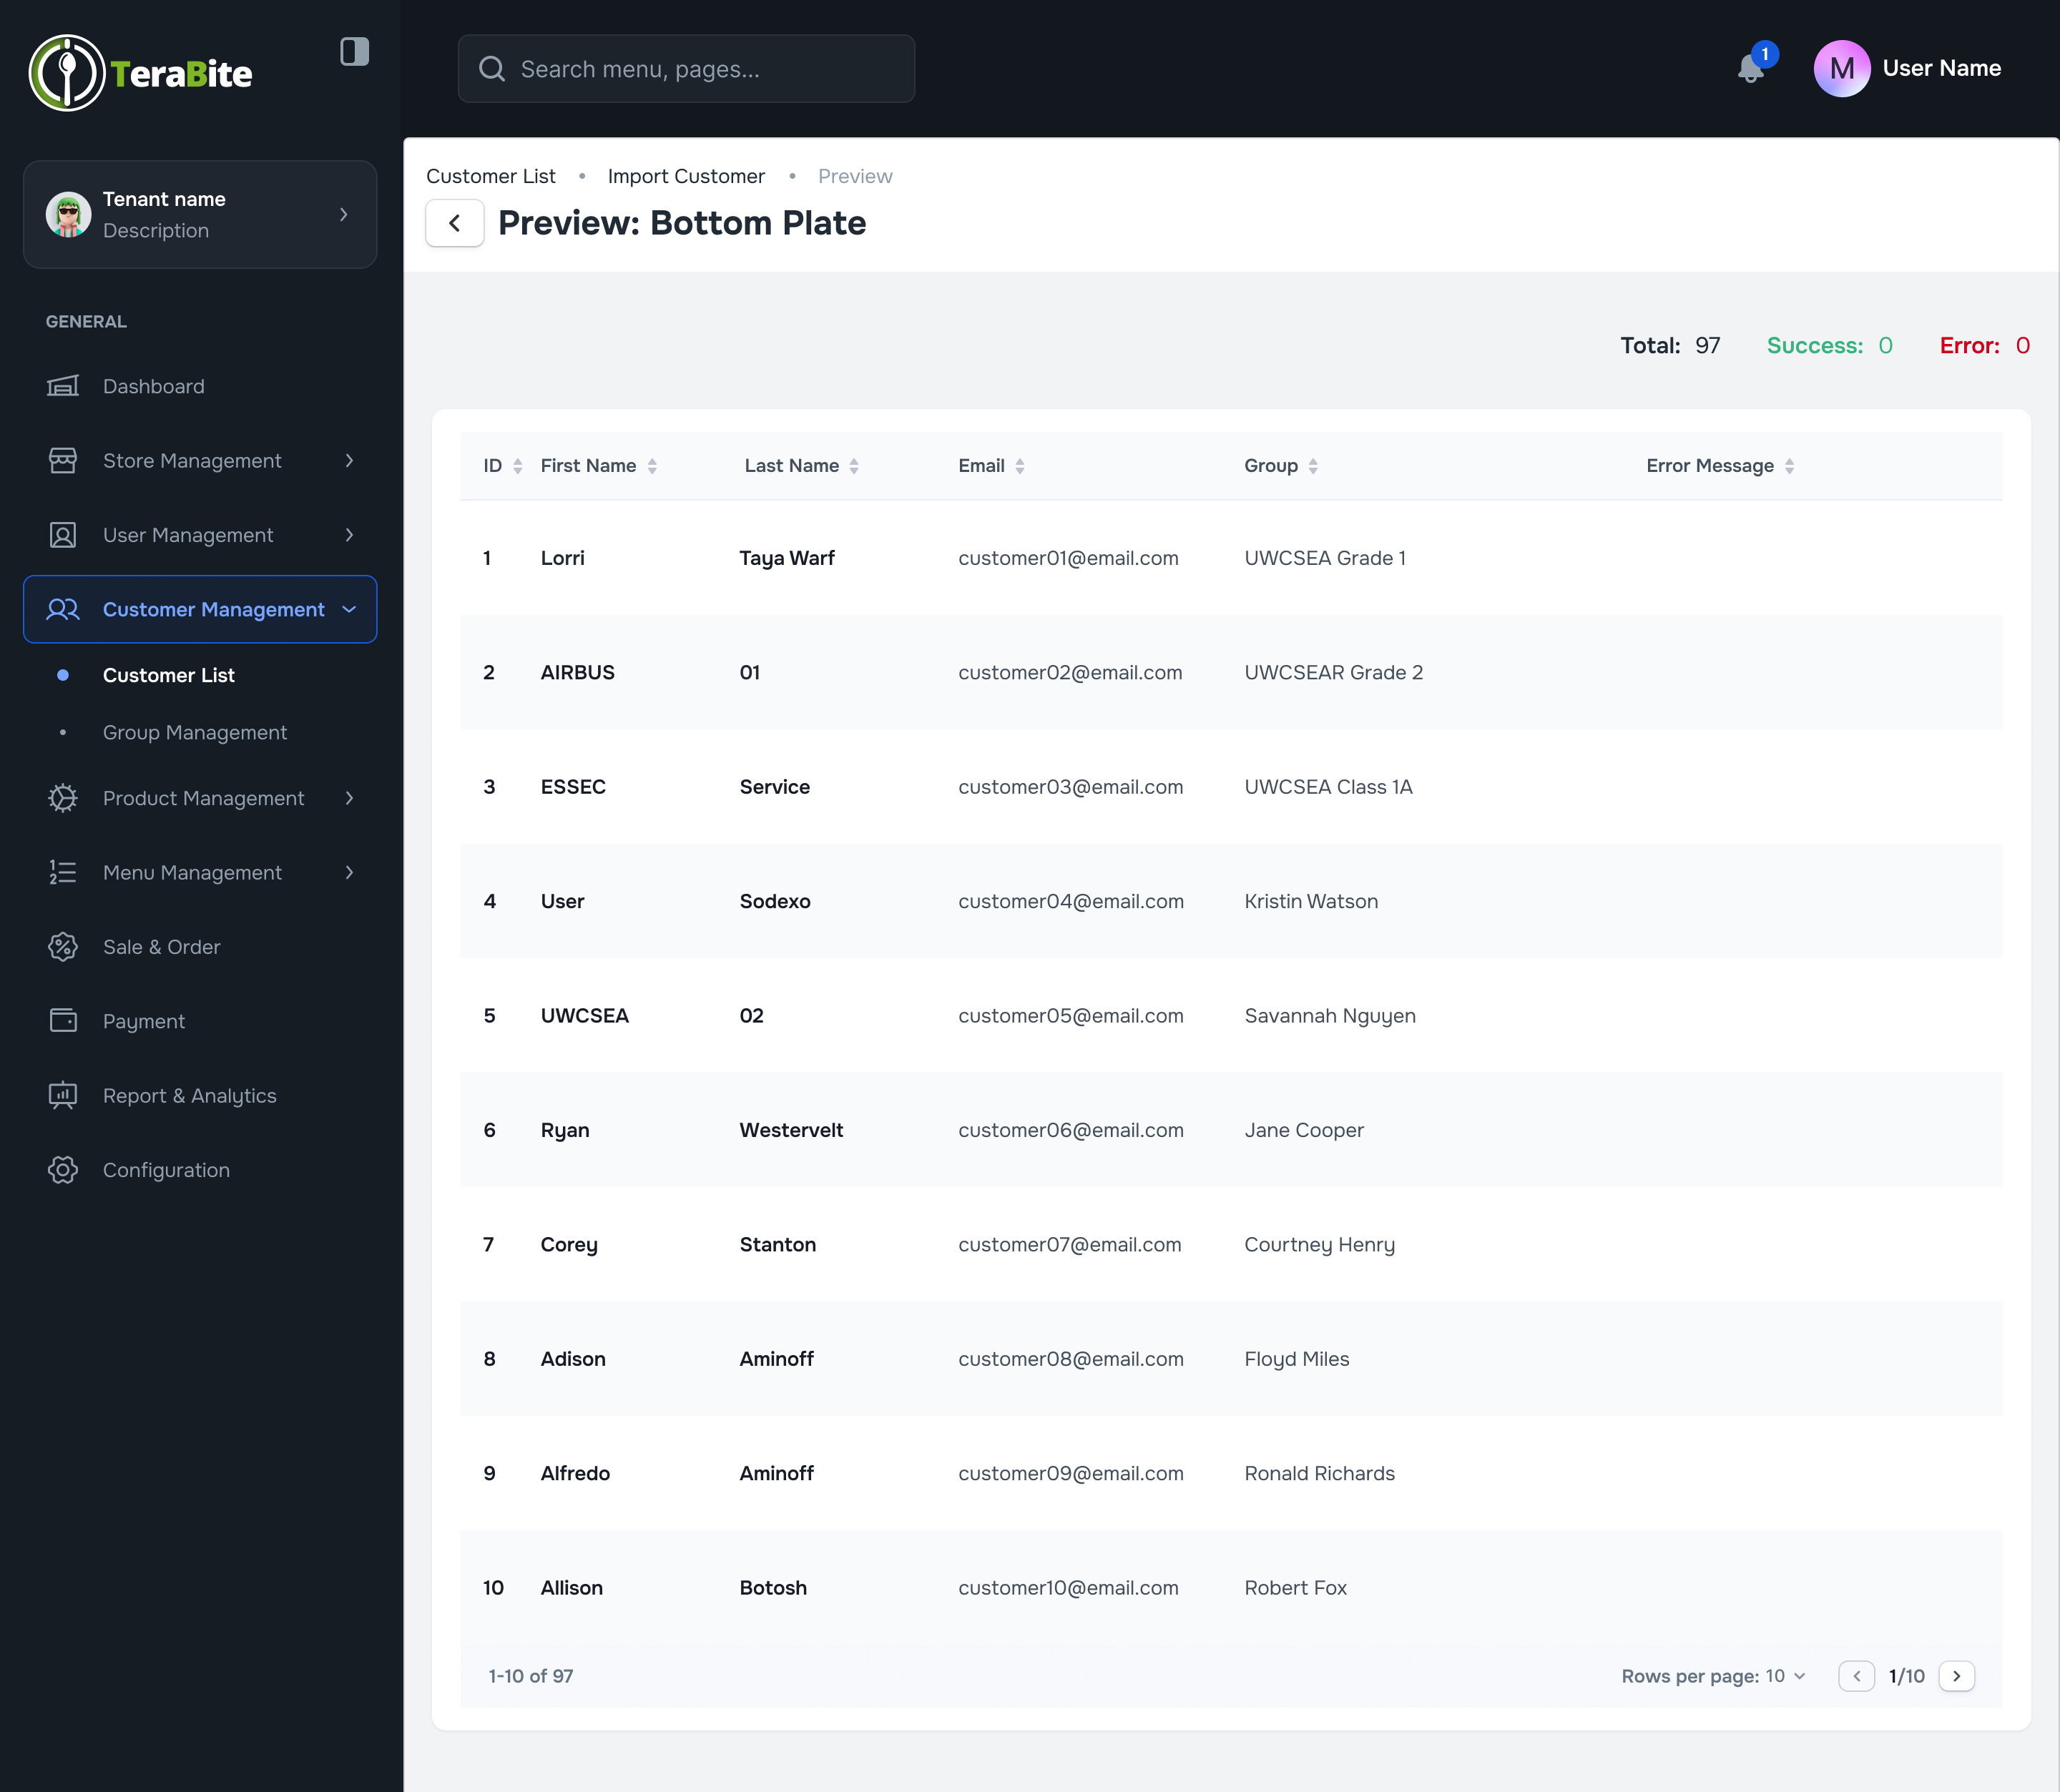
- Preview Preset
- Preview the customer list in the uploaded preset to make sure all data is correct before import to the system
- Import Preset
- Click Import button to import the preset
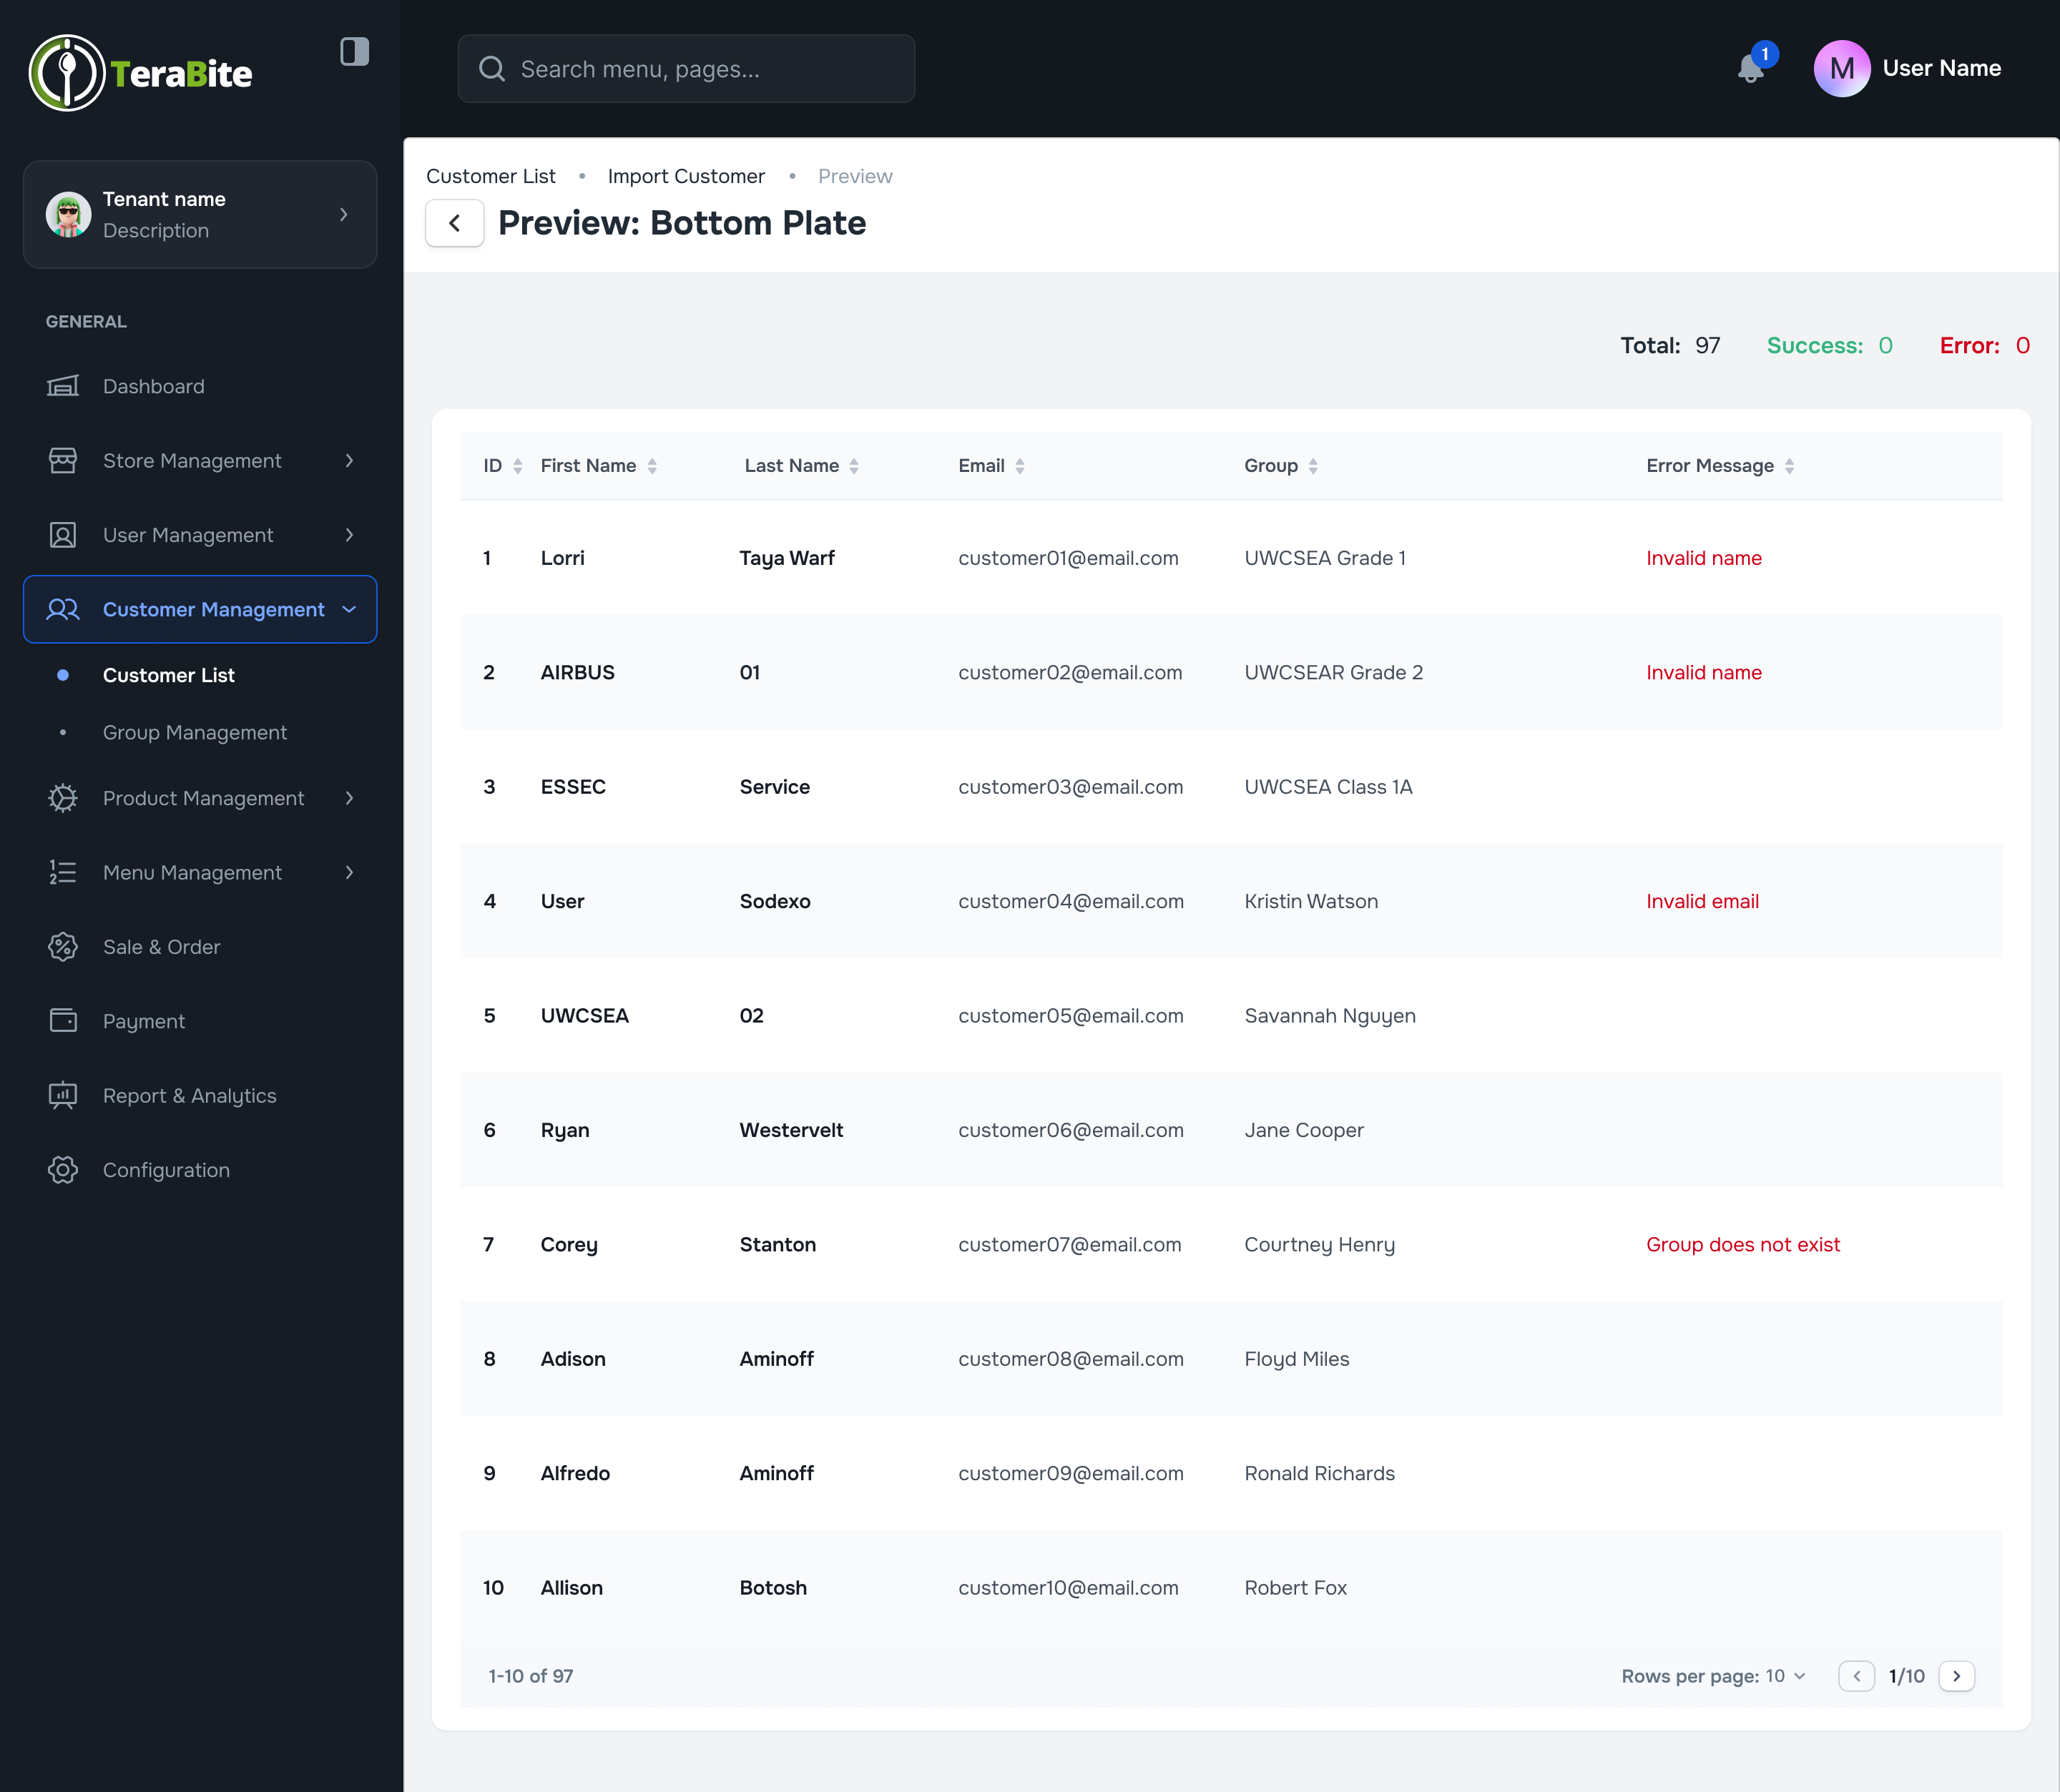
- Review Imported Preset Details
- After importing, review the product list in the preset, including any error messages for fail menu items that may appear along with the summary of the progress such as Total, Success, Fail.
- Data Update
- Success imported customers will be updated successfully.
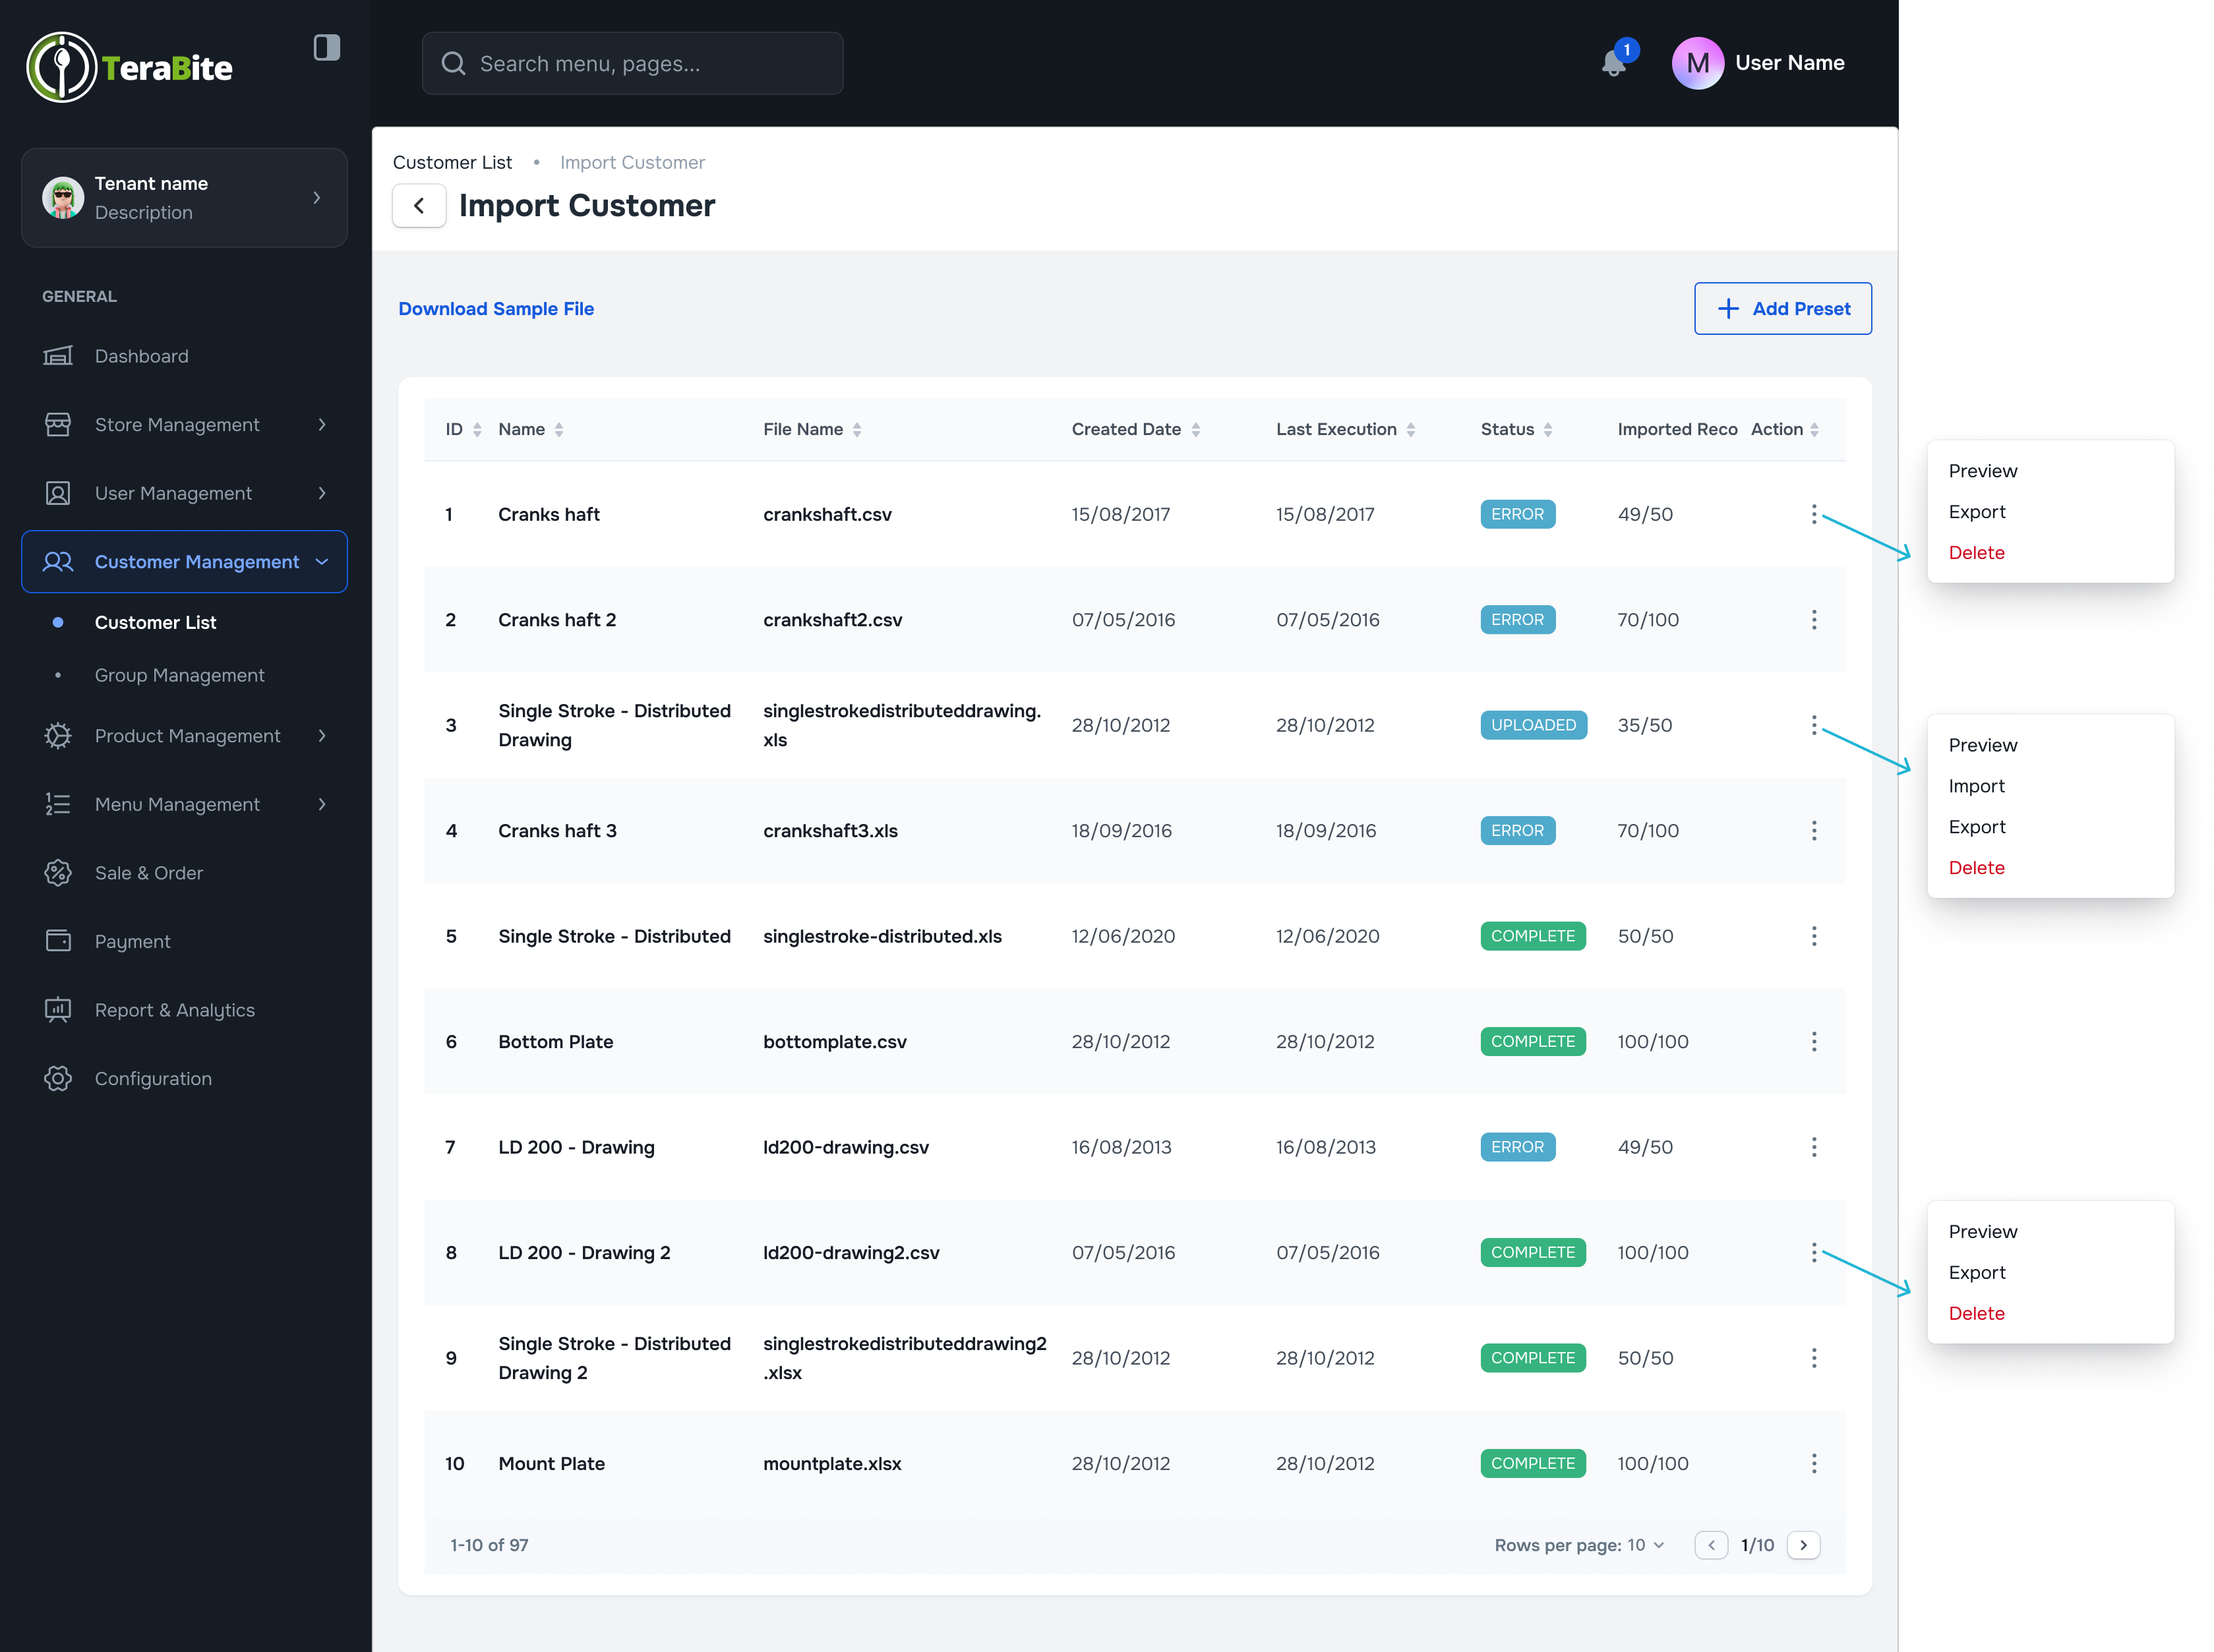
- Perform Actions Based on User Status
- Click on the three-dot menu in each row to reveal available actions for each user based on their status as below:
- Uploaded: Options are View, Import, Export, and Delete.
- Completed: Options are View, Export, and Delete.
- Error: Options are View, Export, and Delete.
#
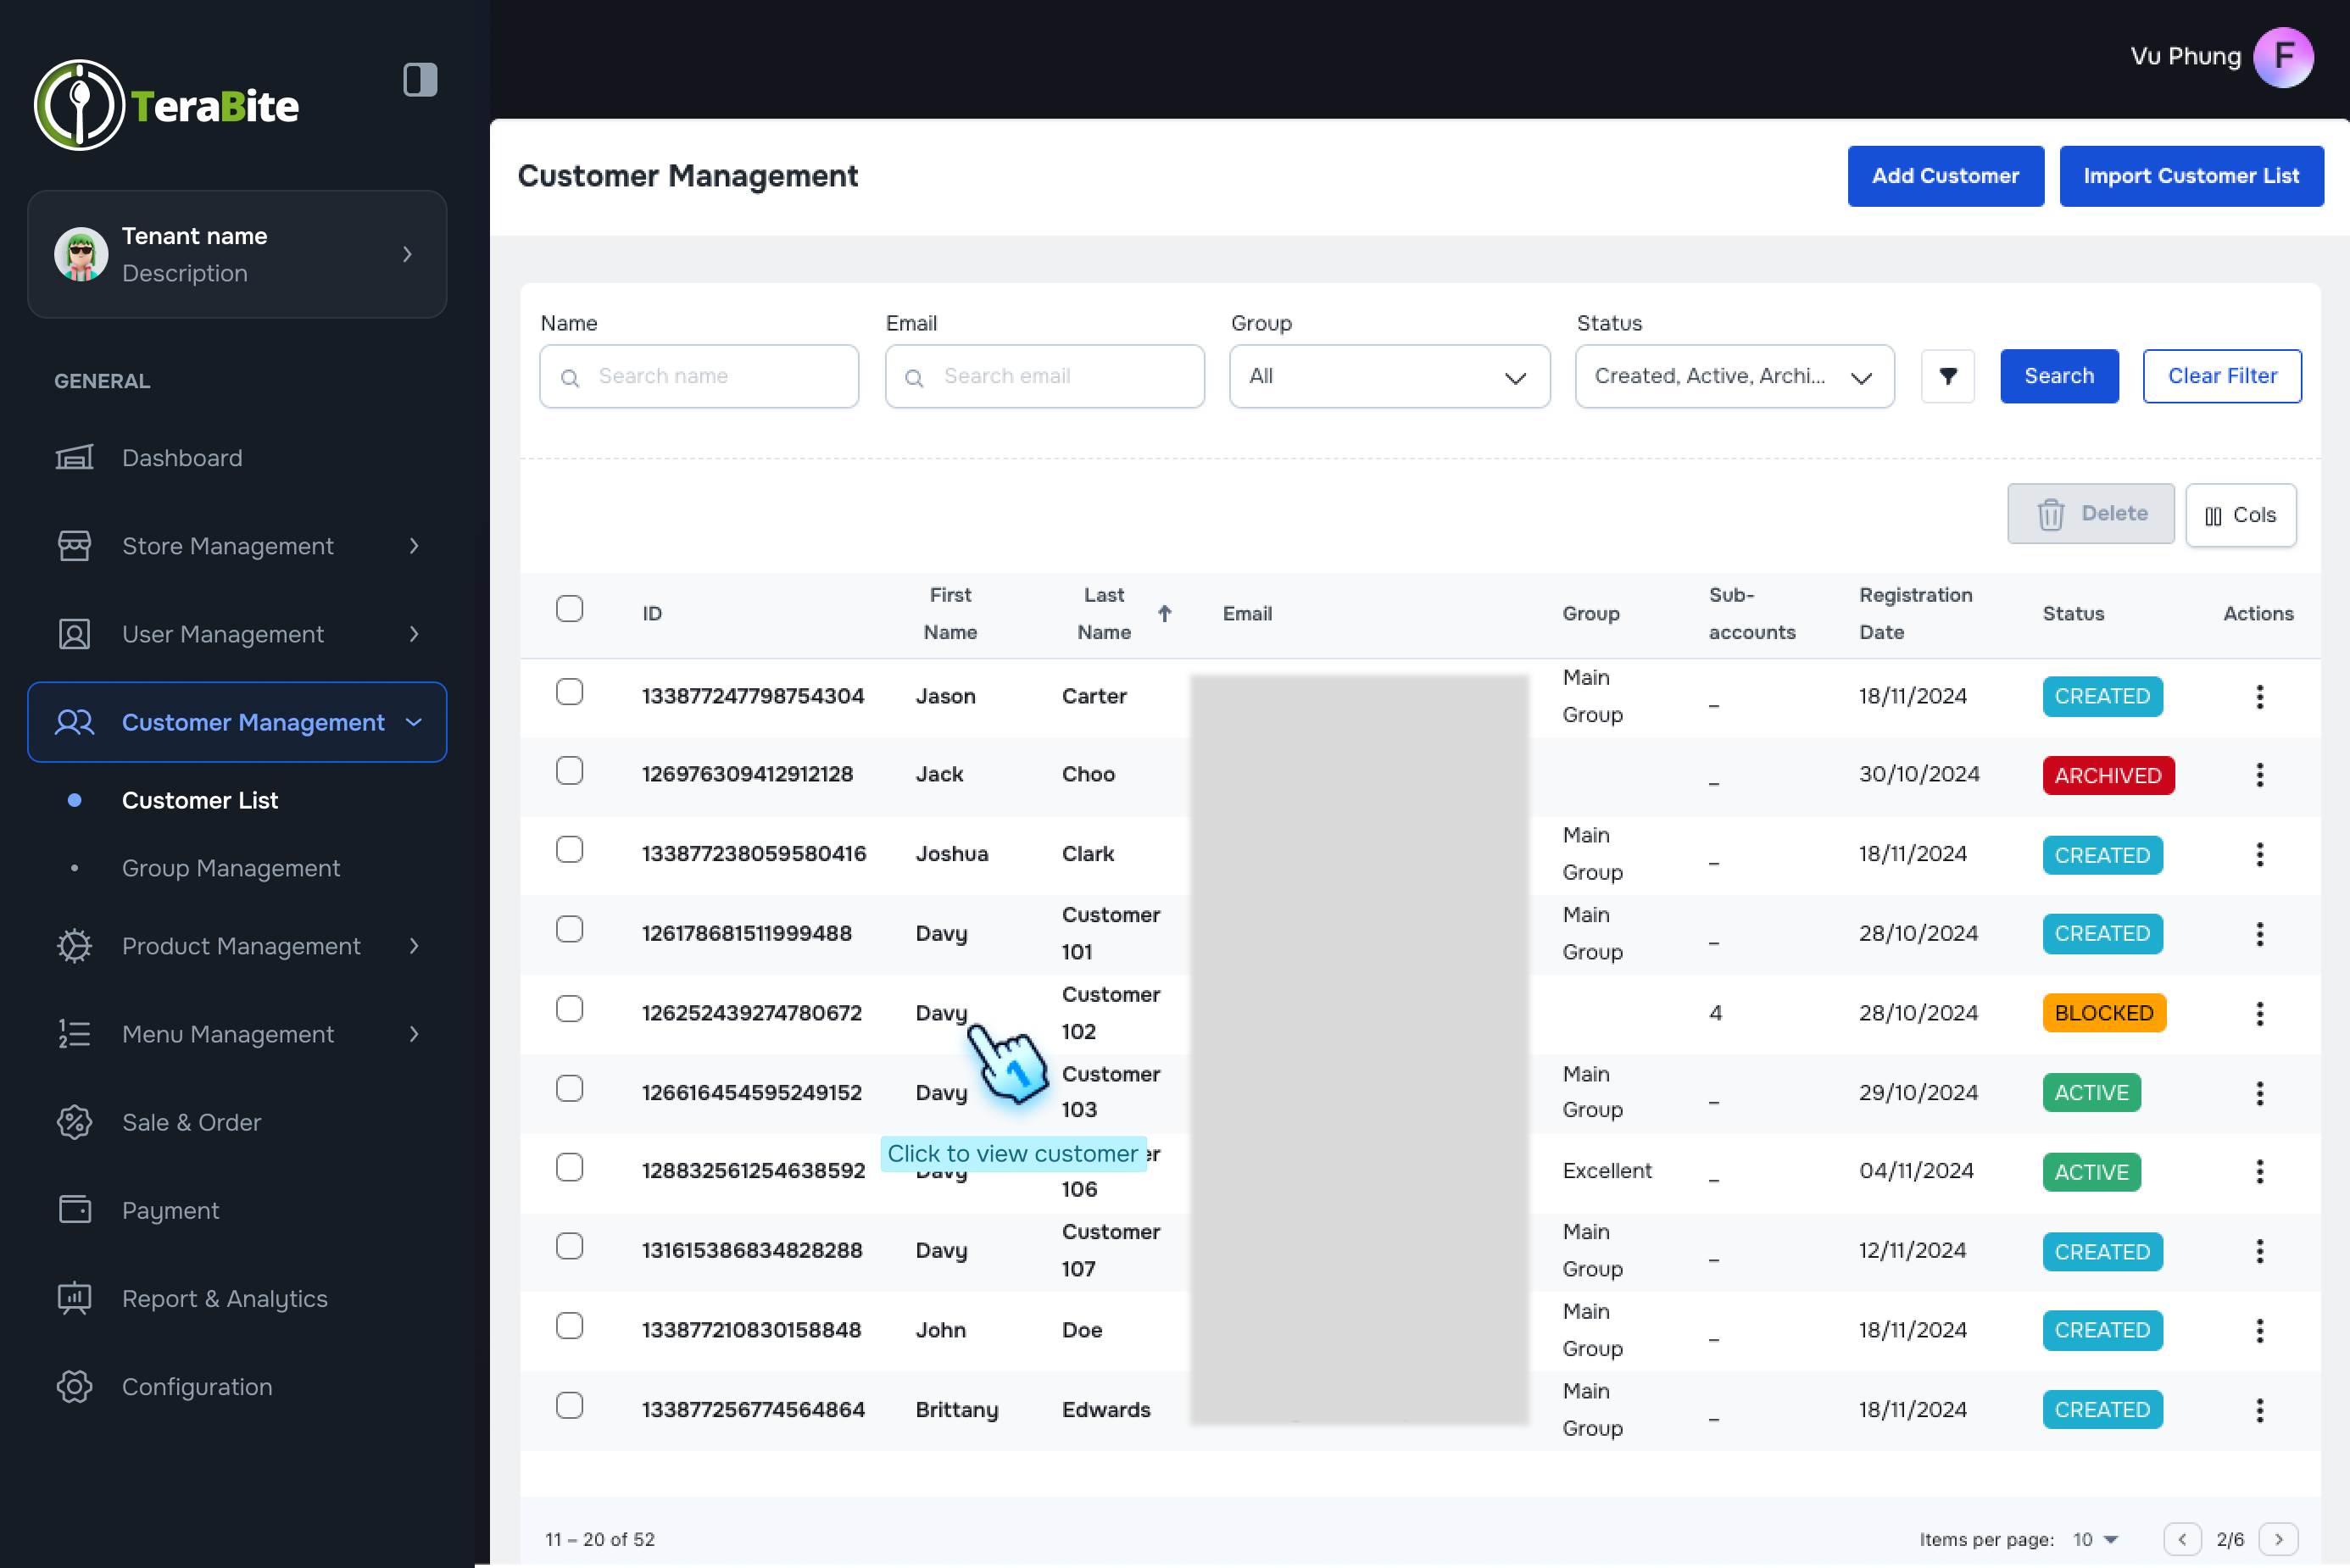
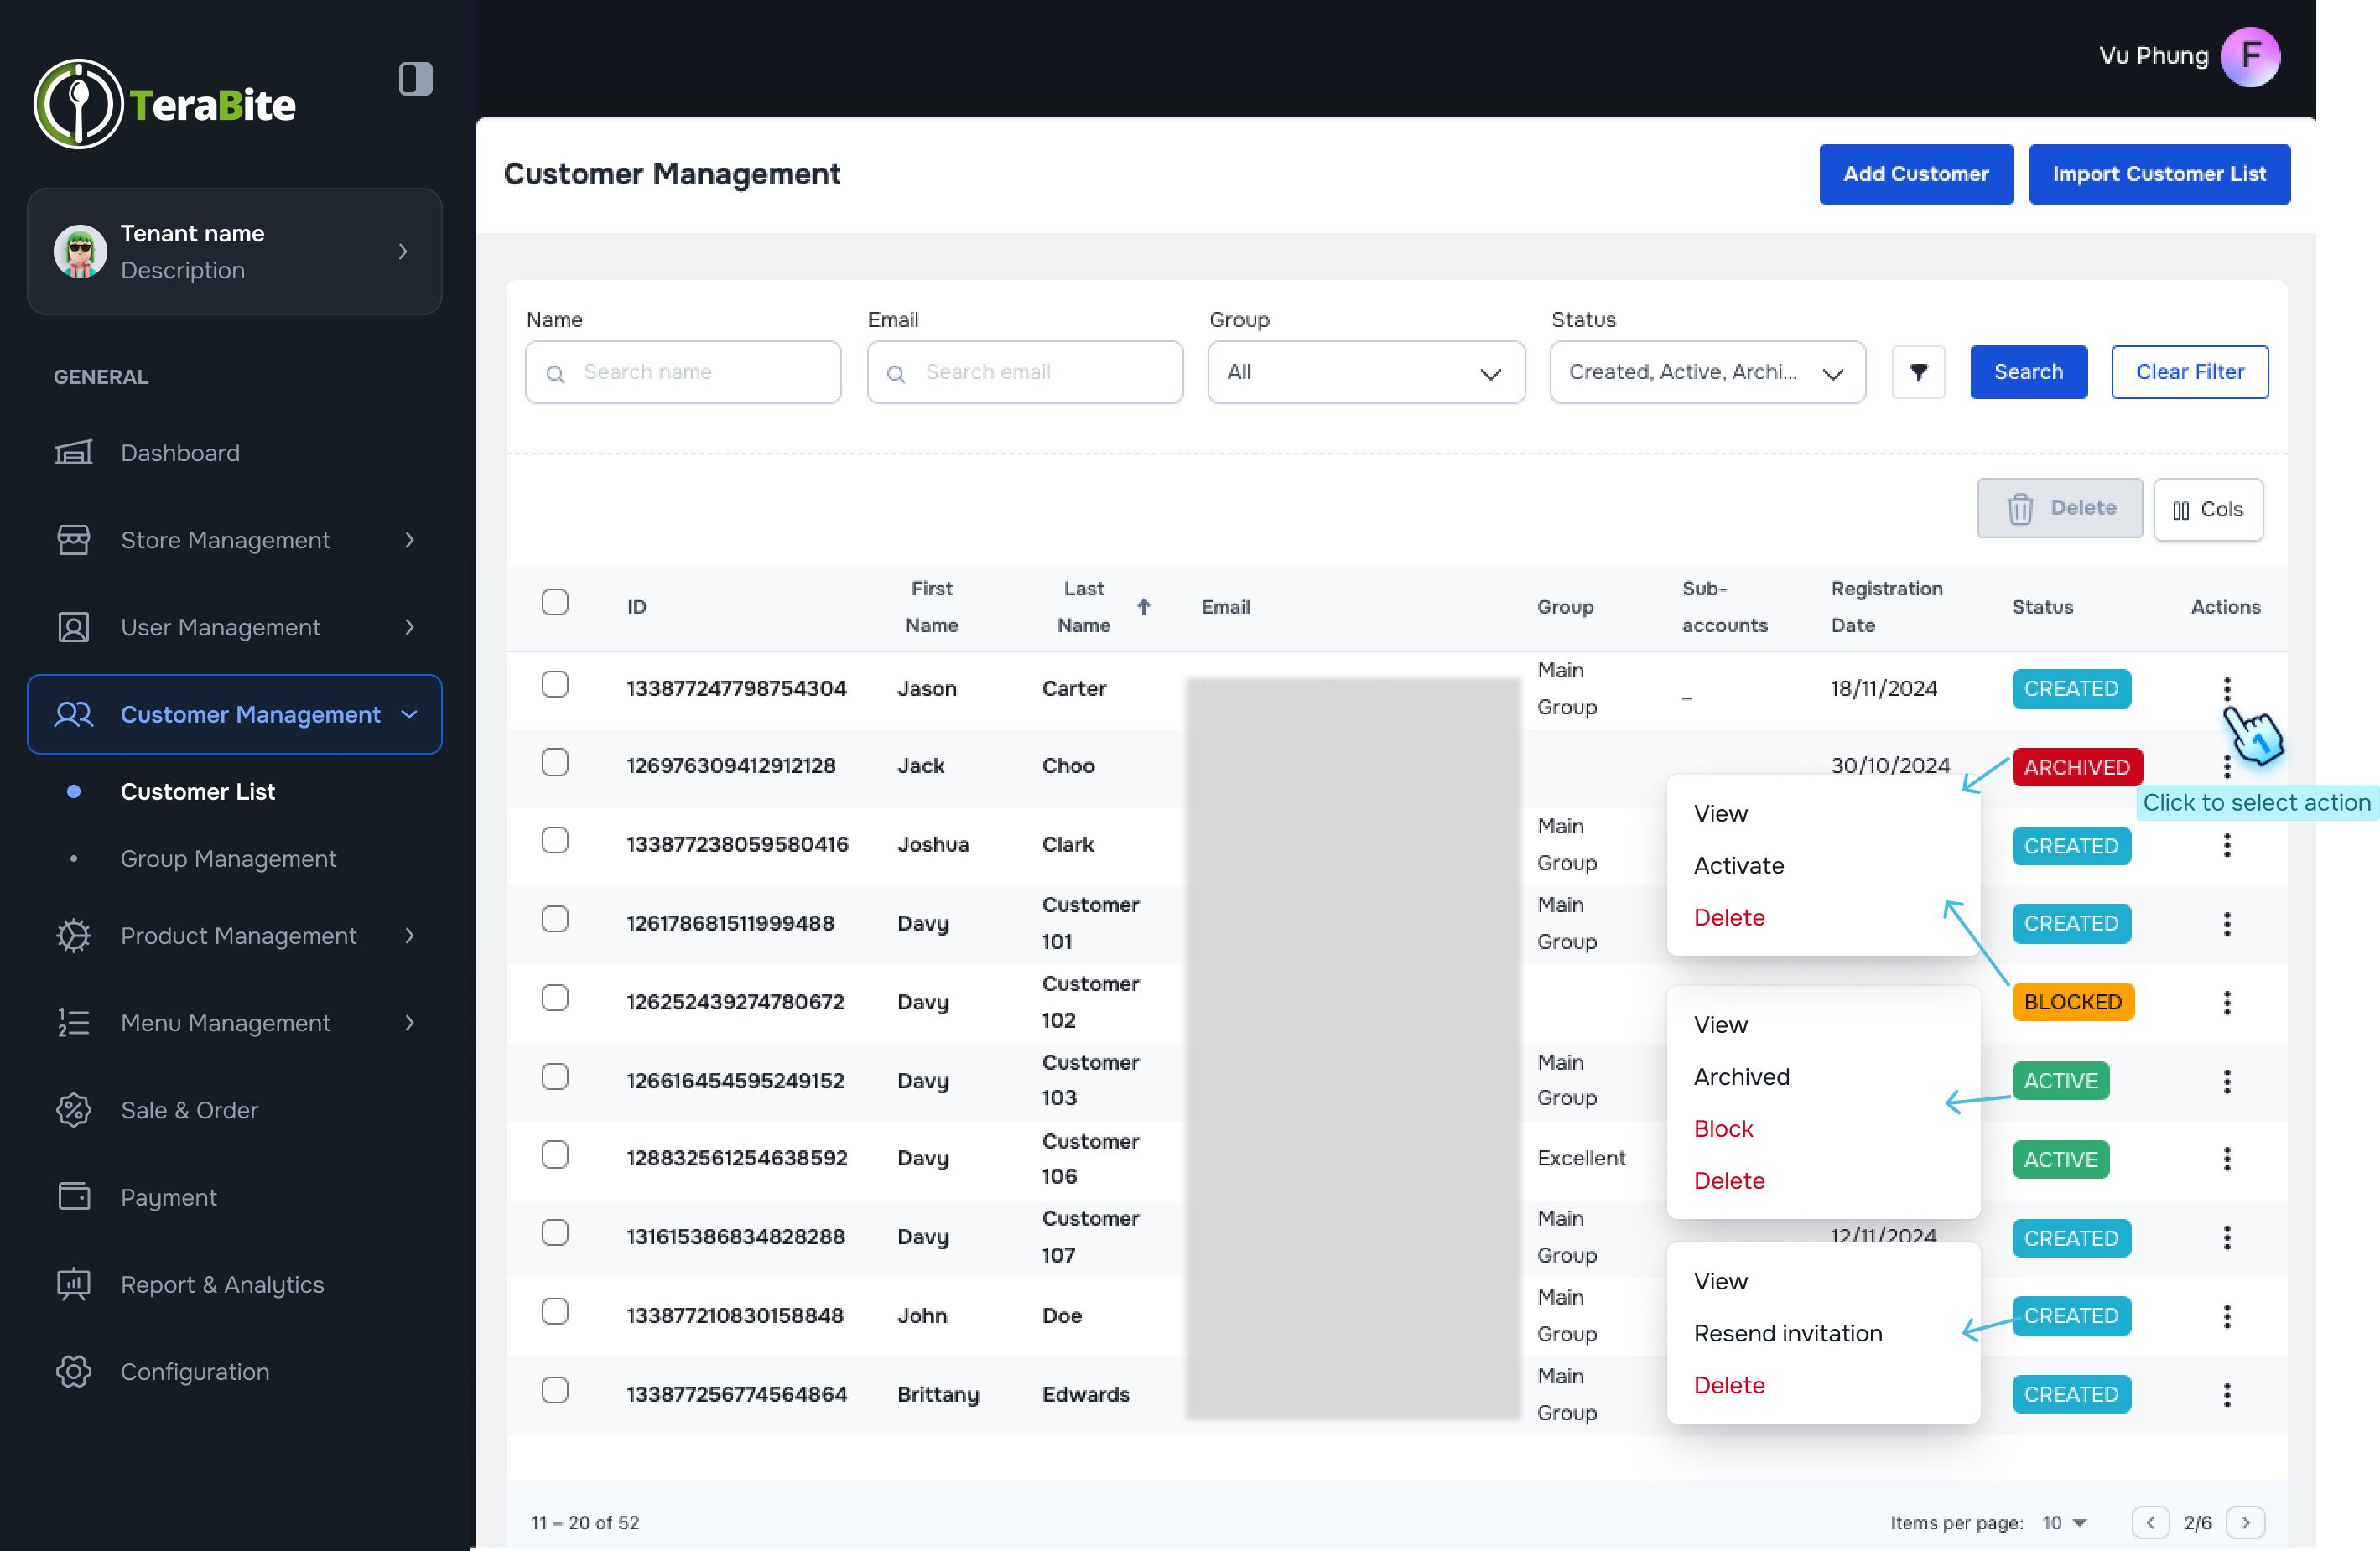
View Customer List and Perform actions
- Access Customer List
- Navigate to the Customer List section where users are displayed with their respective statuses: Created, Active, Inactive, and Blocked.
- Perform Actions Based on User Status
- Click on the three-dot menu in each row to reveal available actions for each user based on their status as below:
- Created: Options are View, Activate, and Delete.
- Active: Options are View, Deactivate, Block, and Delete.
- Archived: Options are View, Activate, and Delete.
- Blocked: Options are View, Unblock, and Delete.
- Archived (with Deletion time): Options are View, Activate. if Deletion time has not passed
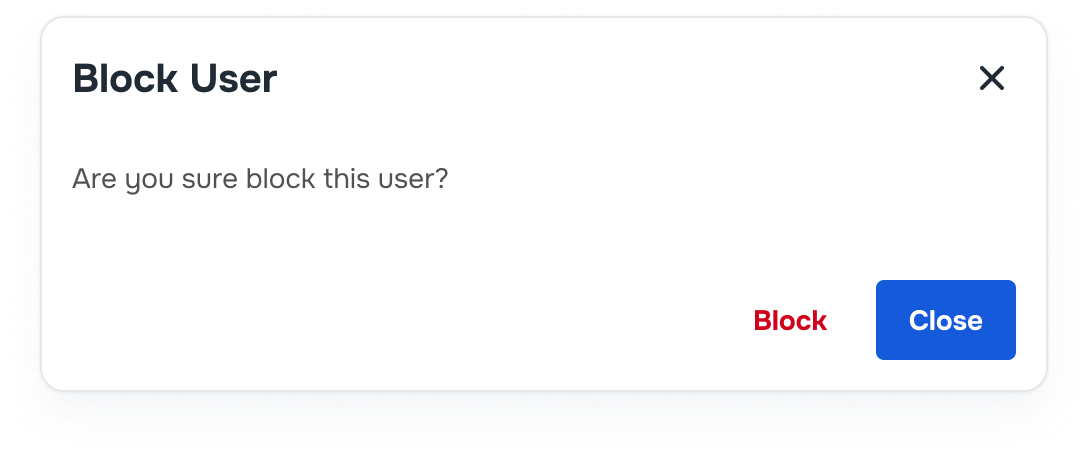
- Delete Customer
- Select "Delete" from the three-dot menu for each Customer.
- Confirm Deletion in A confirmation dialog.
- The customer's status will be updated to "Archived."
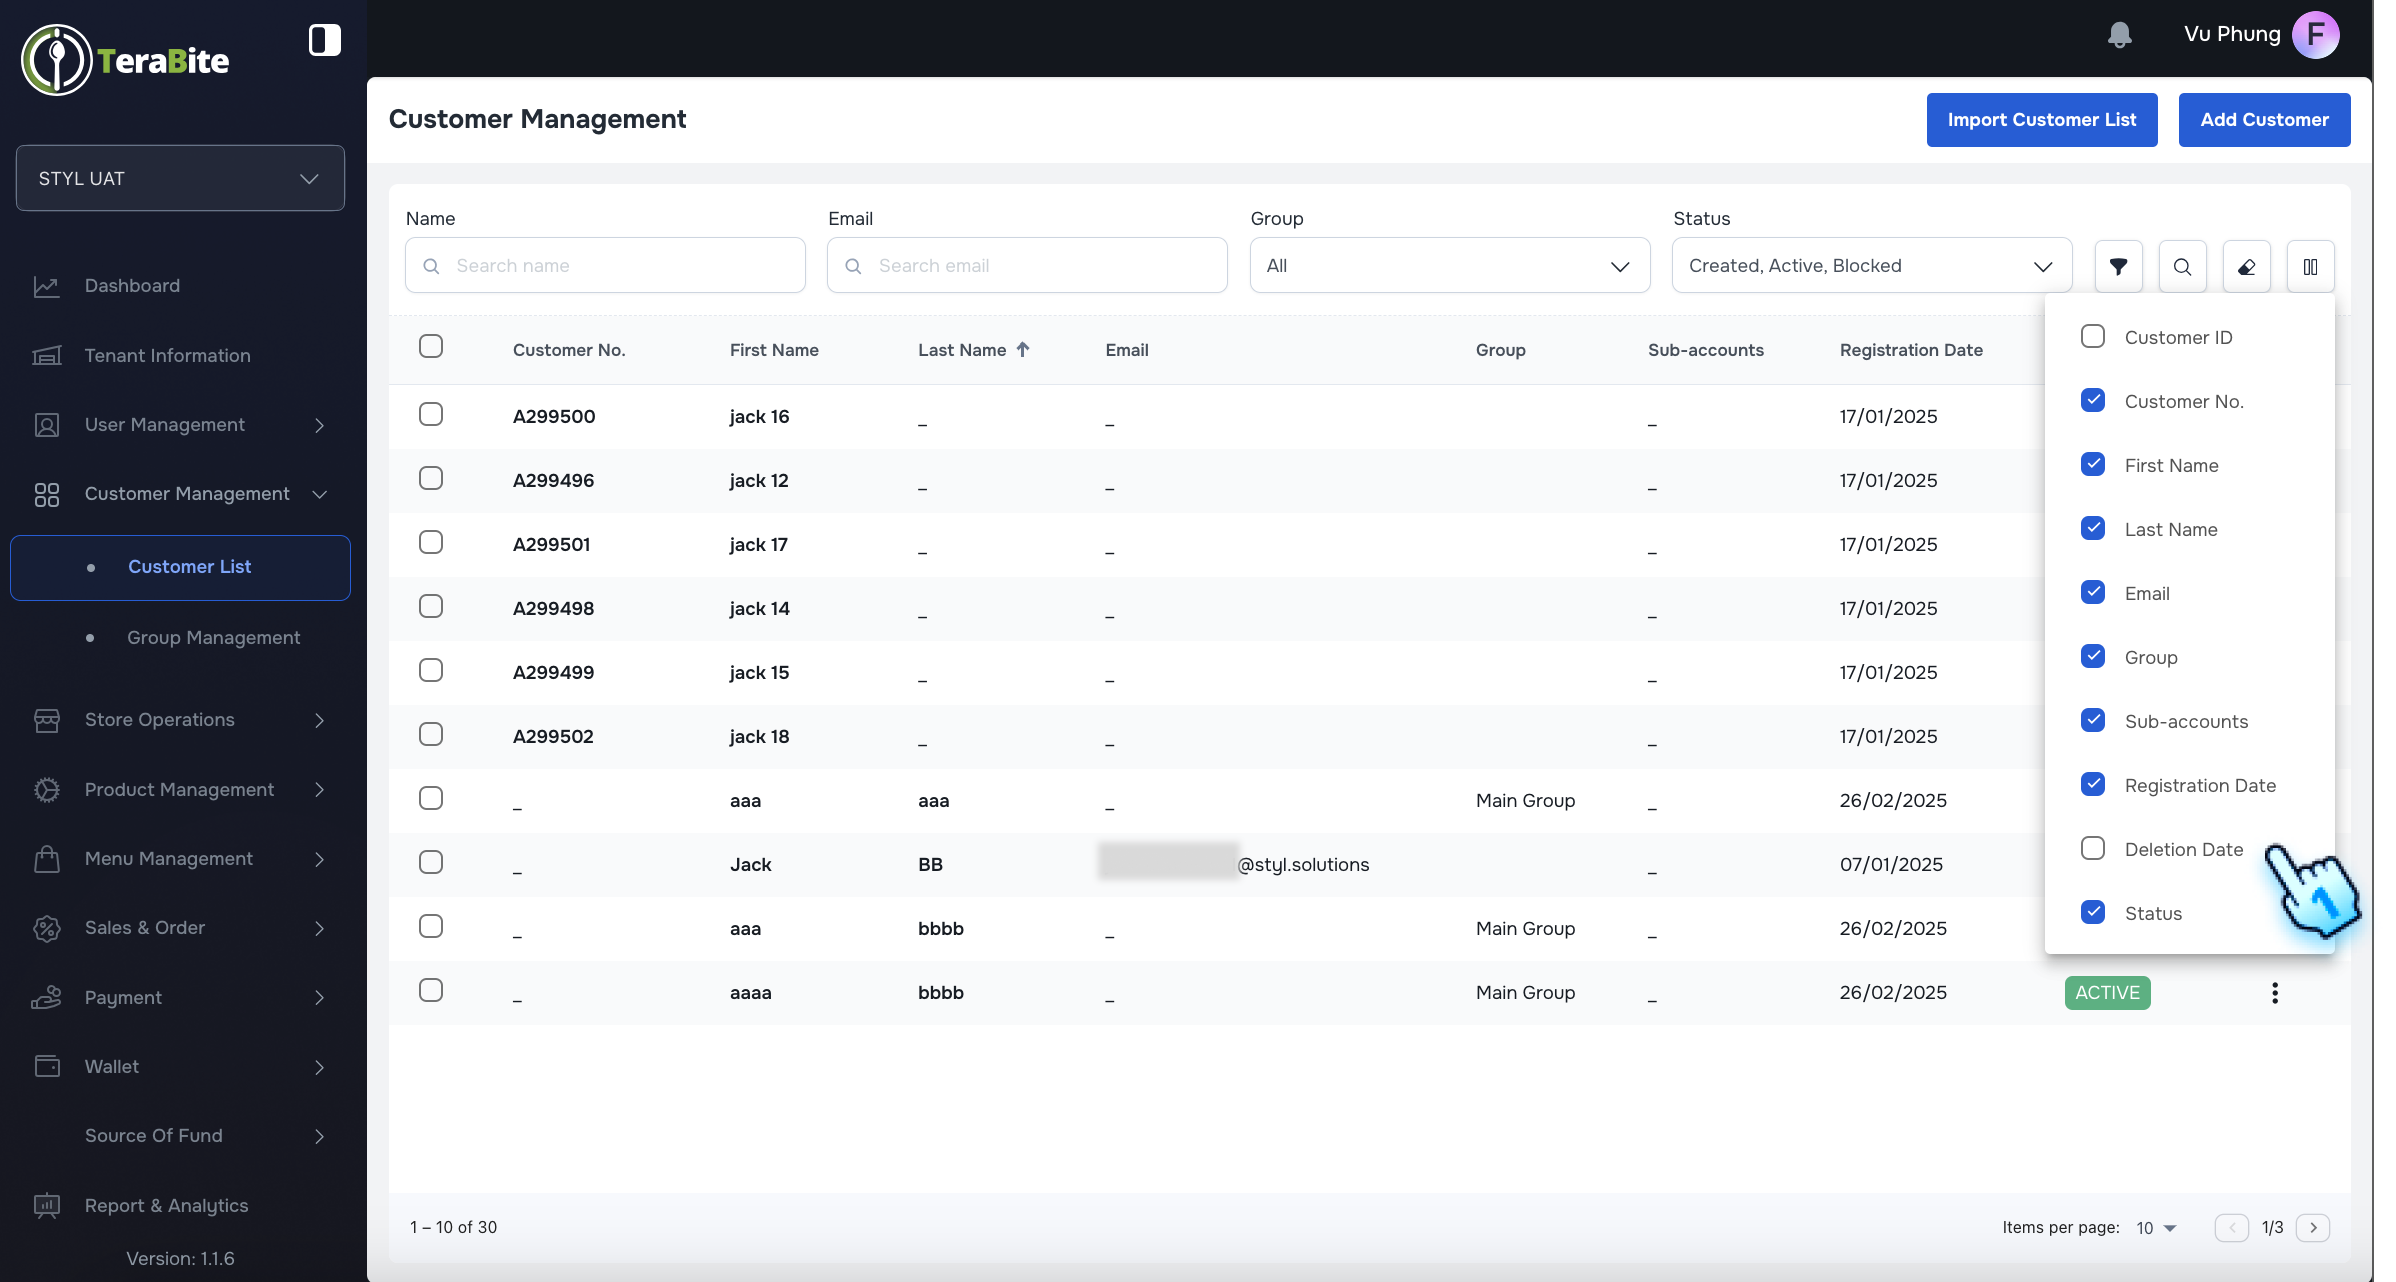
- View Deletion Date
- Navigate to the customer list.
- Select "Deletion Date" in the column button of the navigation bar to drag it to display in the table.
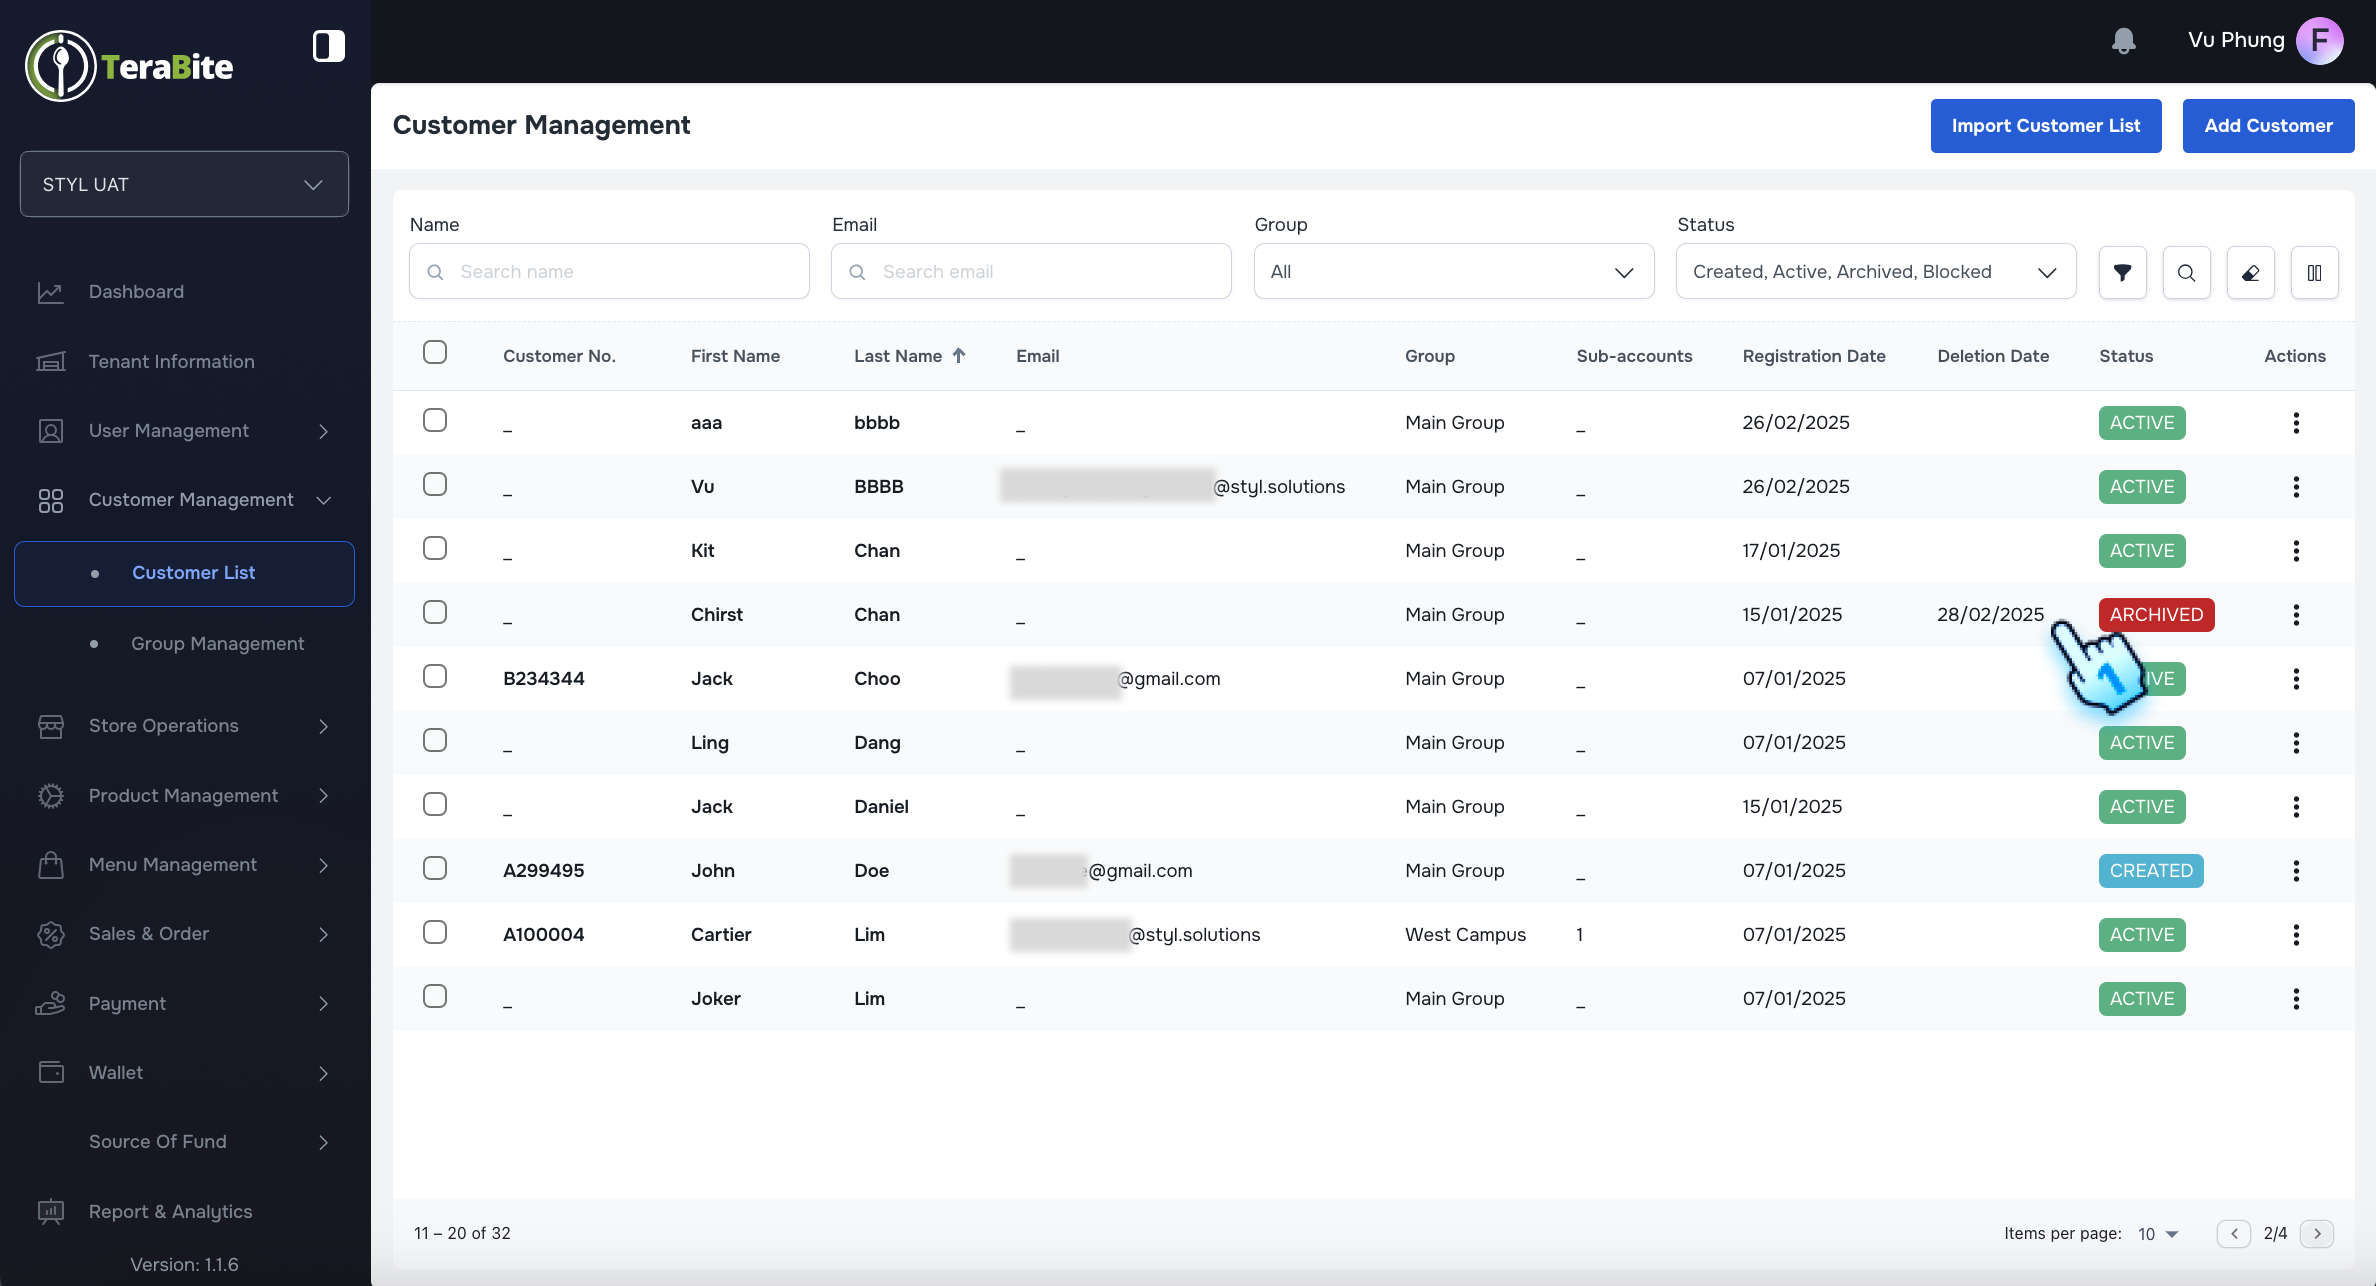
- The deletion date will be only displayed for deleted customers.
- Delete Customer Completely
- After the deletion date has passed, the customer will be removed from the list.
- Activate Deleted Customer
- Before the deletion date, Activate Deleted Customer if neccessary
- The customer will be reactivated, and the deletion date will disappear.
#
Customer Detail and Setup Information
#
Description
This section outlines the steps to view customer details and configure customer-specific information, including sub-accounts, cards, and allergens.
#
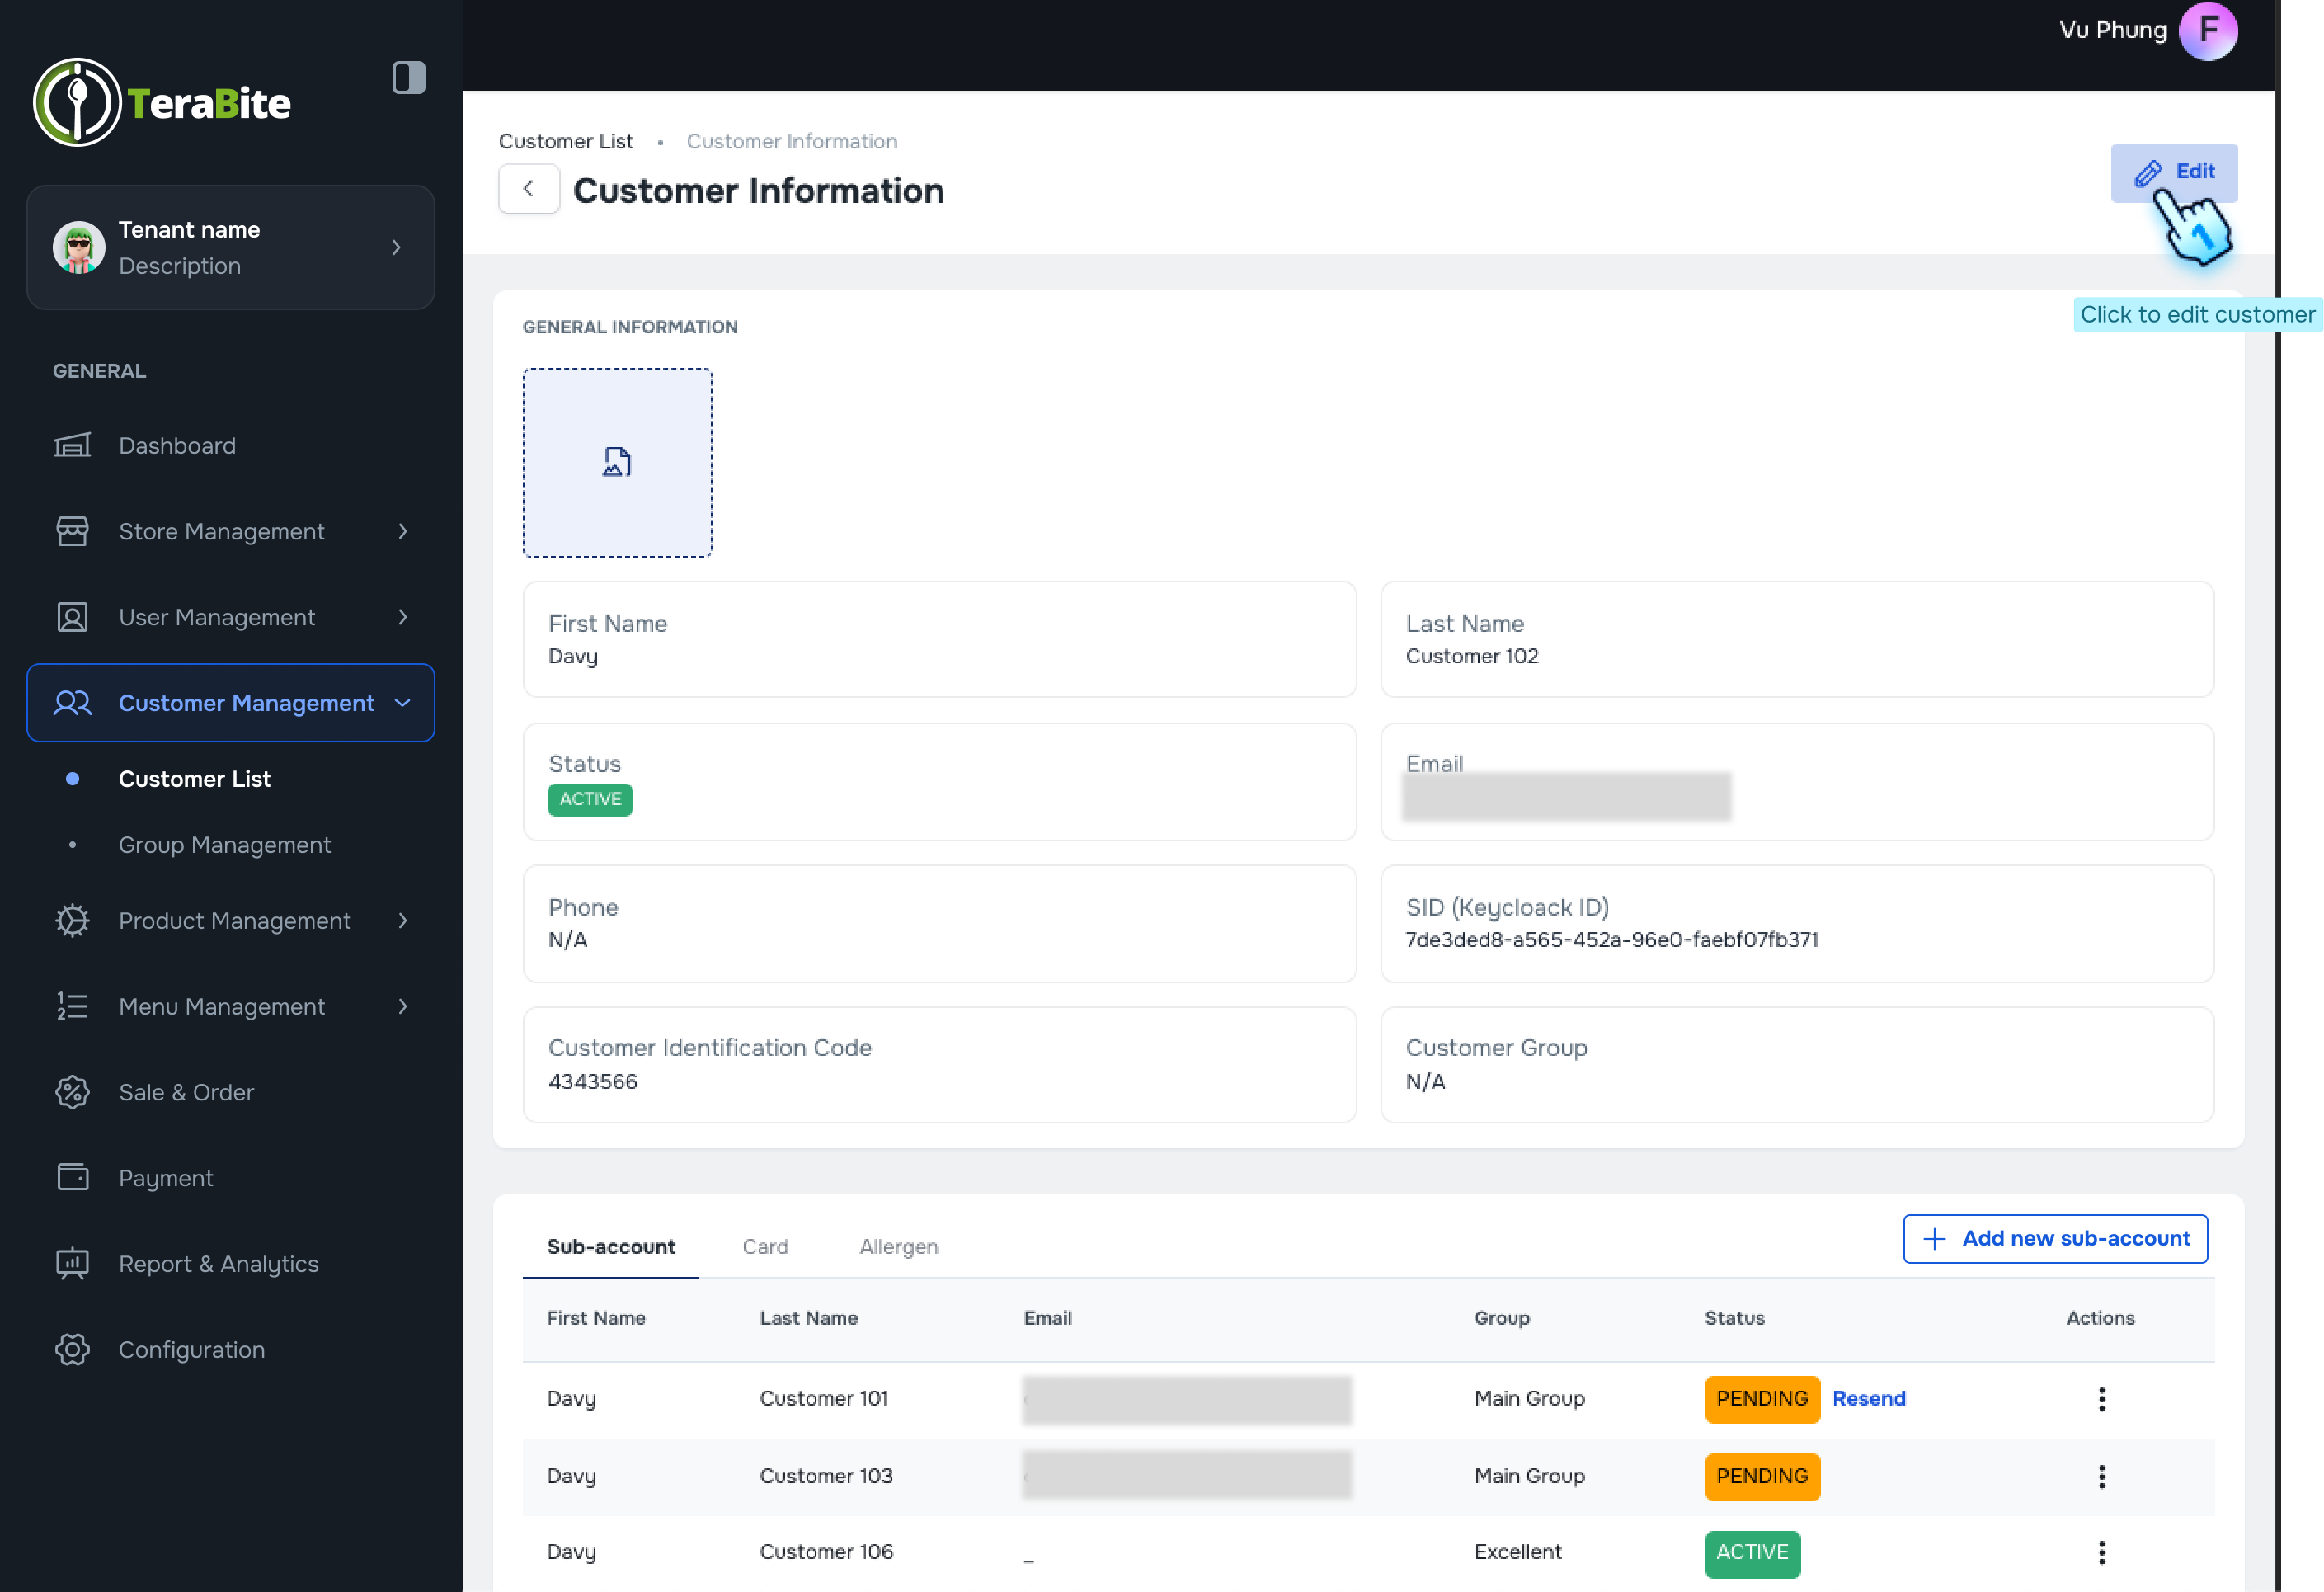
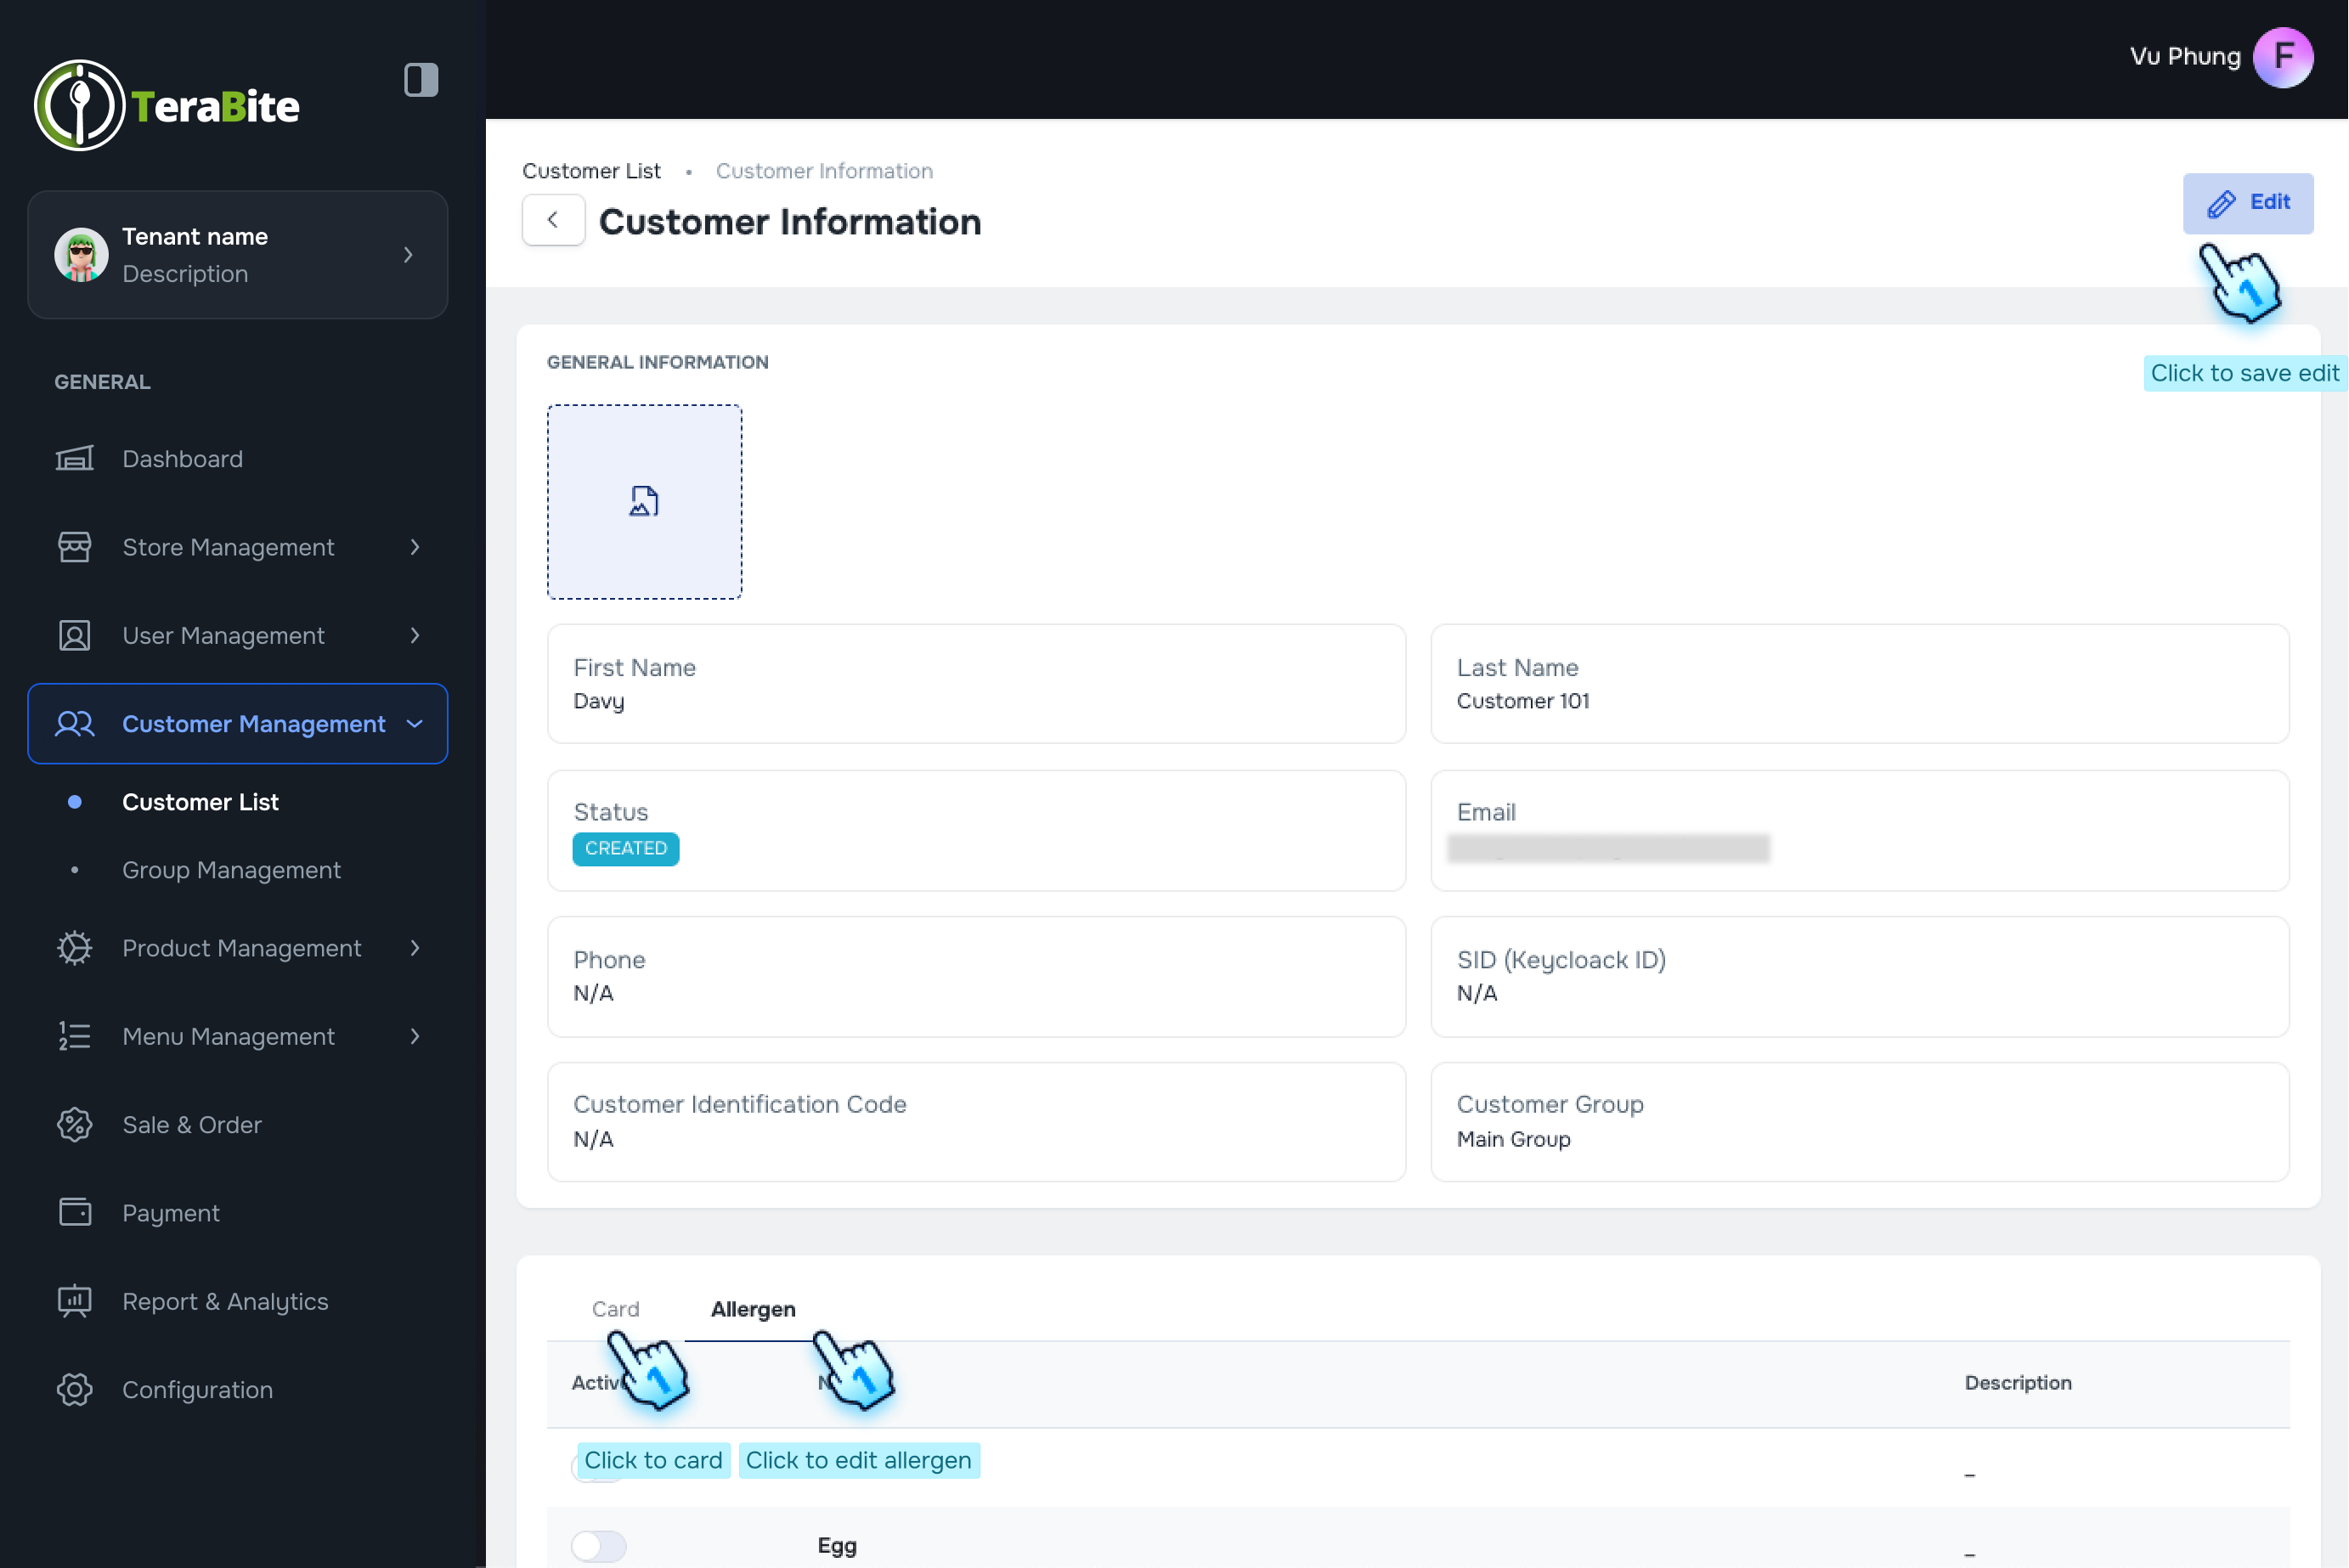
Set Up Customer Information
- Click on the first name of the customer to display their detailed information.
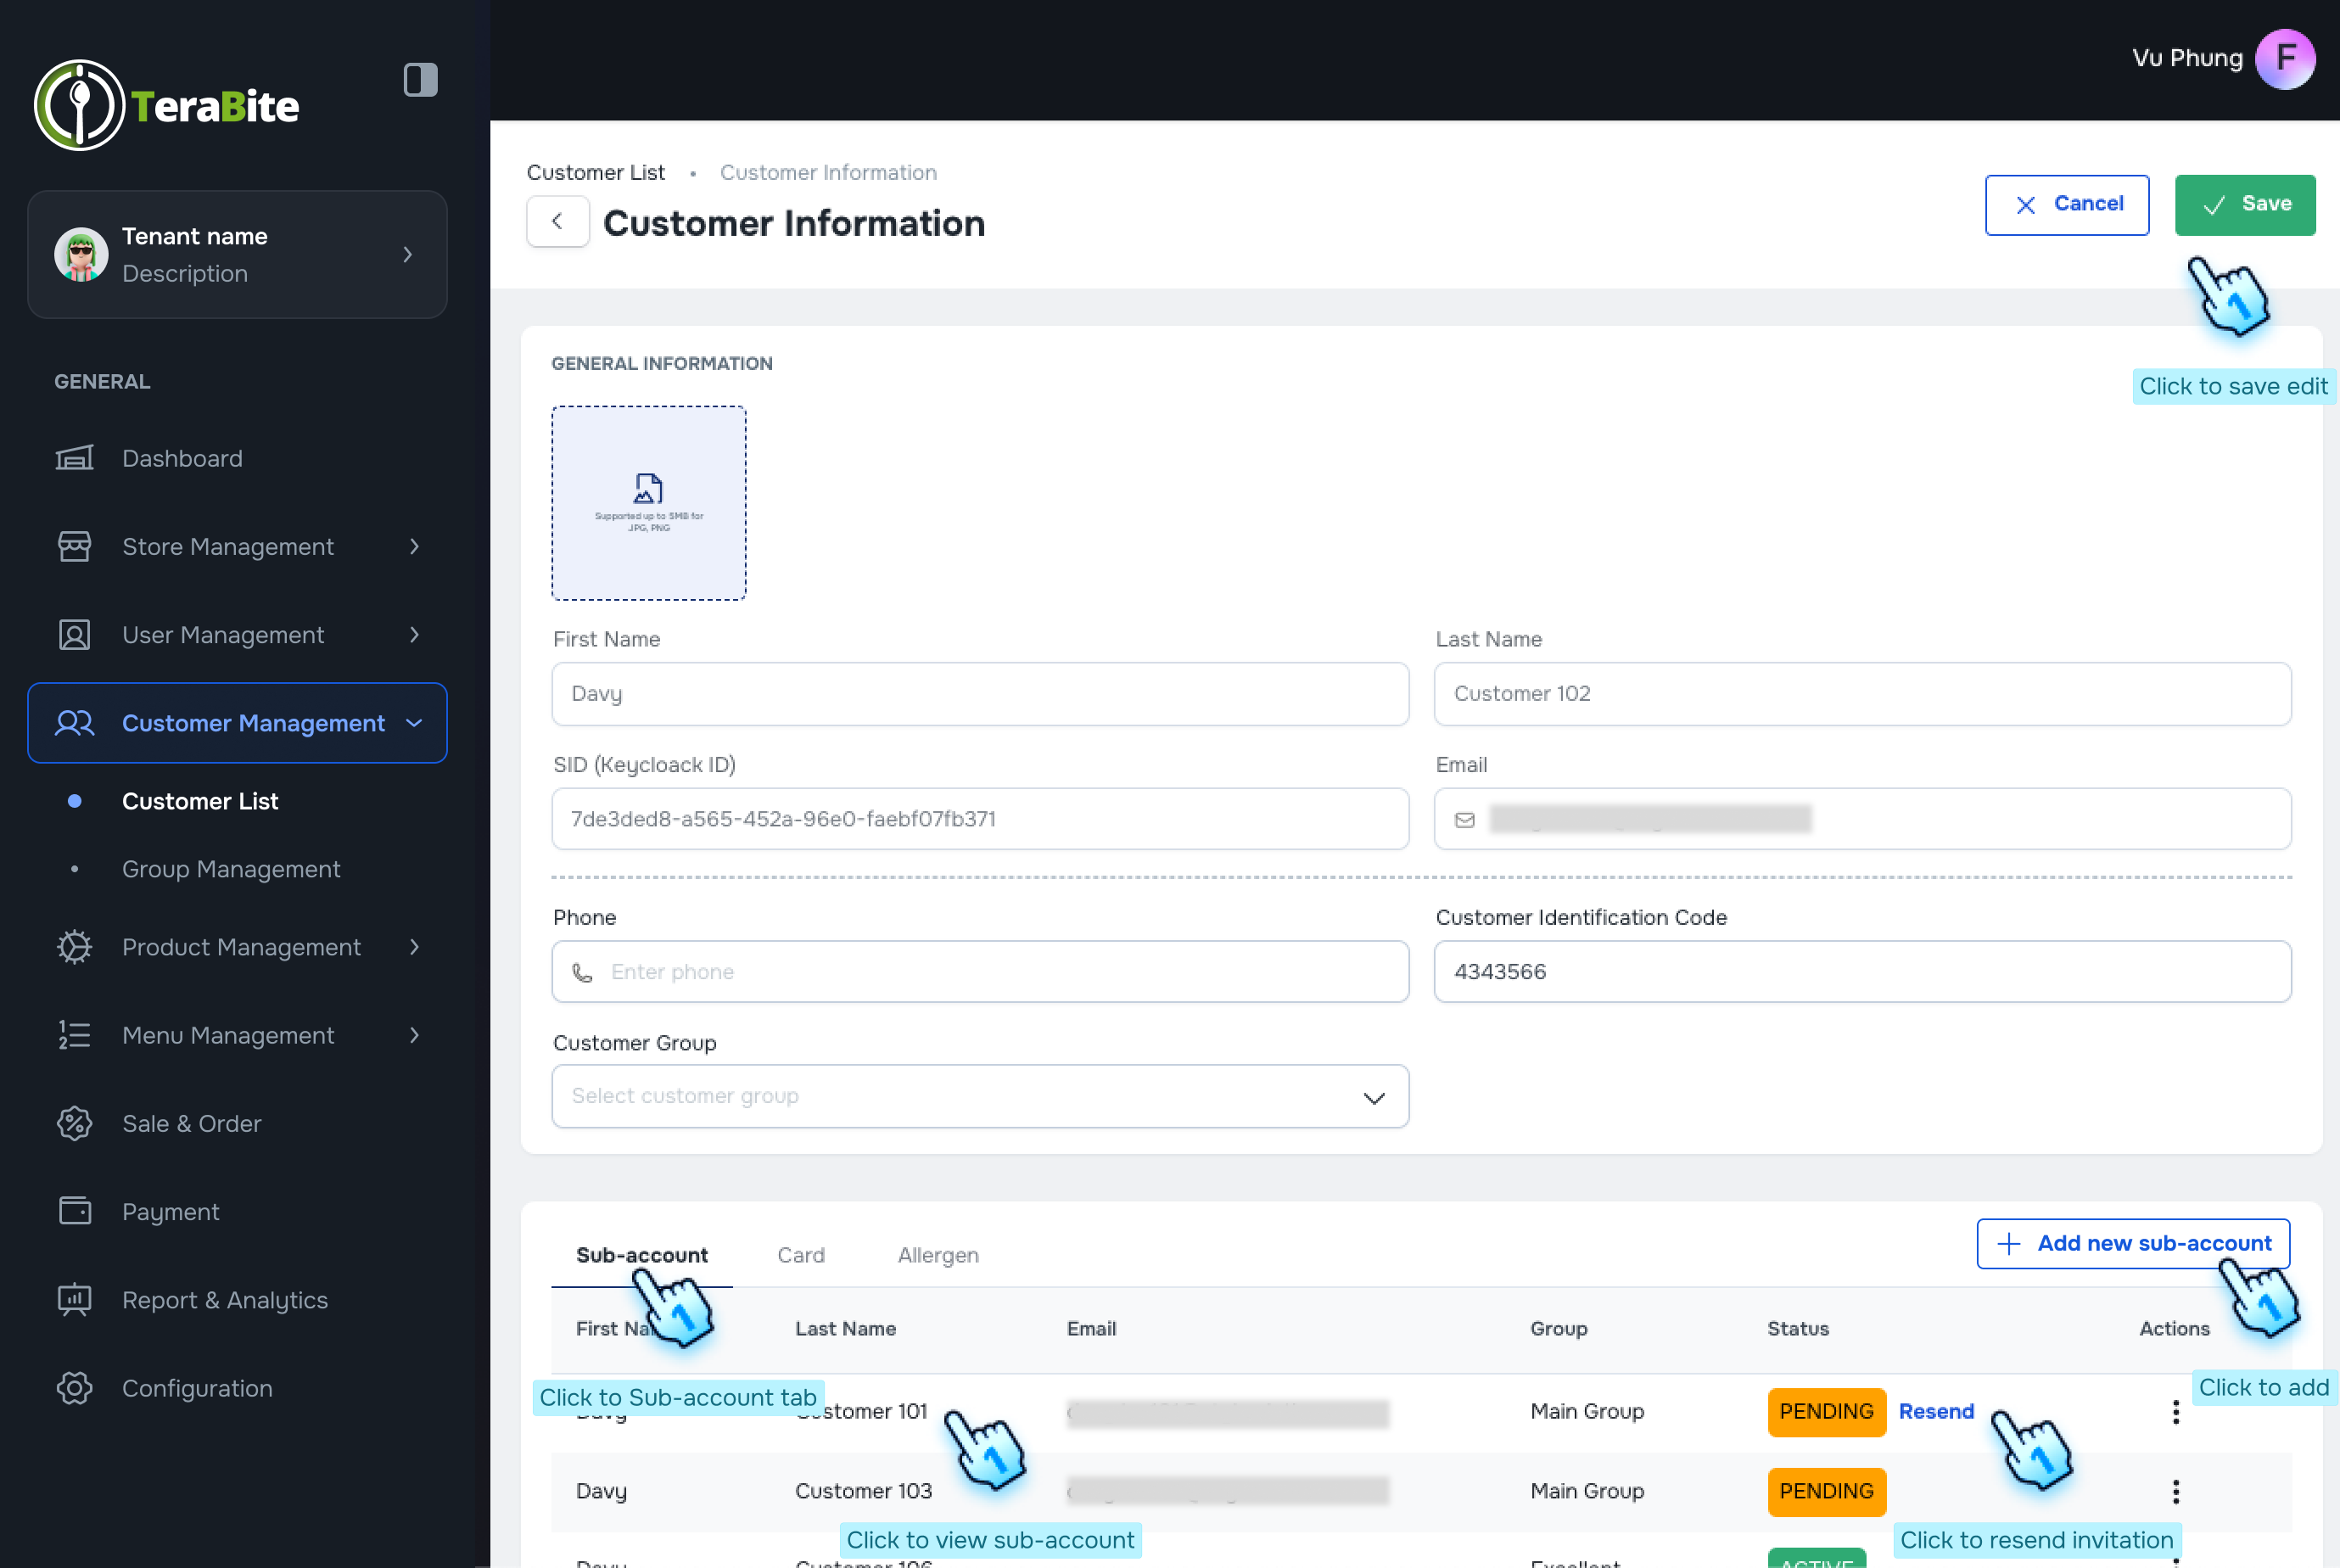
- Sub-account Management
- Review Sub-account List
- Click on the "Sub-account" tab below to view the list of sub-accounts associated with the customer.
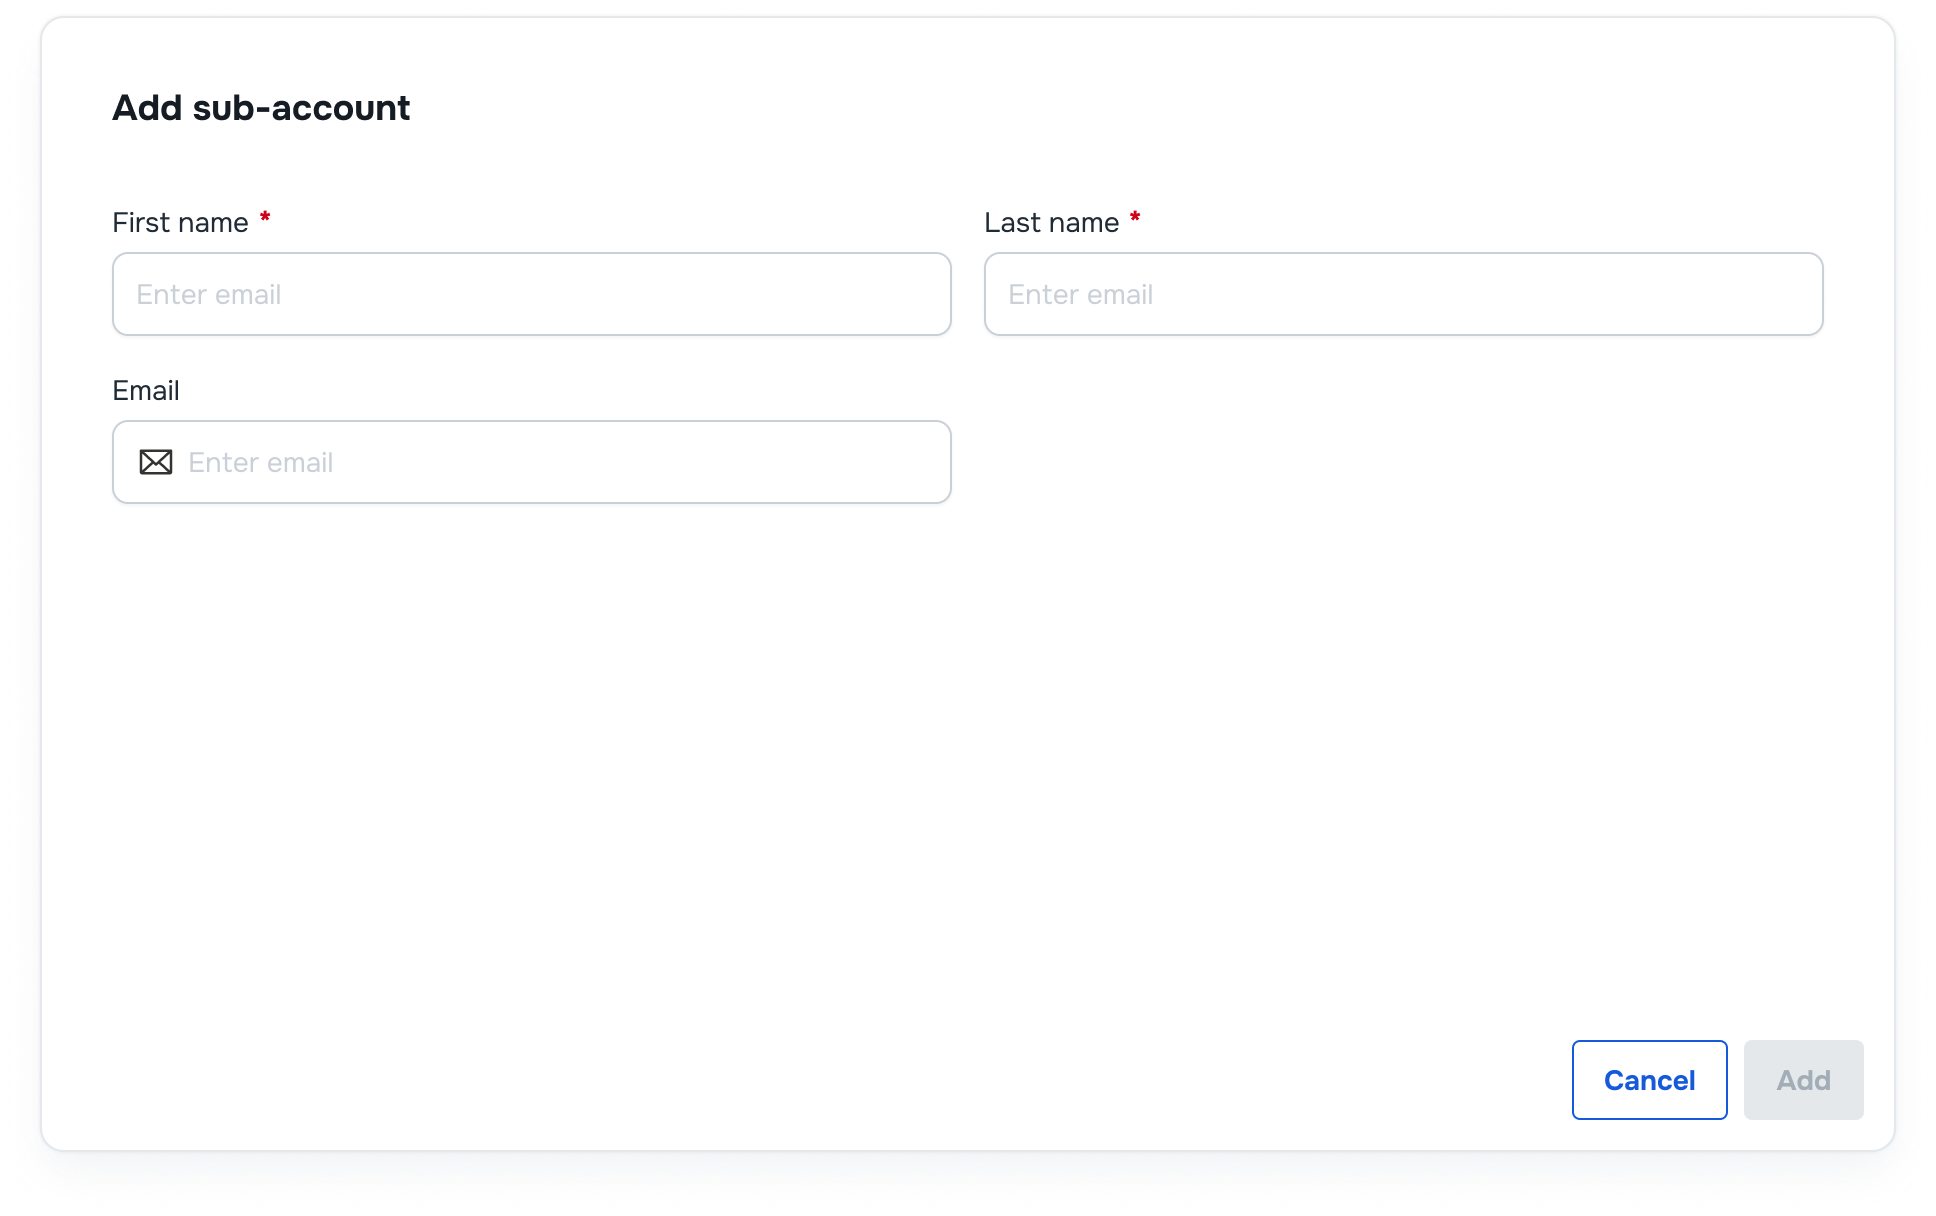
- Add New Sub-account
- Click on the "Add New Sub-account" button.
- Enter Sub-account Information
- Fill in the required fields:
- First Name
- Last Name
- Email Address (optional)
- Click "Add" the new sub-account to the customer record.
- Fill in the required fields:
- Actions per Status in Three-Dot Menu
- For each sub-account, click on the three-dot menu to reveal the following options:
- Pending: Options are View, and Remove.
- Active: Options are View and Remove.
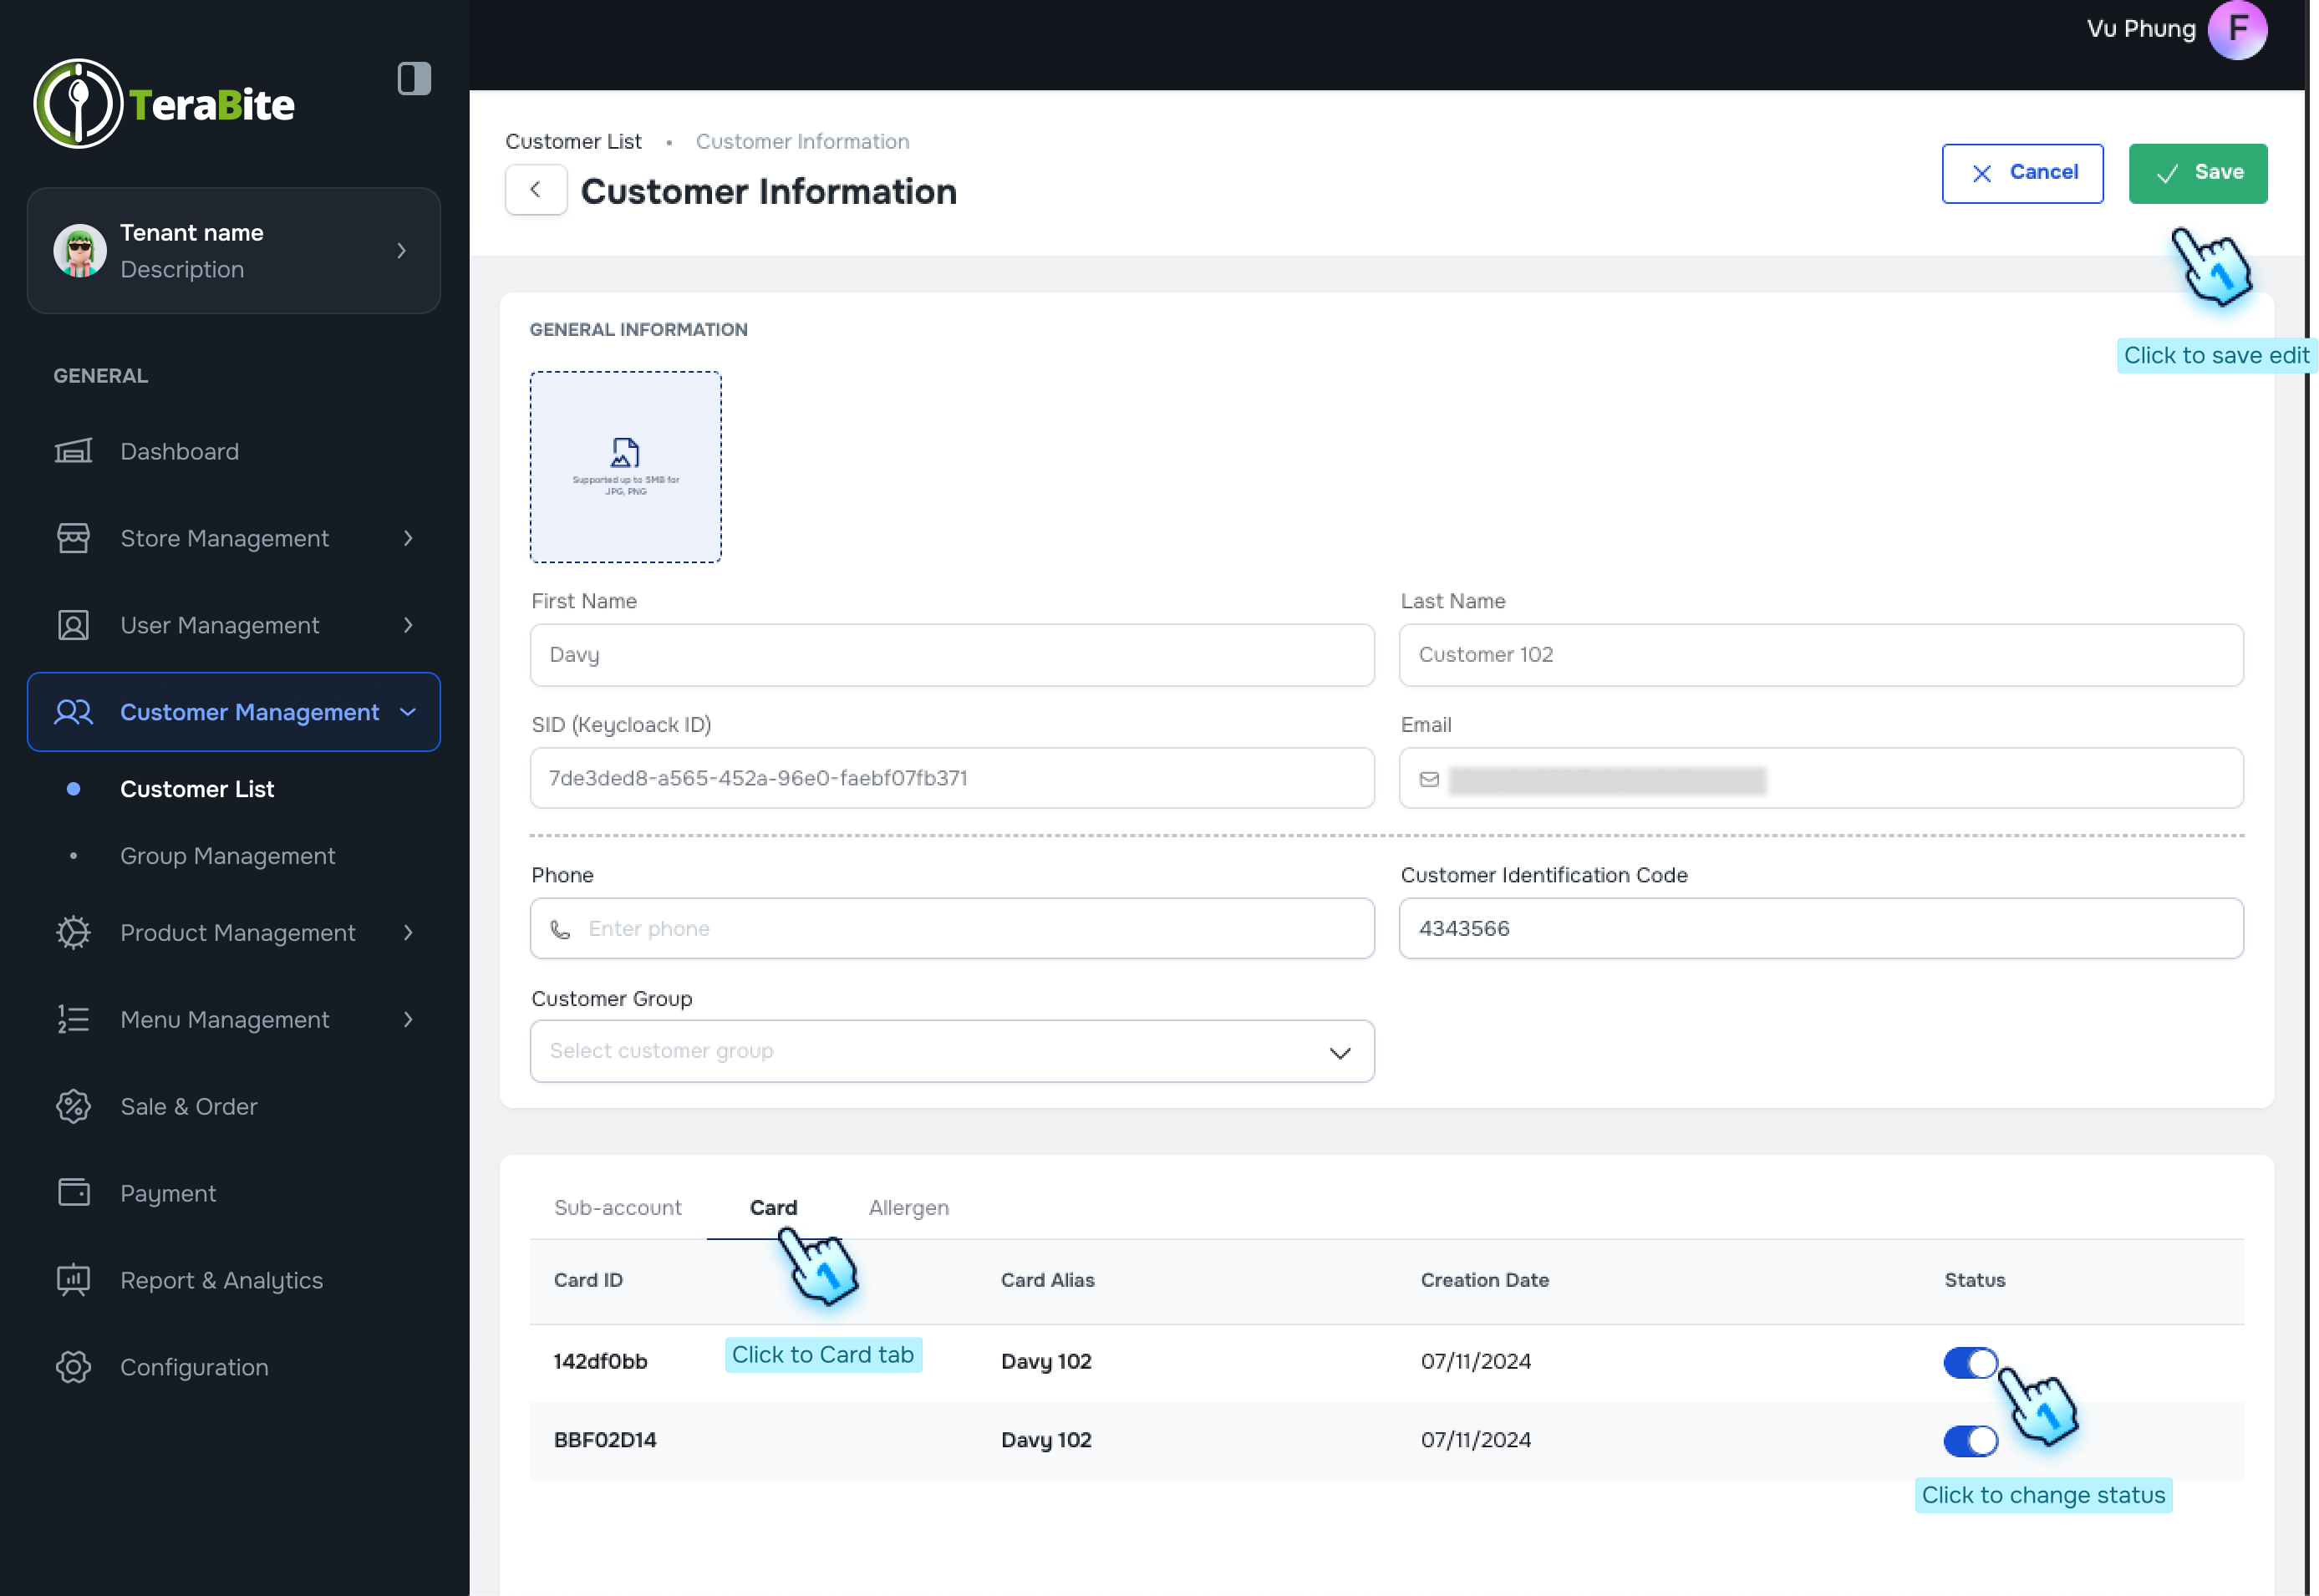
- Setup Sub-account
- Continue to click Each row or View button in the three-dot menu to access the sub-account setup.
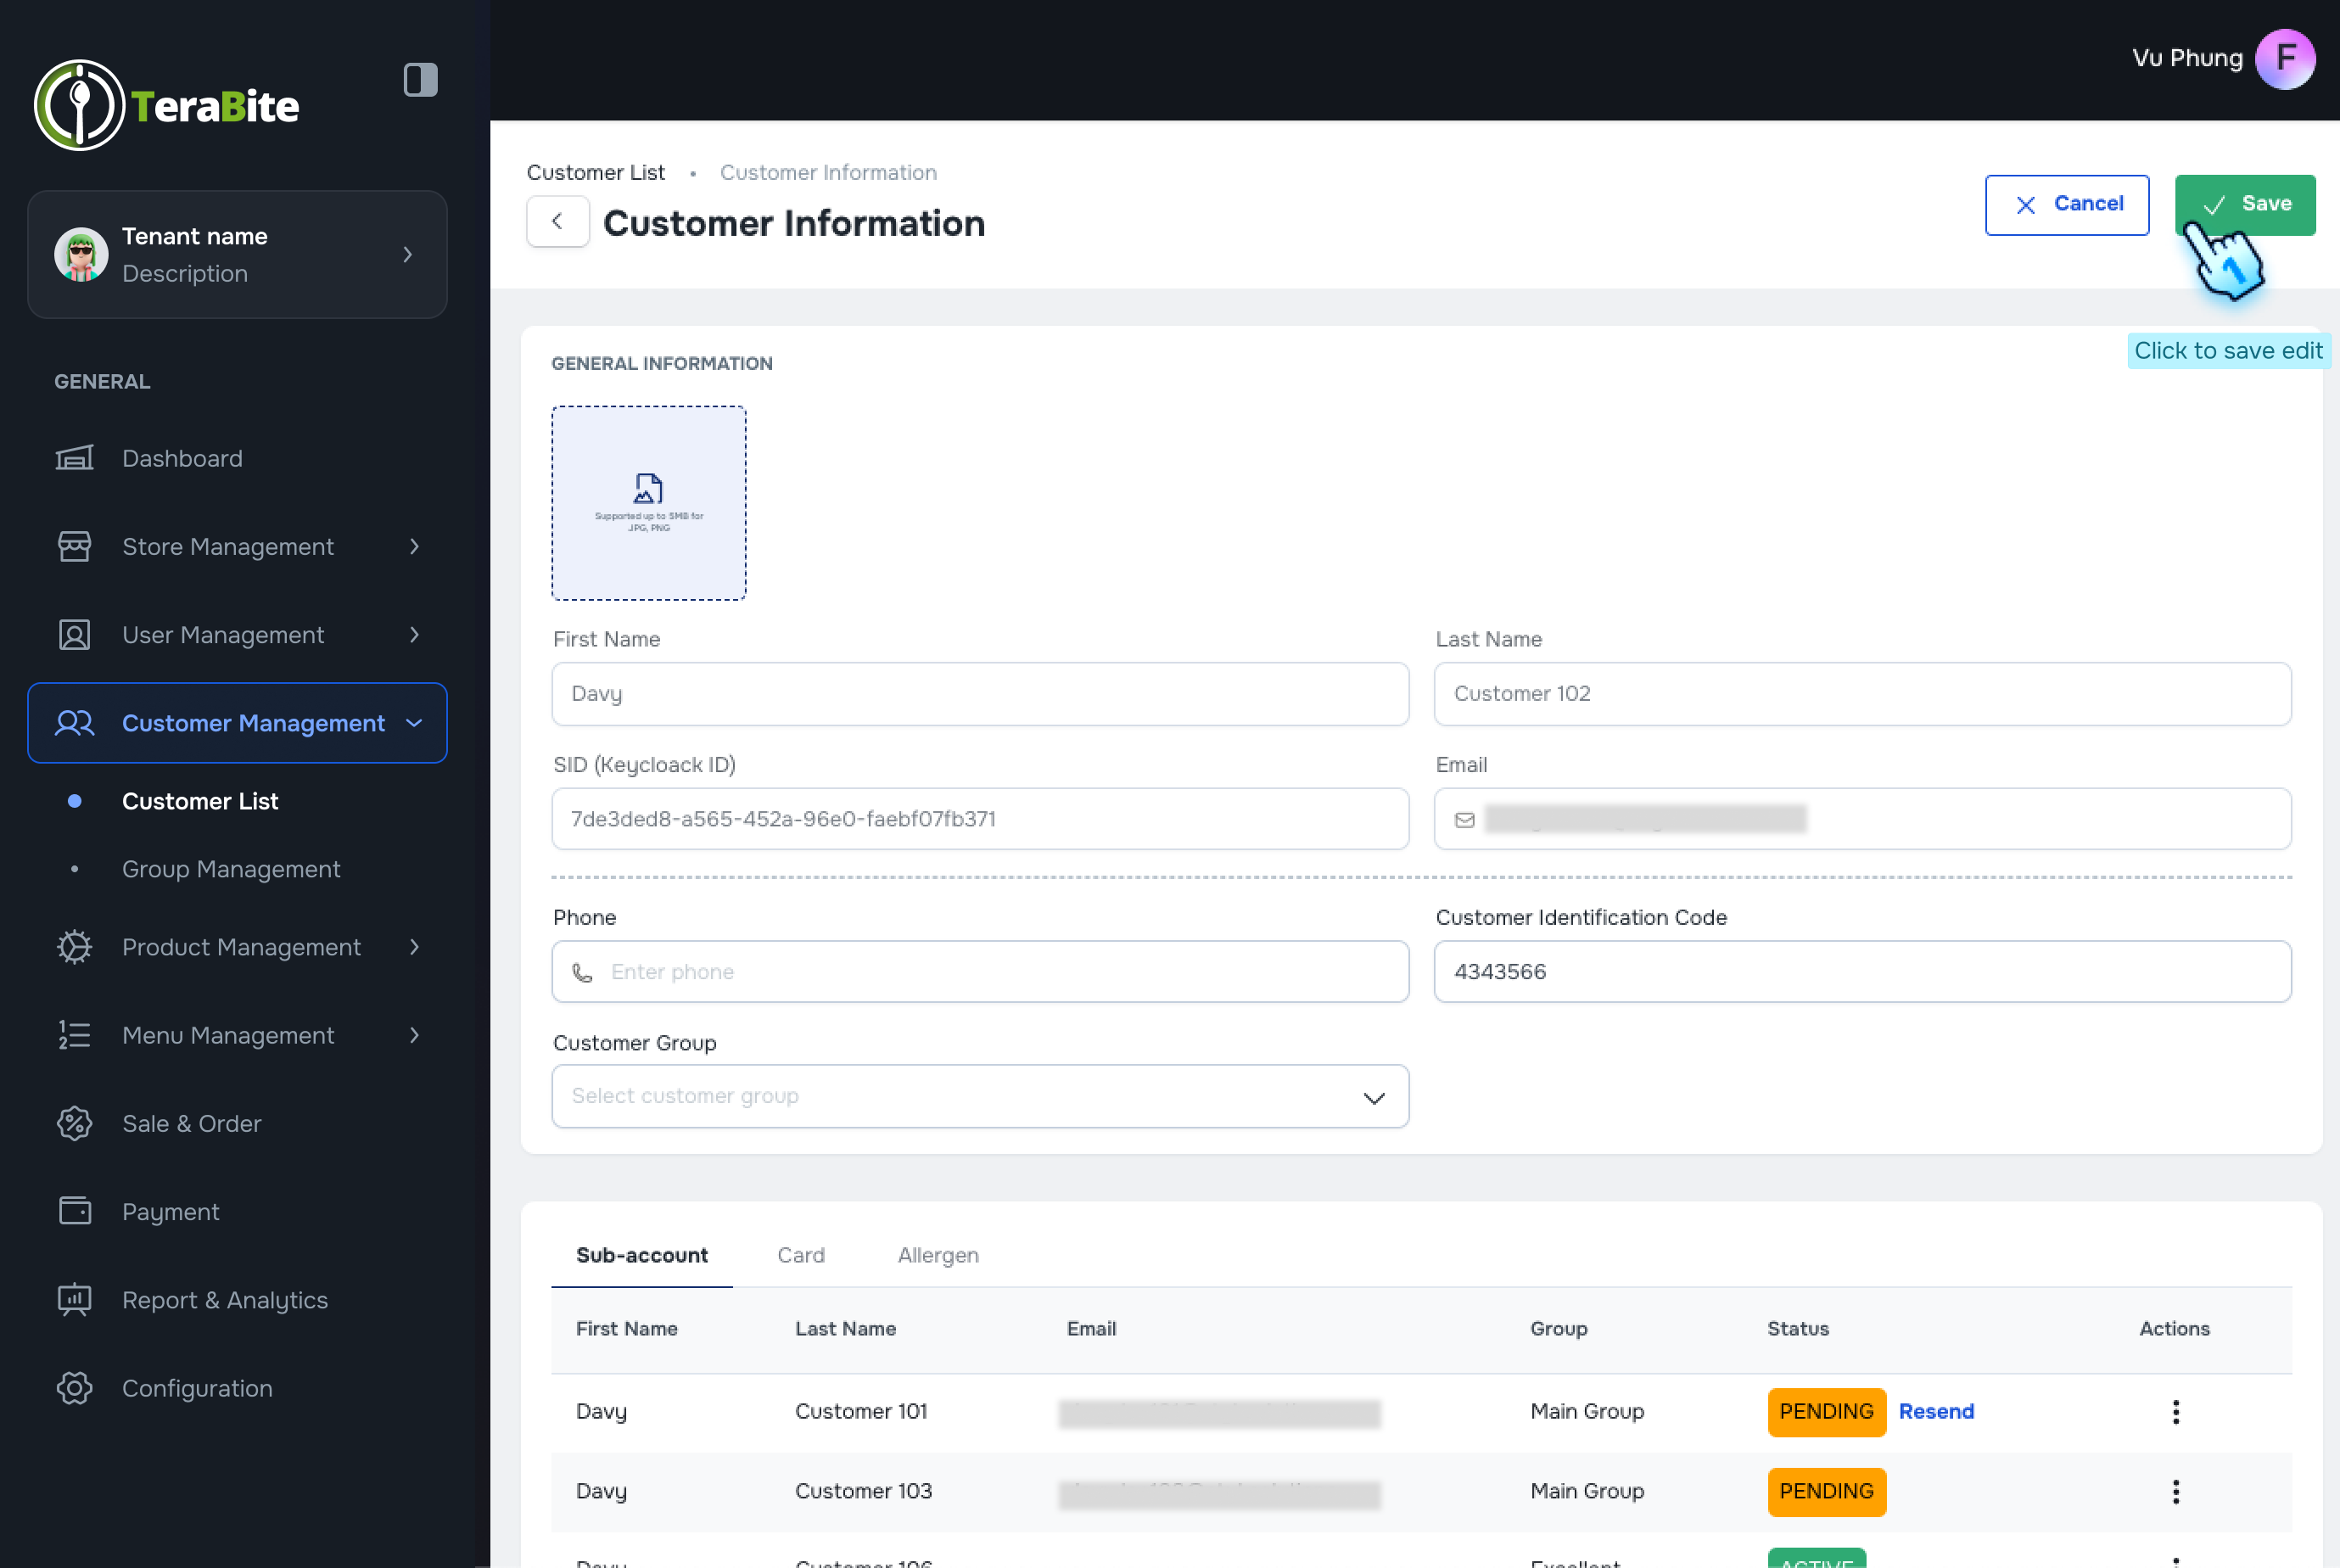
- Click "Edit" button to edit sub-account information (if necessary)
- Manage Card for sub-account
- Click on the toggle in the Card tab to turn the card on or off in the Card tab beblow
- Click "Add card" button
- Enter card information
- Click "Add" button to finish
- Manage Allergen
- Click on the toggle in the Allergen tab to turn the allergen on or off in the Allergen tab beblow
- For each sub-account, click on the three-dot menu to reveal the following options:
- Card Management
- Review Card List
- Click on the "Card" tab to view the list of cards associated with the customer.
- Add Card
- Click on the "Add Card" option.
- Enter Card Information
- Fill in the required fields:
- Card ID
- Card Alias (optional)
- Fill in the required fields:
- Actions per Status in Three-Dot Menu
- For each card, click on the three-dot menu to reveal the following options:
- Pending: Options are Edit and Delete.
- Active: Options are Edit, Mark as Broken, and Delete.
- For each card, click on the three-dot menu to reveal the following options:
- Activate/Deactivate Card
- Click on the toggle to turn the card on or off.
#
Conclusion
This document provides 2 sections. One is a structured approach for managing customer data, enabling efficient addition, importation, and review of customer information within the system. The other is for viewing and managing customer details, including sub-accounts, cards ensuring accurate and efficient customer information setup.
#
Screen flow
#
Customer Management

#
Customer Detail and Setup Information