#
Menu Board Management
#
Description
This document provides detailed instructions for creating, managing, and revoking menu boards within the Menu Management system. Proper management of menu boards ensures effective display and organization of menu items.
#
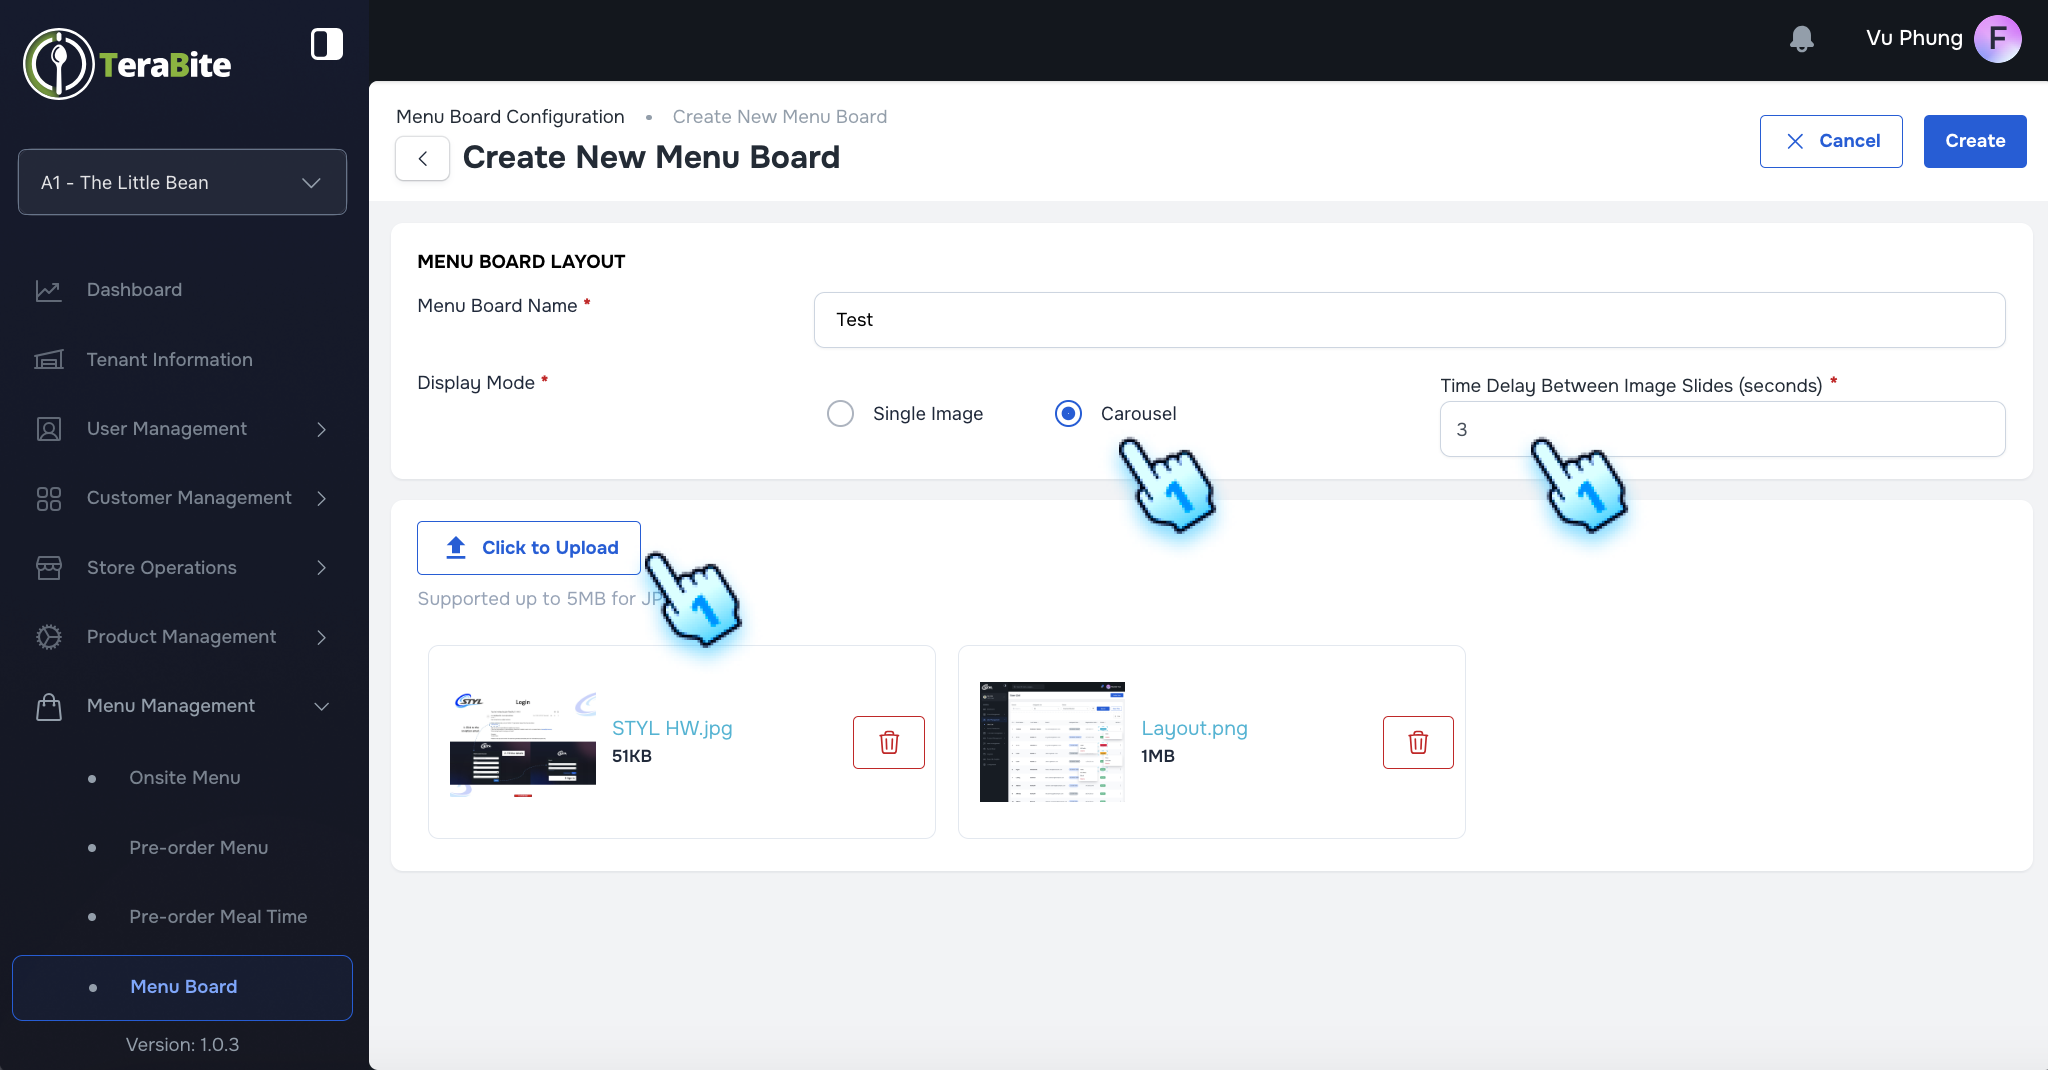
Create Menu Board
- Navigate to Menu Board in Menu Management
- Access the Menu Management section and select Menu Board.
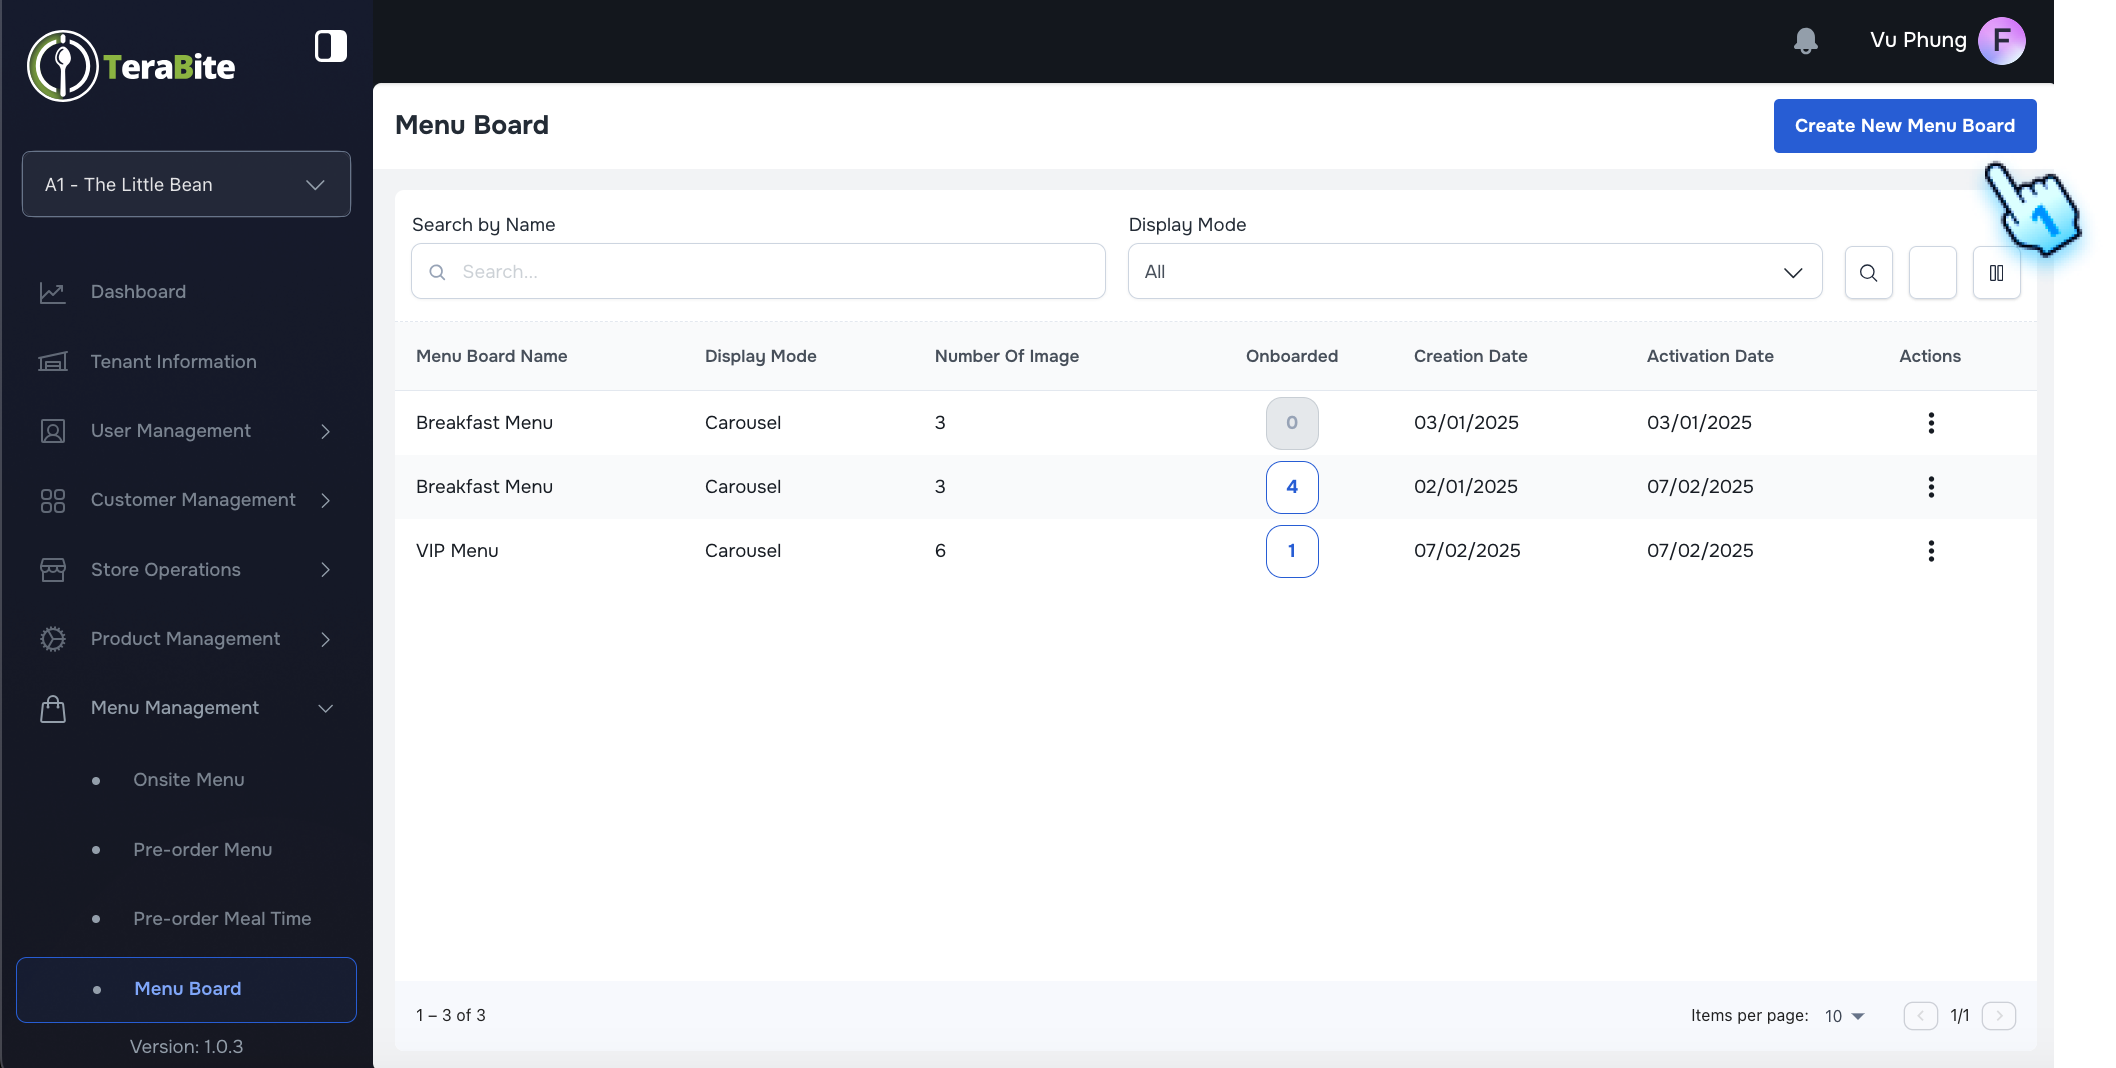
- Create New Menu Board
- Click on Create New Menu Board button.
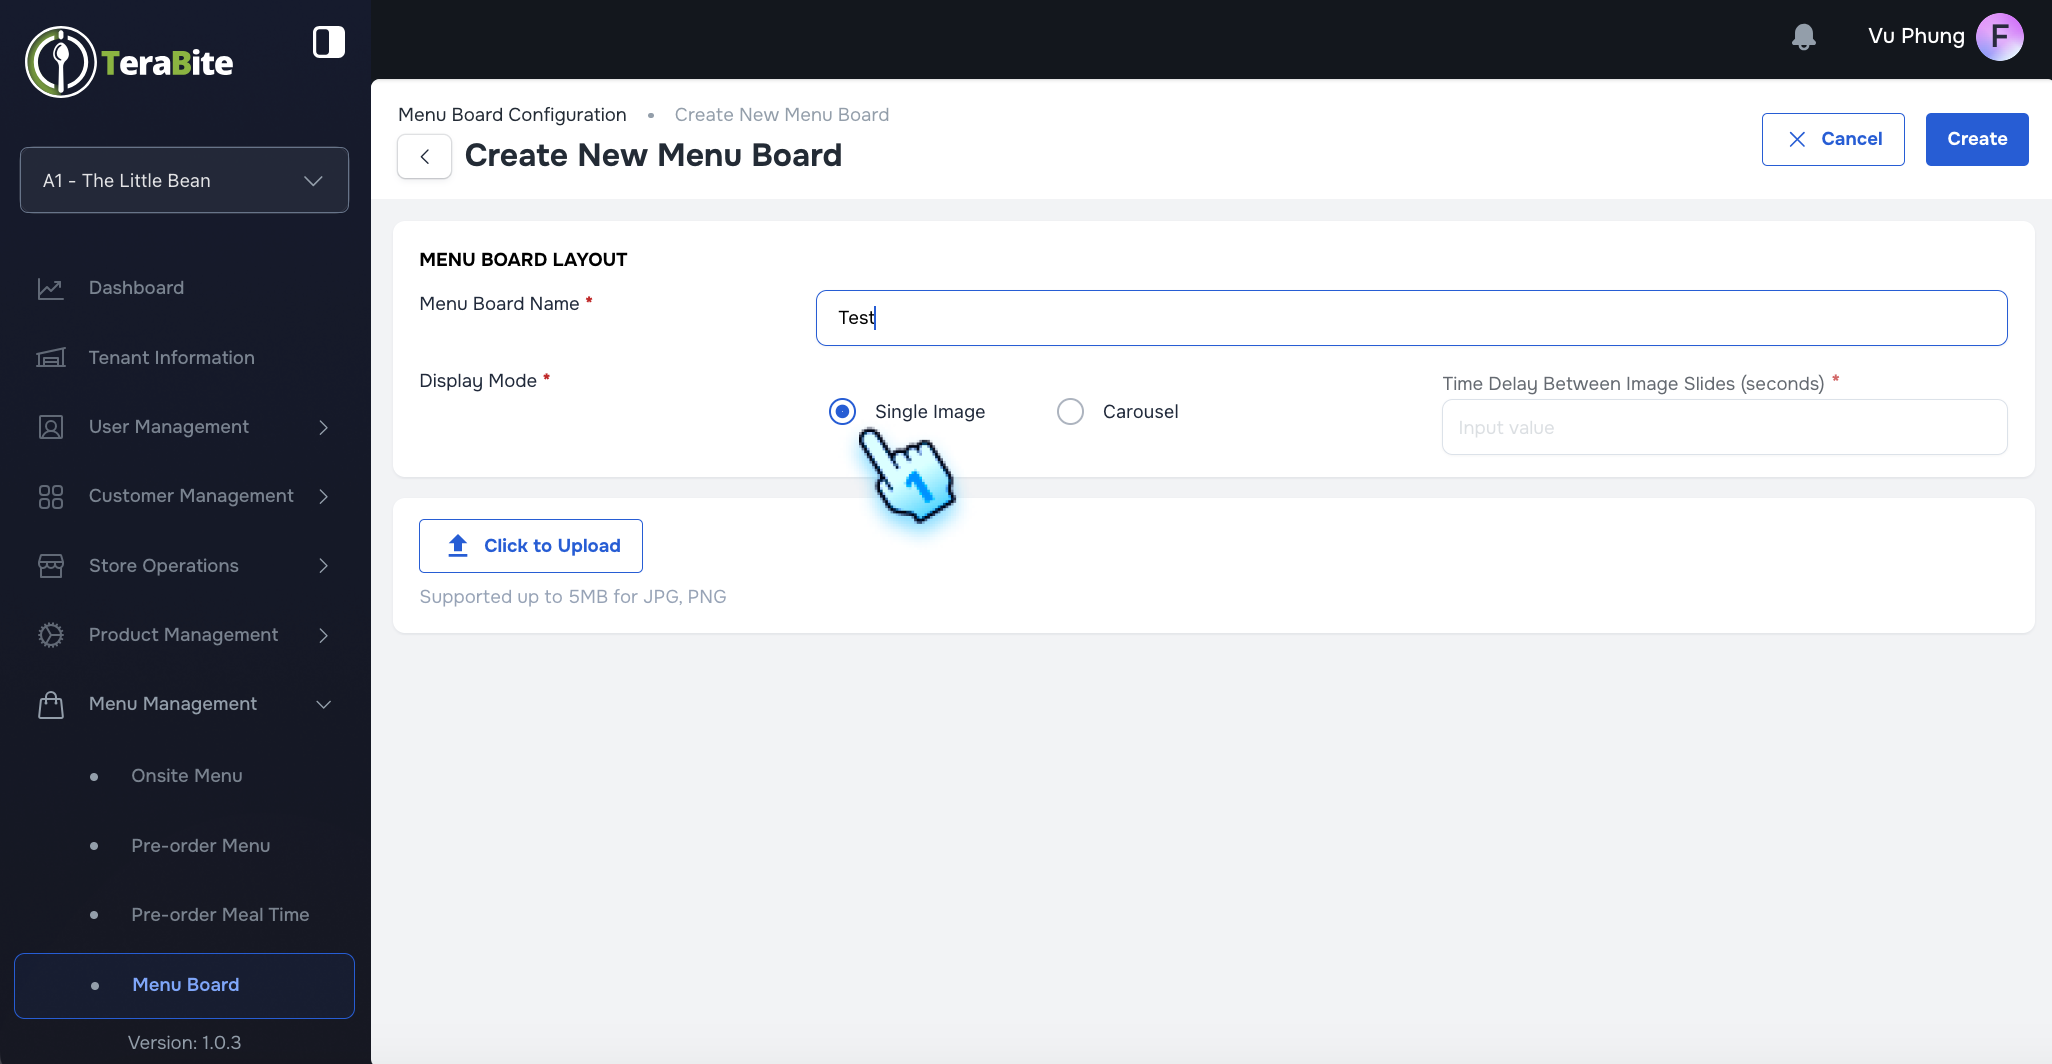
- Enter Menu Board Name
- Input a name for the new menu board in the designated field.
- Select Single Menu Board
- Choose the option for a Single Menu Board configuration.
- Select Carousel and Enter Time Delay
- Configure the display settings by selecting Carousel and specifying the Time Delay for each item.
- Upload the Image
- Upload an appropriate image that will be displayed on the menu board.
#
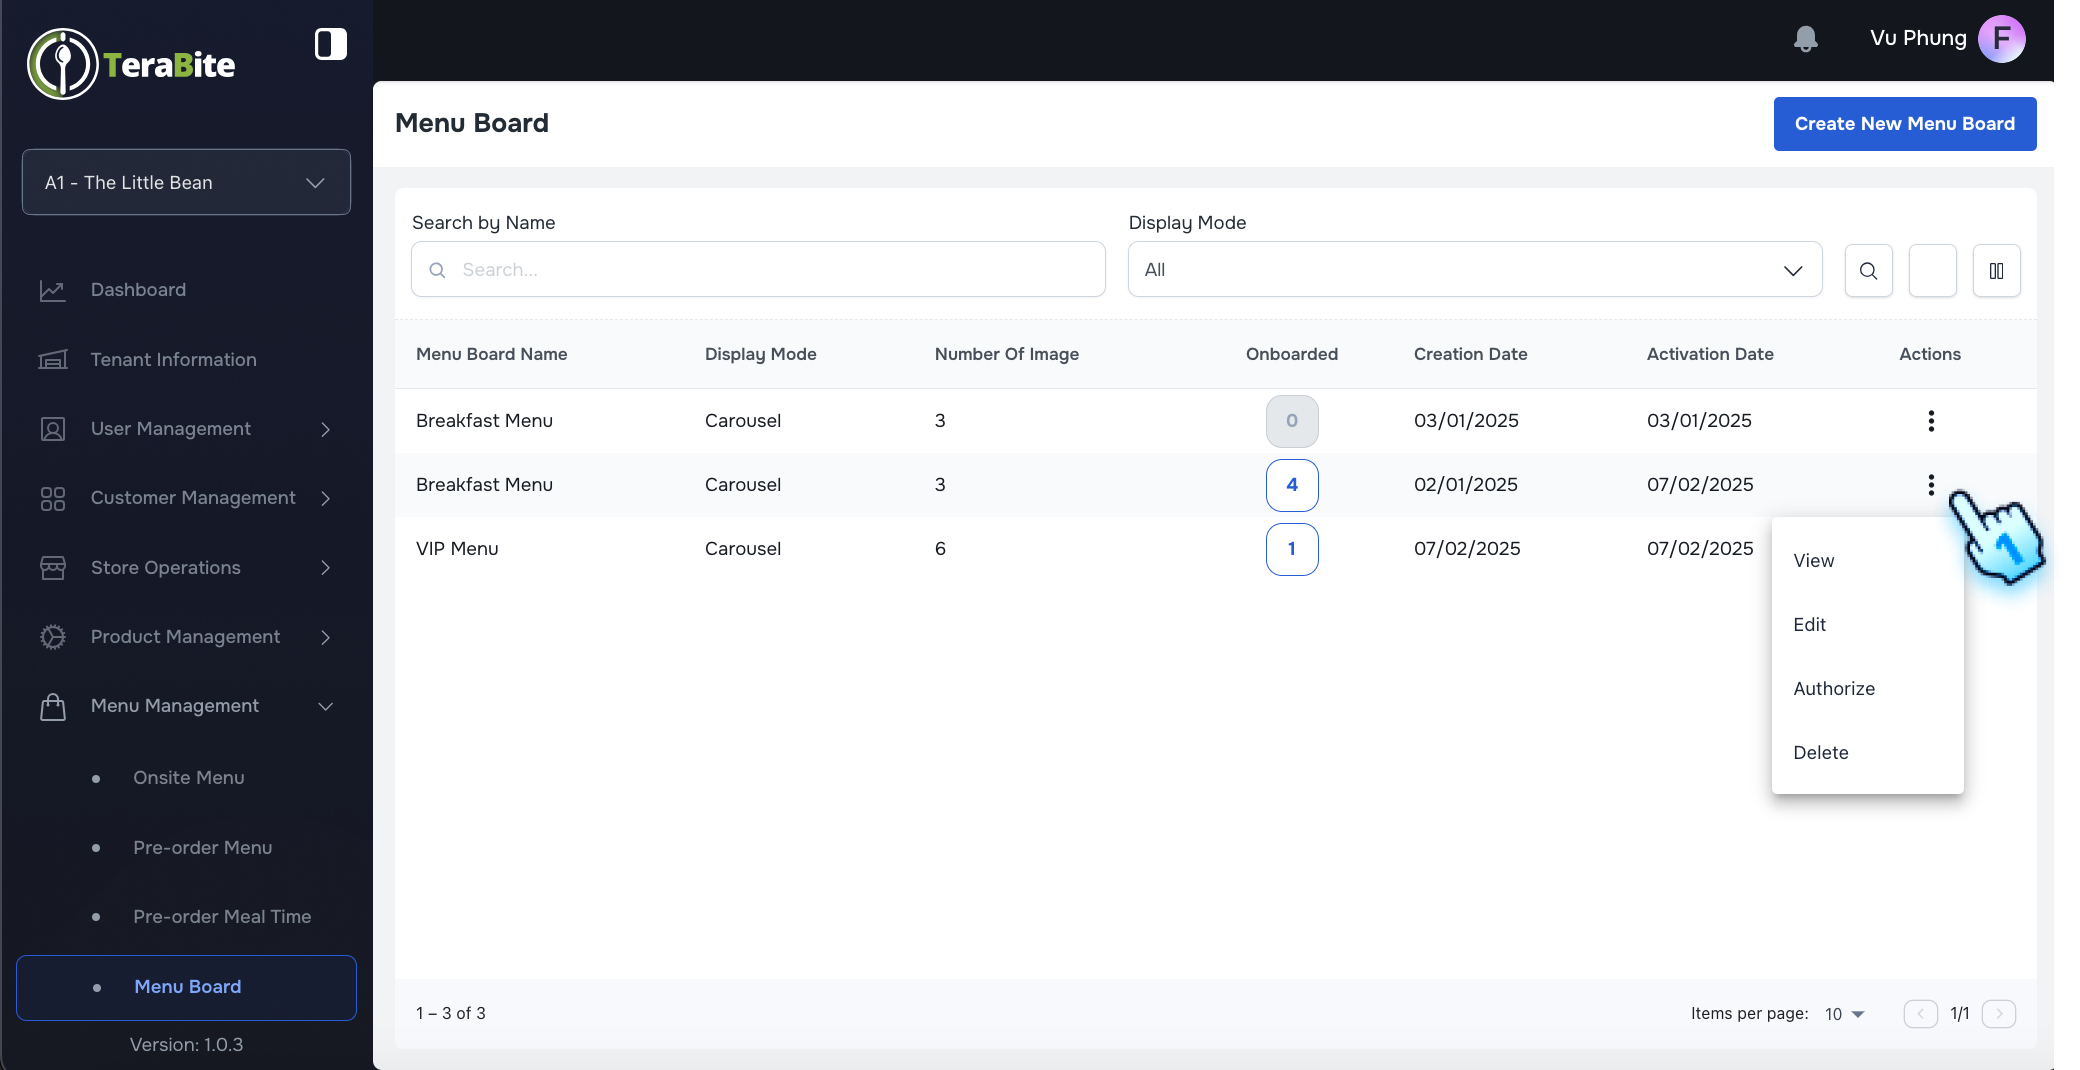
Perform Actions for Menu Board
Click the Three-Dot Menu to Display Actions Access the three-dot menu to reveal available actions: View, Edit, Authorize, and Delete.
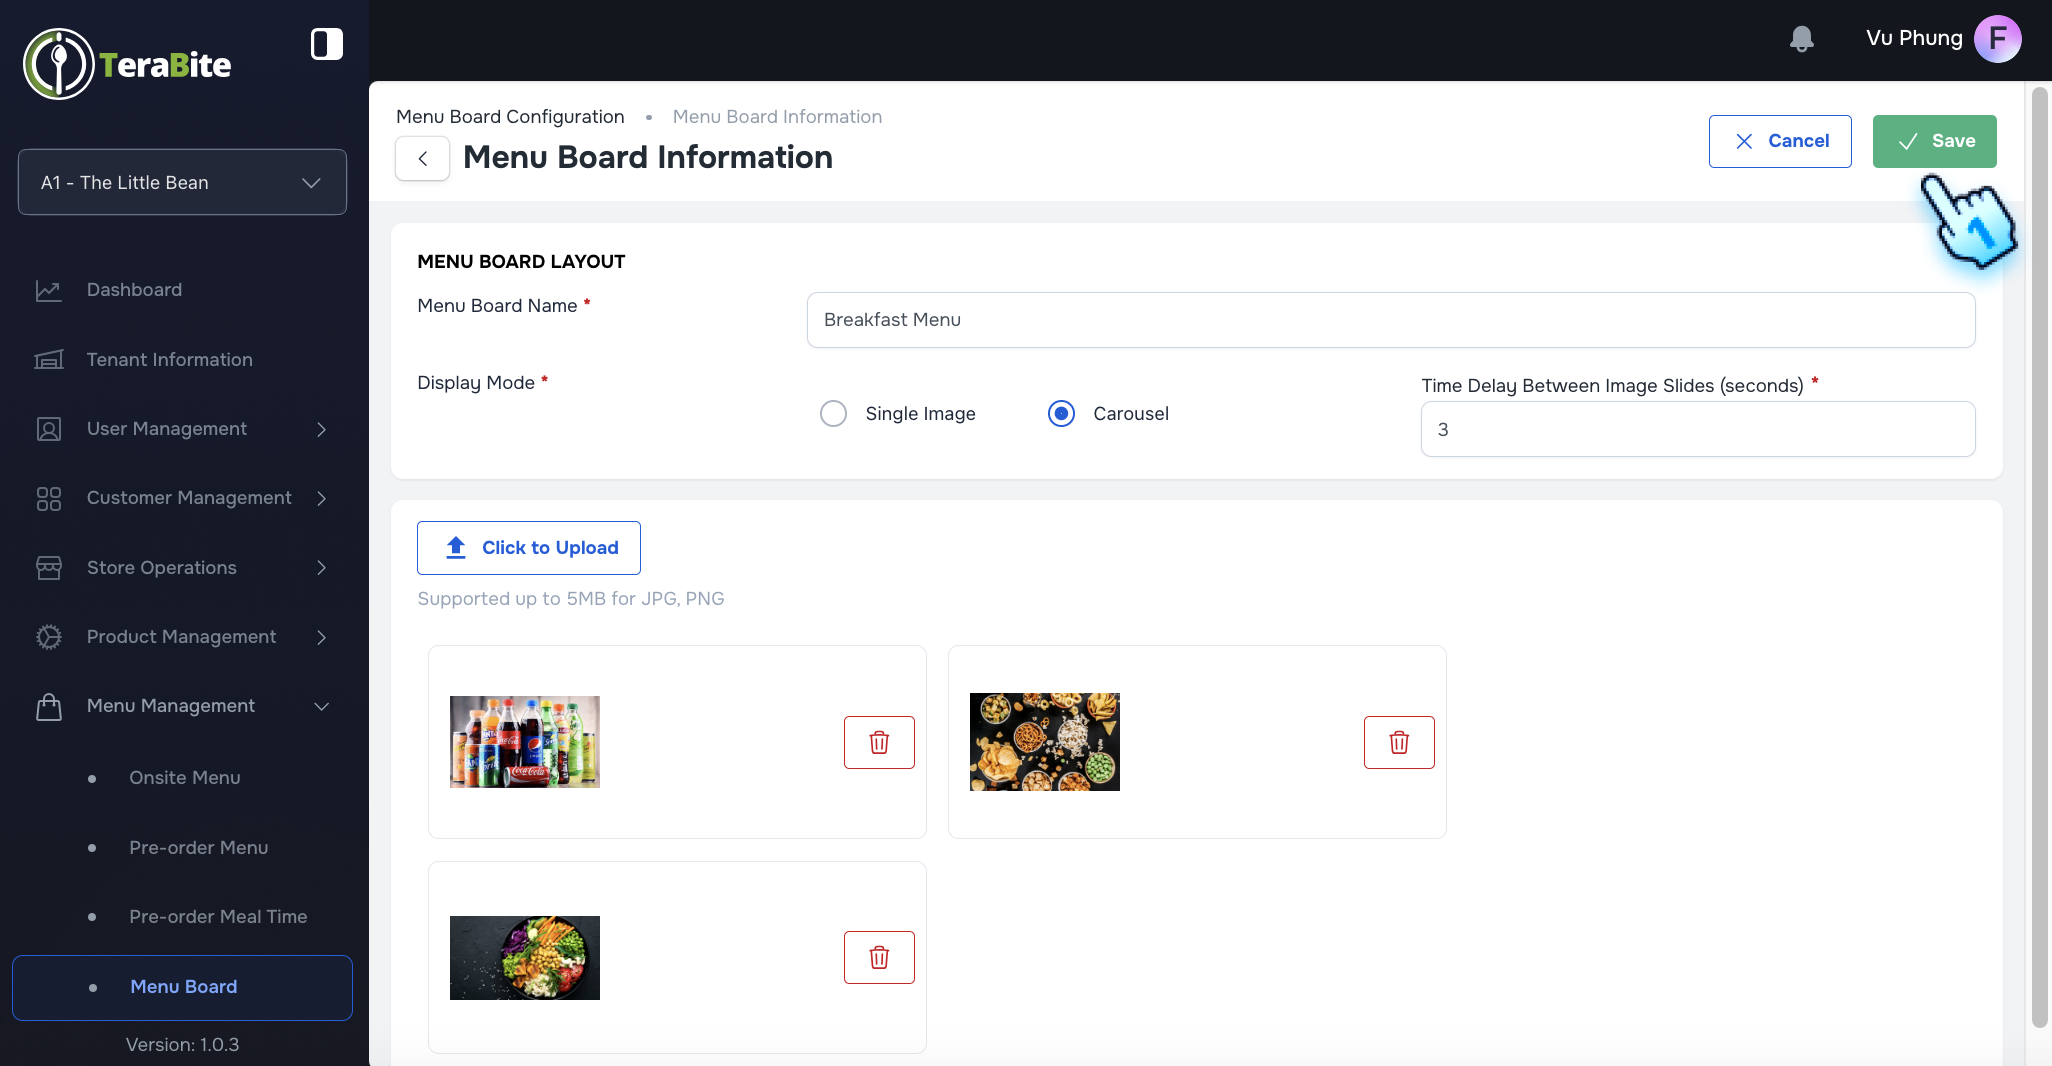
Click the Edit Button
- Select the Edit button either from the View page or the three-dot menu.
- Edit Details and Click Save
- Modify the necessary details for the menu board and click Save to finalize the changes.
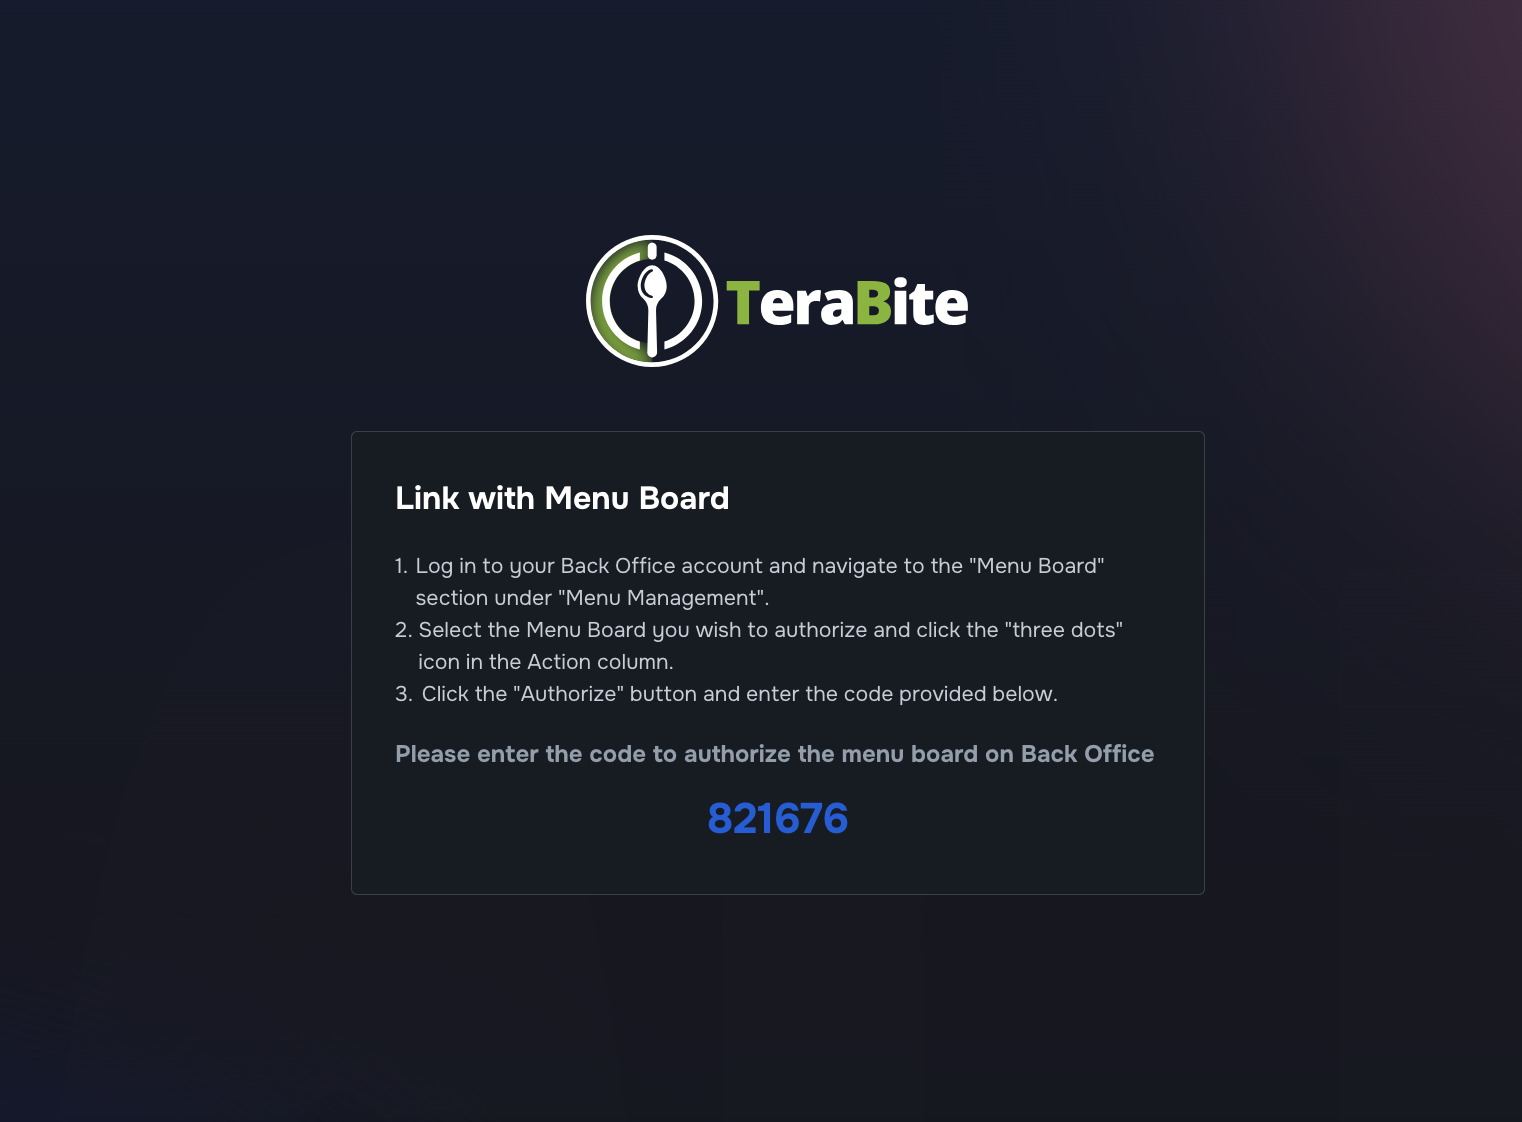
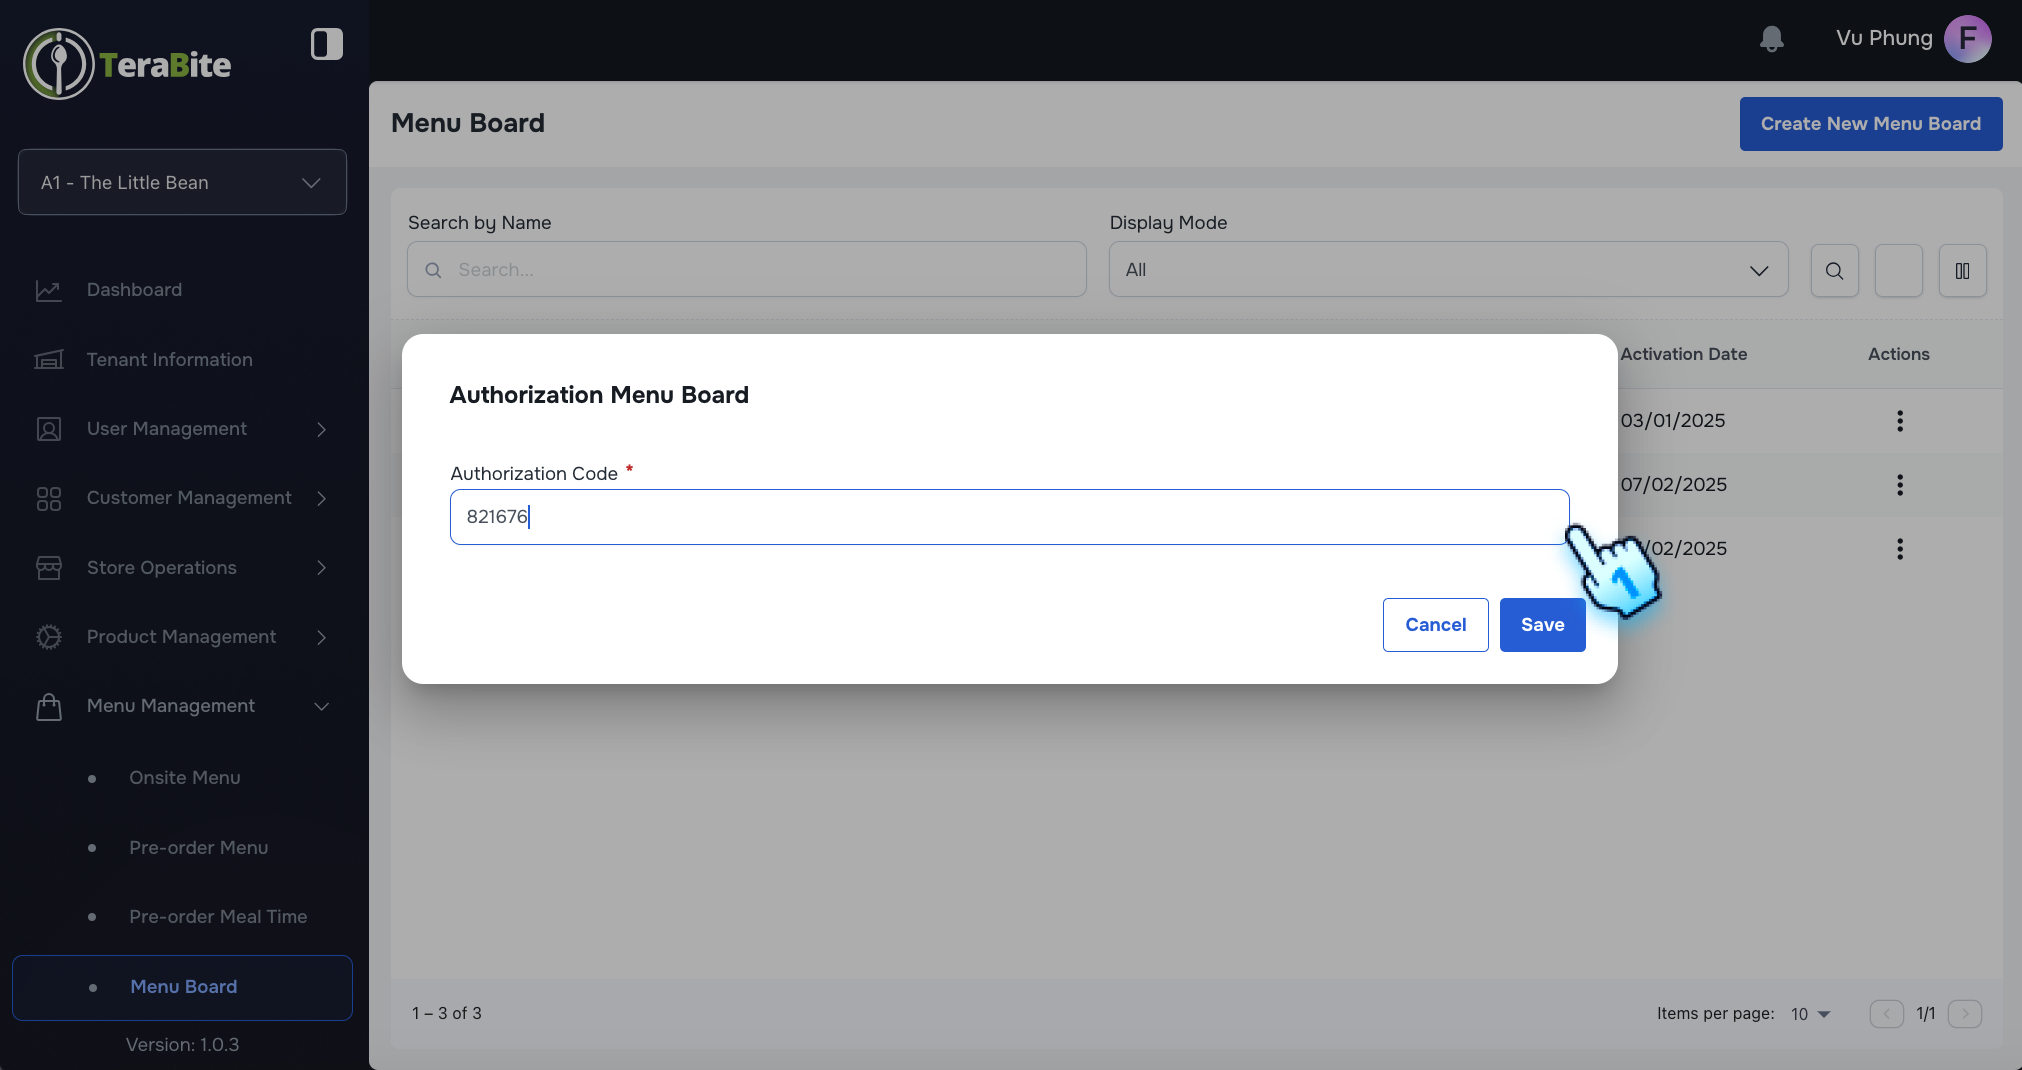
- Click Authorize Button
- Click the Authorize button to enable the menu board for display on the device.
- Enter Authorization Code
- Input the Authorization Code from the device and click Save to complete the authorization process.
#
Revoke Menu Board
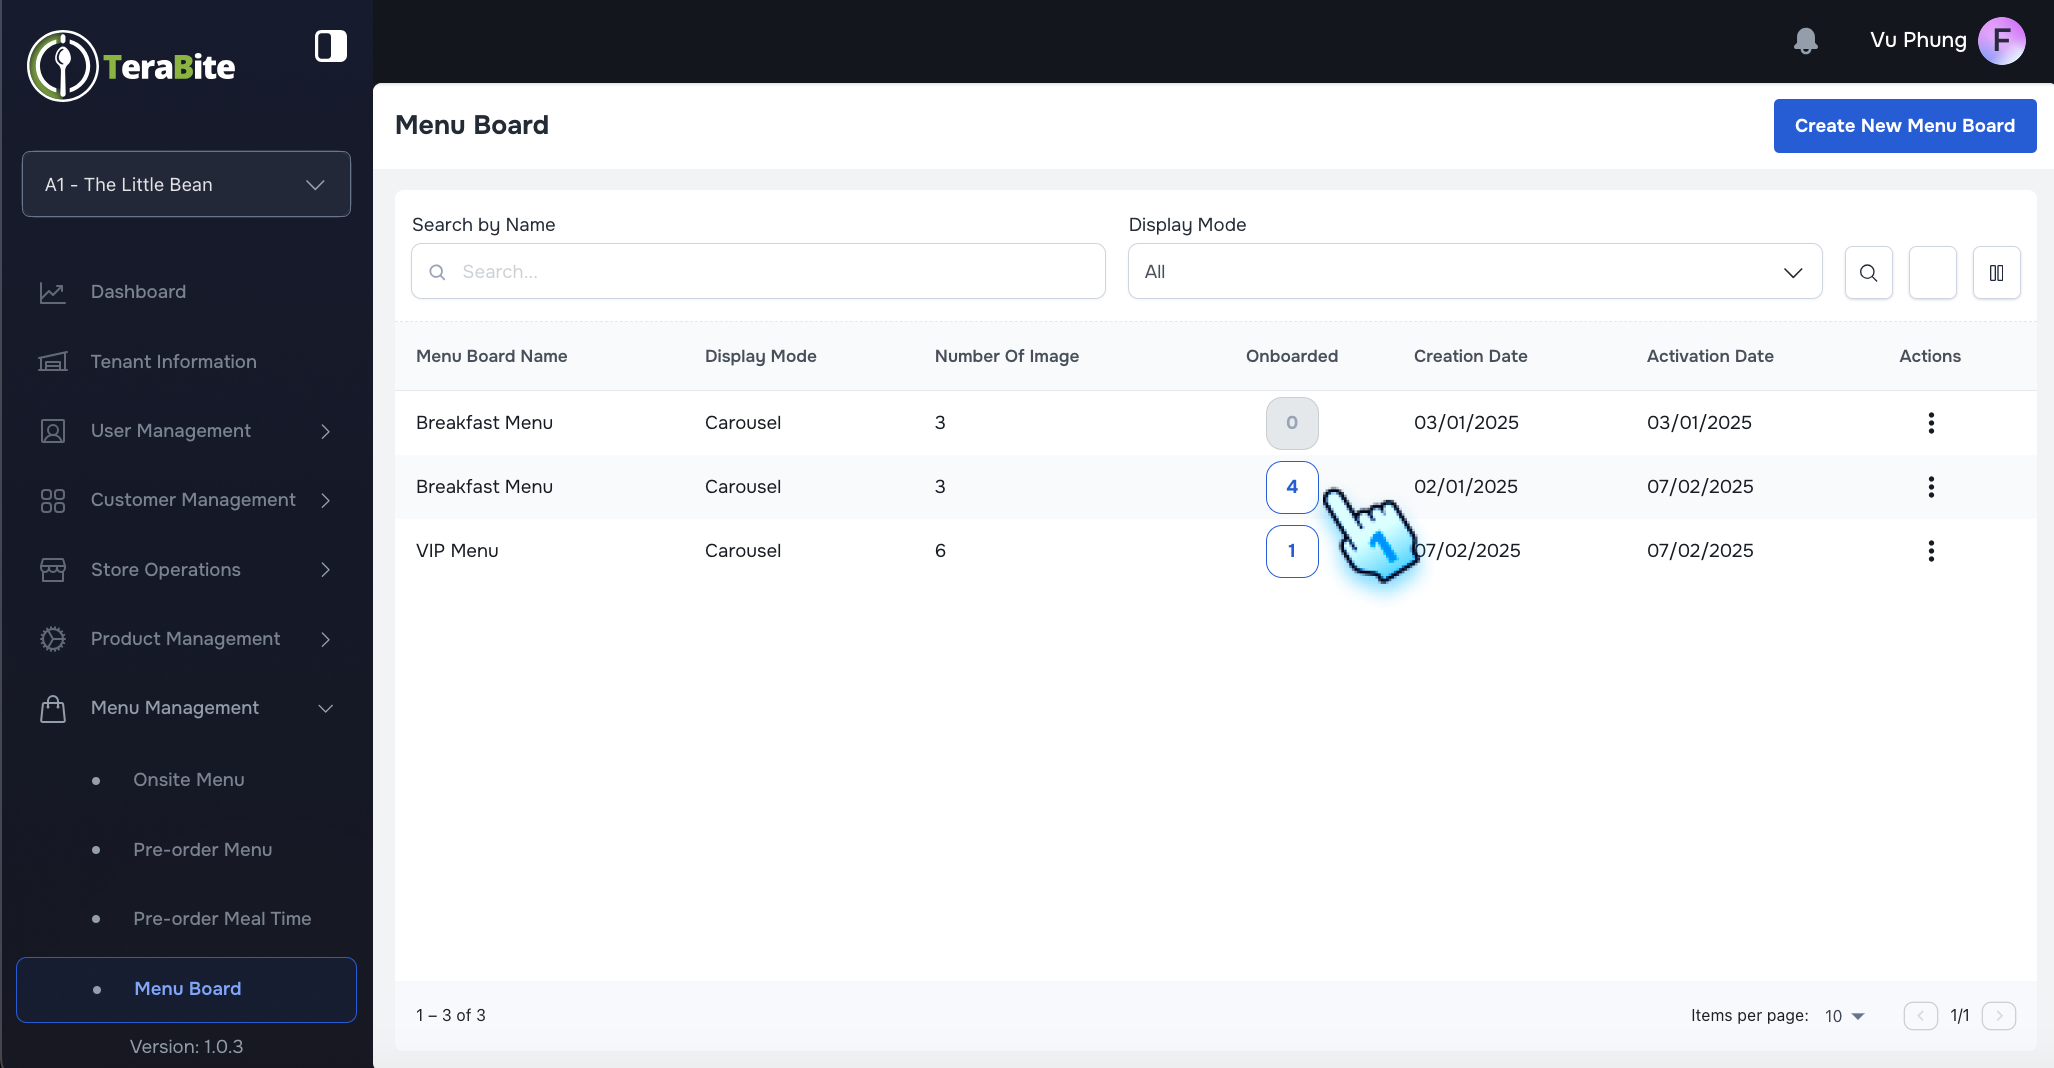
- Click the Button on the Onboarded Column
- Locate the Onboarded column and click the corresponding button for the menu board you wish to revoke.
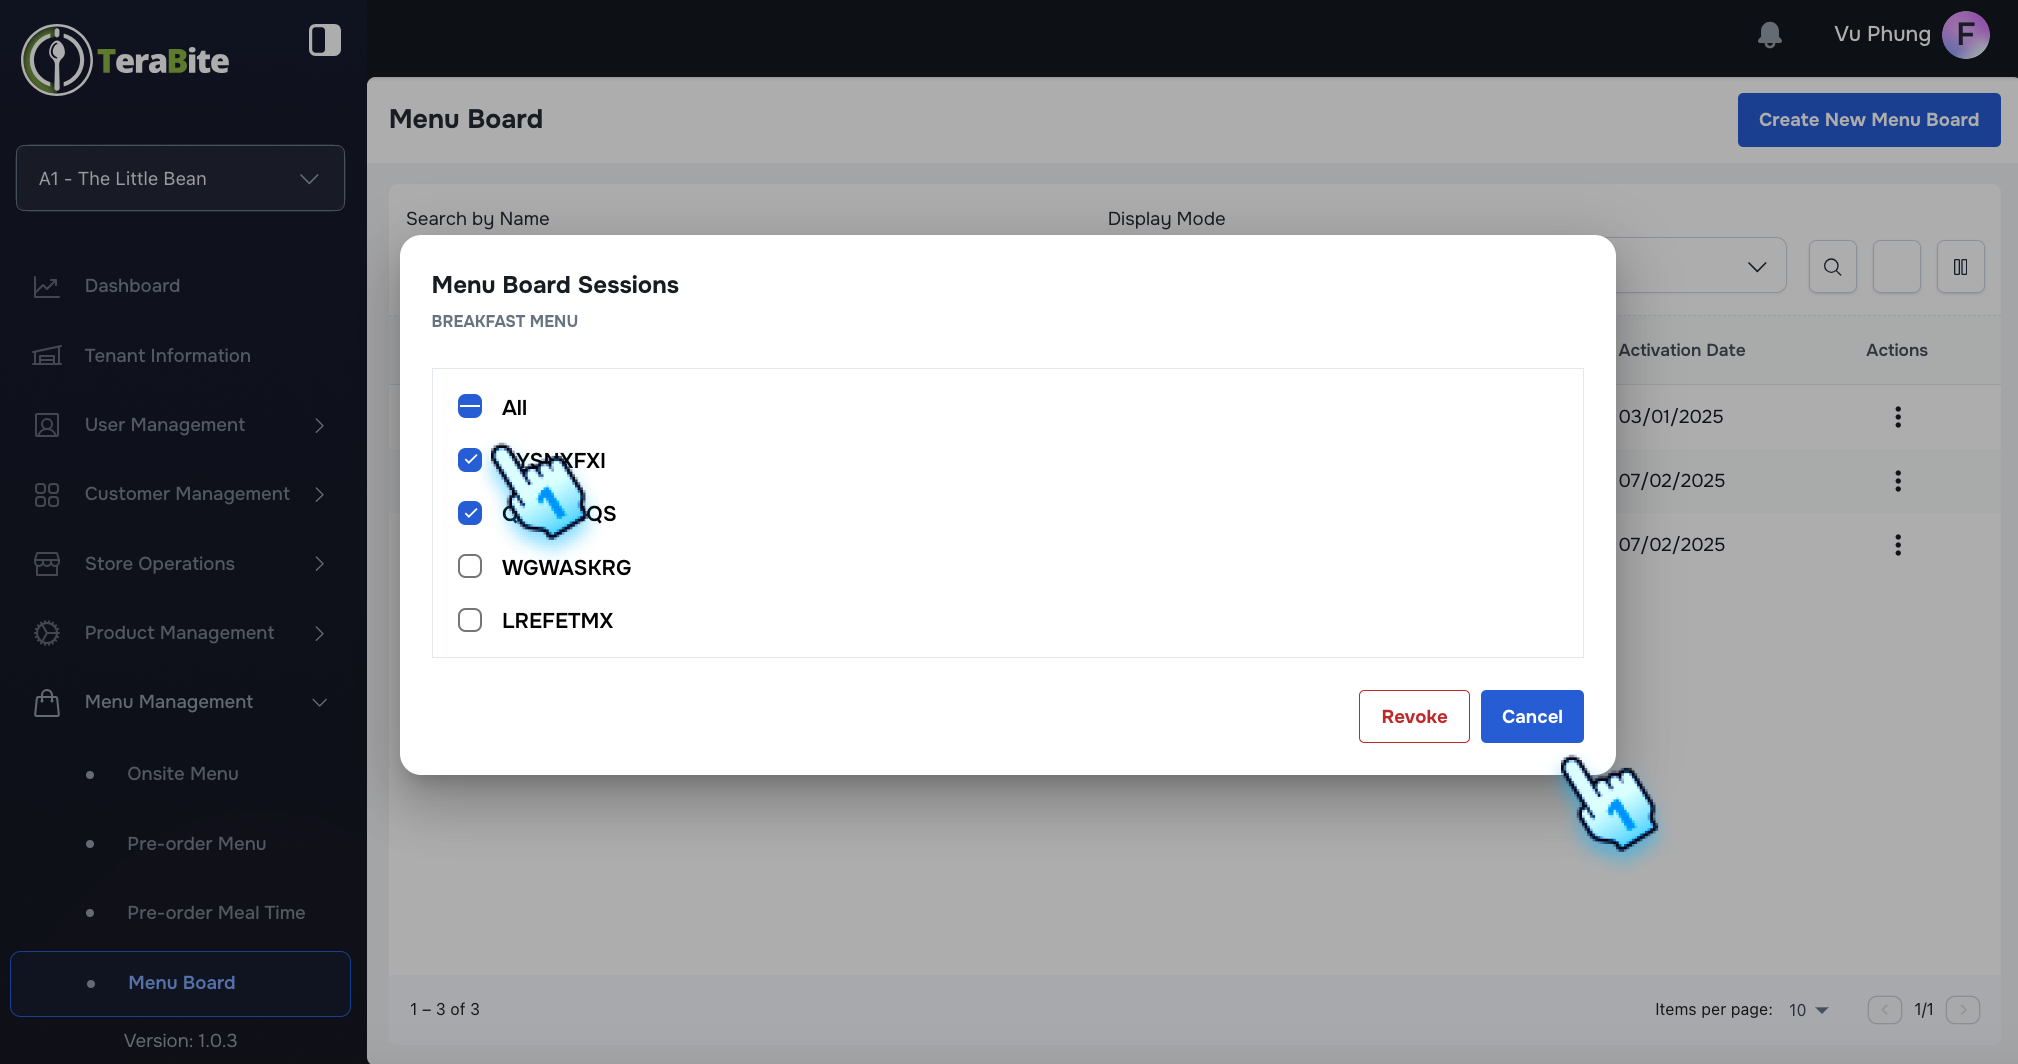
- Select the Menu Board Section to Revoke
- From the options, select the Menu Board section code to proceed with revocation.
- Click the "Revoke" Button
- Confirm the action by clicking the "Revoke" button to remove the menu board from display on the devices.
#
Conclusion
By following these steps, users can effectively create, manage, and revoke menu boards within the Menu Management system. This ensures that the displayed menu items are up-to-date and relevant. For further assistance, please refer to the additional documentation or contact support.
#
Screen flow
#
Create Menu Board
#
Perform Actions for Menu Board
#
Revoke Menu Board