#
Menu Management
#
Description
This document outlines the procedures for creating new menus, viewing and editing menus, and managing the status of menus within the Sales and Order module.
#
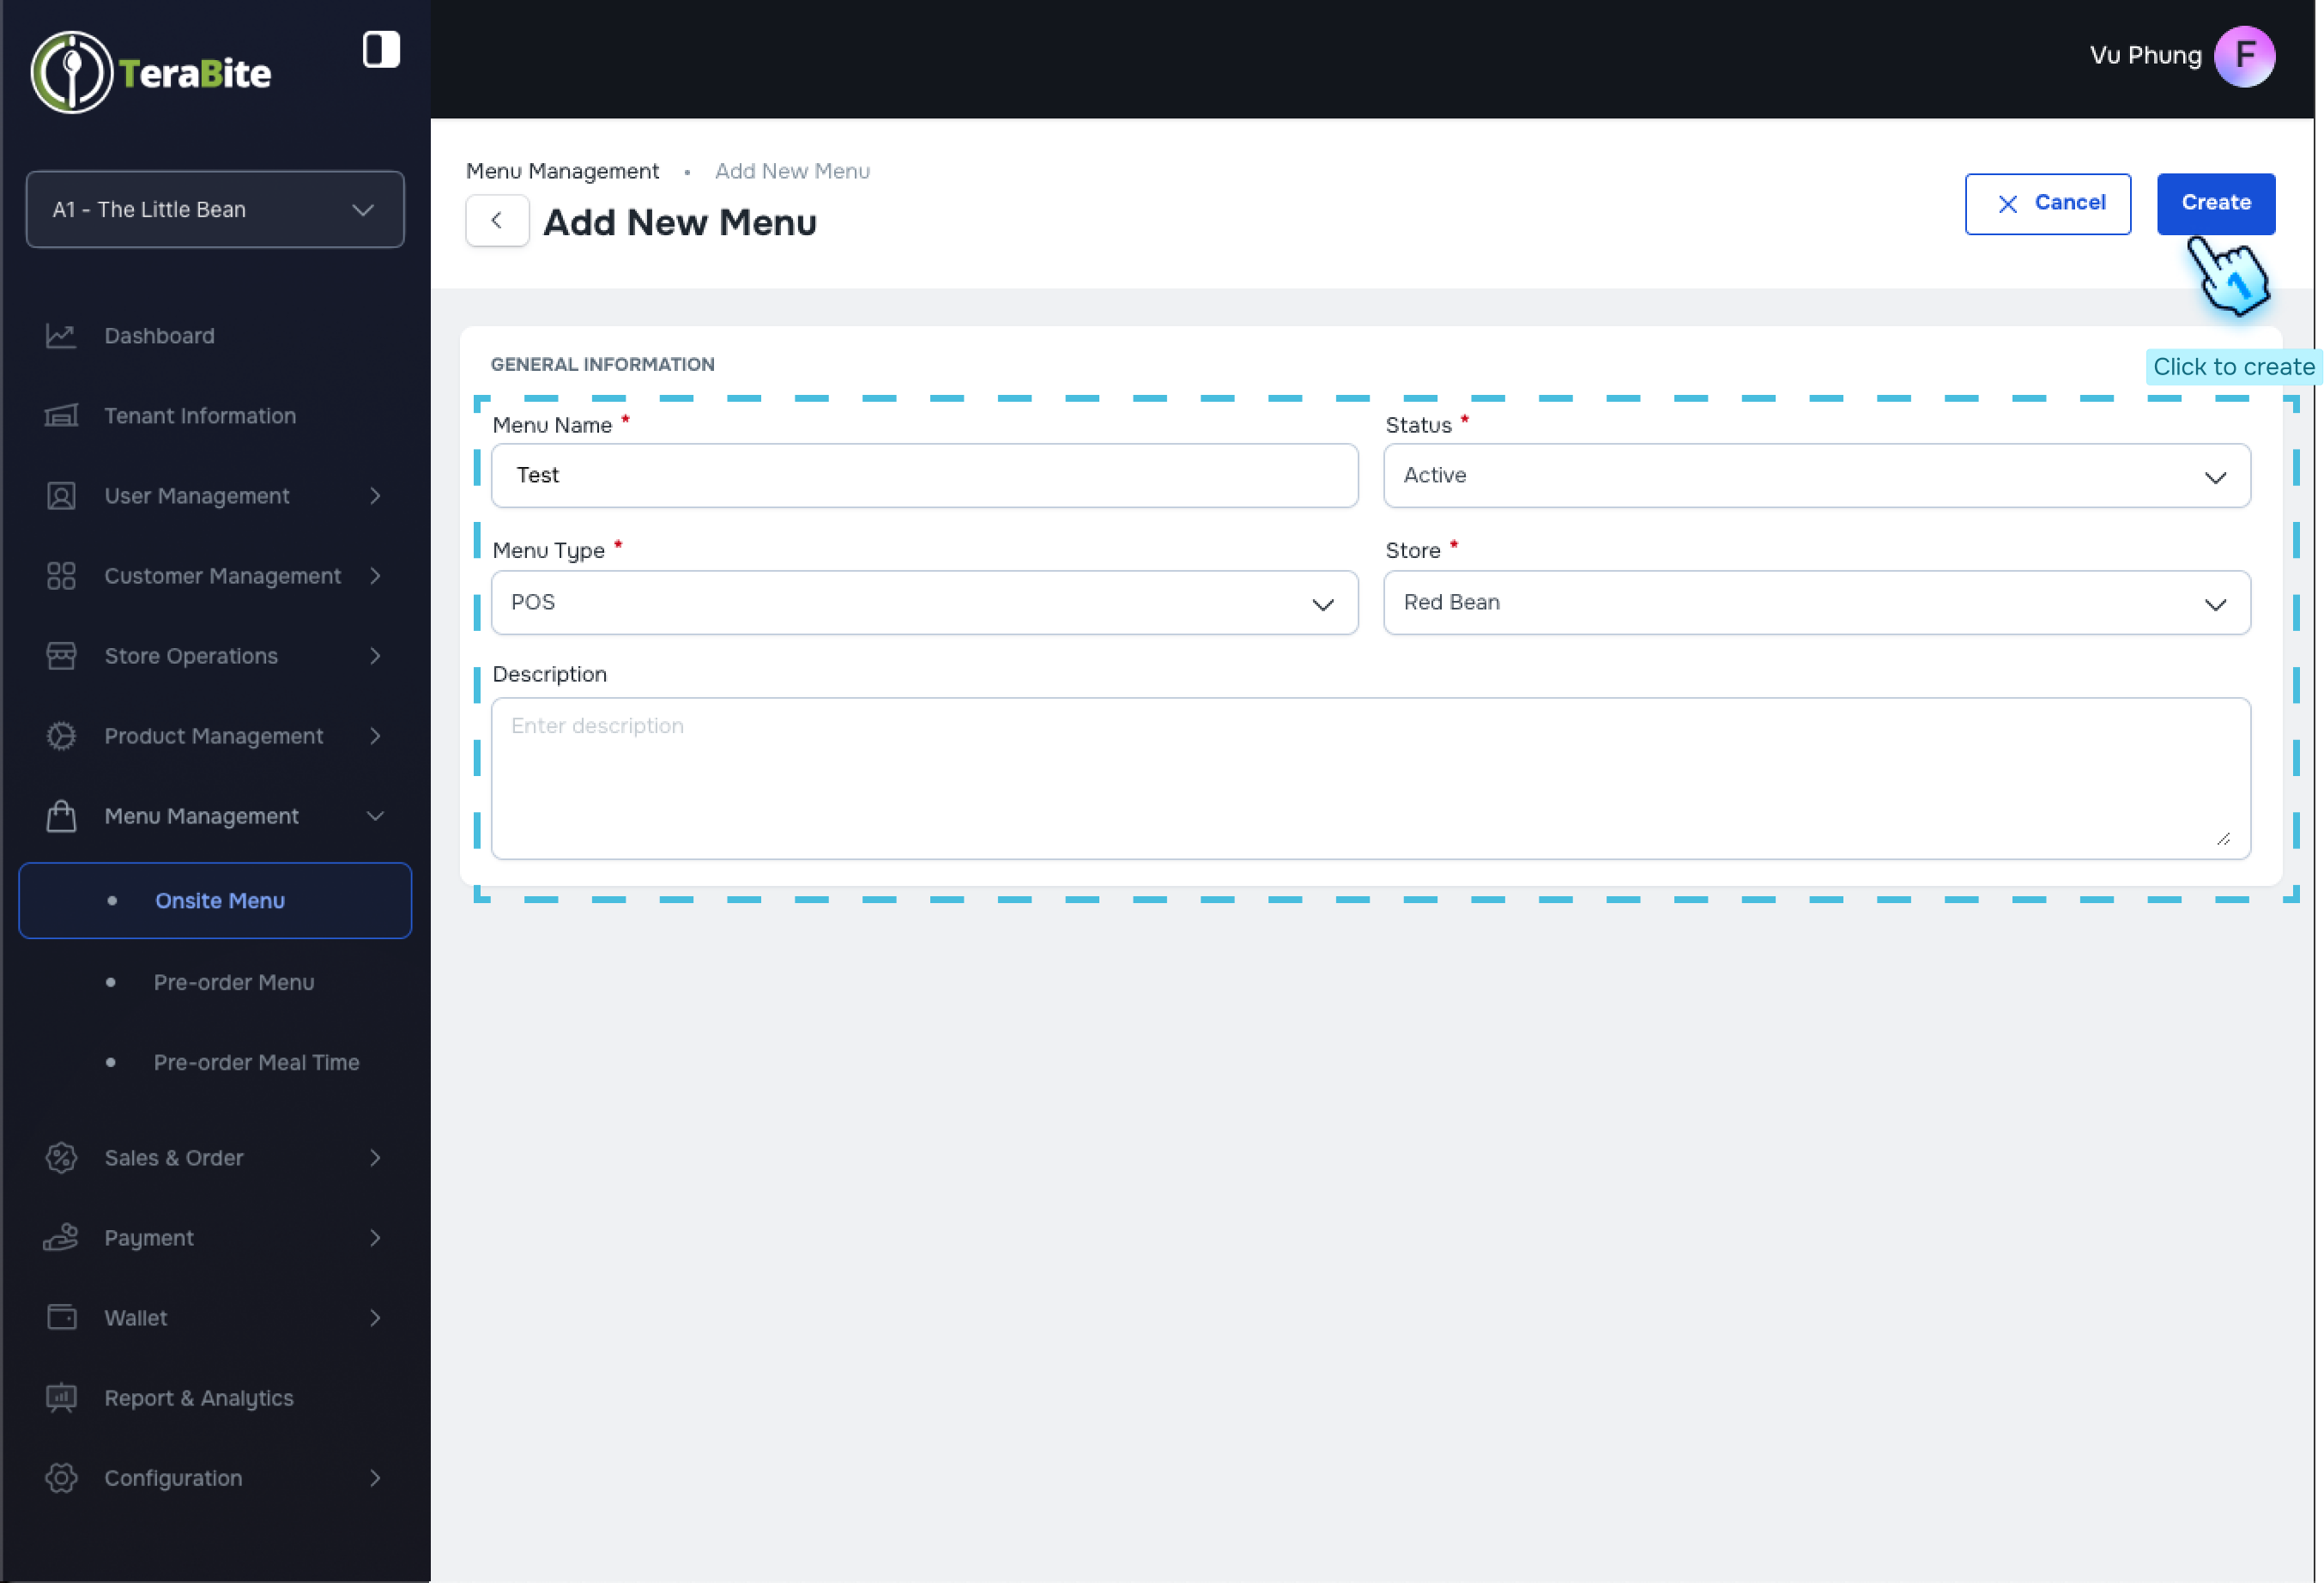
Create a New Menu
- Access Menu Management
- Navigate to the Menu Management module
- Initiate Menu Creation
- Click the "Create New Menu" button.
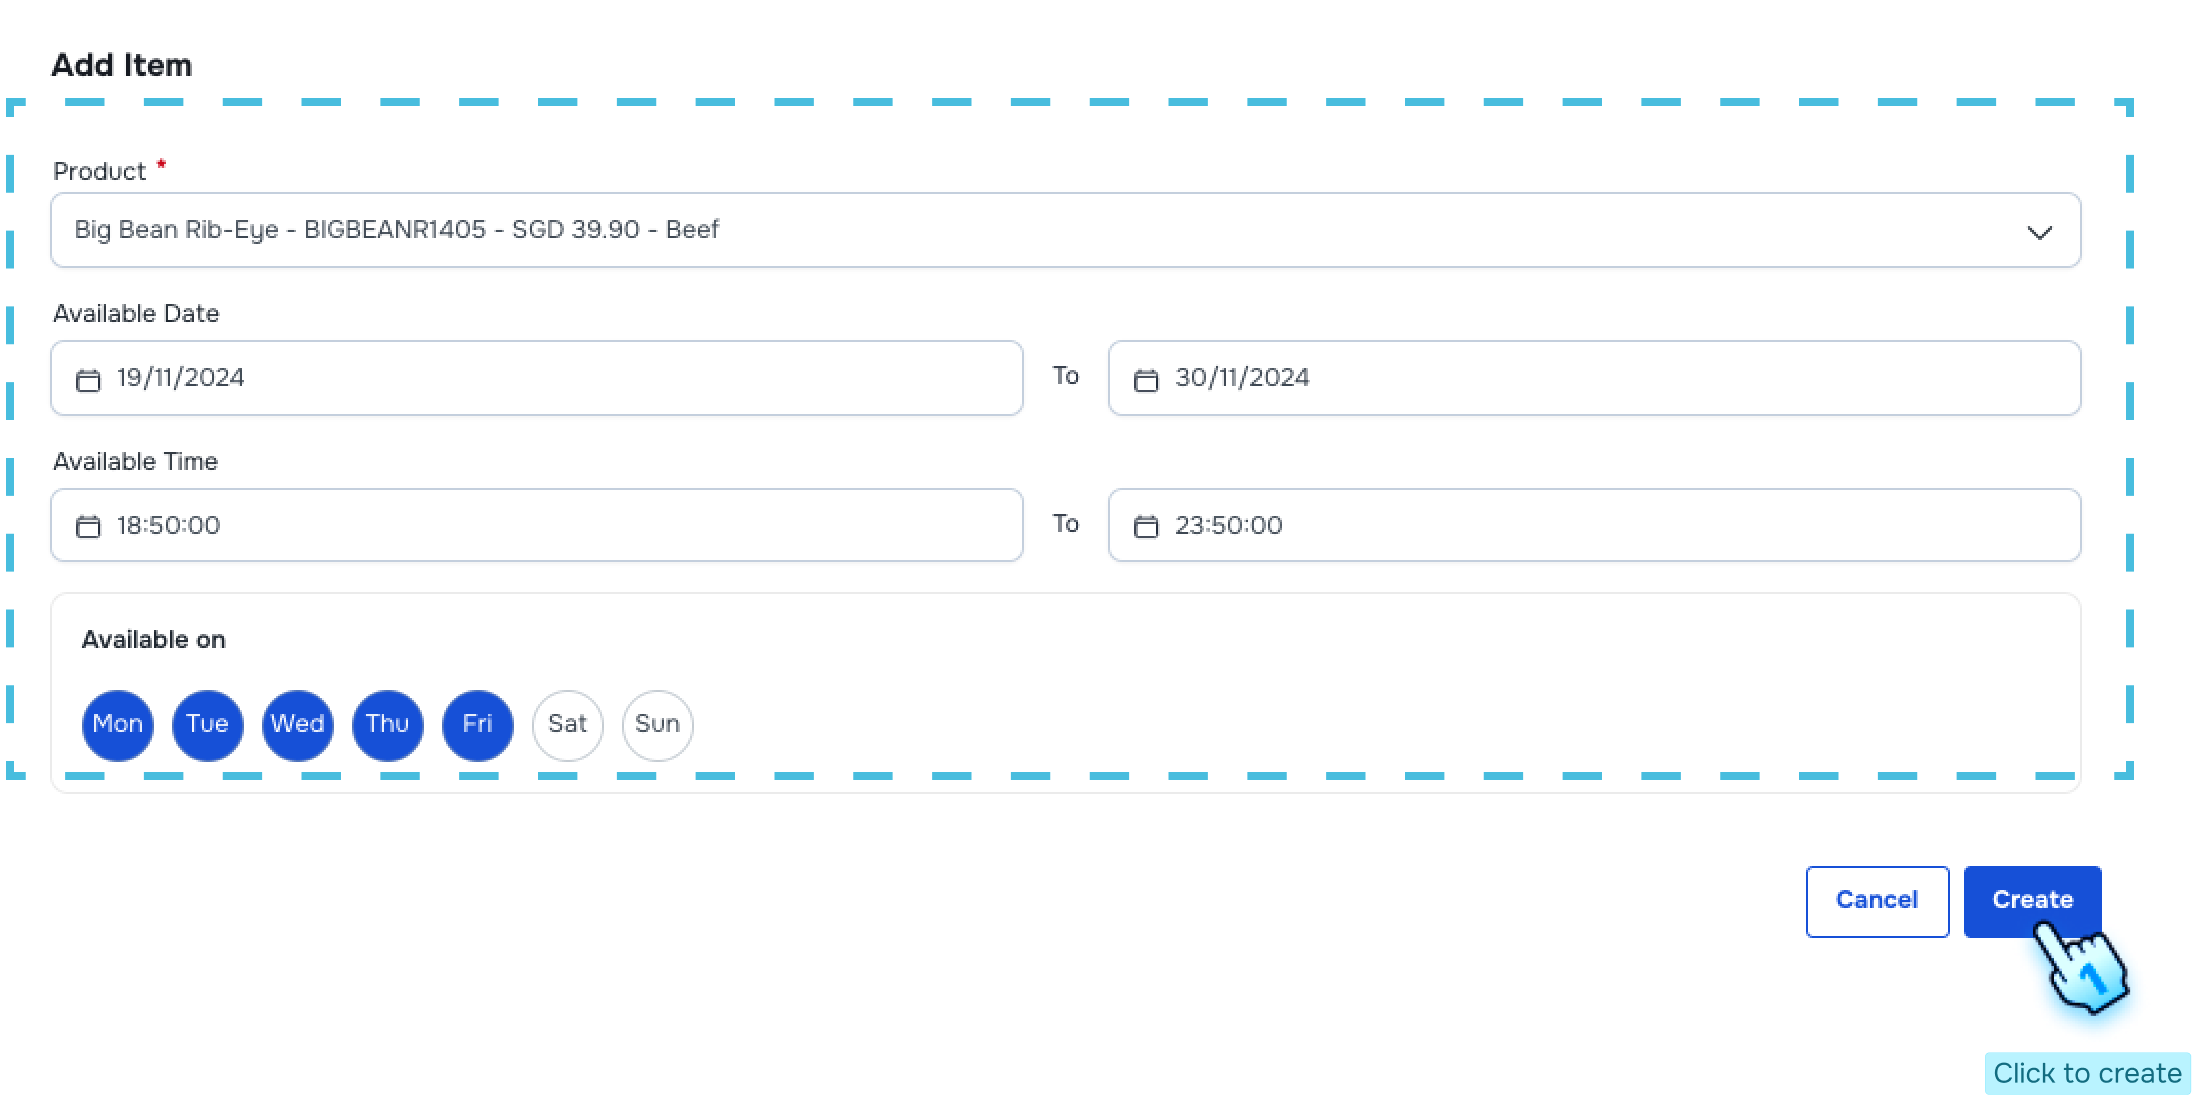
- Fill Required Information
- Complete all required fields in the menu information form.
- Add Items to the Menu
- Search for and select items to include in the menu.
- Setup Available Date and Time
- Specify the available date and time for the menu.
- Select Available Days of the Week
- Choose the days of the week when the menu will be available.
- Submit Menu Information
- Click the "Create" button to finalize the creation of the new menu.
#
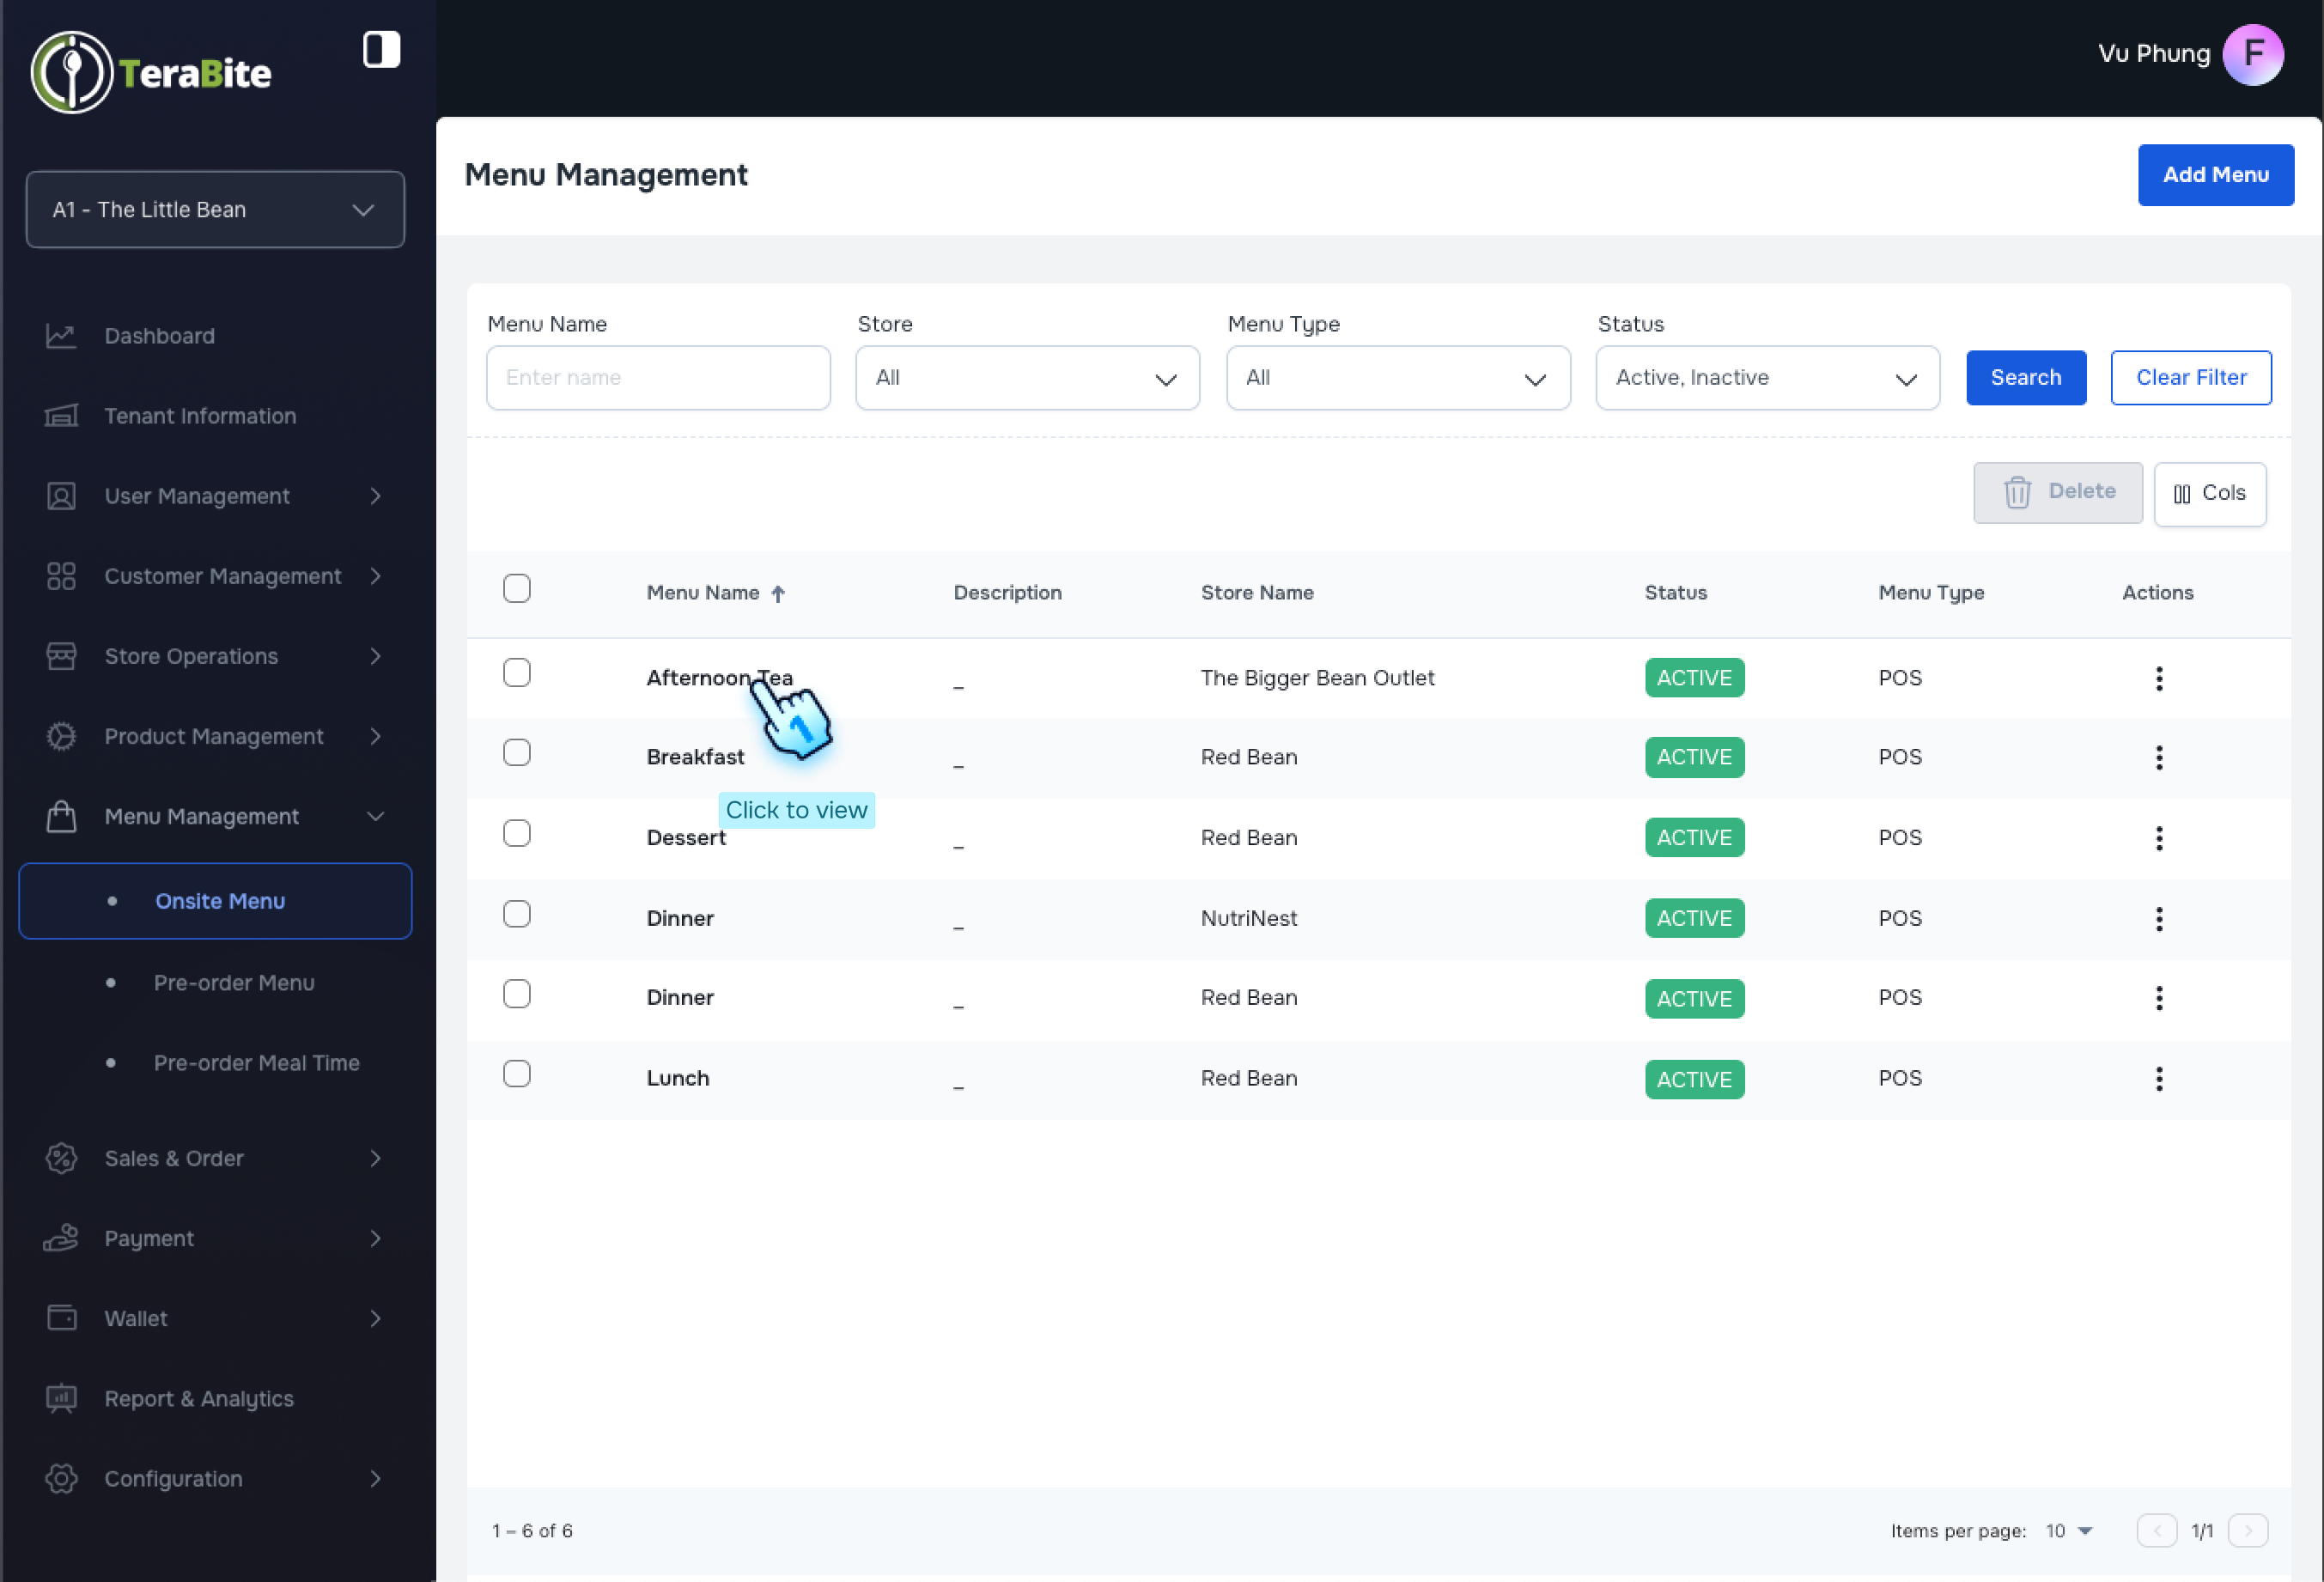
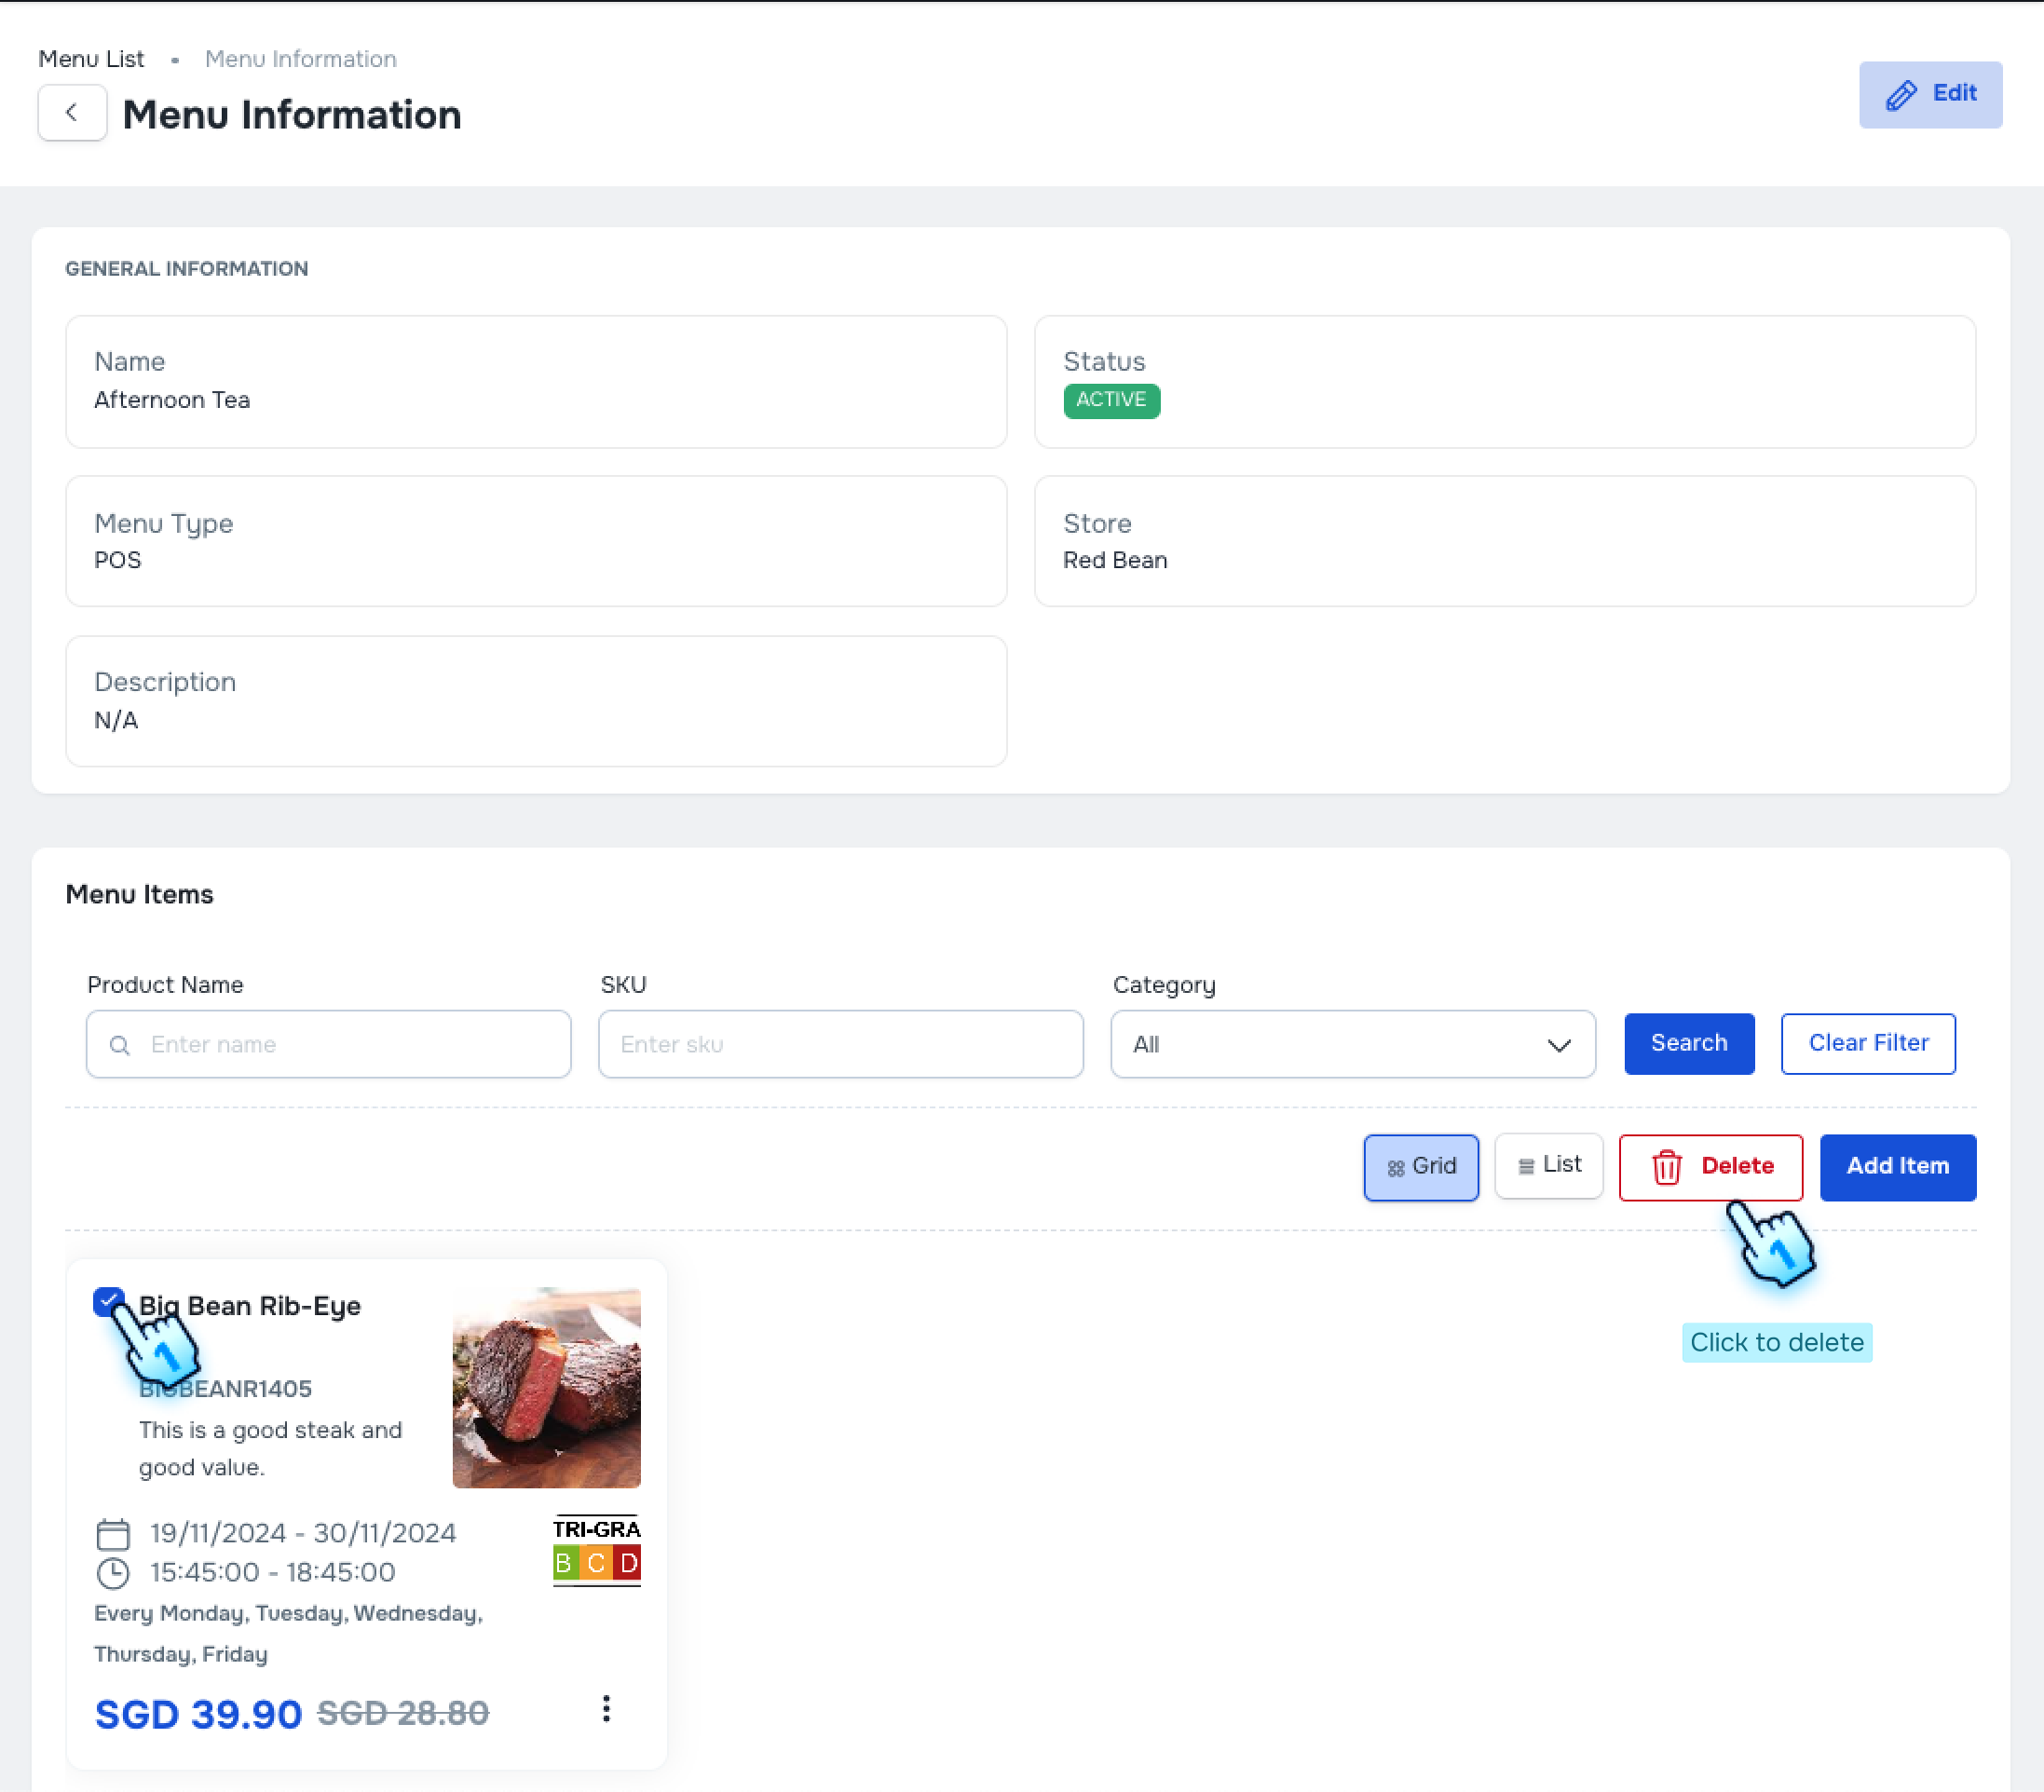
View and Edit a Menu
- Access Menu Management
- Navigate to the Menu Management page.
- Select Menu
- Click on each menu name to view its details.
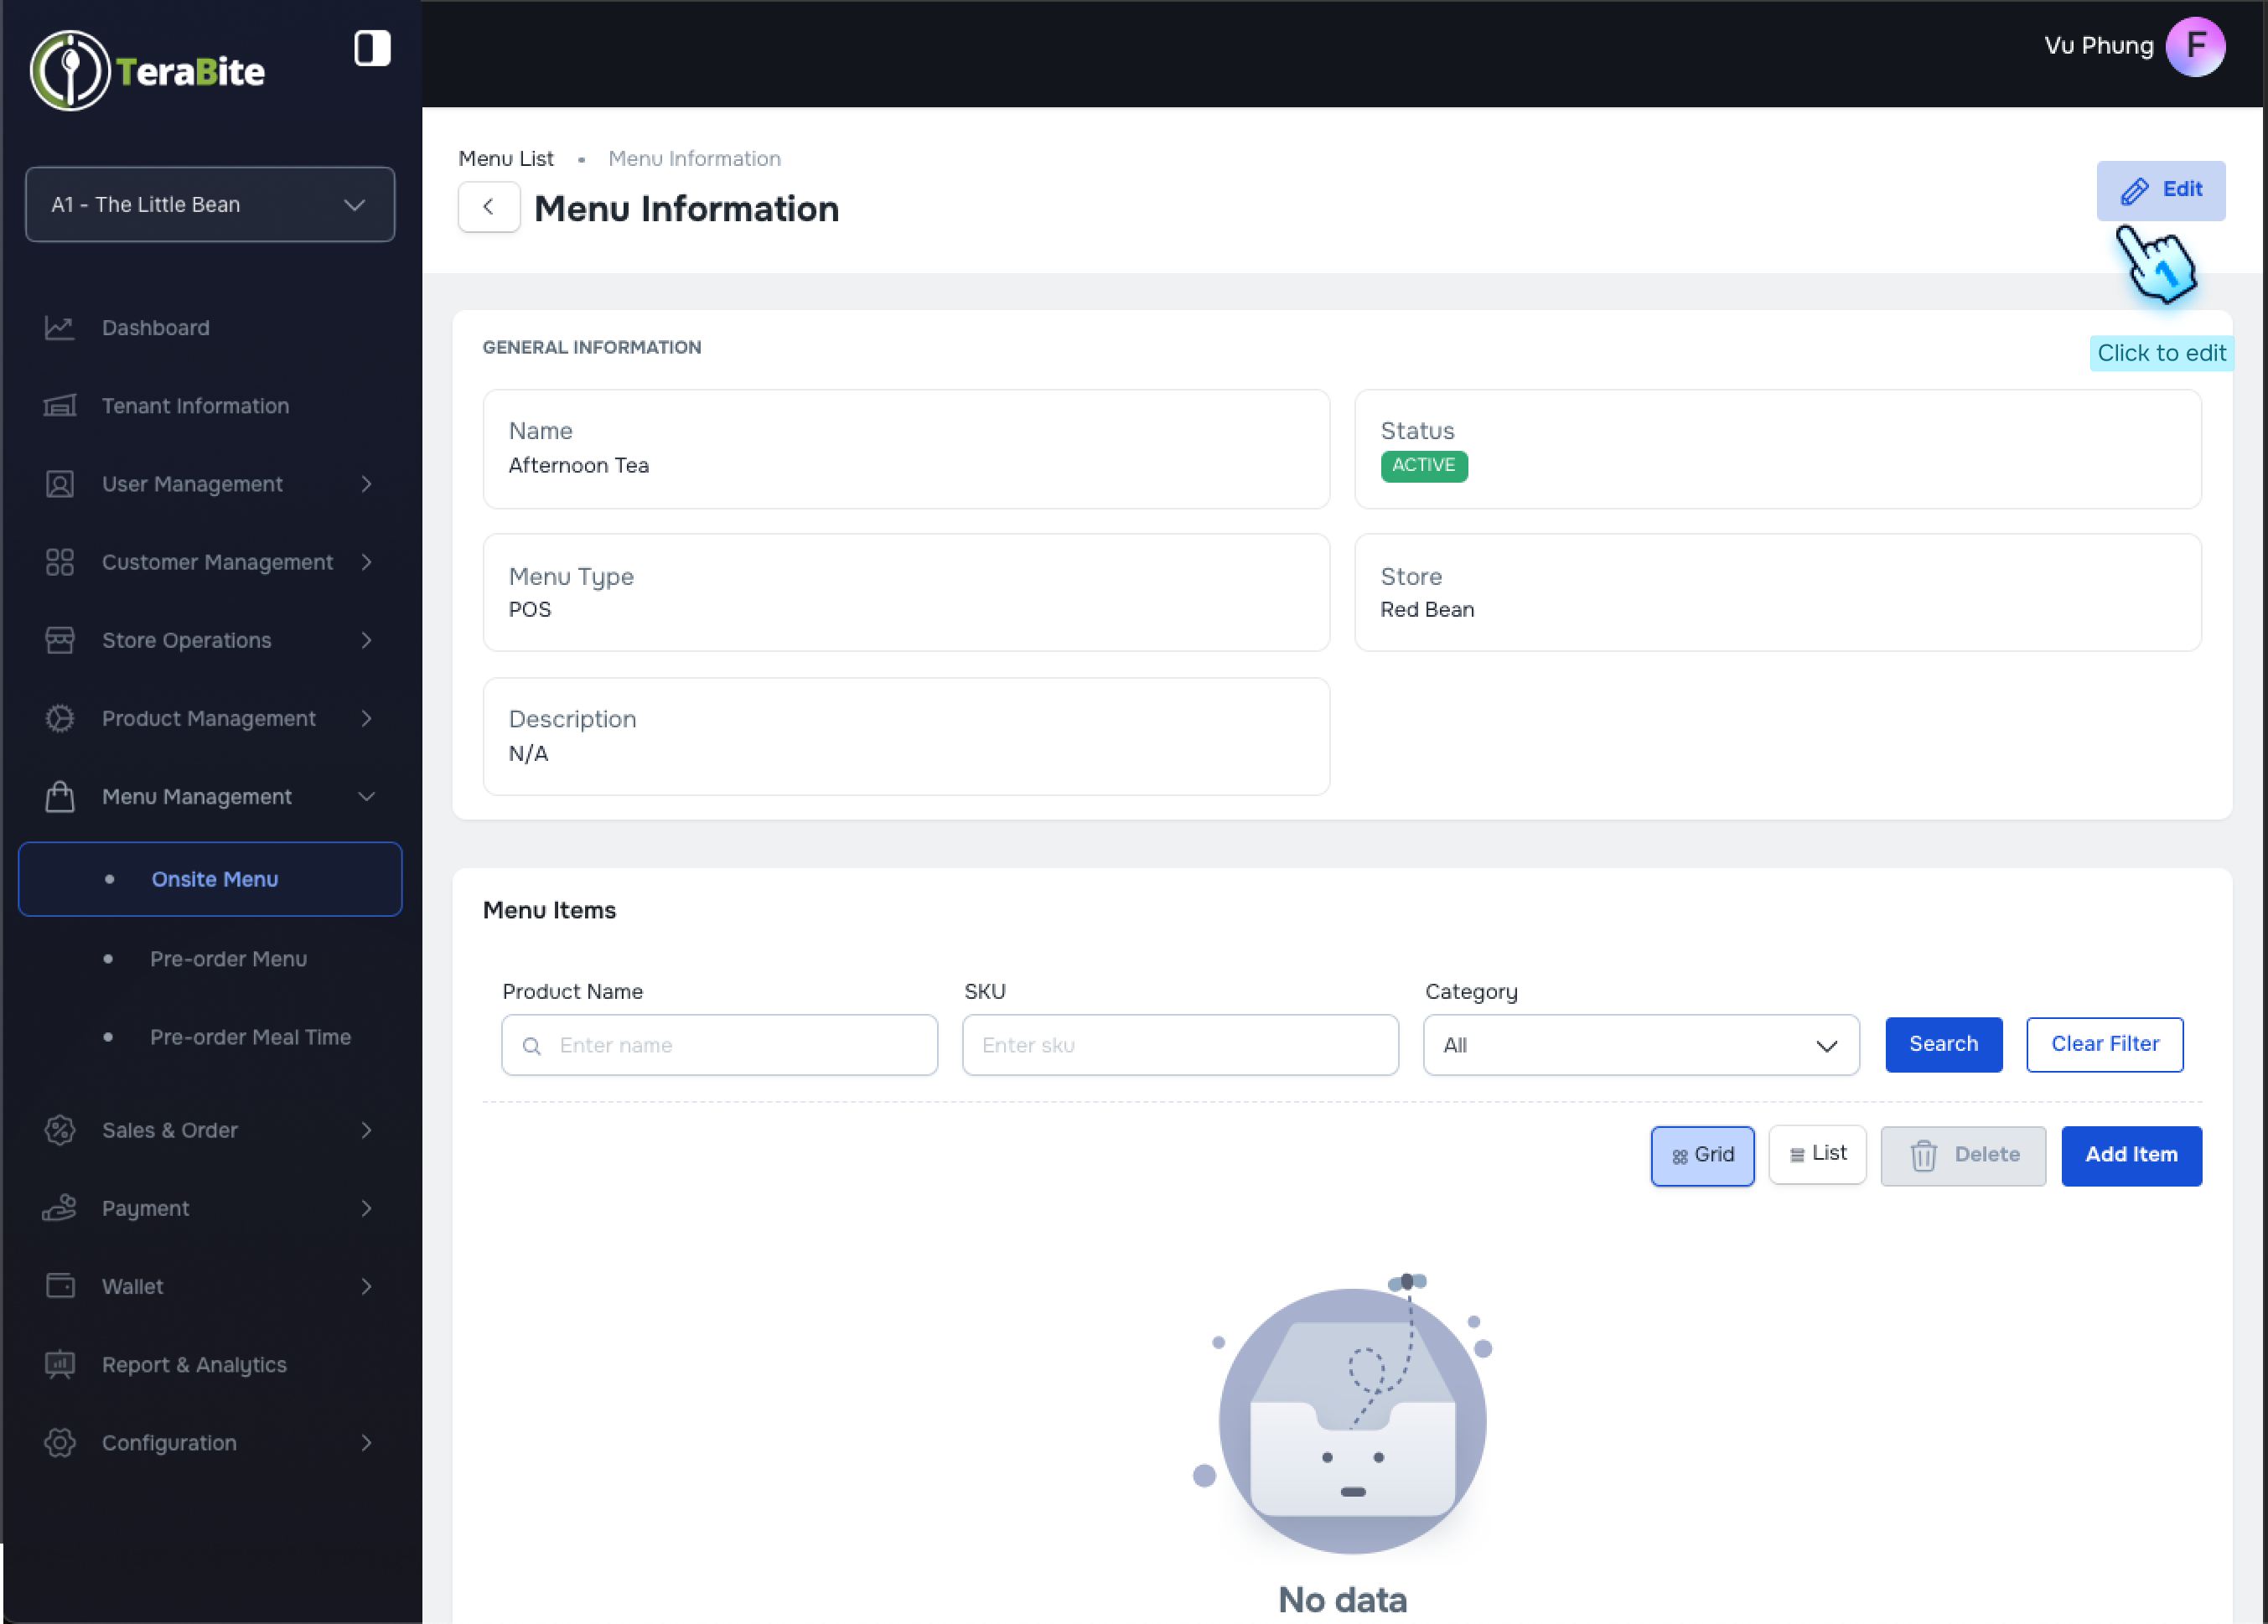
- Edit Menu Information
- Click the "Edit" button.
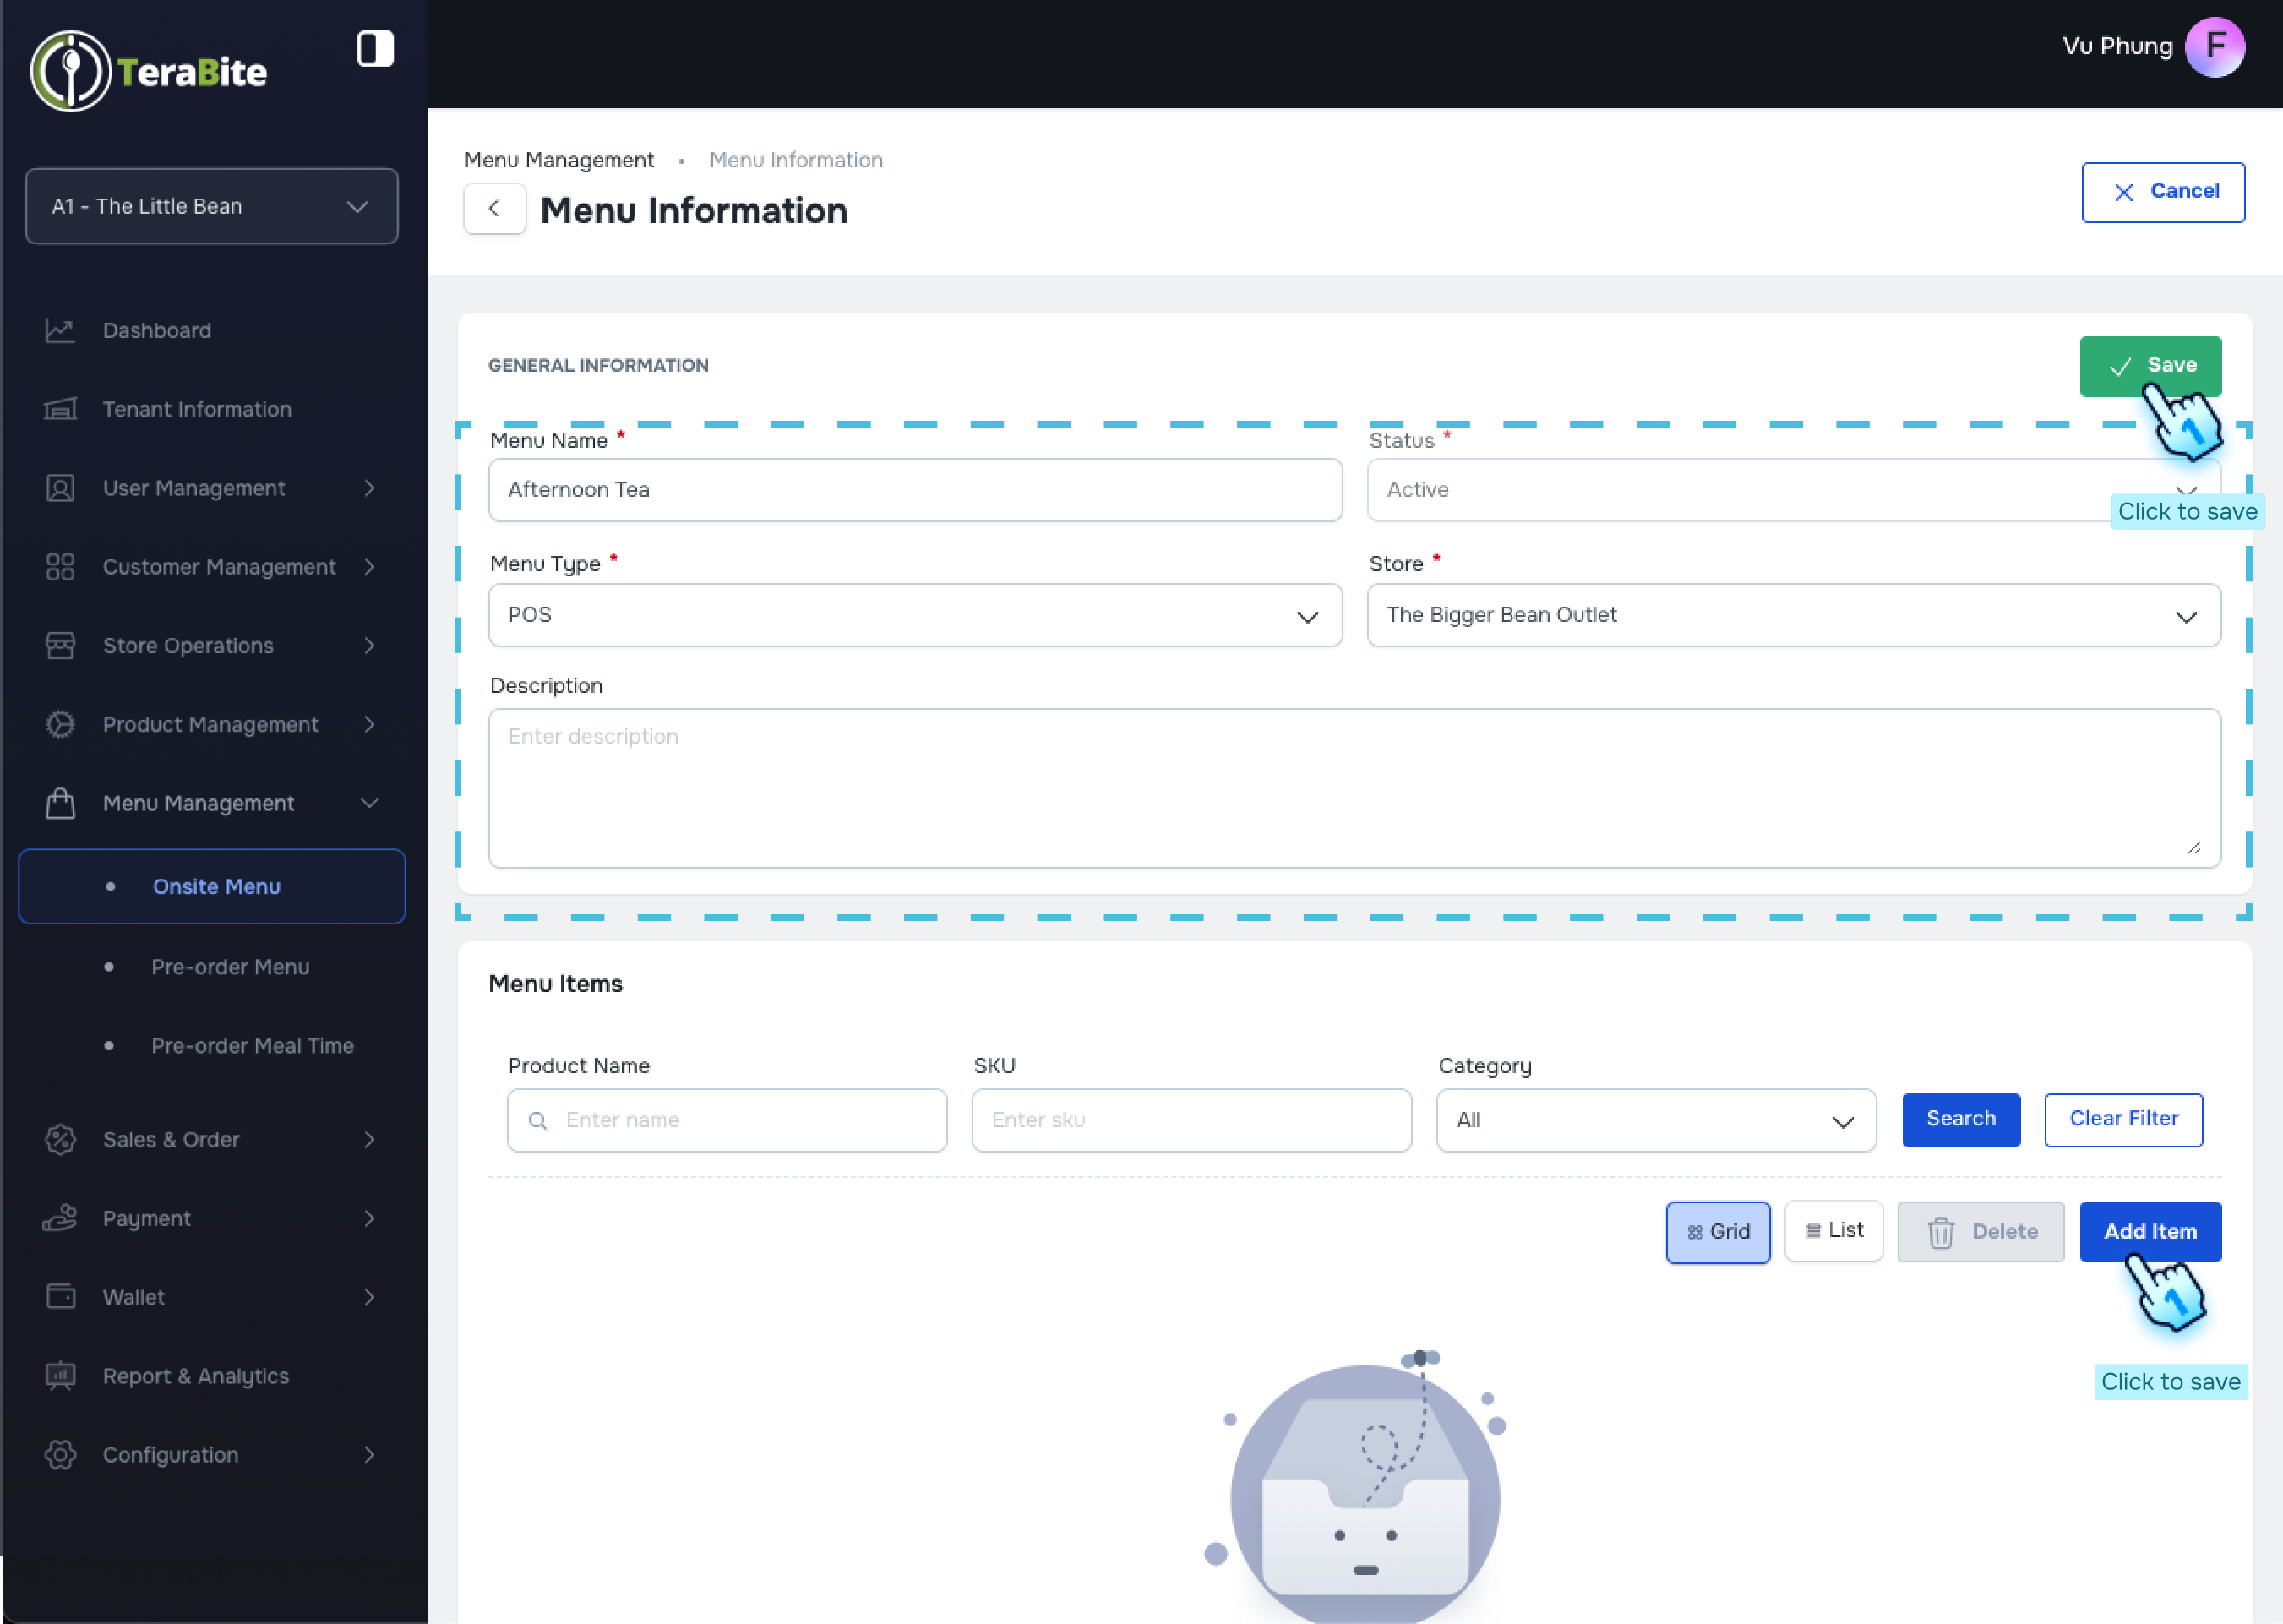
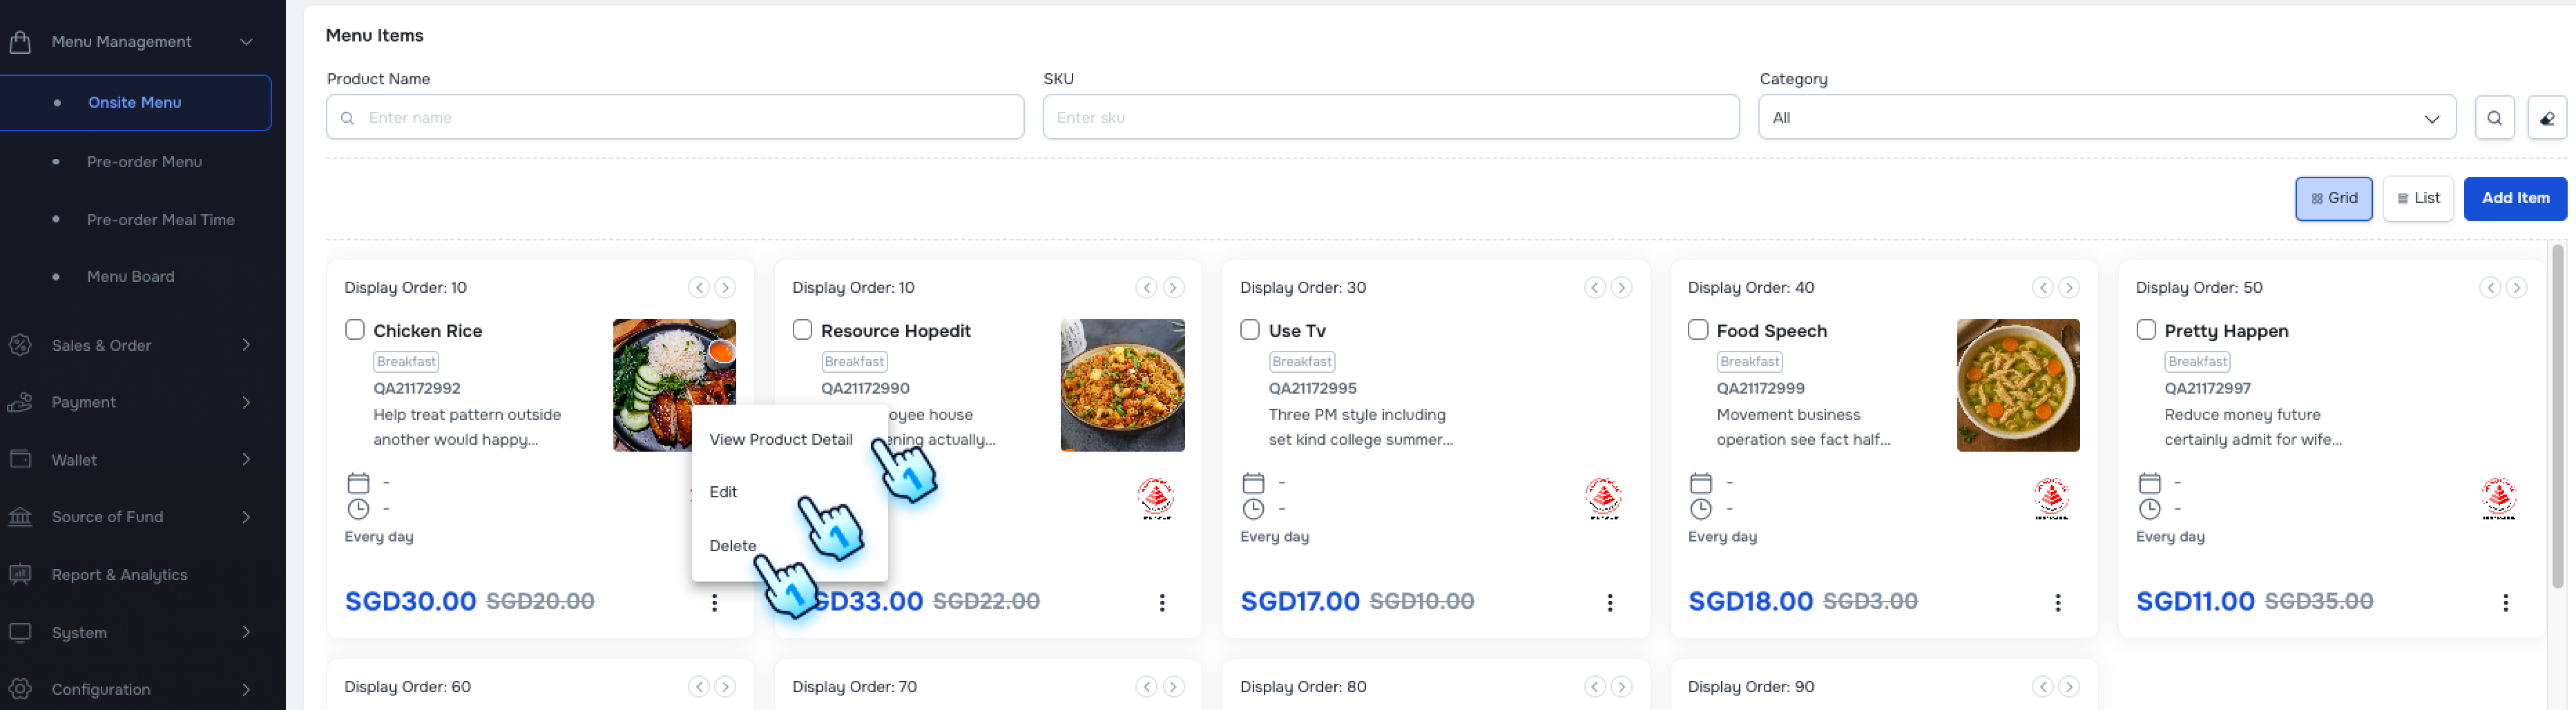
- Modify Menu Layout
- In the edit page, you can edit information and change the layout of items (Grid or List).
- Edit Individual Items
- Click the "Edit" button on each item to modify its details.
- Follow Creation Steps for Items
- Follow the same steps as outlined in the Create New Menu action to set up item details.
- Save Changes
- Click "Save" to finalize your changes.
#
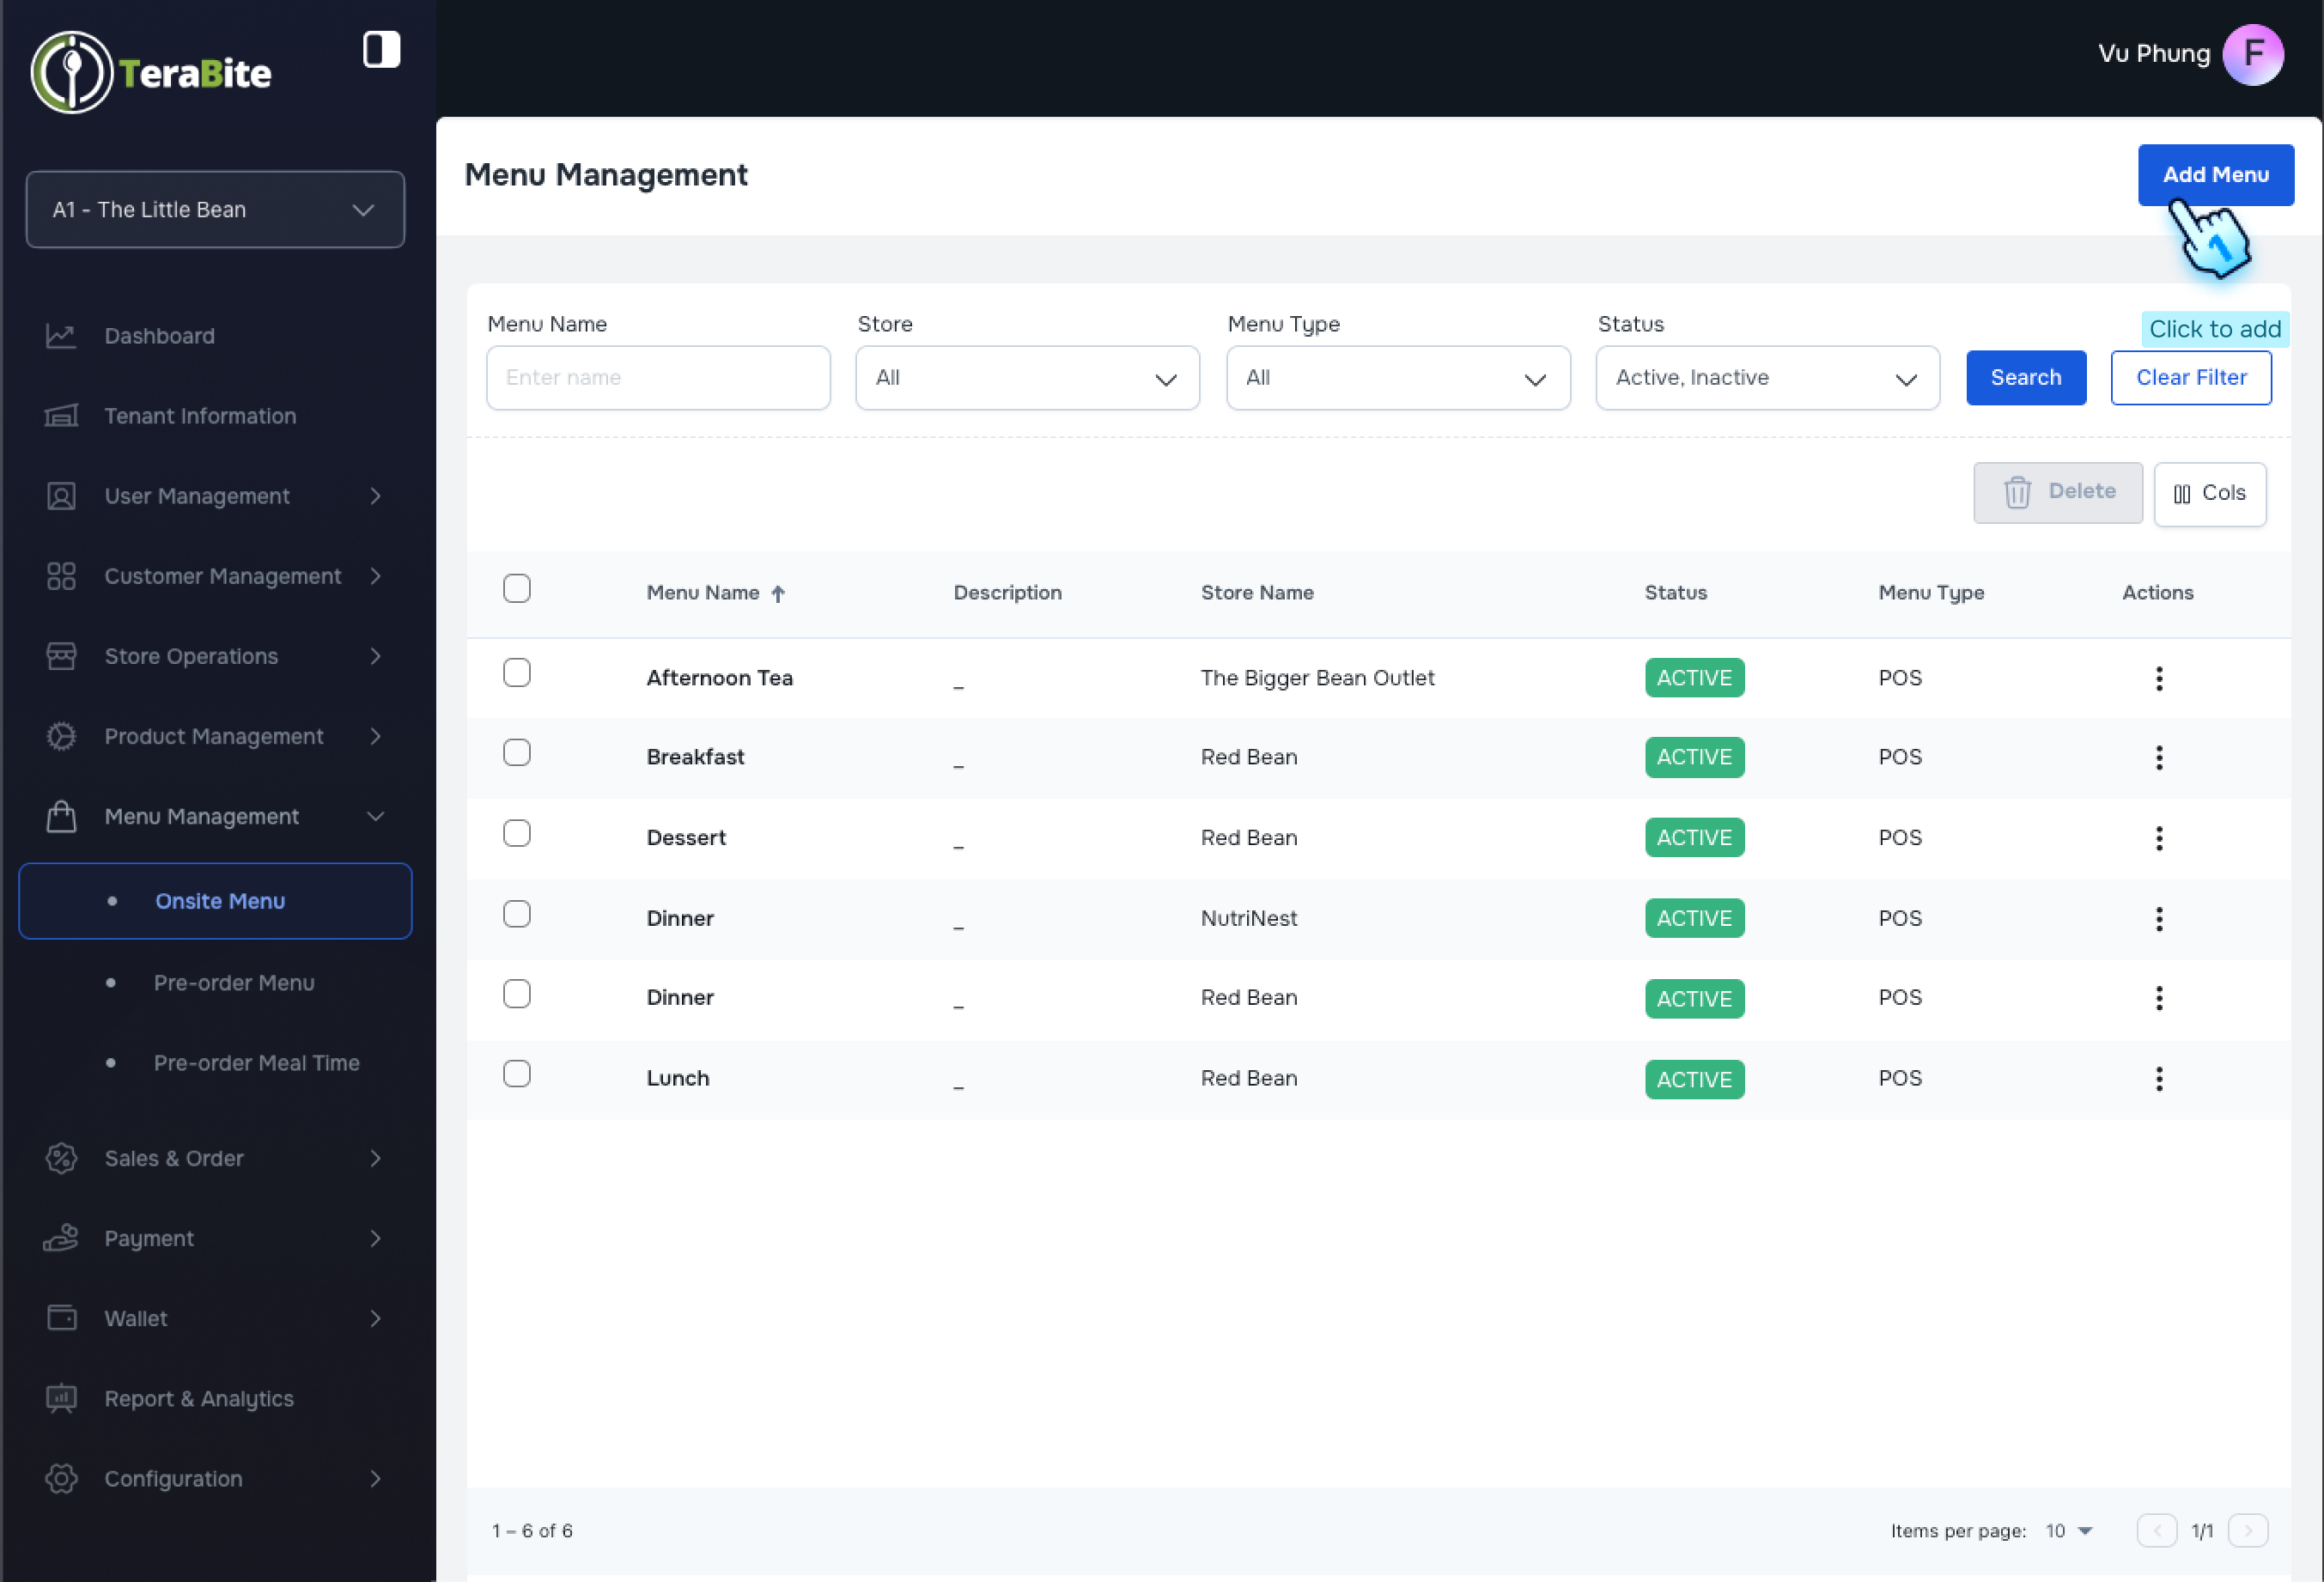
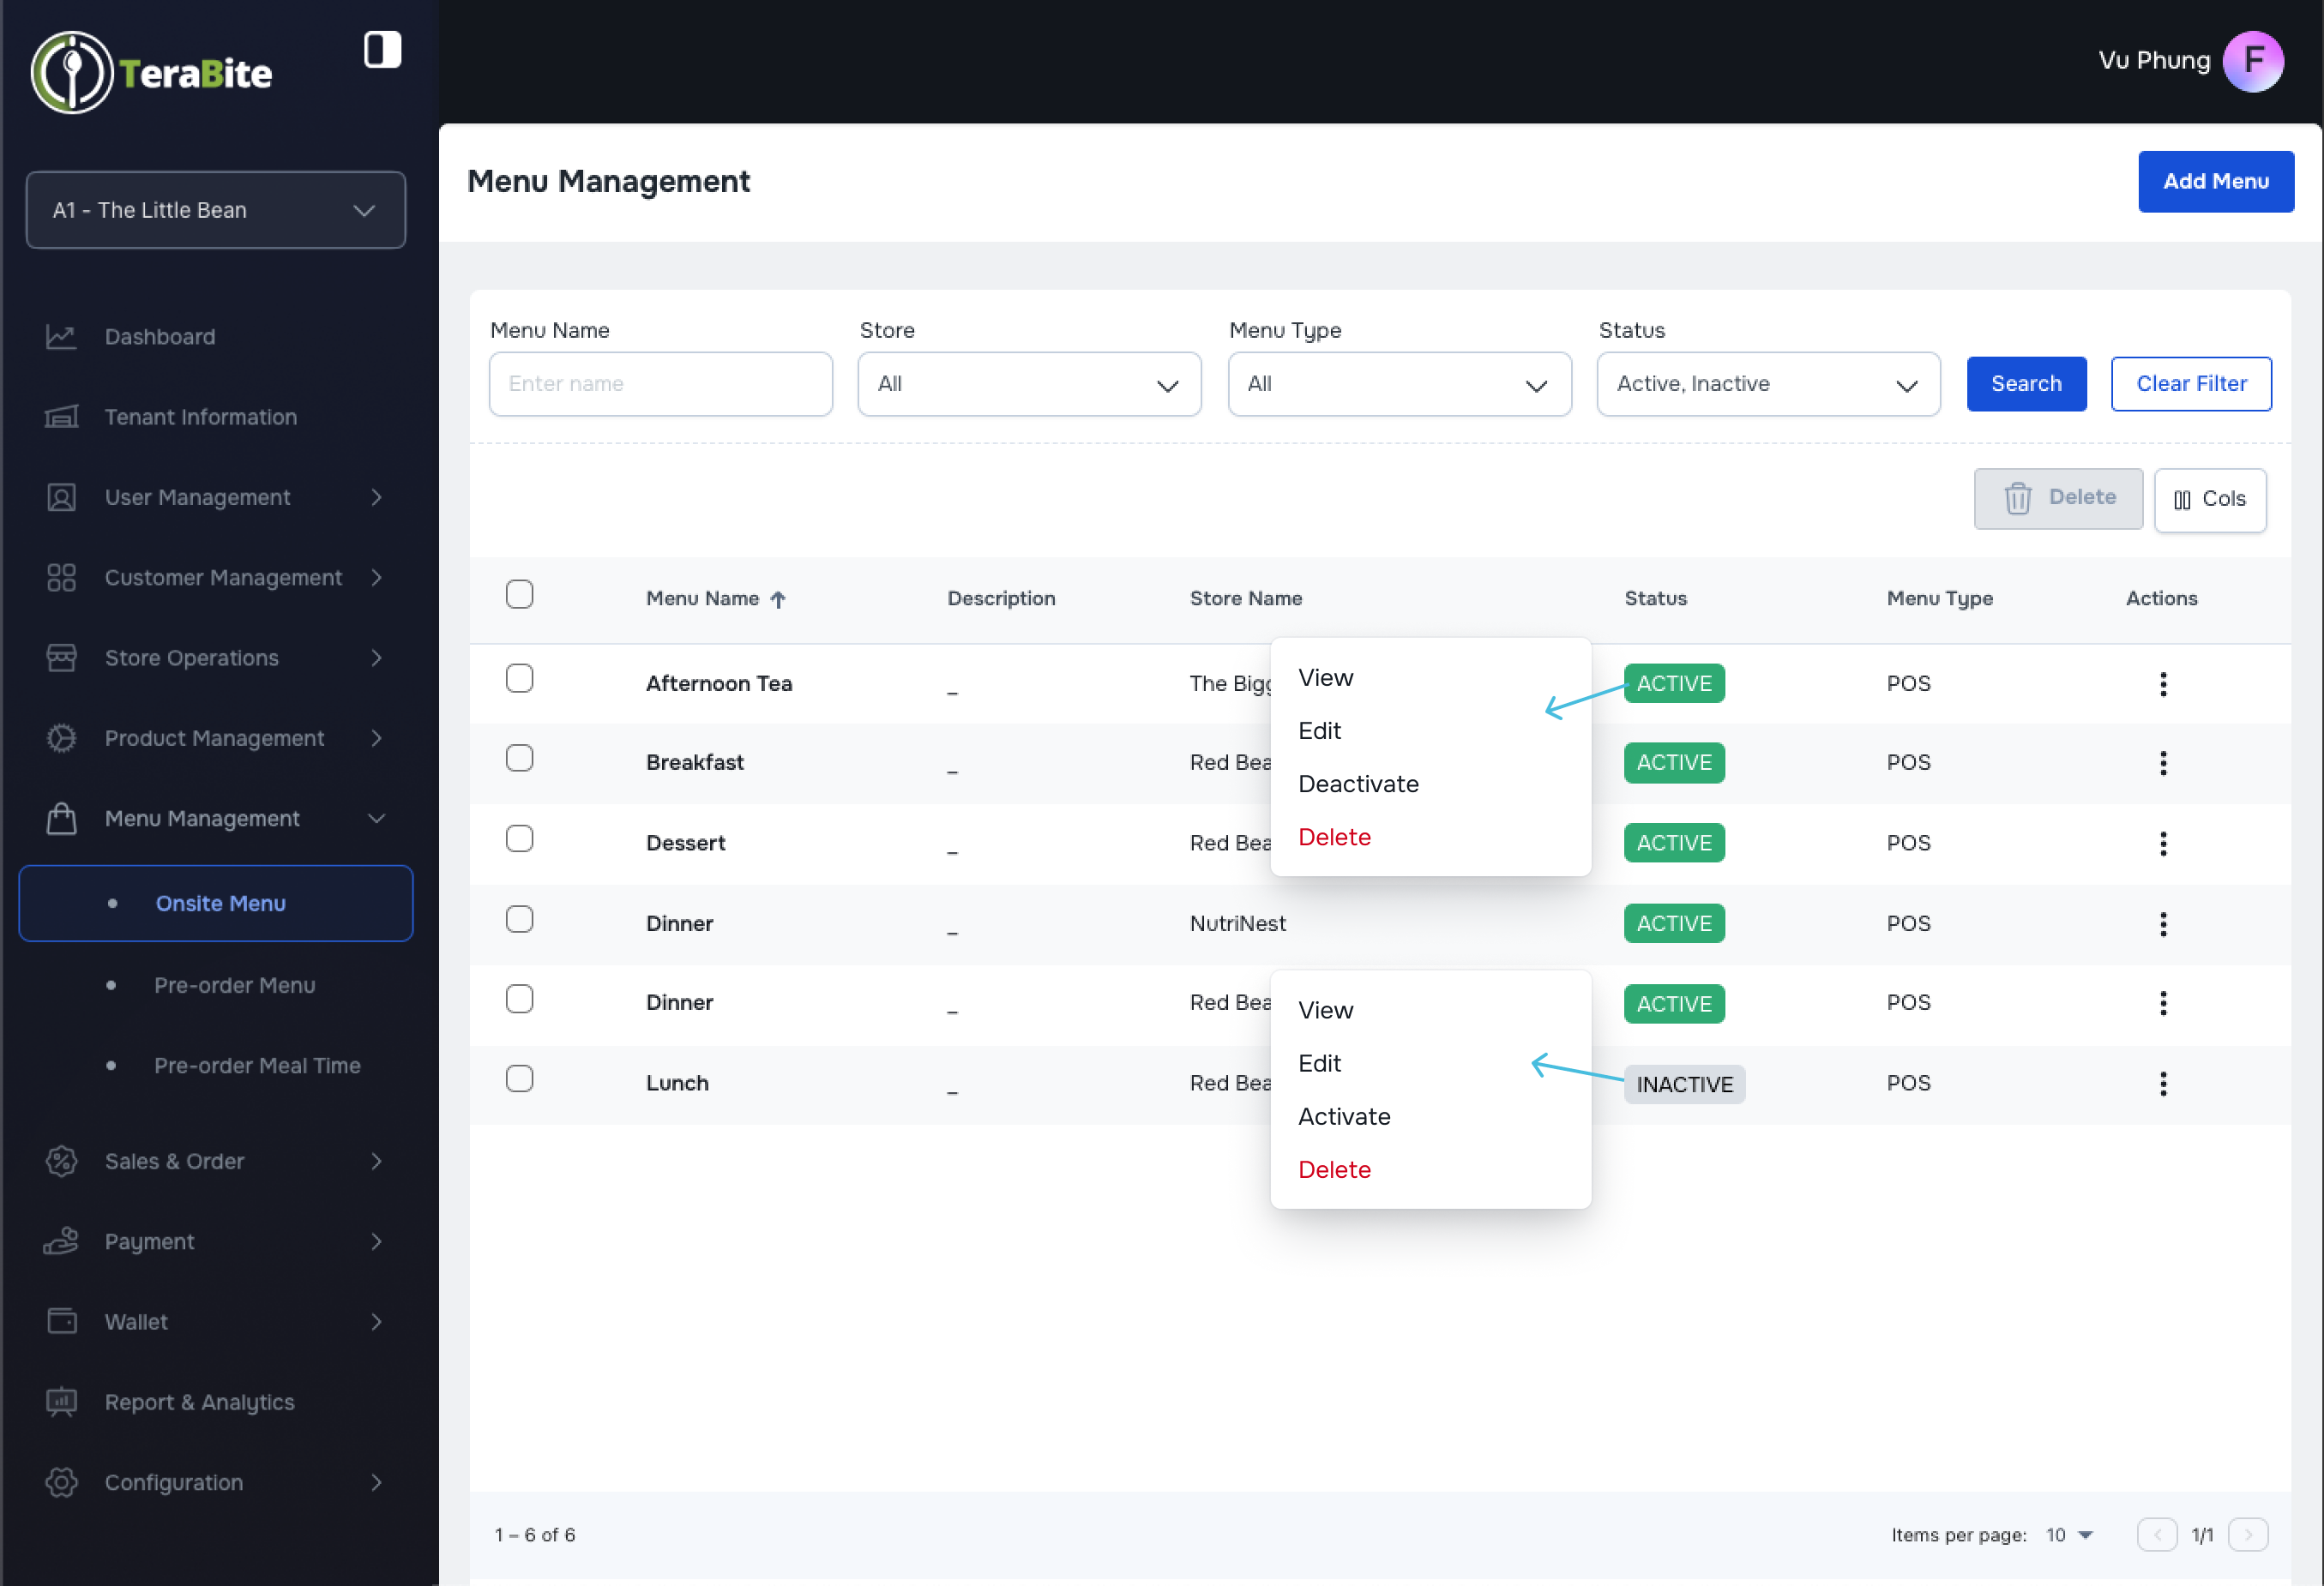
View Menu List and Change Status
- Access Menu List
- Navigate to the Menu List section, where menus are displayed with their respective statuses: Active and Inactive.
- Perform Actions Based on Menu Status
- Click on the three-dot menu in each row to reveal available actions for each menu based on its status.
- Actions per Status:
- Active: Options are View, Deactivate, Duplicate, and Delete.
- Click on "Deactivate" in the three-dot menu and confirm by clicking the "Deactivate" button in the confirmation dialog.
- Click on "Duplicate" in the three-dot menu to navigate to the Create New Menu page, review the auto-filled information, and click the "Create" button to finish.
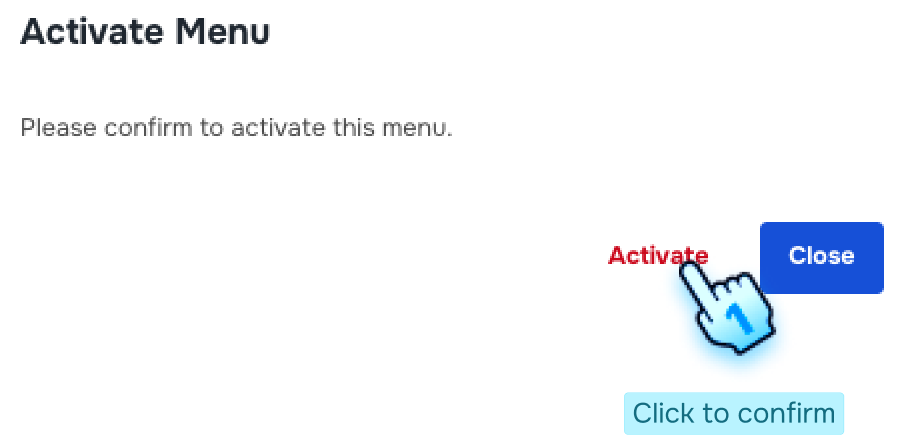
- Inactive: Options are View, Activate, and Delete.
- Click on "Activate" in the three-dot menu and confirm by clicking the Activate" button in the confirmation dialog.
#
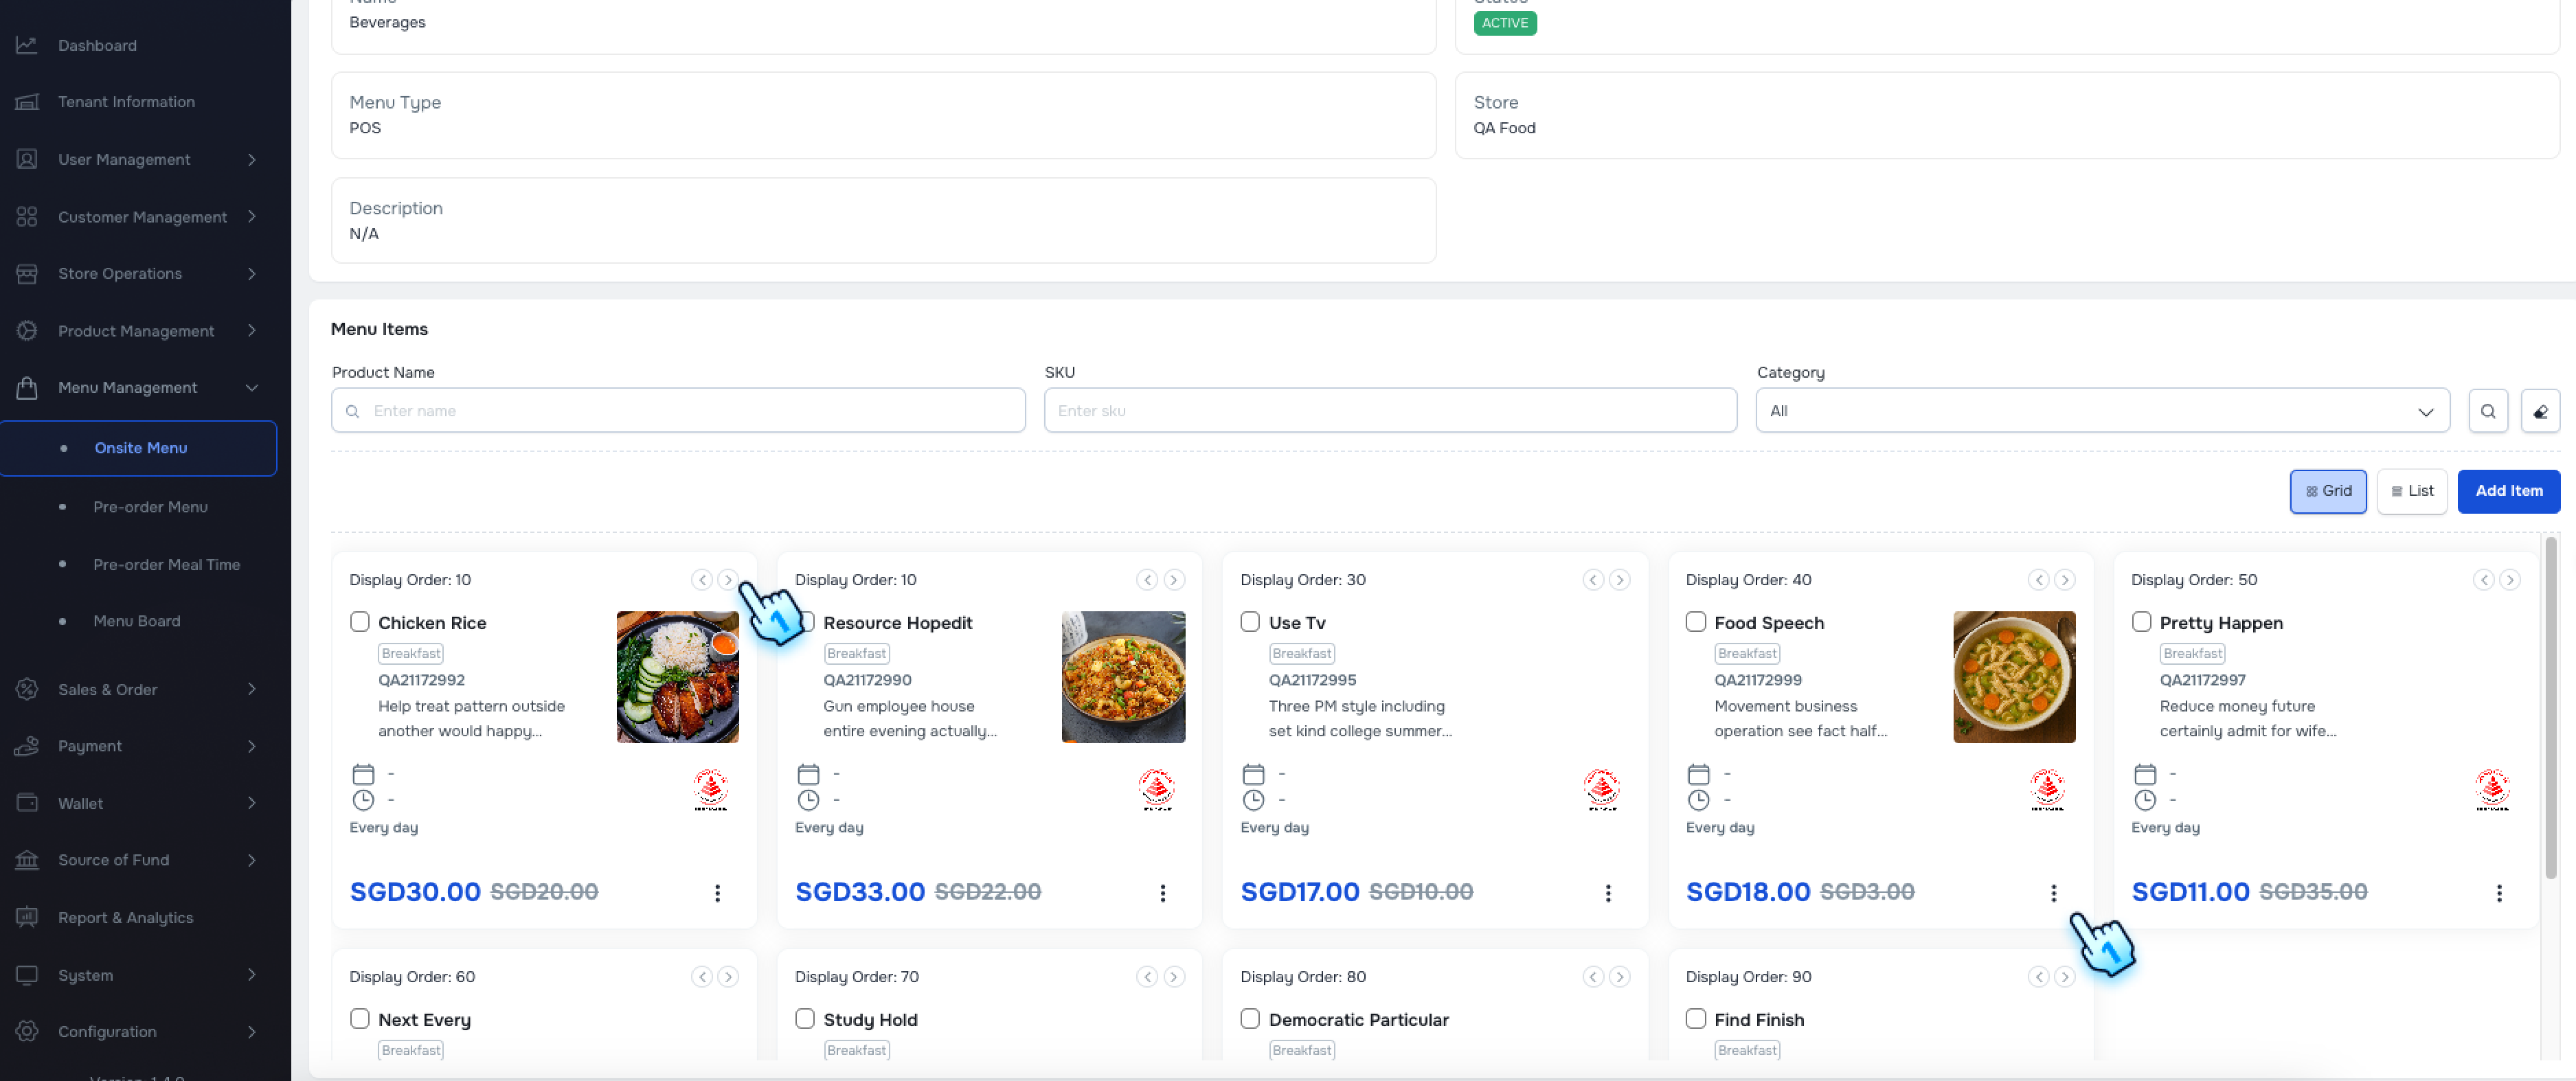
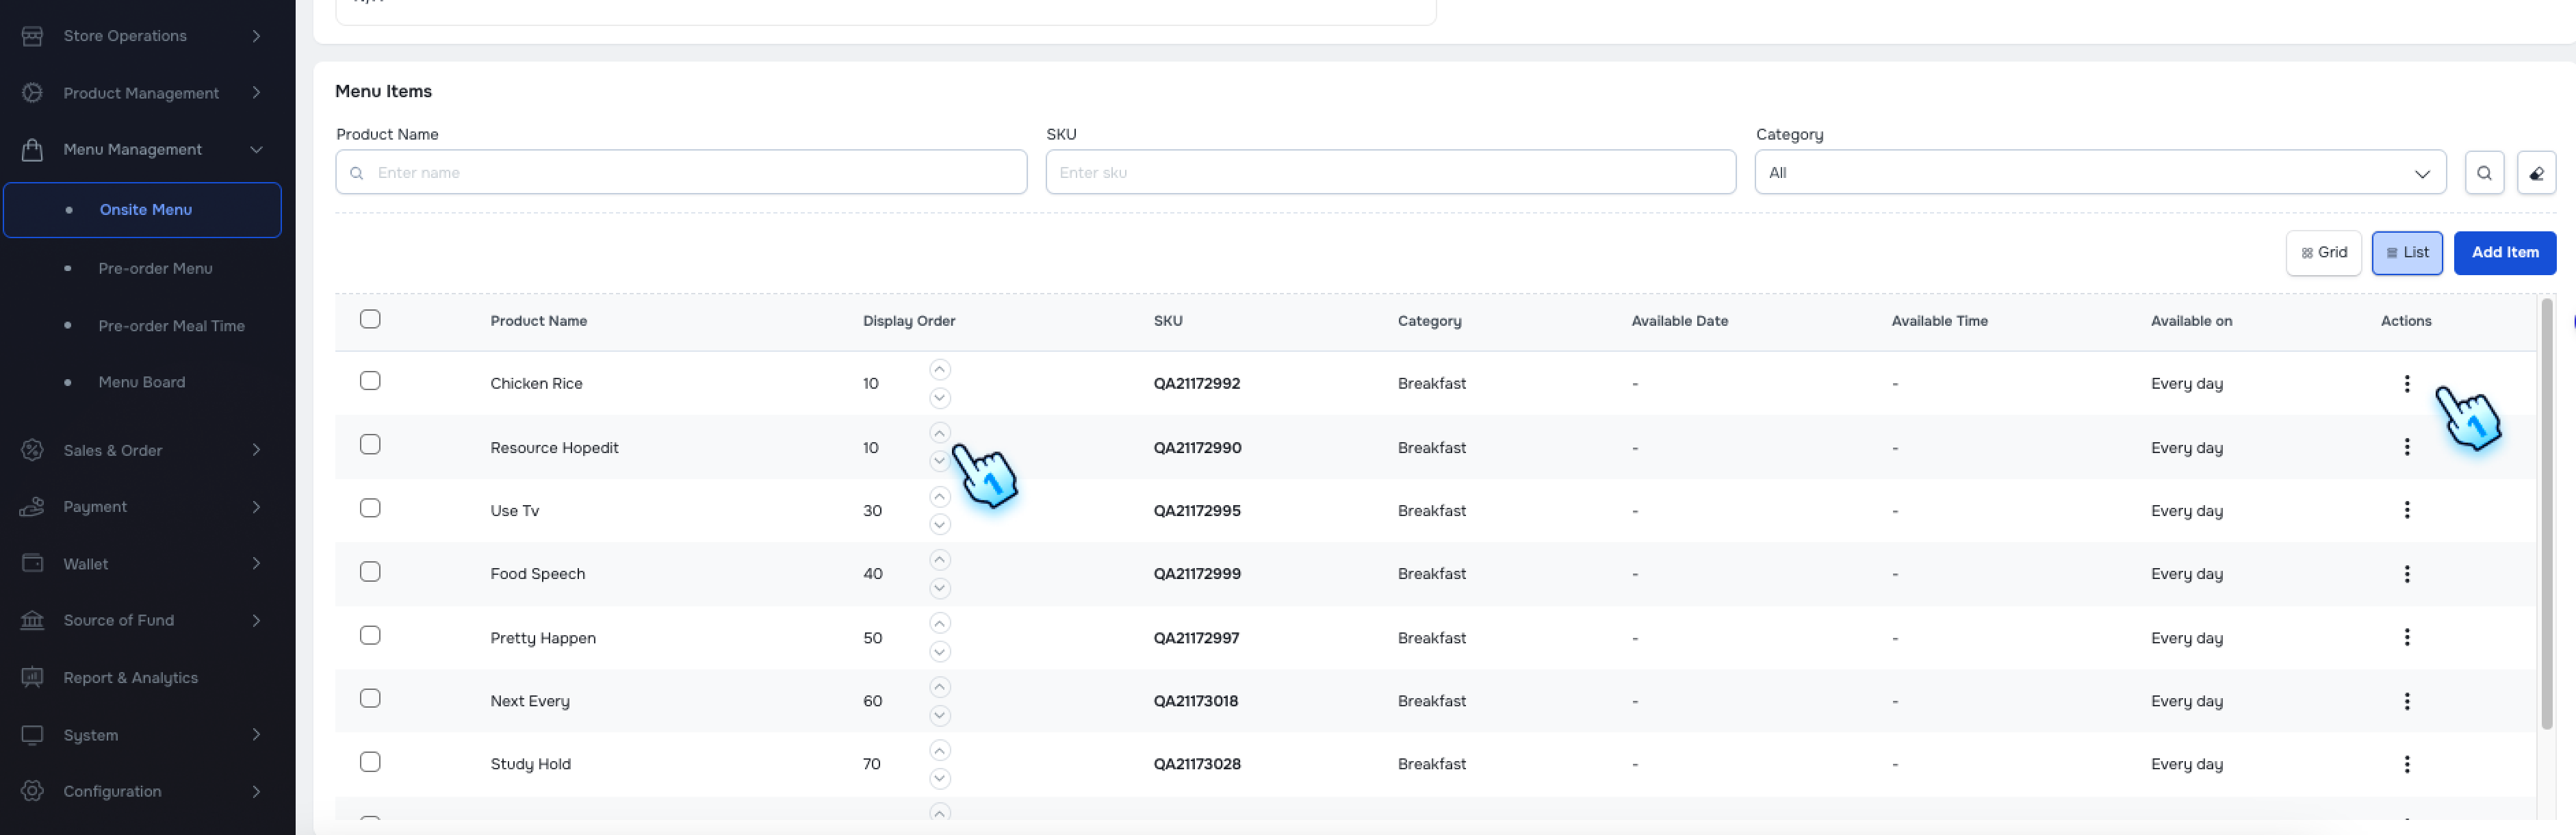
Rearrange Menu Items
- Rearrange by Button Rearrange Menu Item Order by button
- Use the left/right buttons in Grid view or the up/down buttons in List view.
- The menu items will be successfully reordered as specified.
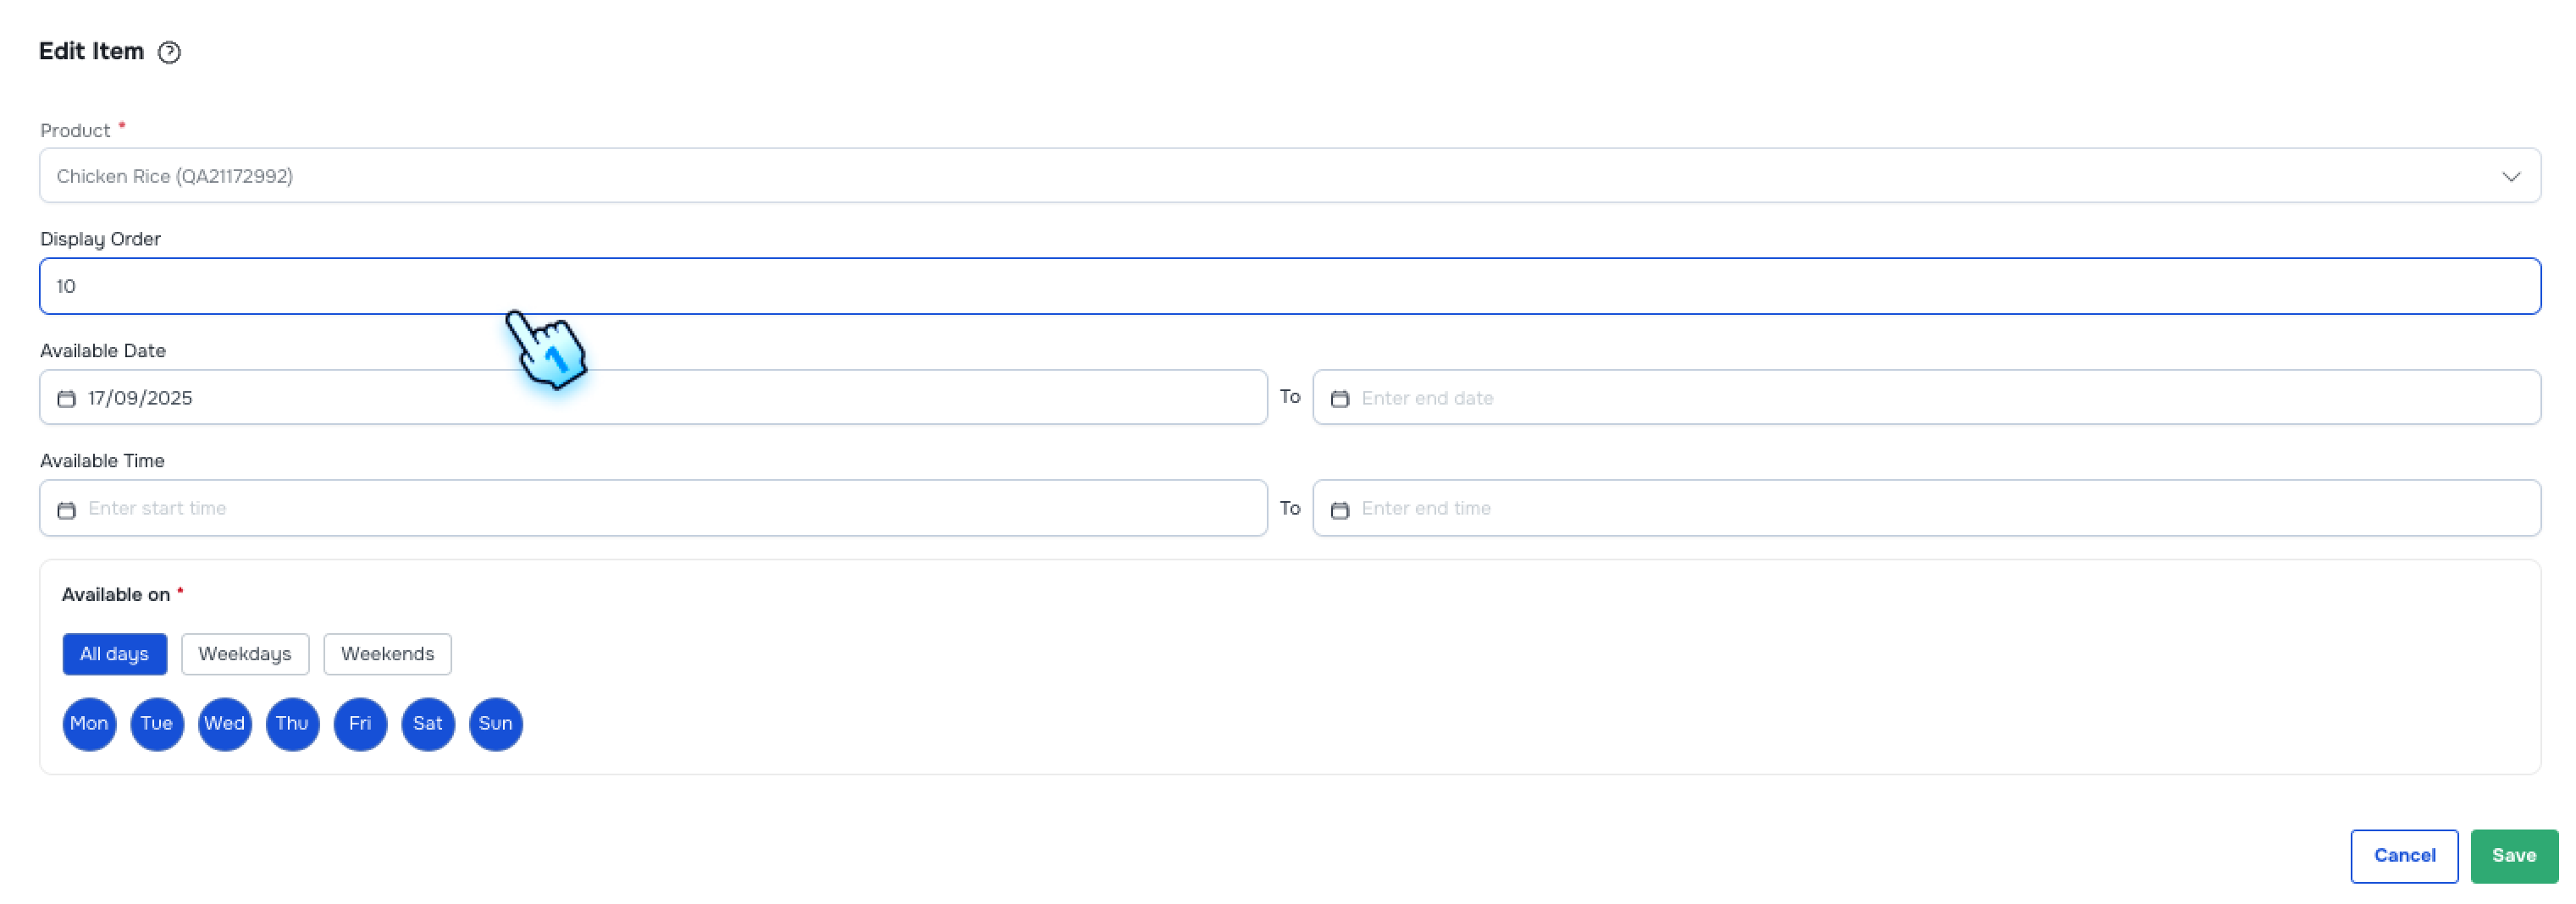
- Rearrange by Display Order
- Change the Display Order in the Edit form.
- The menu items will be successfully reordered as specified by the new display order number.
#
Conclusion
This document provides a comprehensive guide for managing menus within the Sales and Order module, including the creation, viewing, editing, and status management of menus.
#
Screen flow
#
Create a New Menu
#
View Menu List and Change Status
#
Rearrange Menu Items