#
Product List Management
#
Description
This document outlines the procedures for adding new products, importing products, viewing and editing product details, and managing product statuses within the system.
#
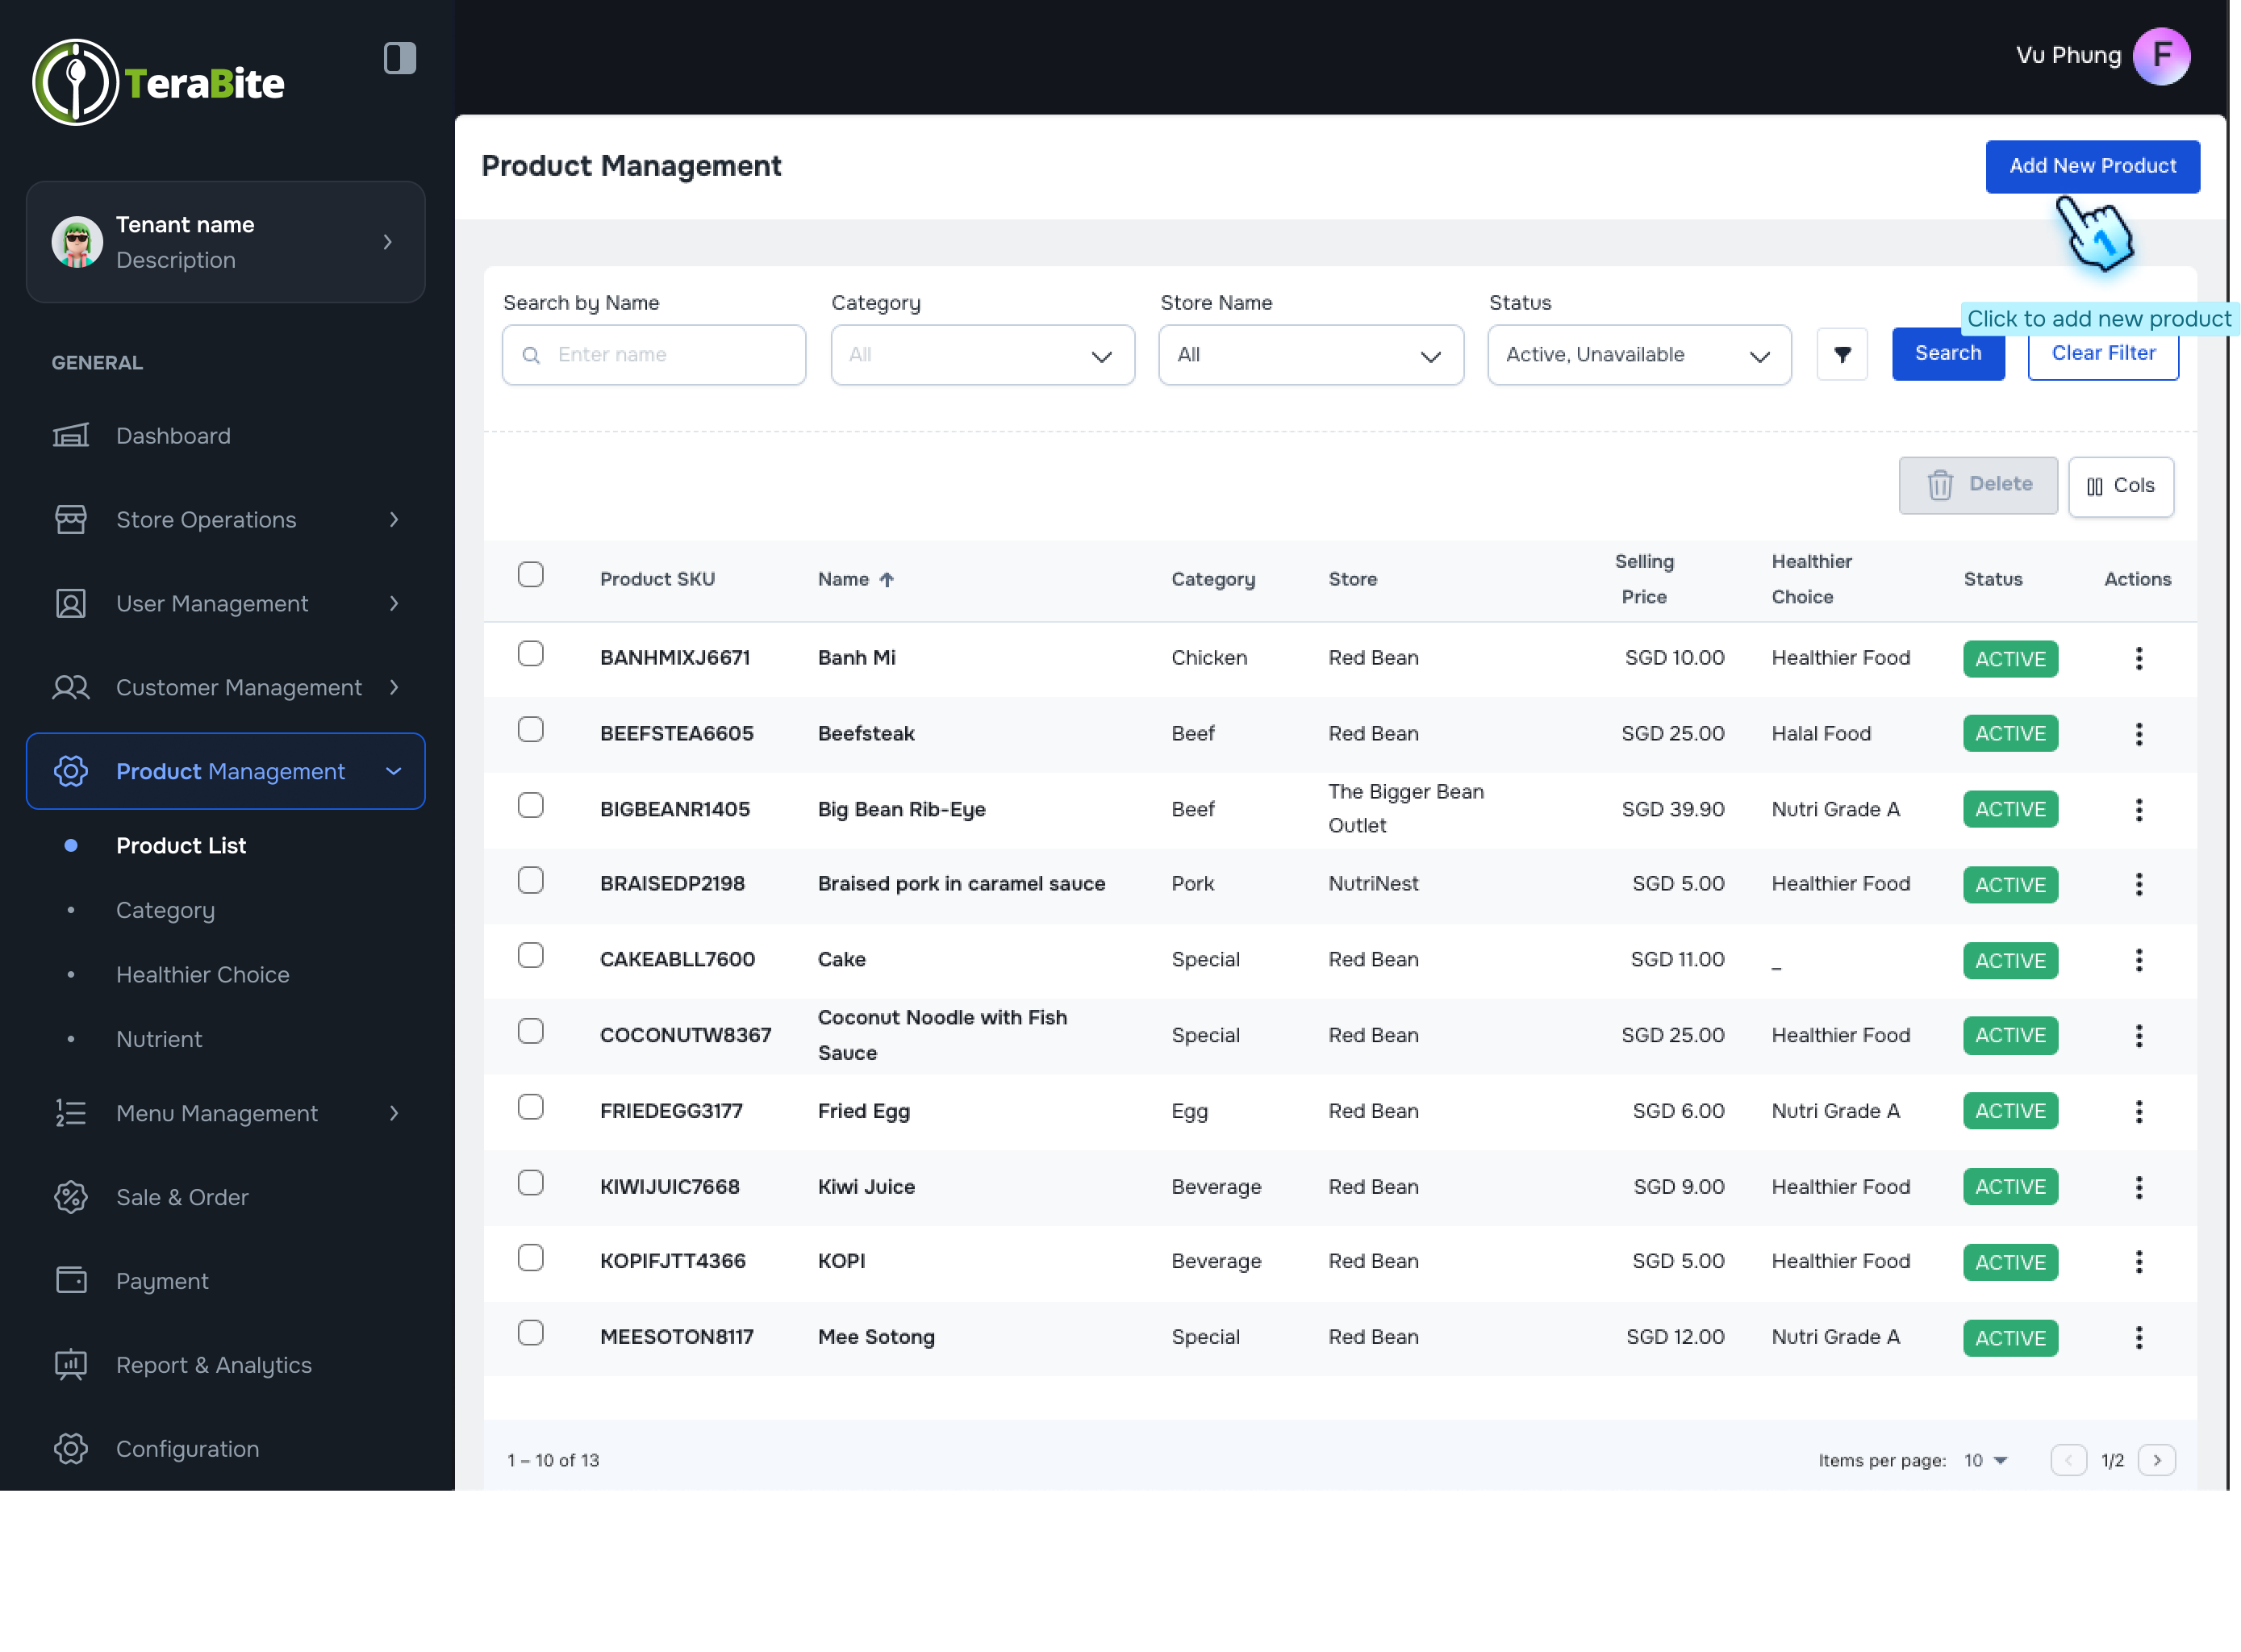
Add a New Product
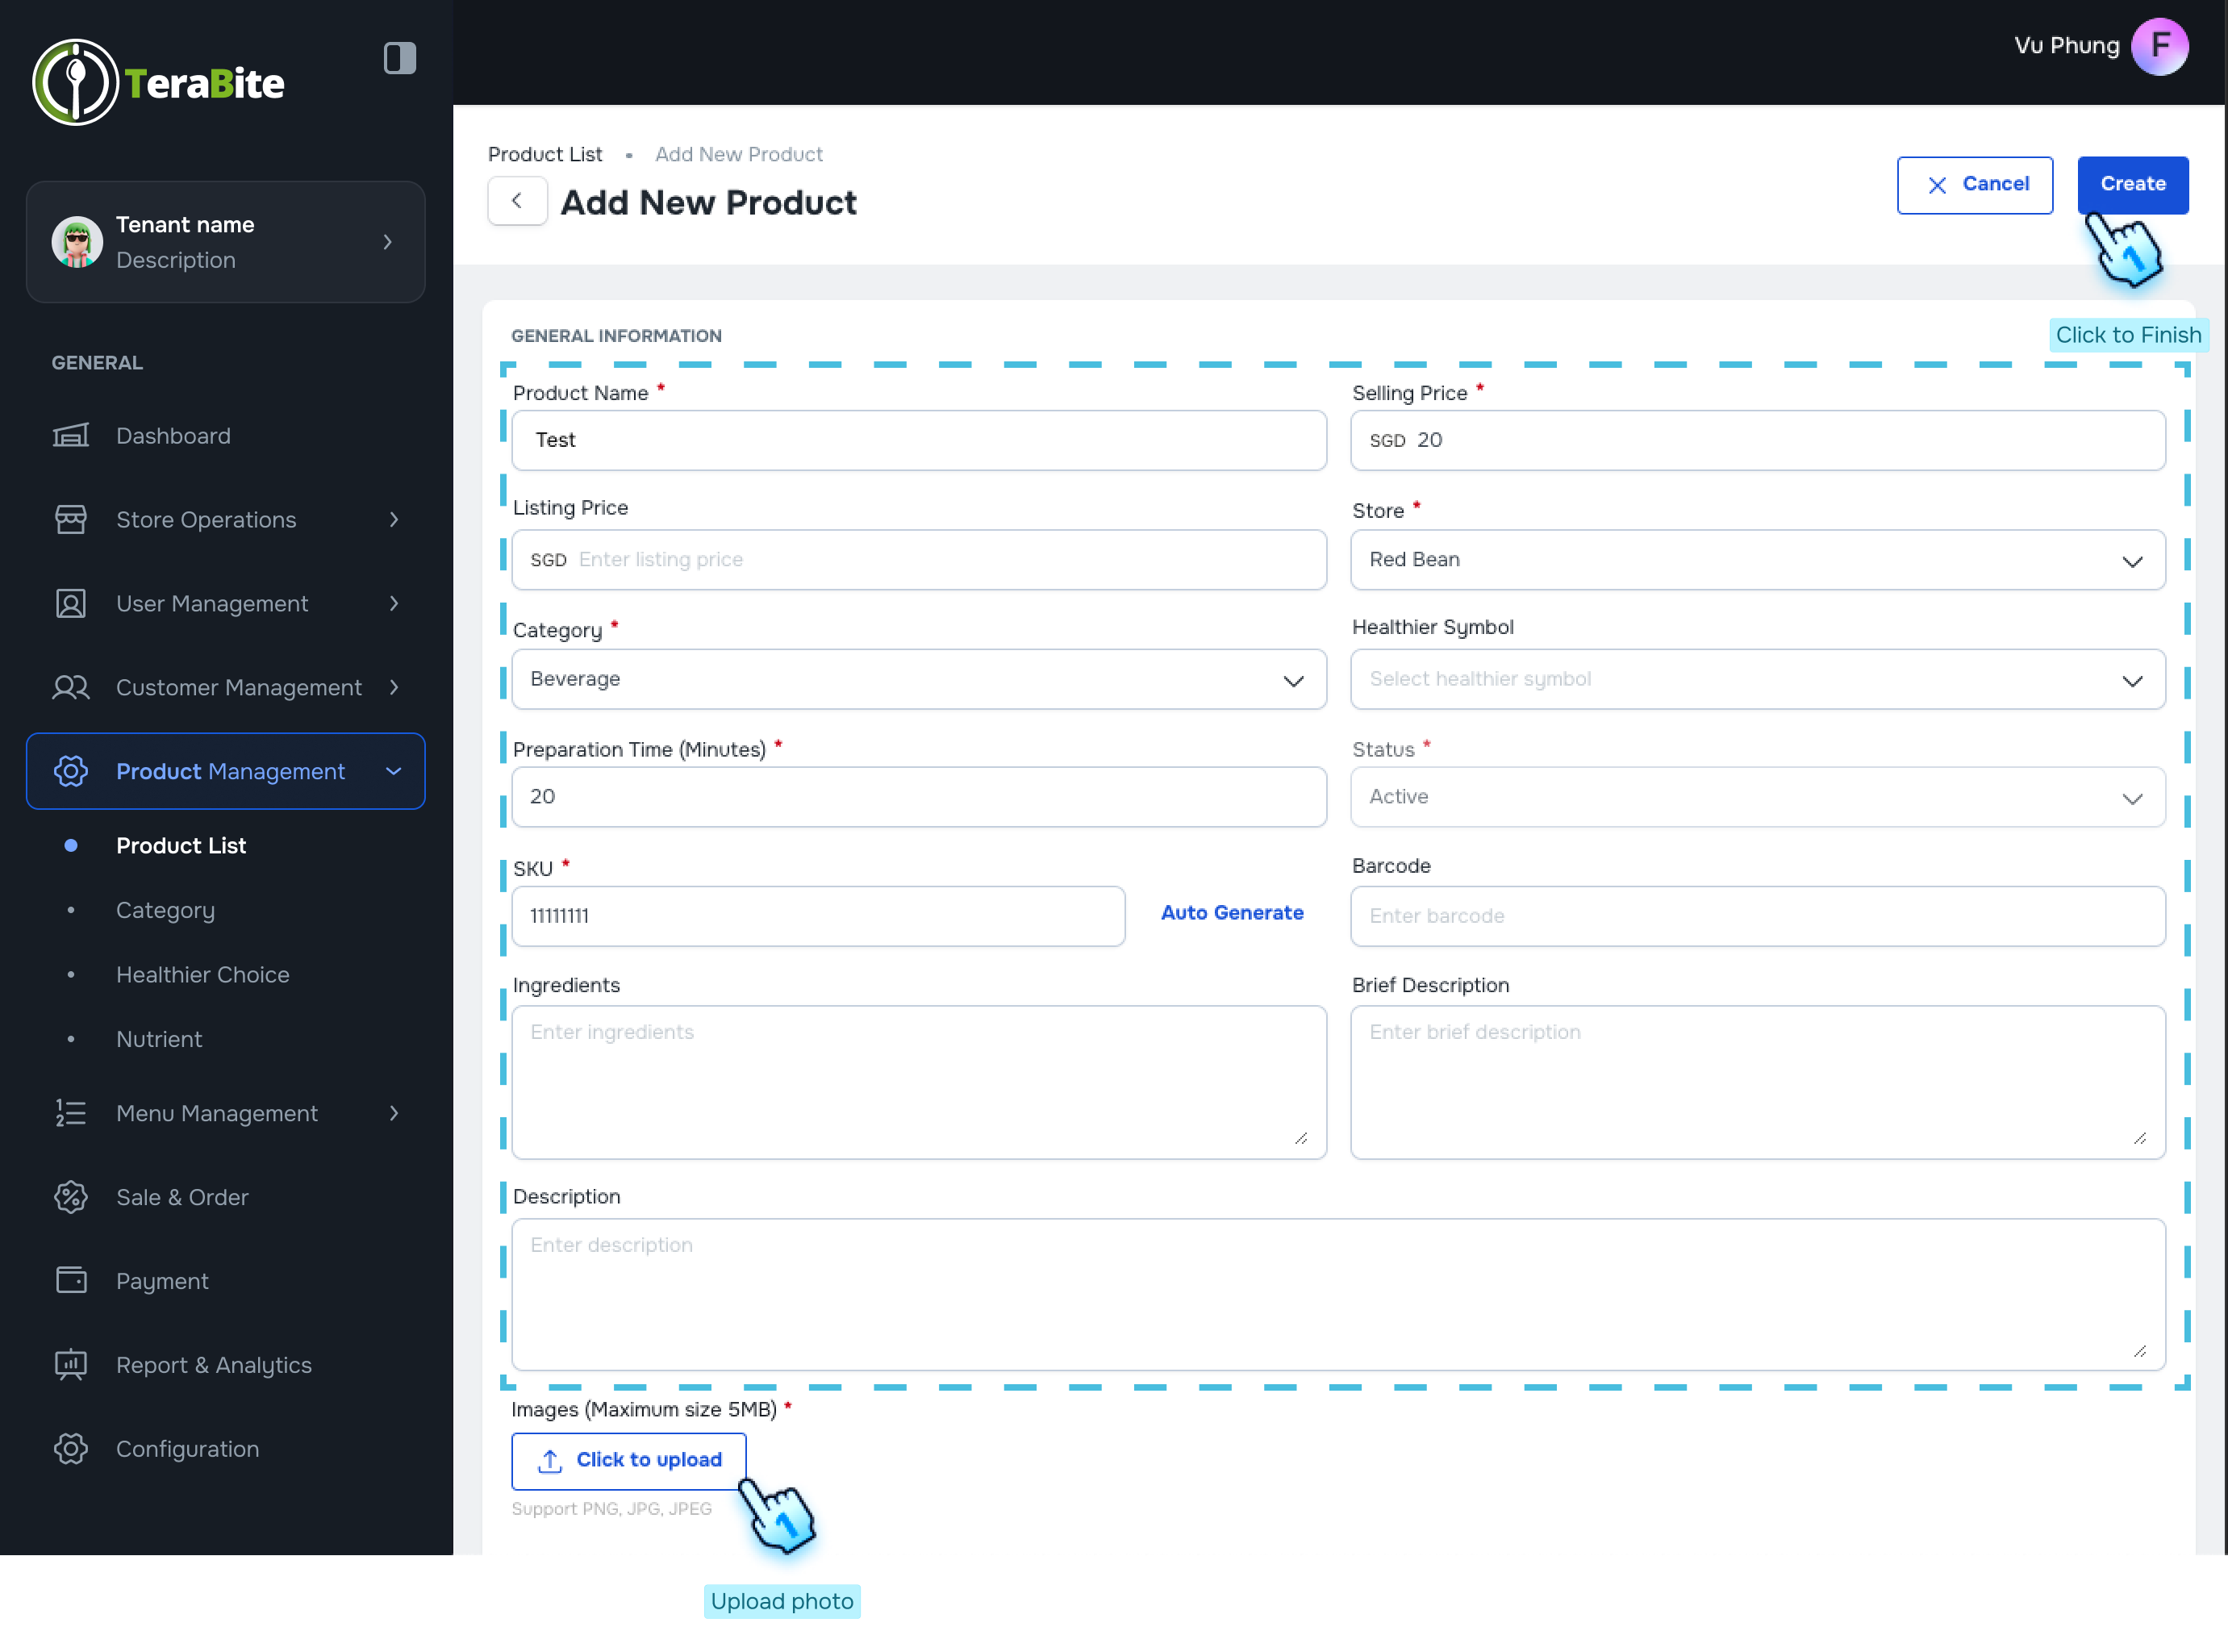
- Access Product List
- Navigate to the Product List section in Product Management module
- Initiate Product Addition
- Click on the "Add New Product" button.
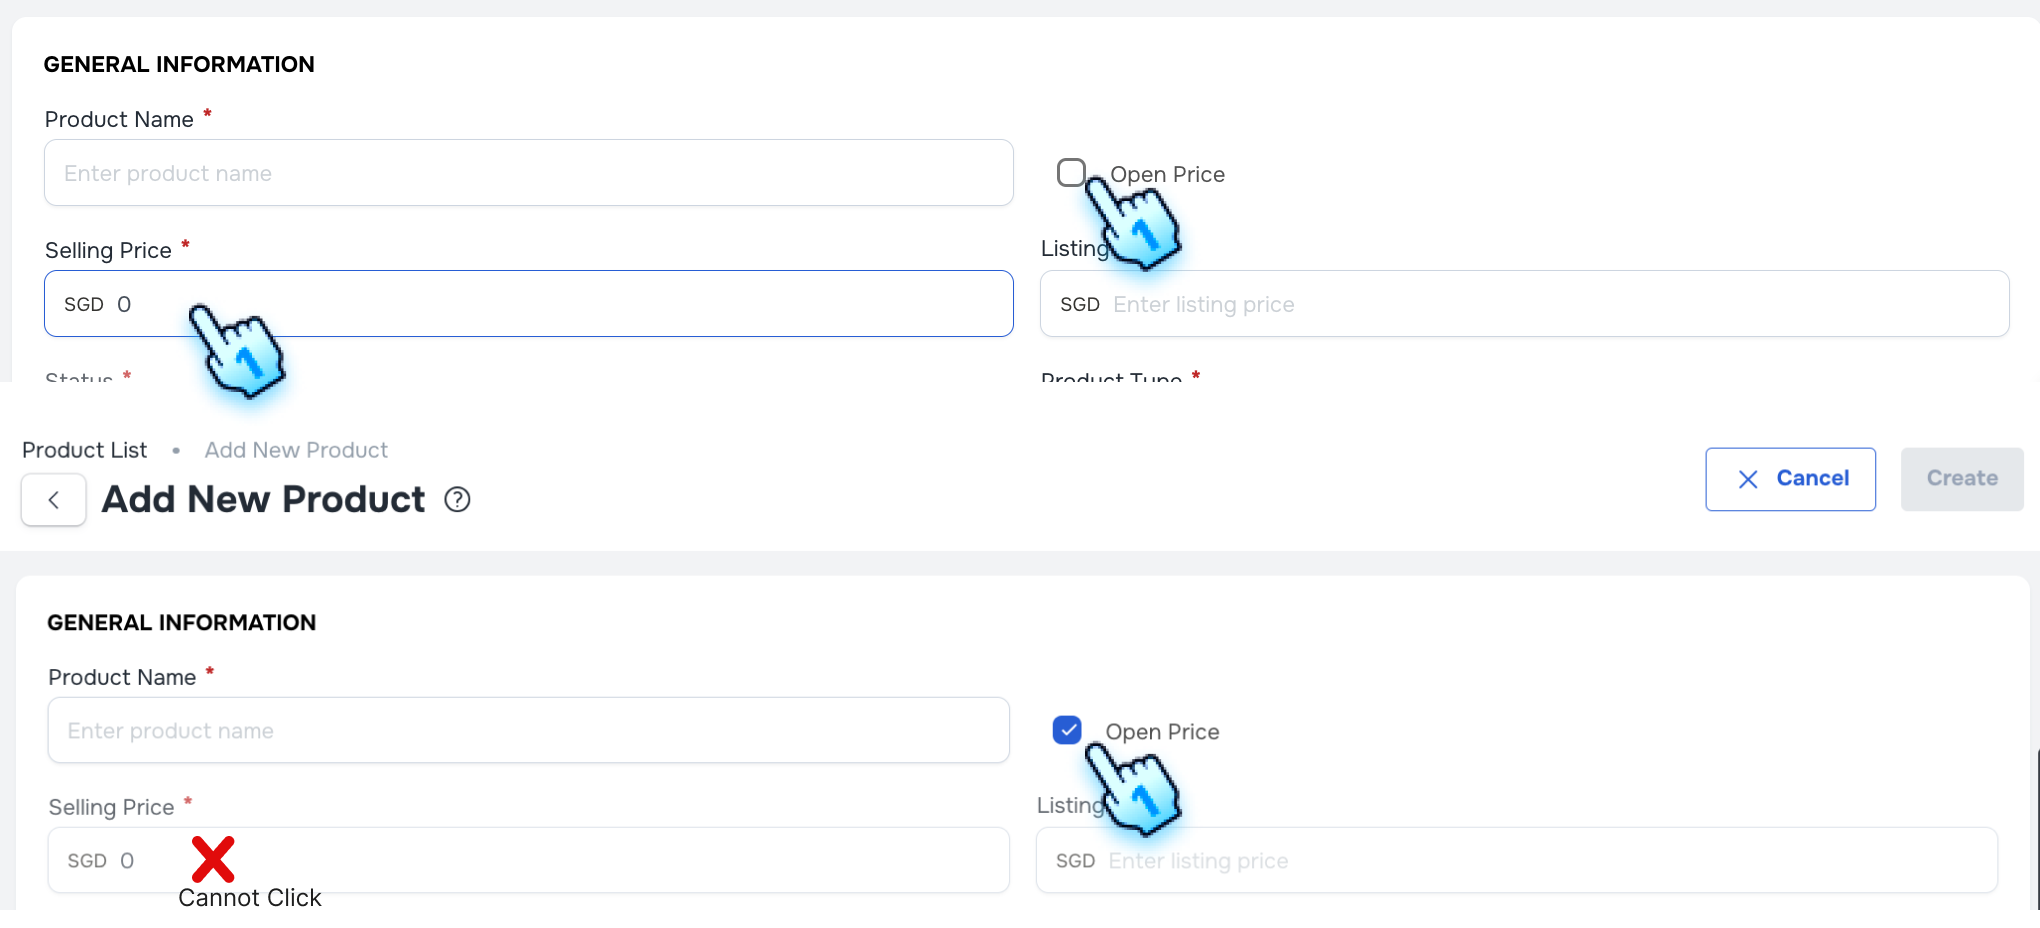
- Fill Required Information
- Complete all required fields in the product information form. Check the checkbox for tracking stock quantity if applicable.
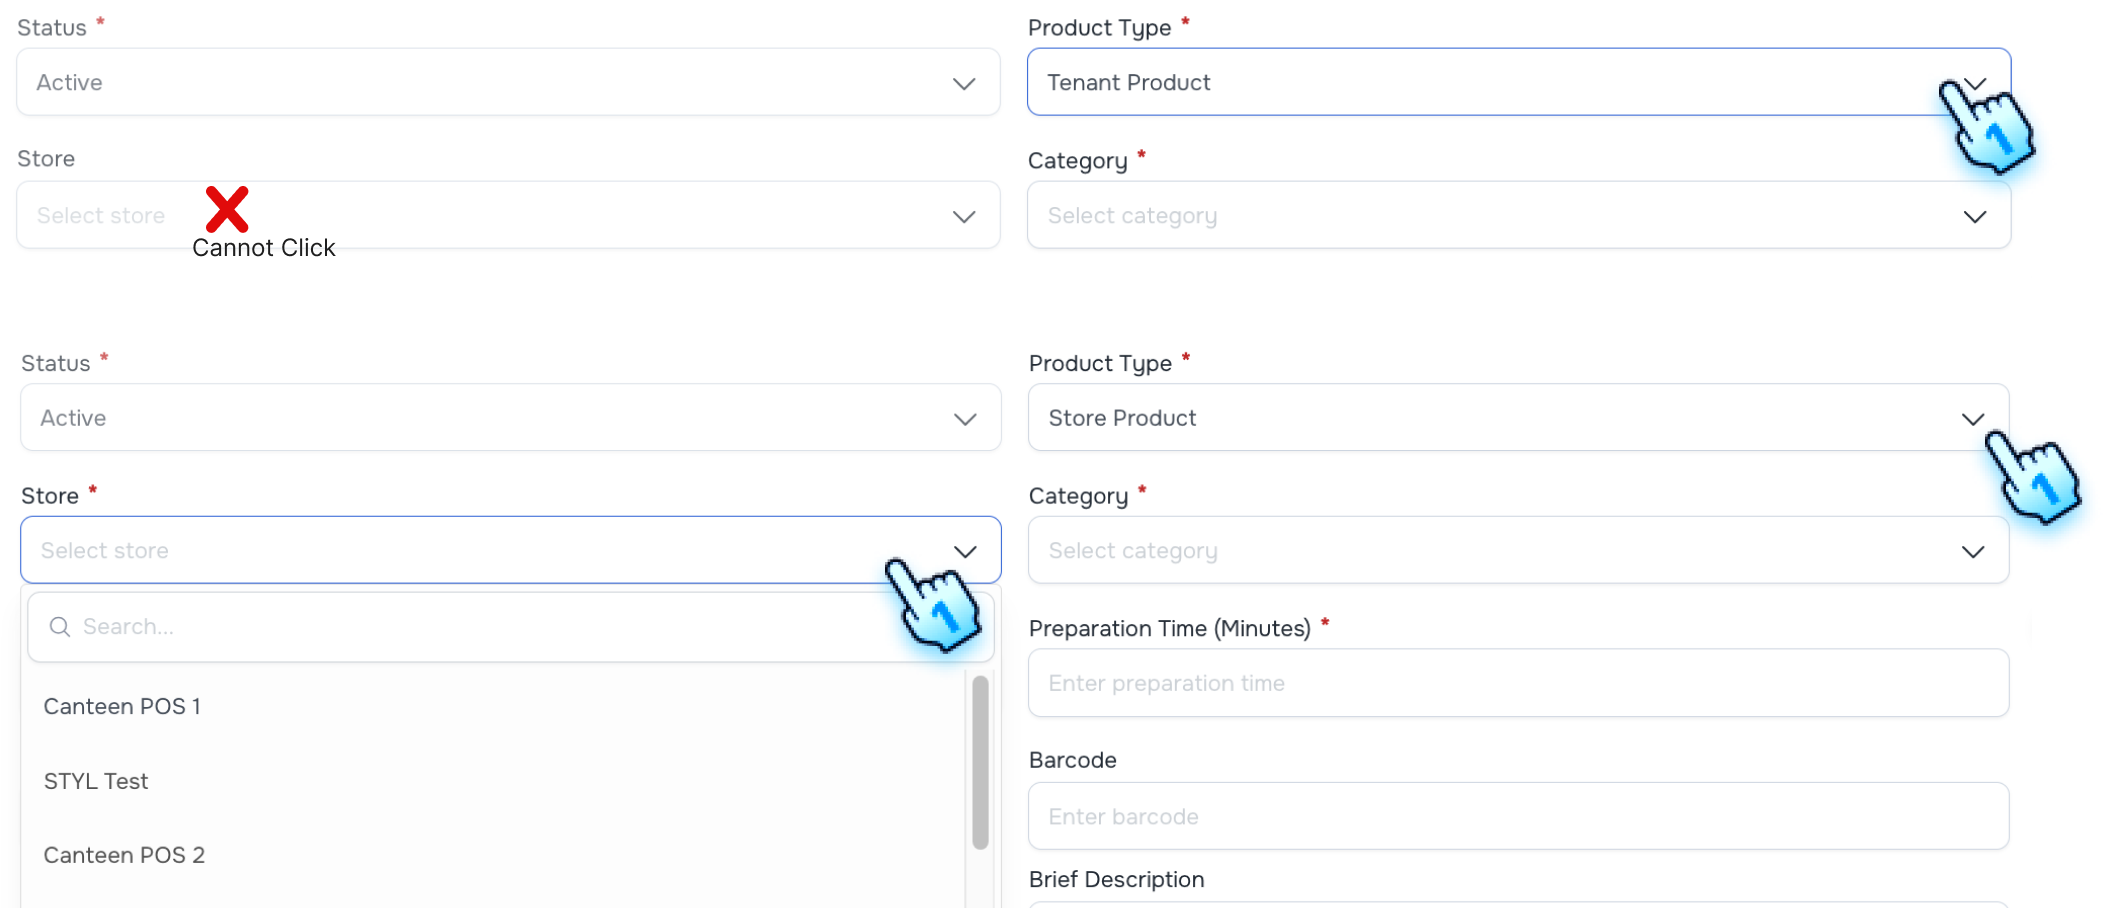
- Select Product Type
- Choose the product type, either "Tenant Product" or "Store Product".
- If "Tenant Product" is selected, the Store field will be disabled.
- If "Store Product" is selected, the Store field will be enabled.
- Select Category
- Choose the appropriate Category/ Sub category for the product.
- Submit Product Information
- Click the "Create" button to finalize the addition of the new product.
#
Edit Product and Edit Product Options
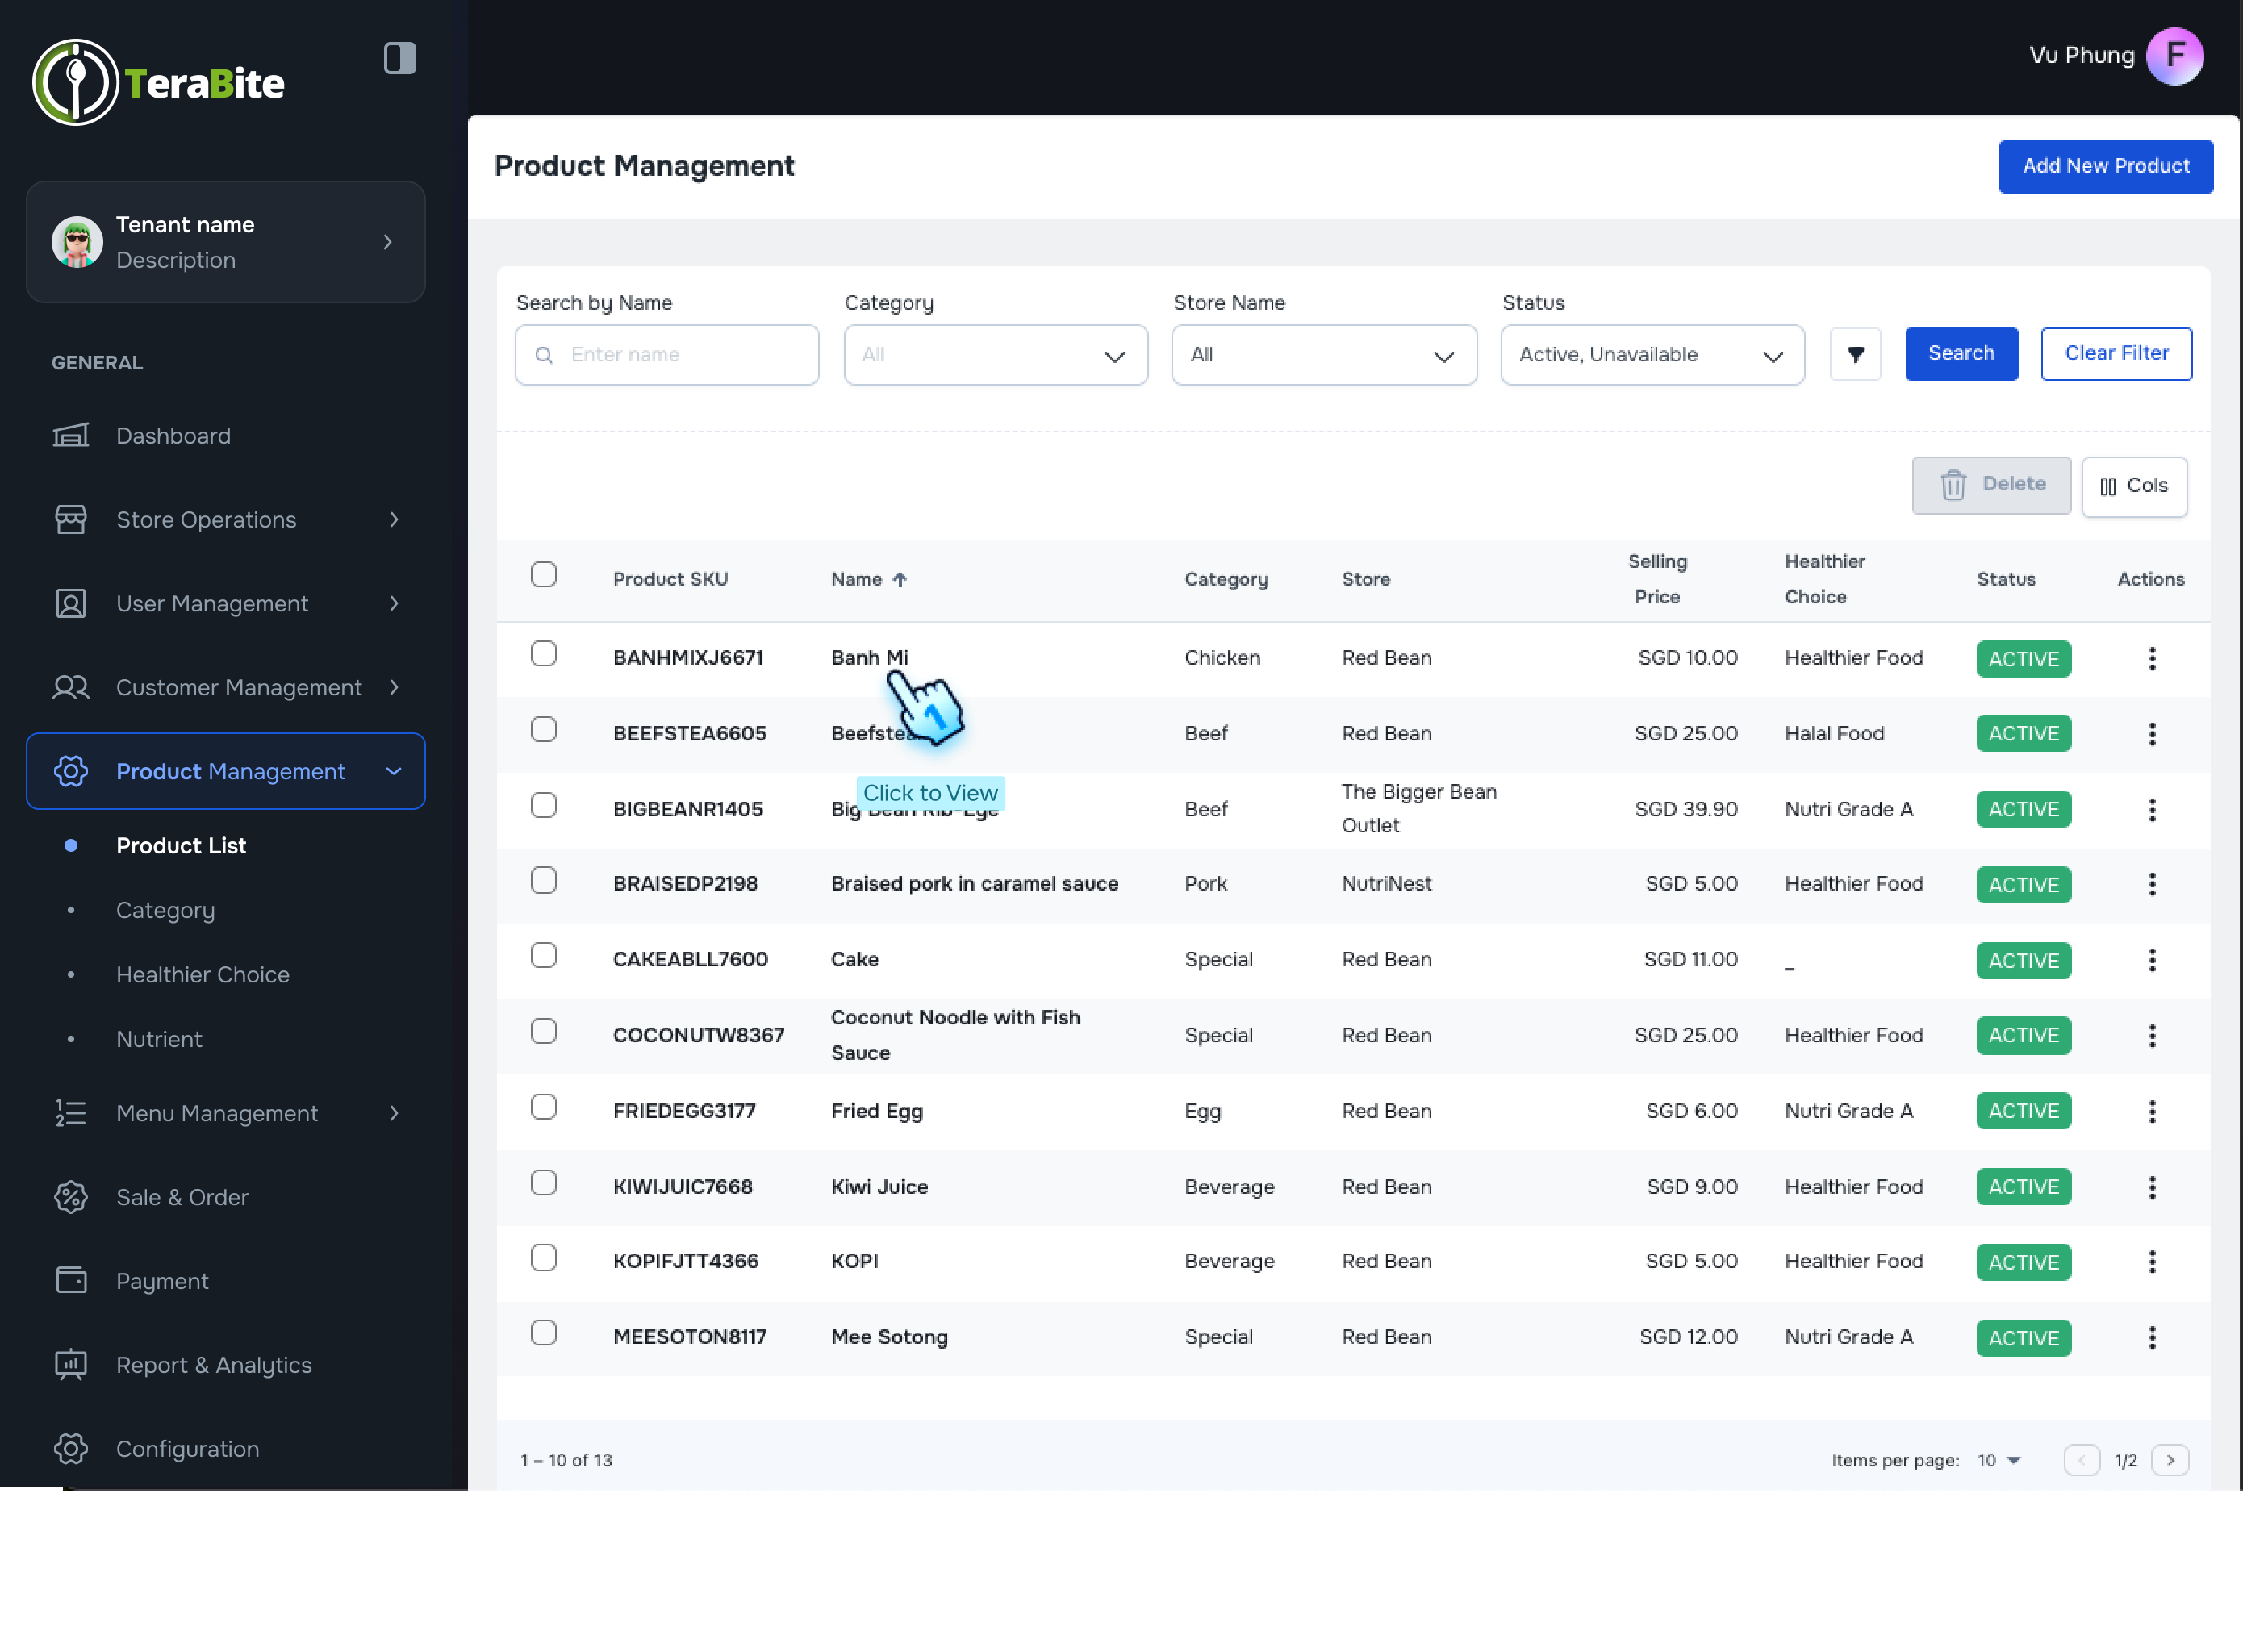
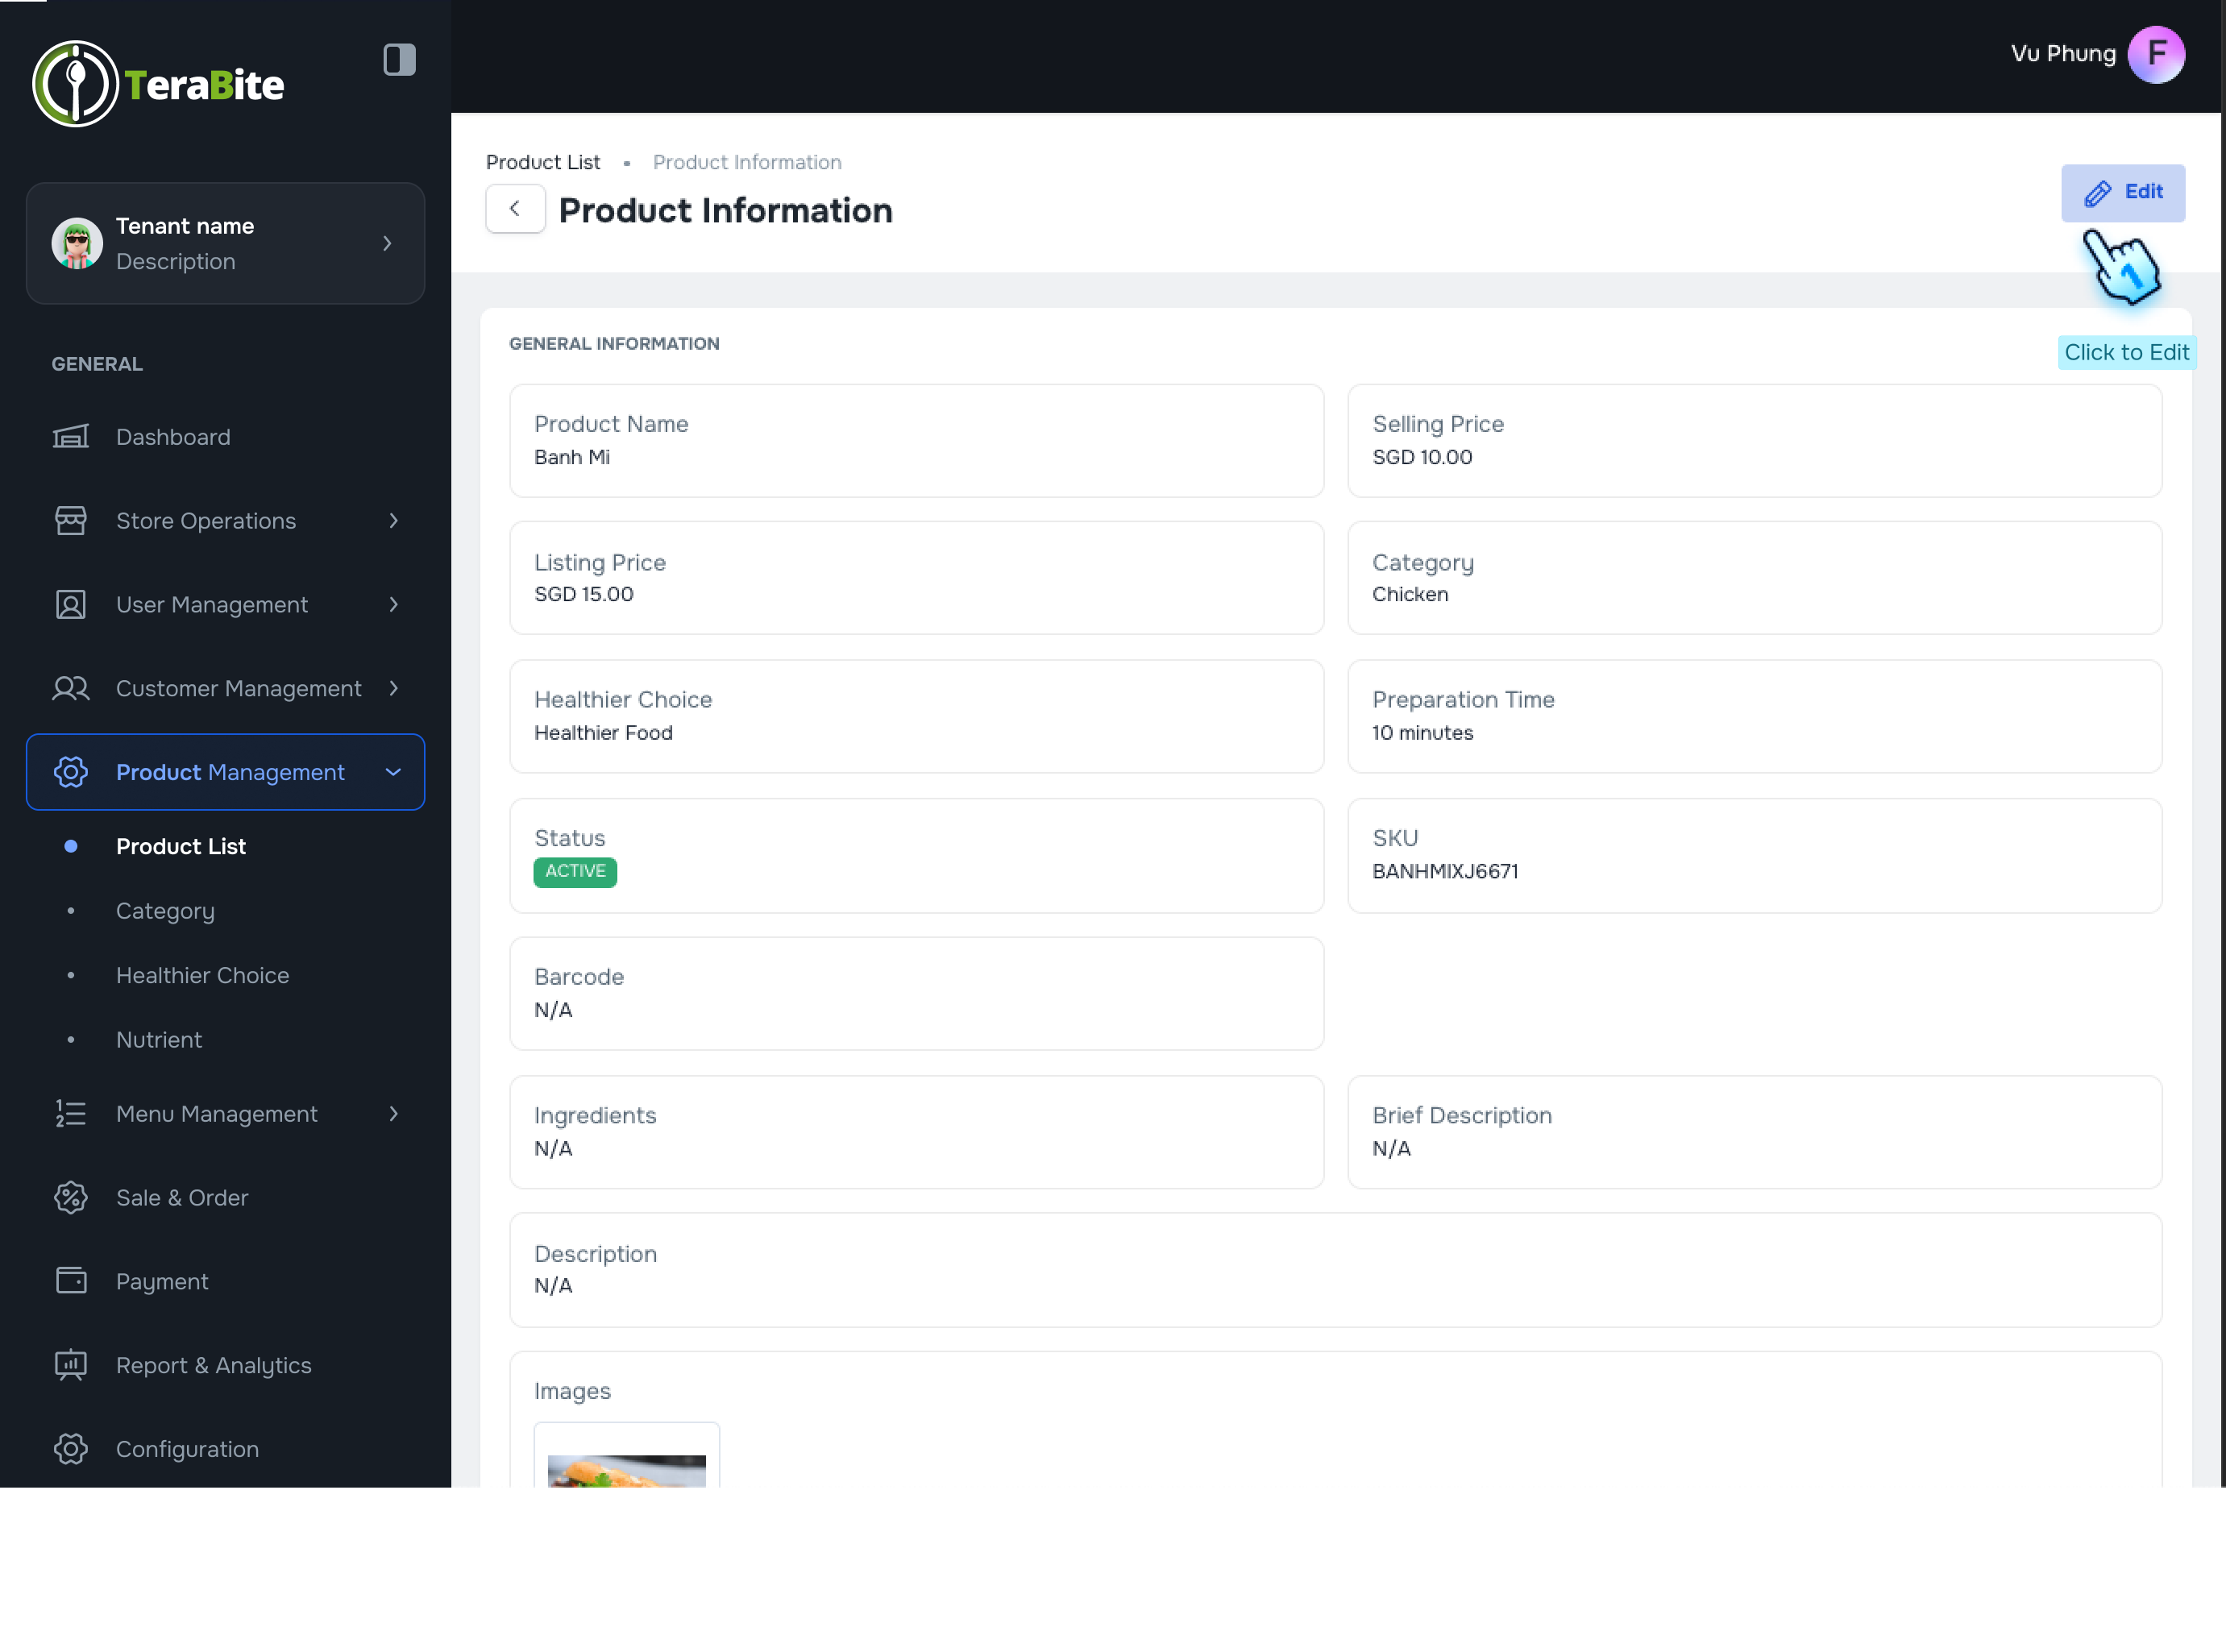
- Access Edit Product
- Click on Each row to view its details.
- Click on Edit button to access Edit Product page
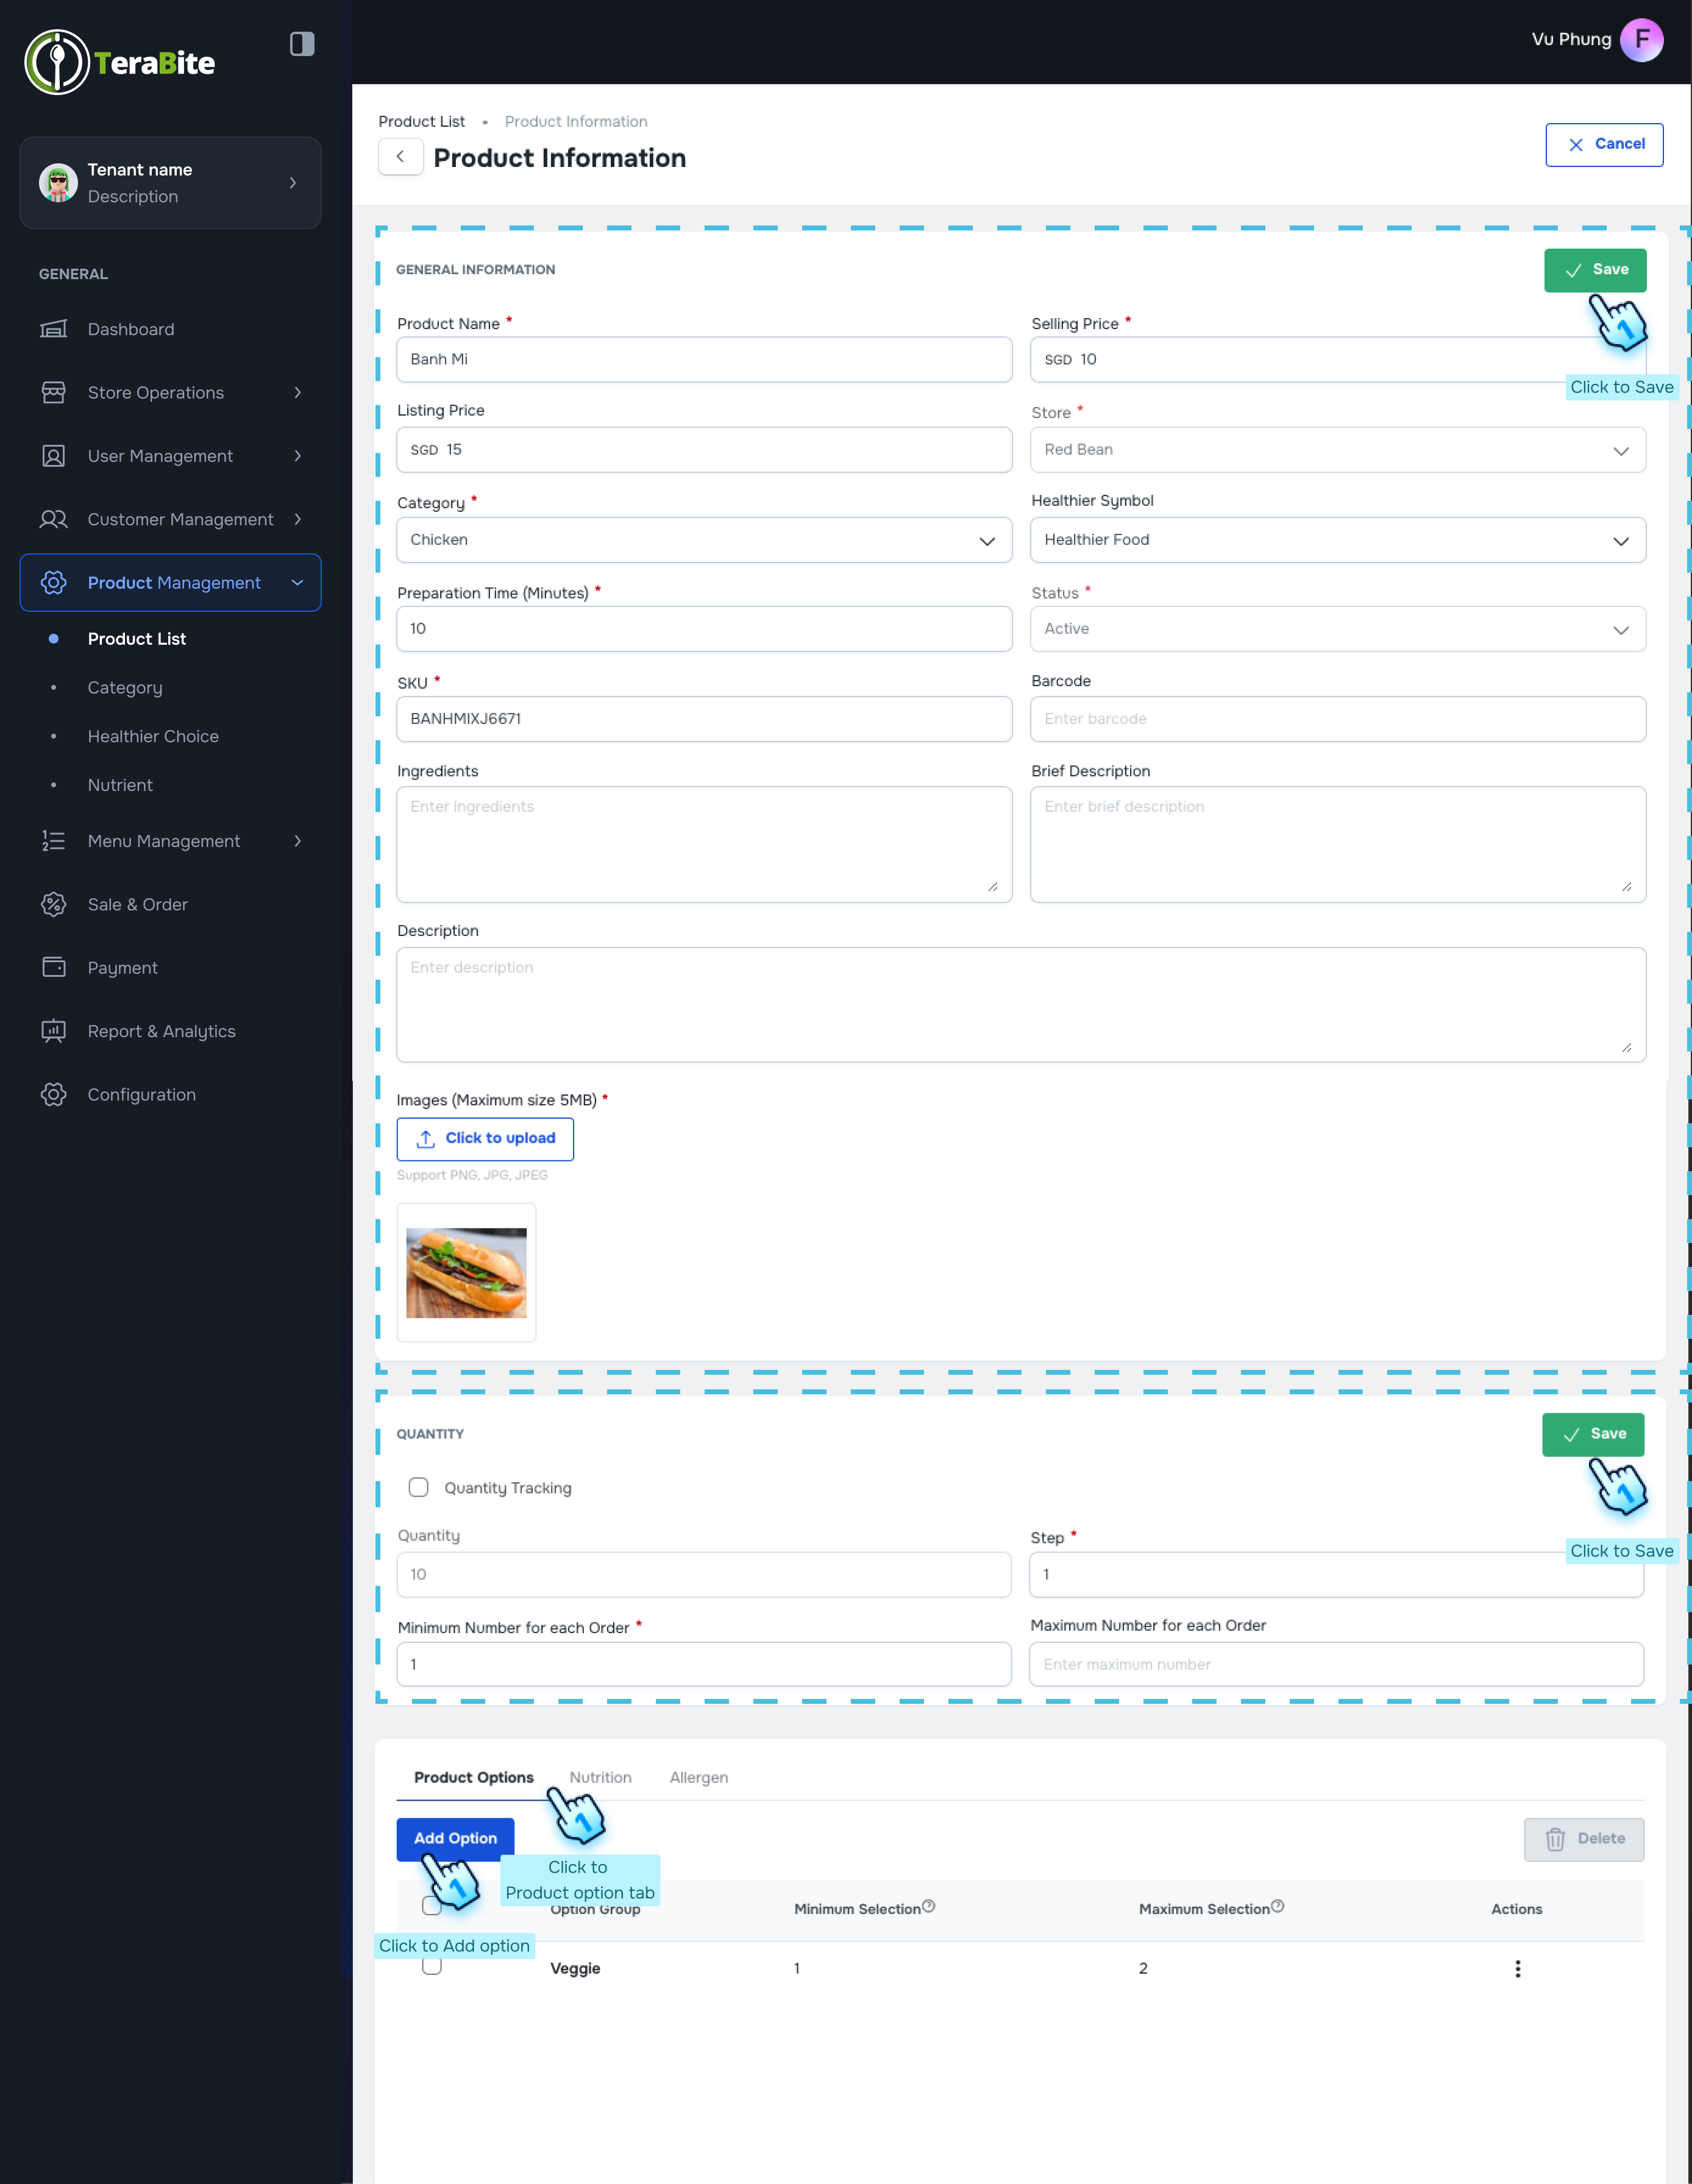
- Select product option
- The Product Options tab will be displayed by default.
- Add New Option
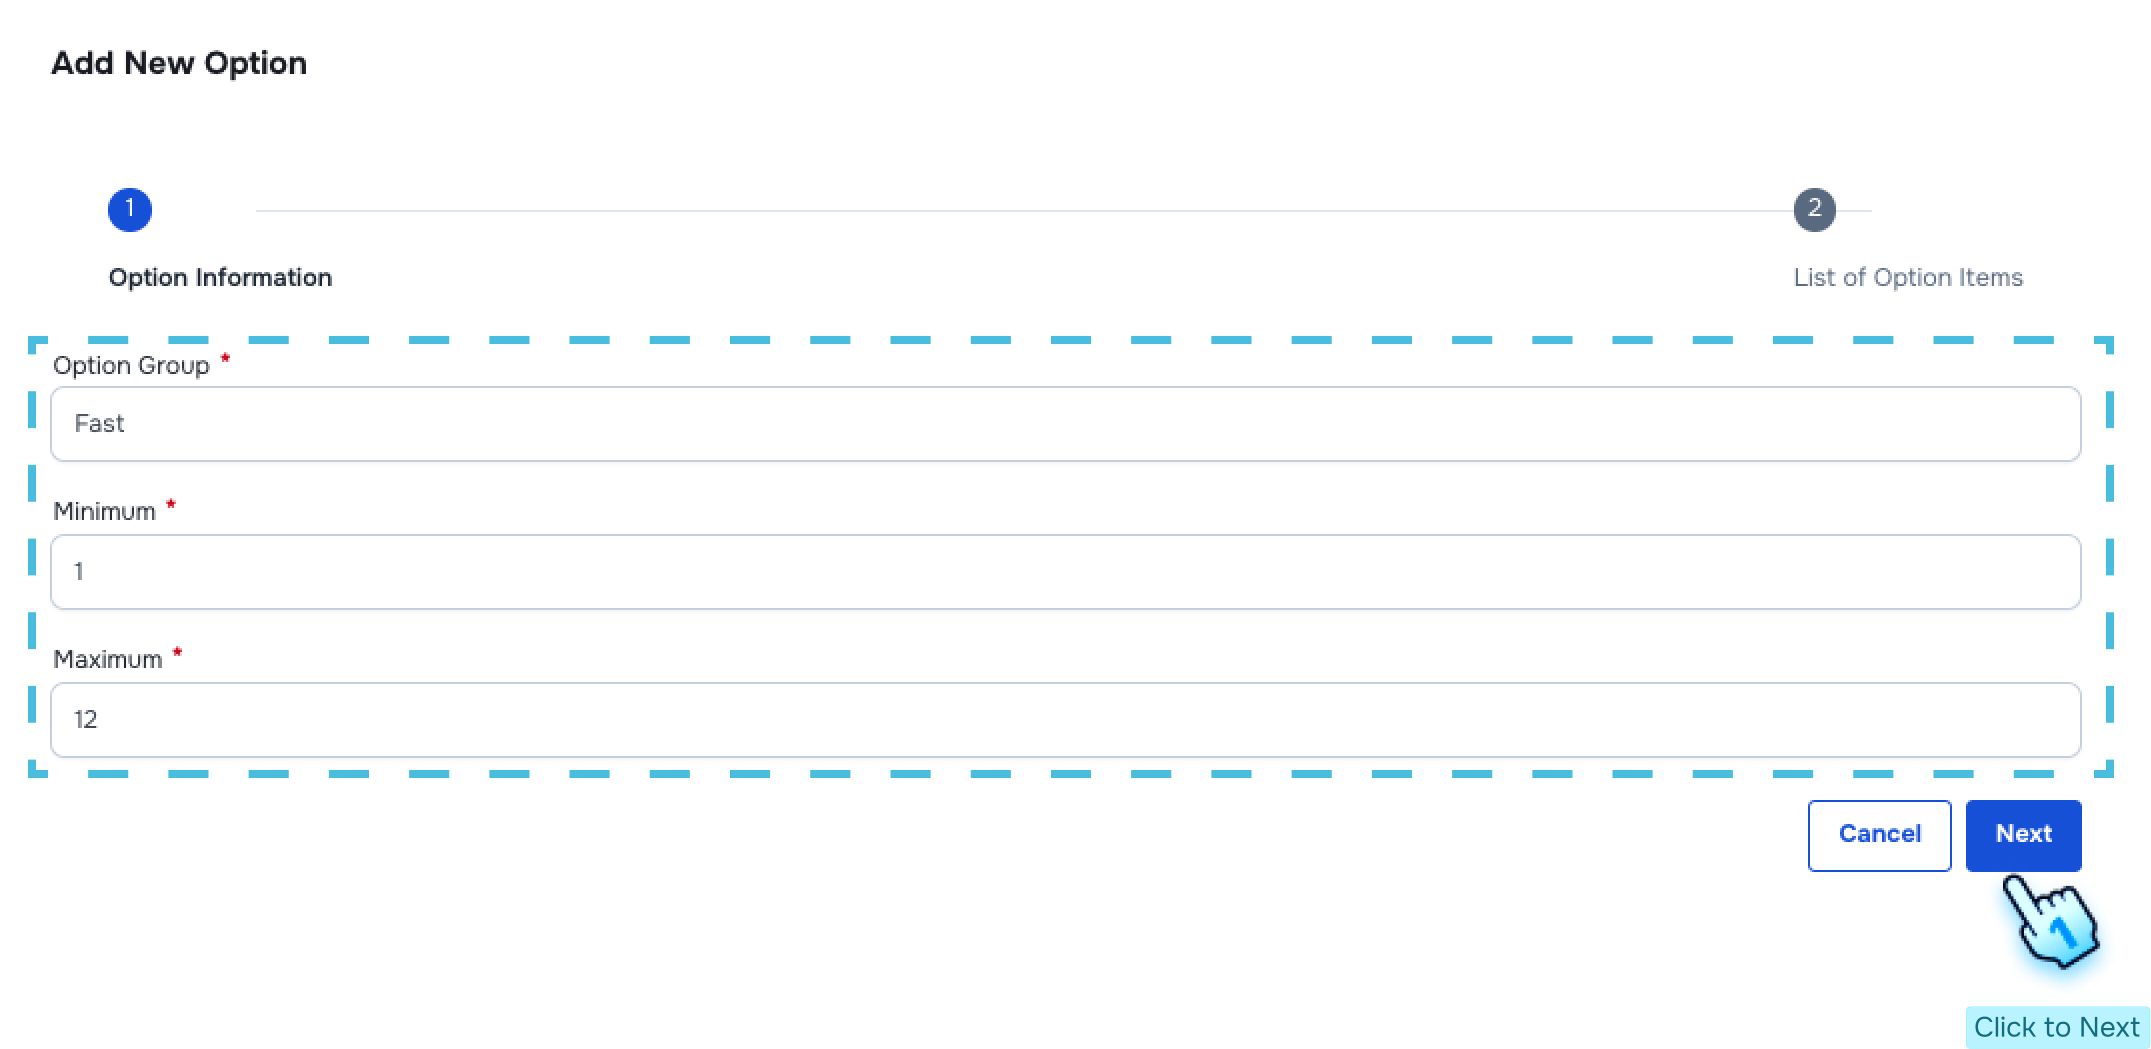
- Click on the "Add Option" button in the bottom table to create a new option:
- Enter the Option Group Name, Minimum Quantity, and Maximum Quantity.
- Click "Next" to add option items in the option group.
- Enter the Option Item Name with any additional price.
- Click the "Create" button to finish.
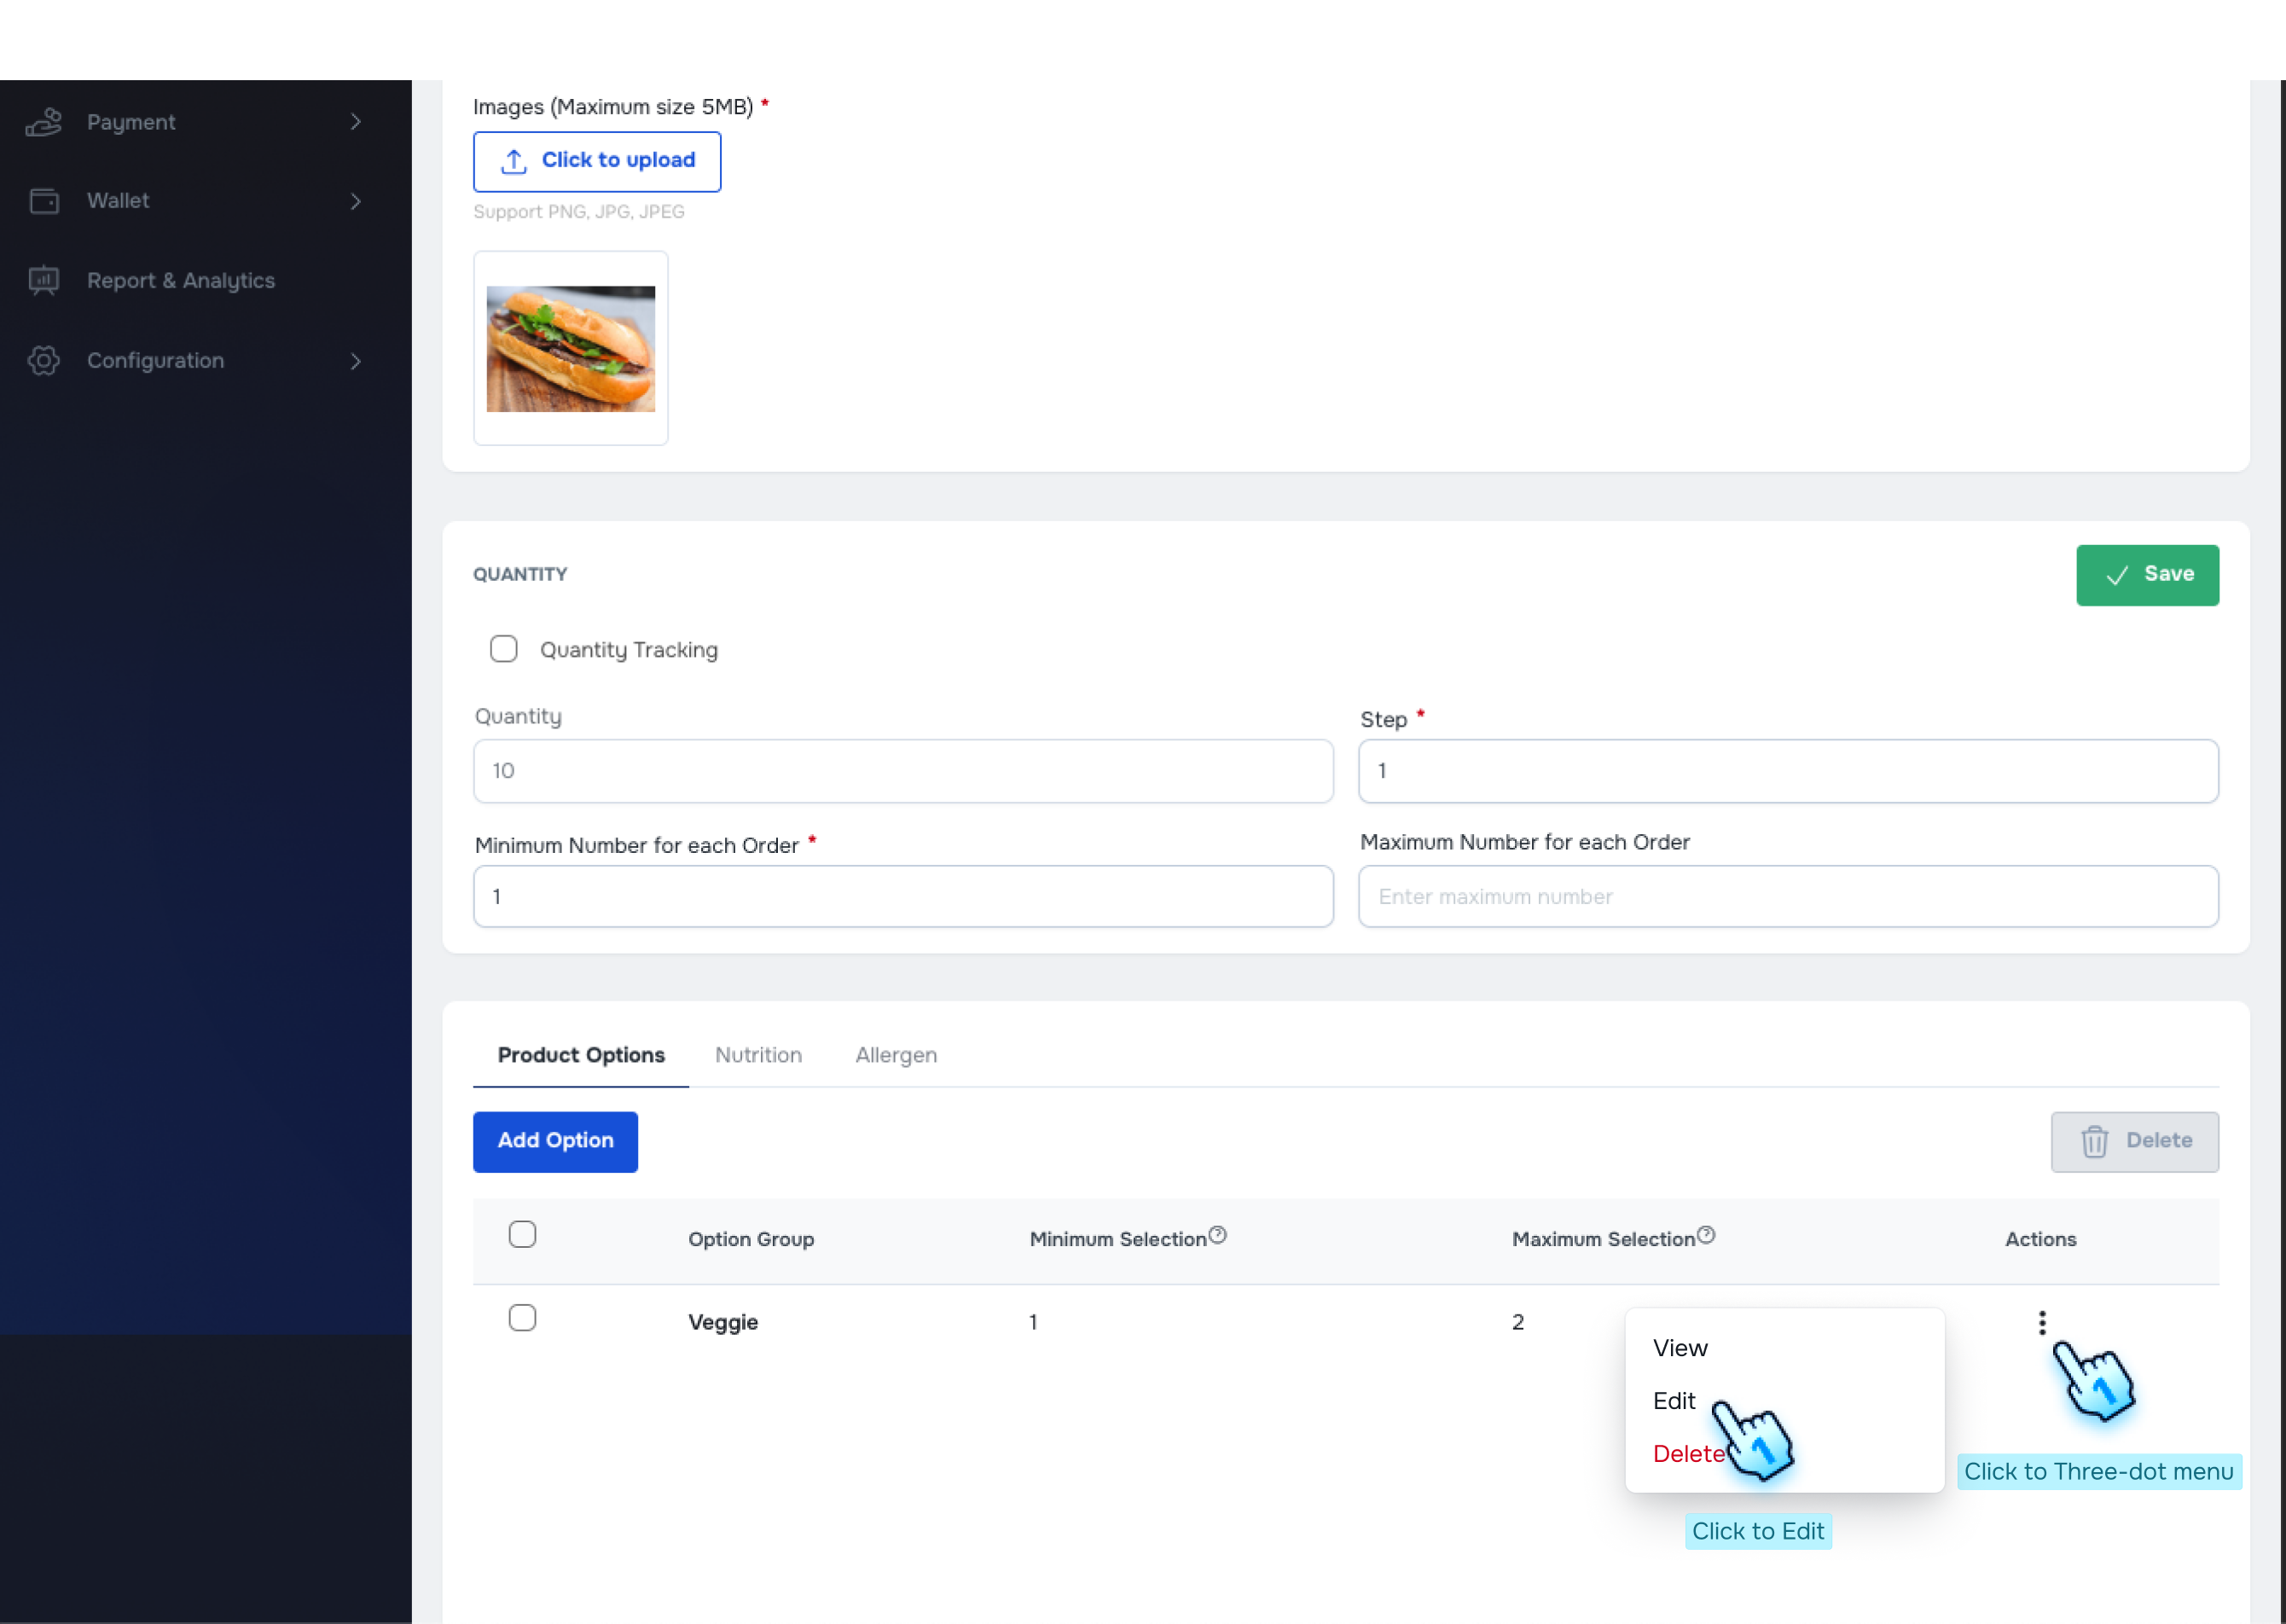
- Edit Product Options
- Click the "Edit" button.
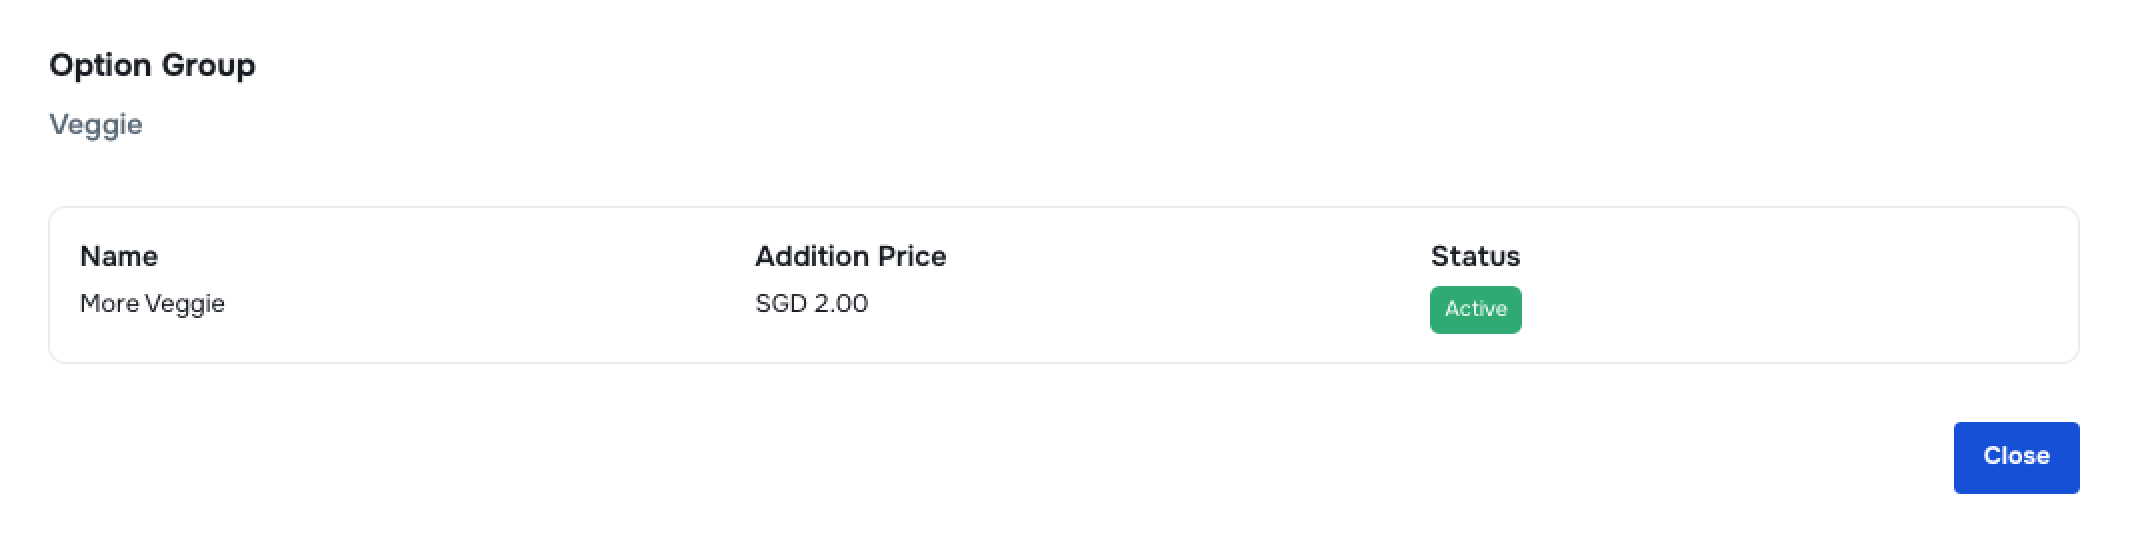
- Review Current Option Groups
- Click on the option group name or View button in the three-dot menu to review the current option group in the bottom table.
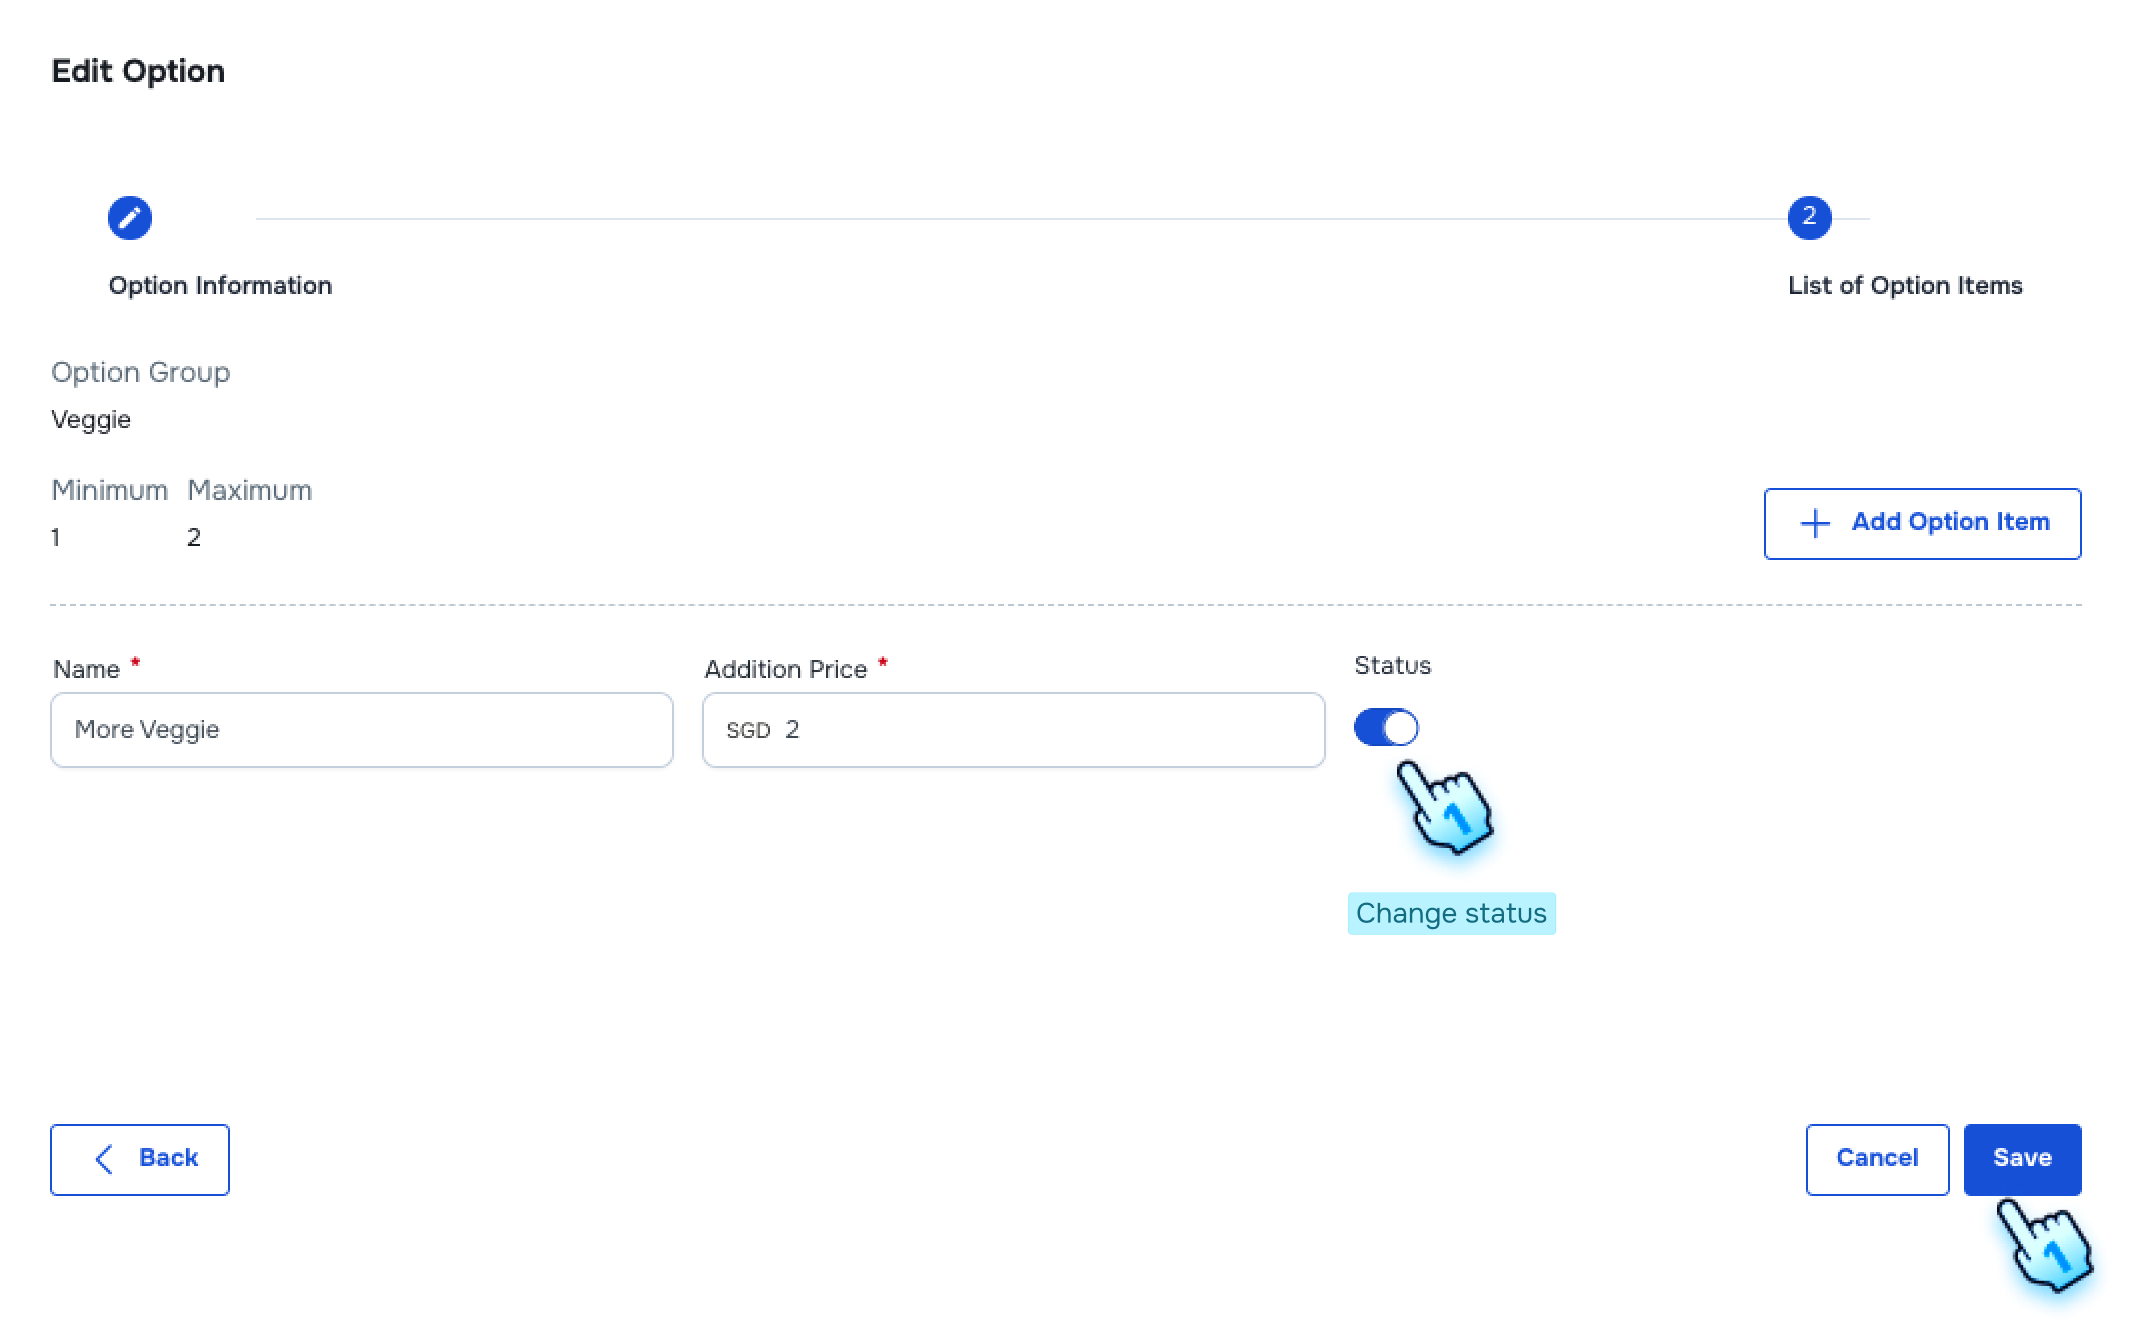
- Edit Existing Option Items
- Click the "Edit" button in the three-dot menu of the option group to edit current option items:
- Edit information in the first page.
- Click the toggle to turn an option item on or off in the second page.
- Click to Delete option items if necessary.
- Click "Add Option Items" if necessary and enter the option item name with additional price.
- Click the "Save" button to finish.
#
Edit Product and Edit Nutrition Information
- Access Edit Product
- Click on Each row to view its details.
- Click on Edit button to access Edit Product page
- Navigate to Nutrition Tab
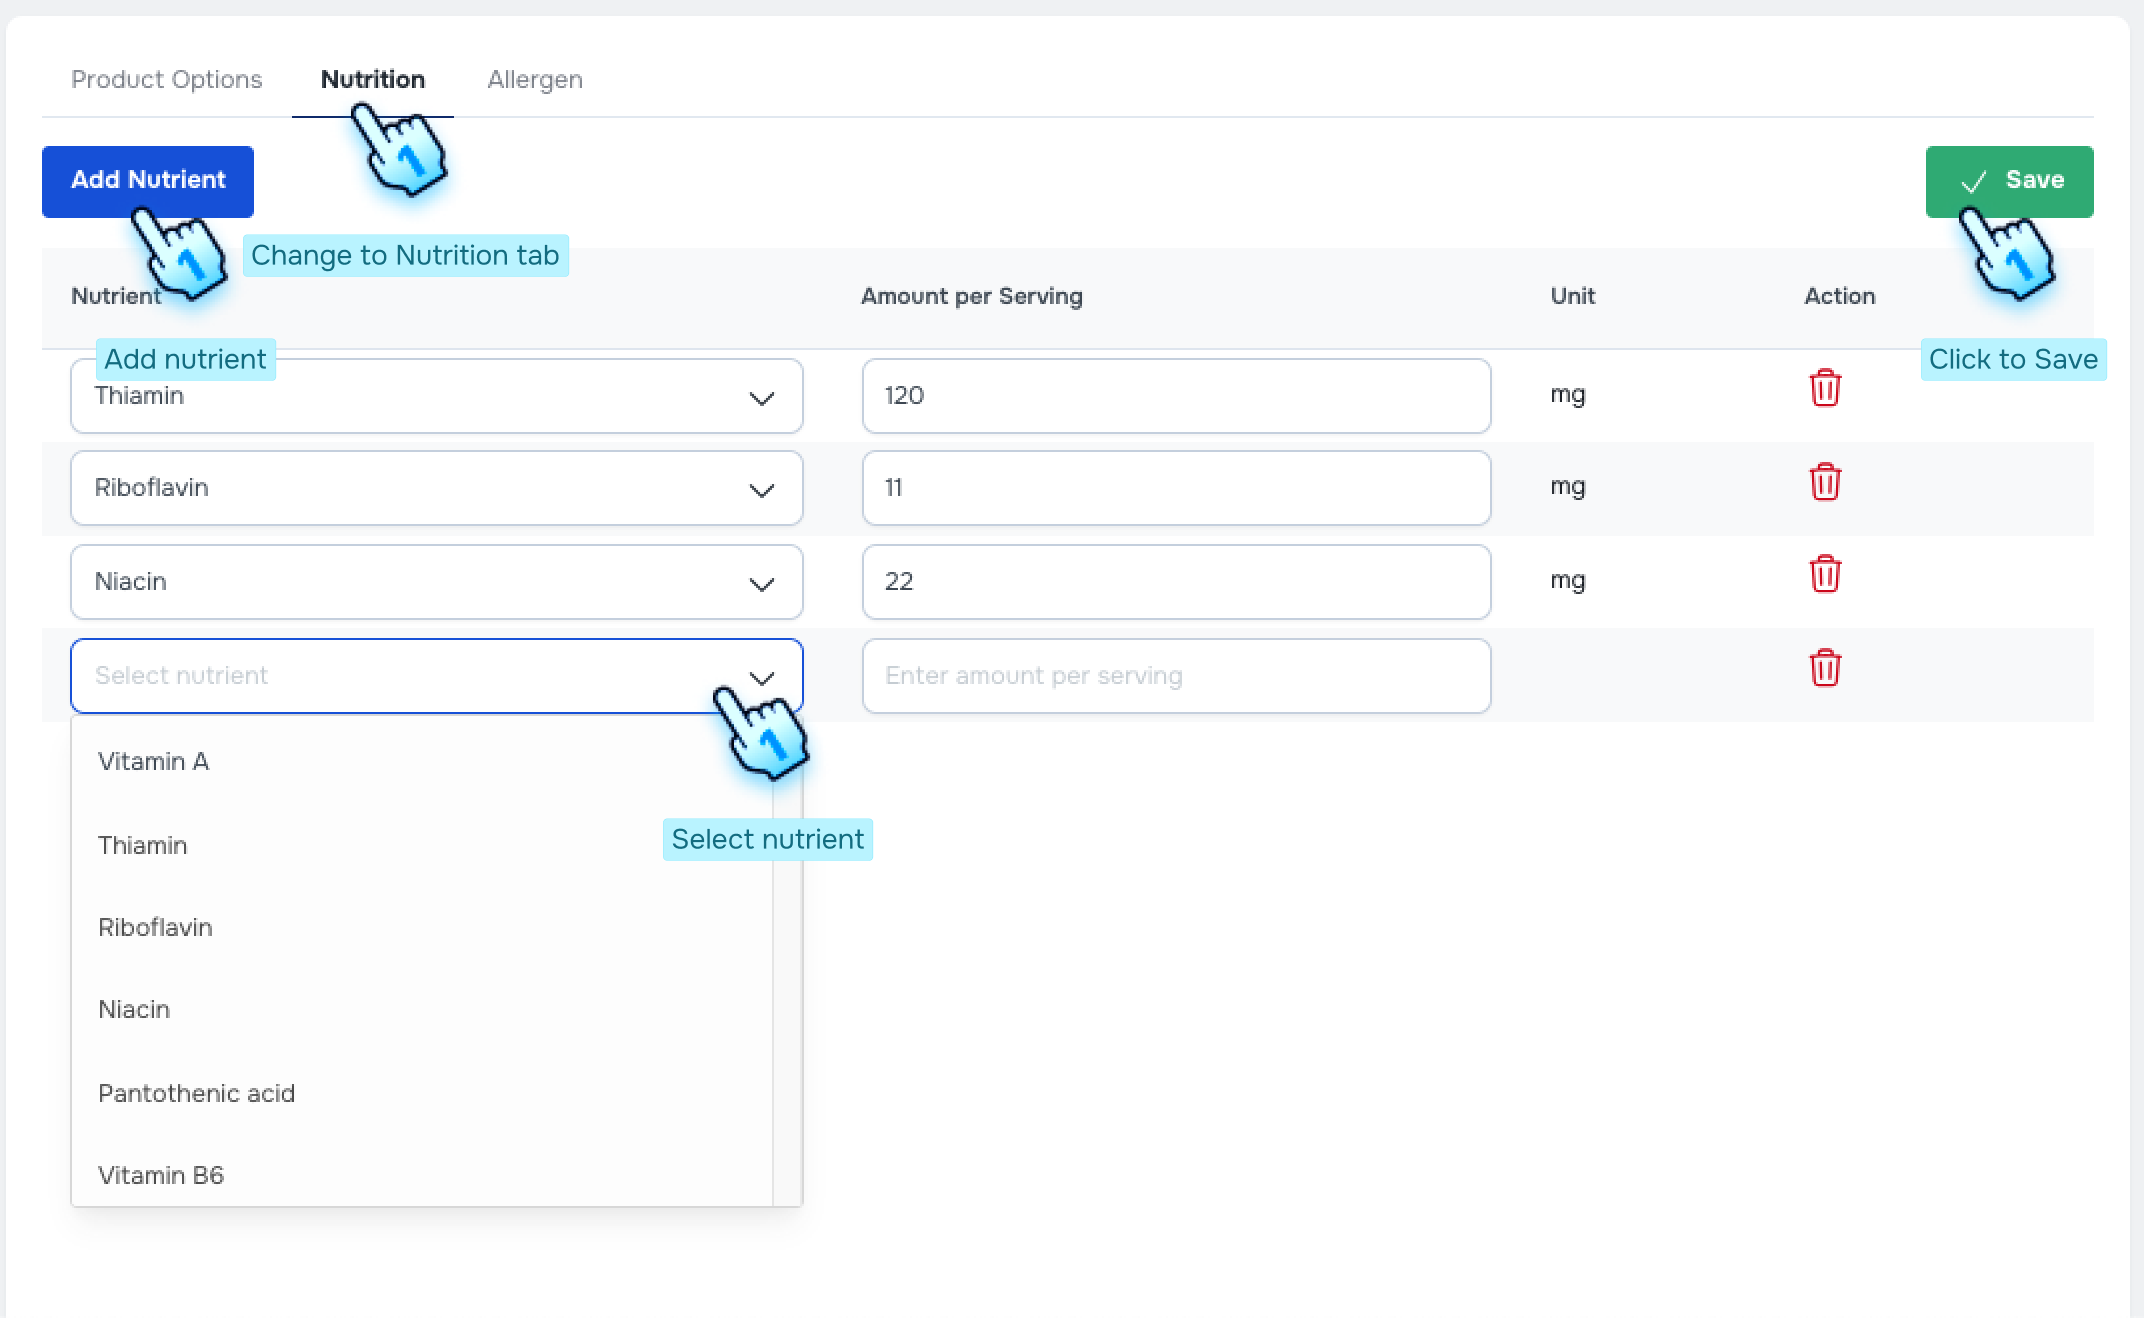
- Click on the Nutrition tab in the bottom table.
- Edit Nutrition Information
- Click the "Edit" button.
- Add Nutrition Value
- Click the "Add Nutrition" button to add nutrition values for the product.
- Select Nutrition
- Choose the appropriate nutrition option from the list.
- Save Nutrition Information
- Edit the Amount per Serving and Unit for each nutrient.
- Click "Save" at the top to finish.
#
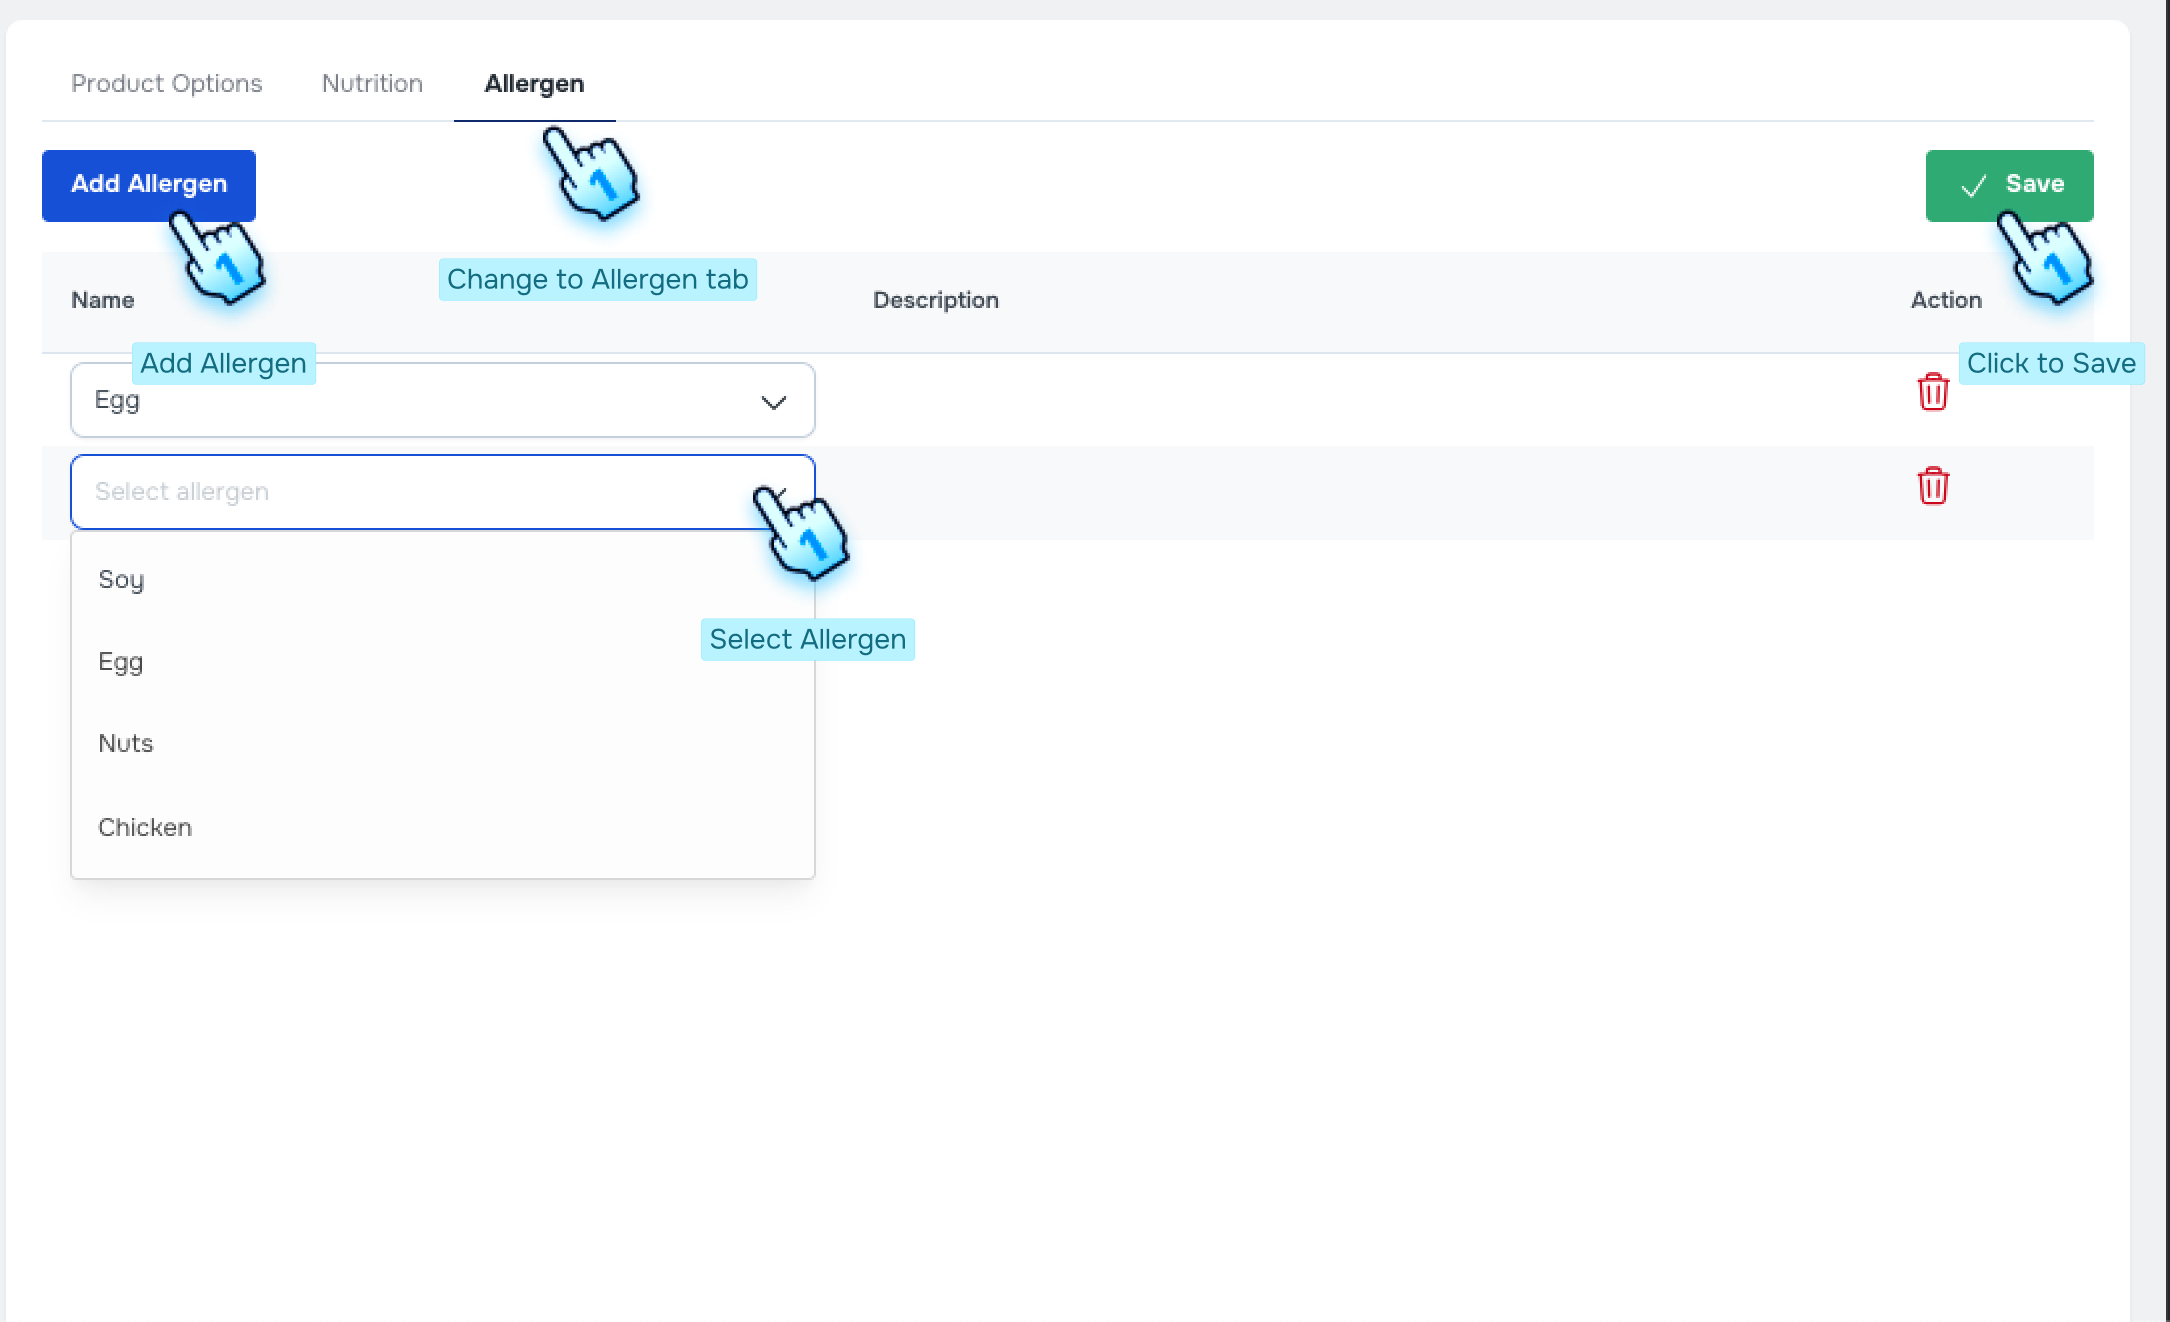
Edit Product and Edit Allergen Information
- Access Edit Product
- Click on Each row to view its details.
- Click on Edit button to access Edit Product page
- Navigate to Allergen Tab
- Click on the Allergen tab in the bottom table.
- Edit Allergen Information
- Click the "Edit" button.
- Manage Allergen Toggle
- Click the toggle to turn the allergen on or off.
- Save Allergen Information
- Click "Save" at the top to finish.
#
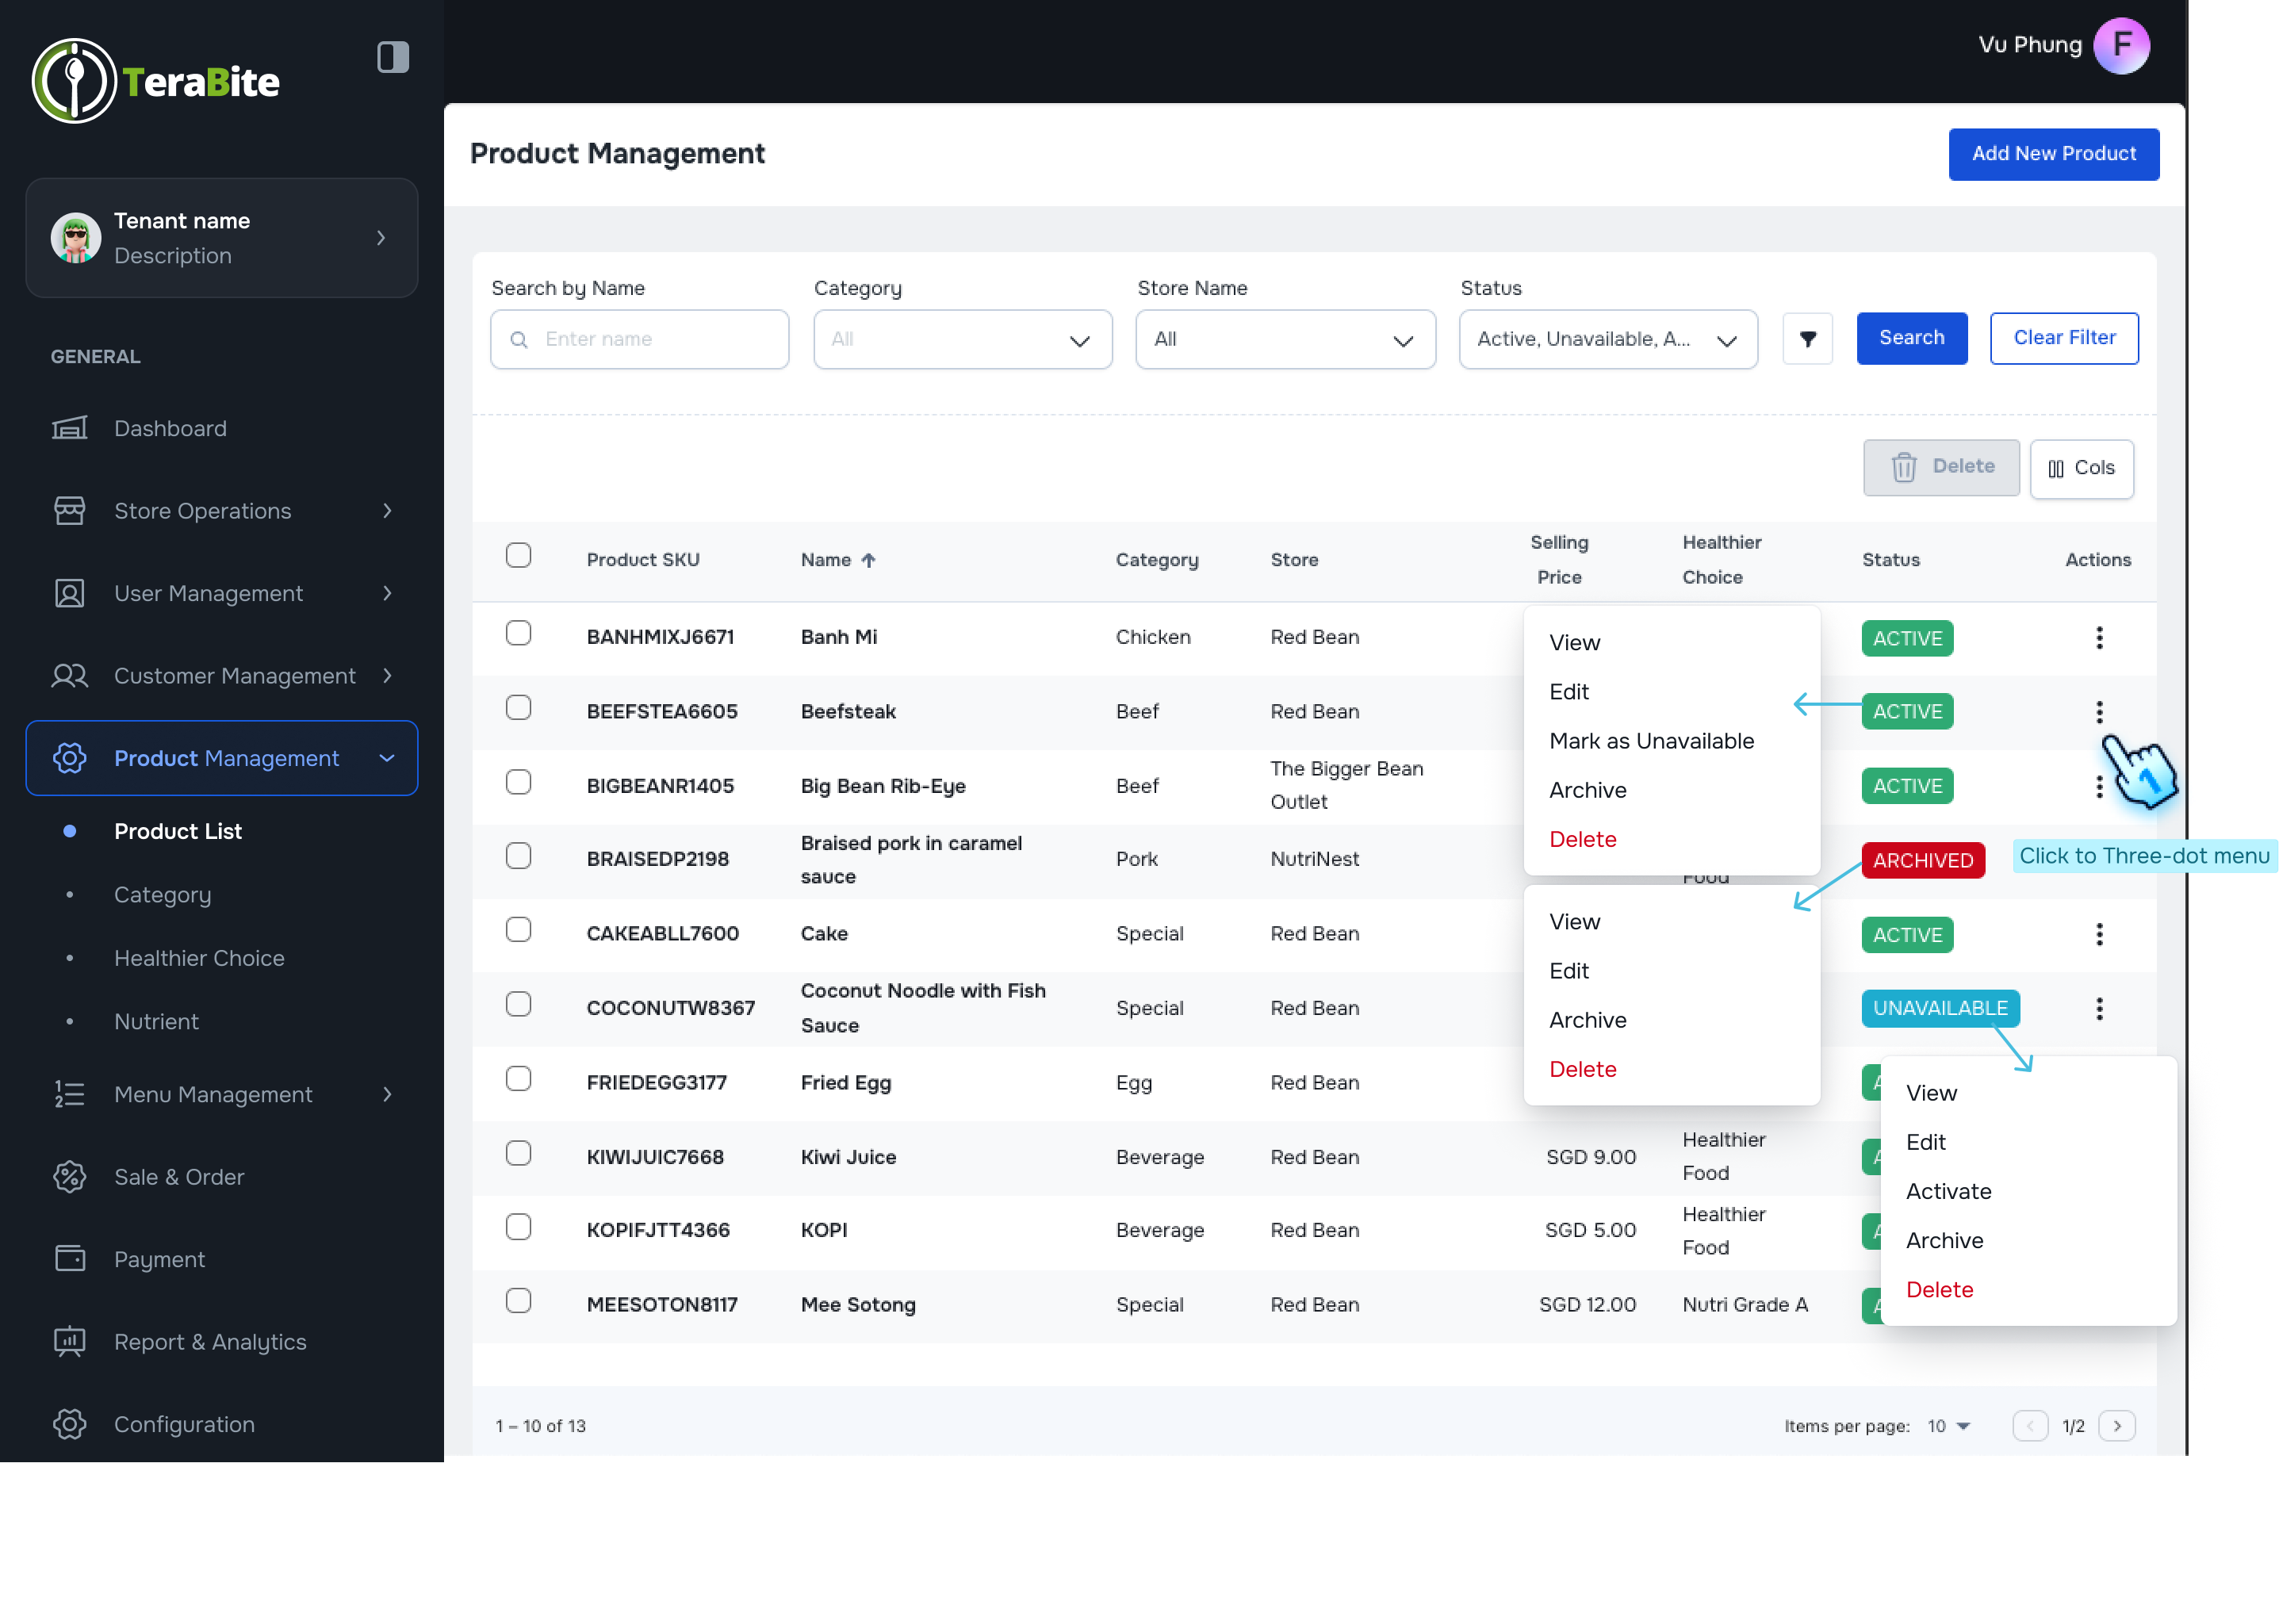
View Product List and Change Status
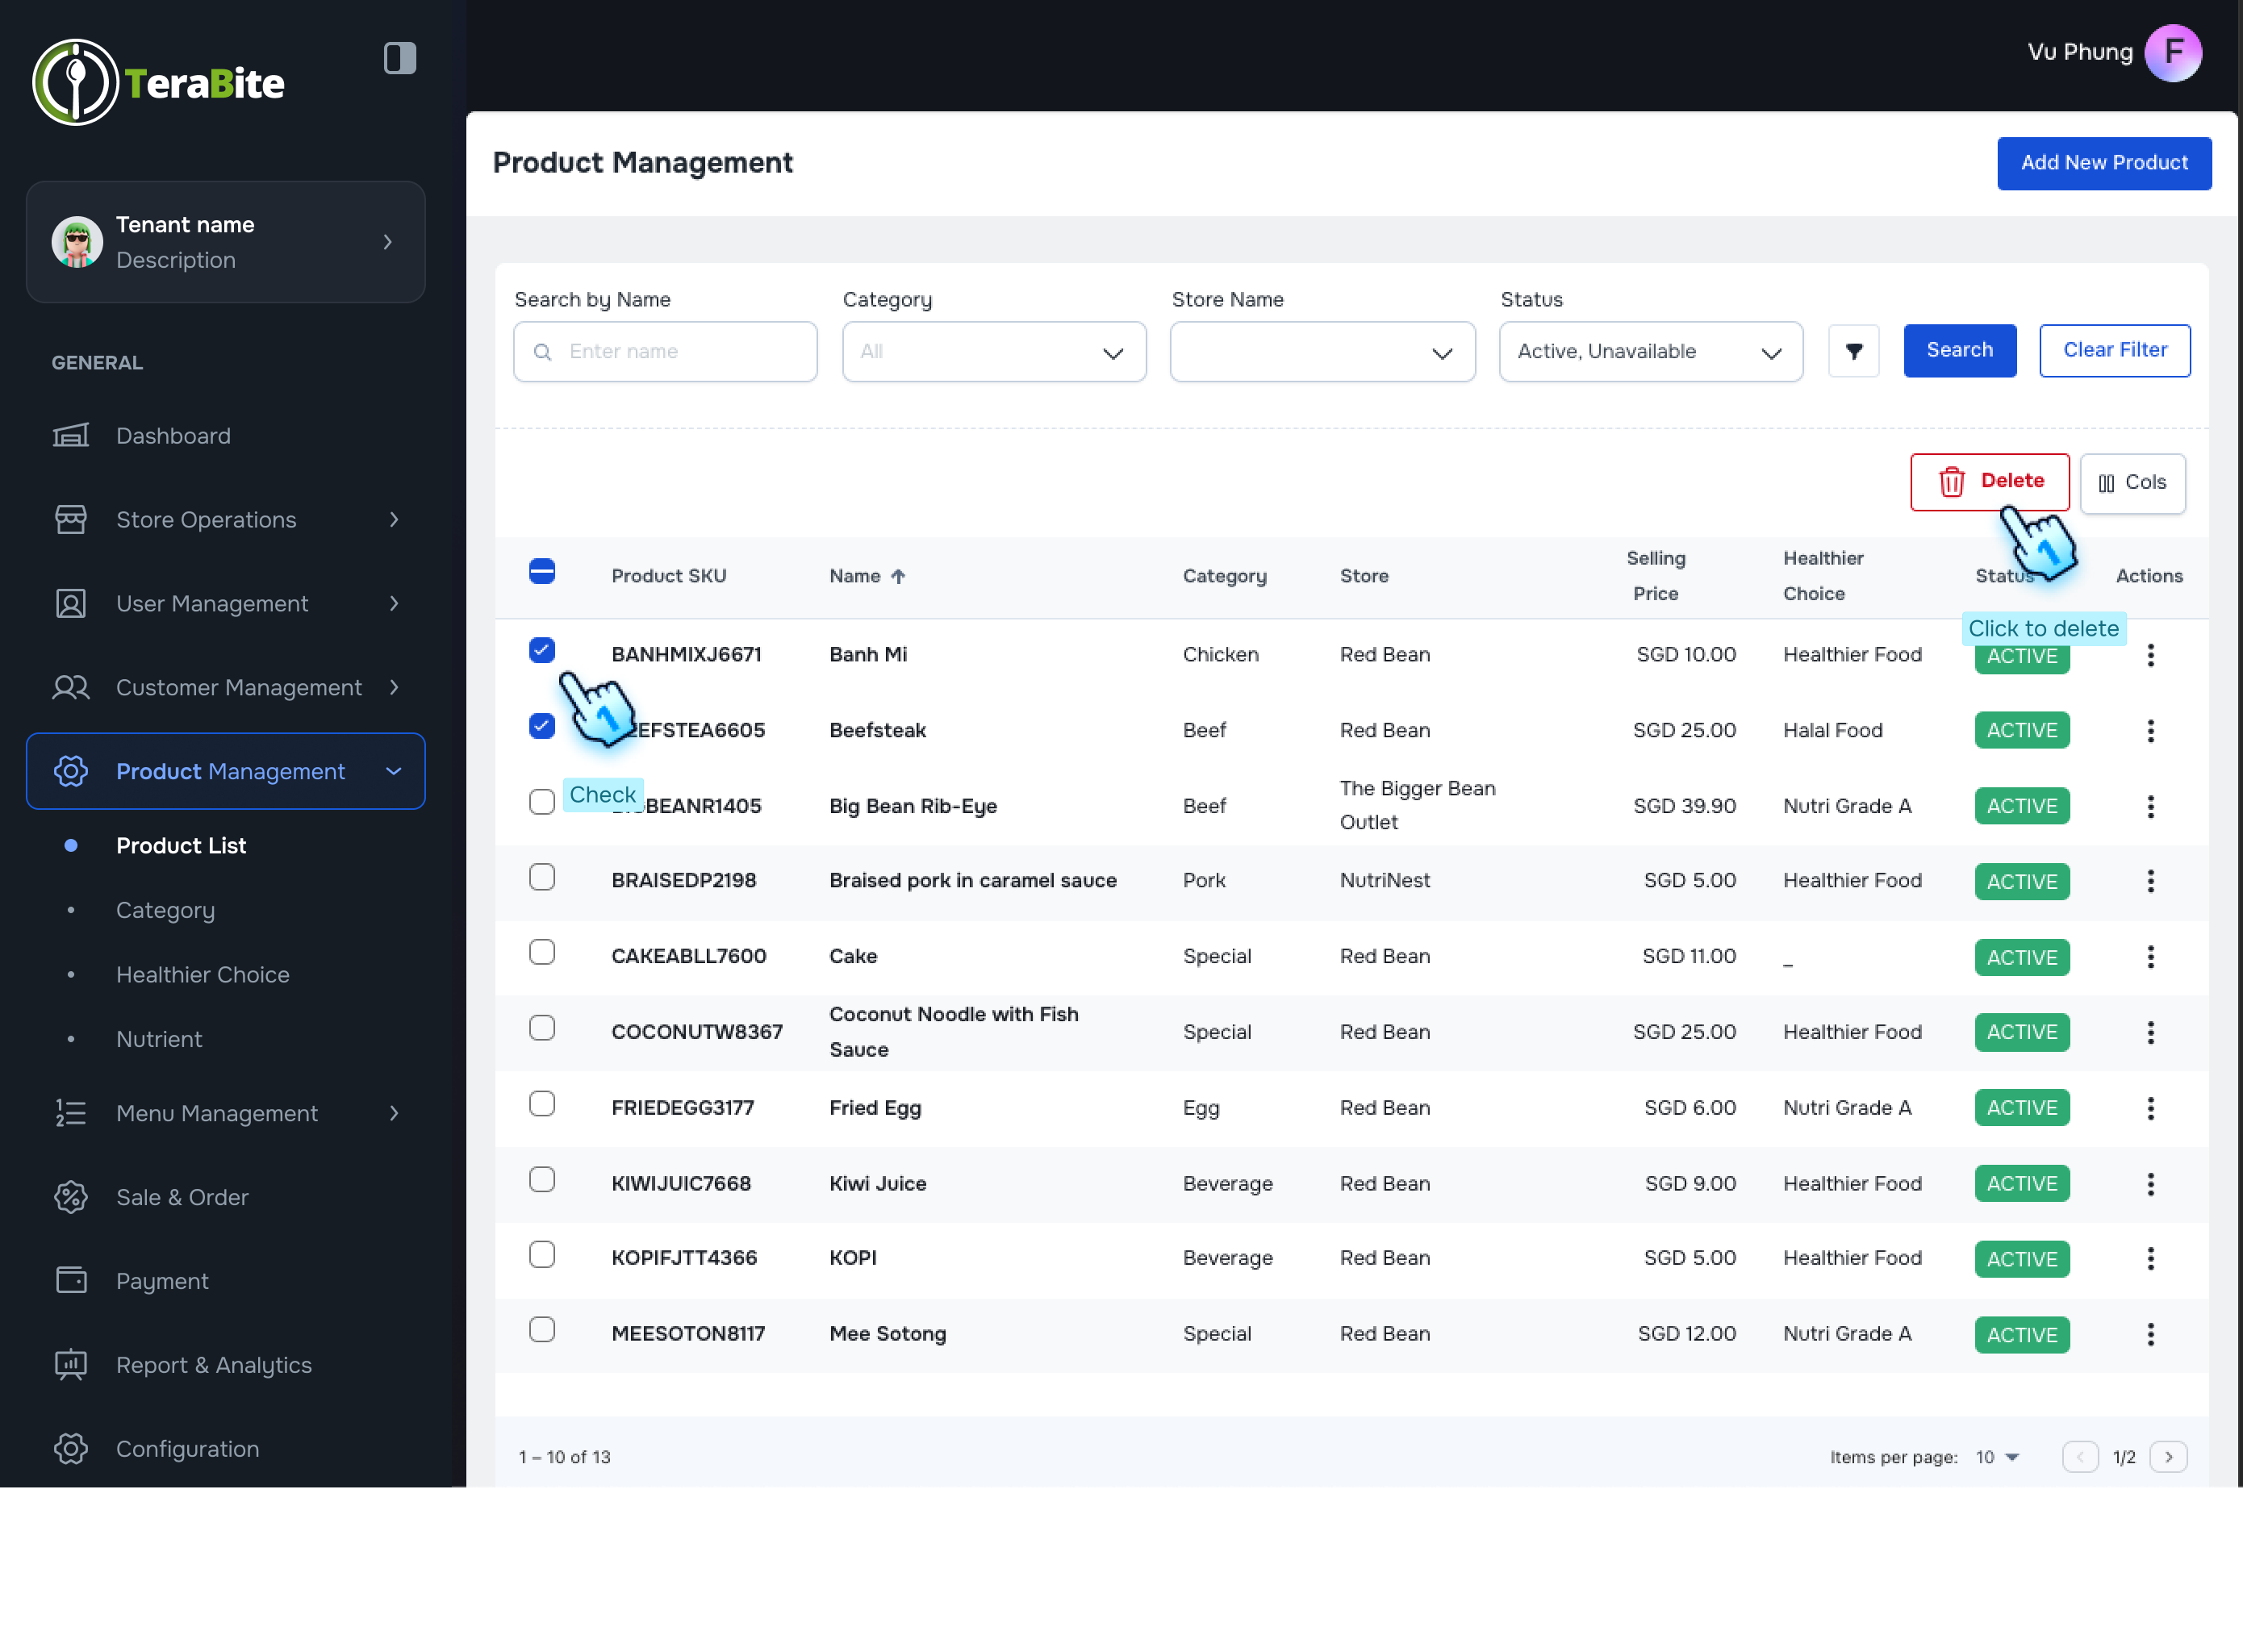
- Access Product List
- Navigate to the Product List section, where products are displayed with their respective statuses: Active, Archived, Unavailable, and Out of Stock.
- Perform Actions Based on Product Status
- Click on the three-dot menu in each row to reveal available actions for each product based on its current status.
- Actions per Status:
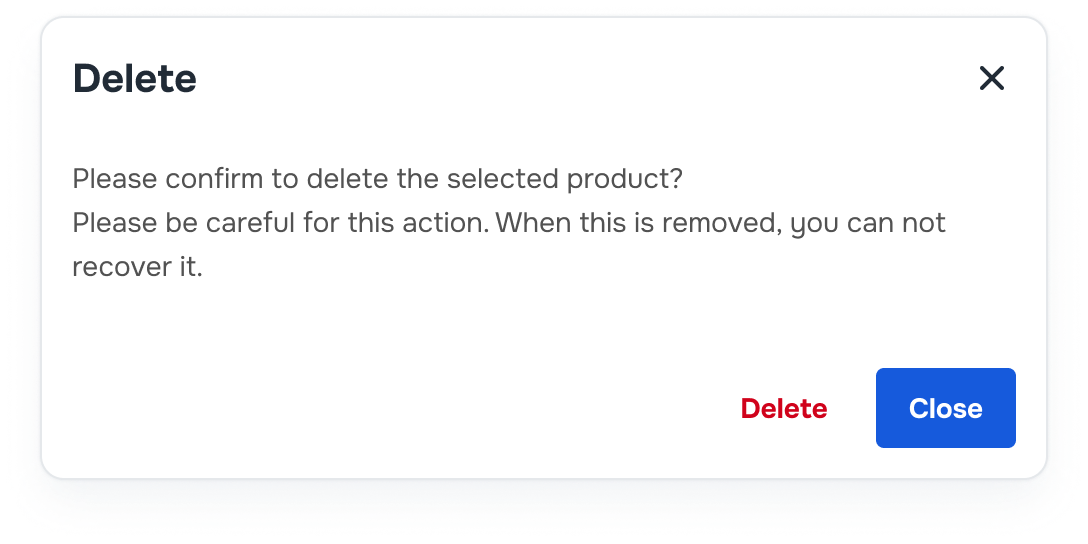
- Active: Options are View, Edit, Mark as unavailable, Archive, and Delete.
- Click Edit product details and click "Save" to finish.
- Click Deactivate, Archive, or Delete as necessary and confirm in the dialog.
- Archived: Options are View, Edit, Activate, and Delete.
- Click "Activate" if necessary and confirm in the dialog.
- Unavailable: Options are View, Edit, Activate, Archive, and Delete.
#
Conclusion
This document provides a comprehensive guide for managing products within the system, including the addition, importation, editing of product details, and changing product statuses.
#
Screen flow
#
Add a New Product
#
View Product Details and Edit Product Options


#
View Product Details and Edit Nutrition Information
#
View Product Details and Edit Allergen Information