#
Product List Import
#
Description
This section outlines the procedures for uploading products via CSV files, including handling errors, updating existing SKUs, and assigning products to menus
#
Import a Product List
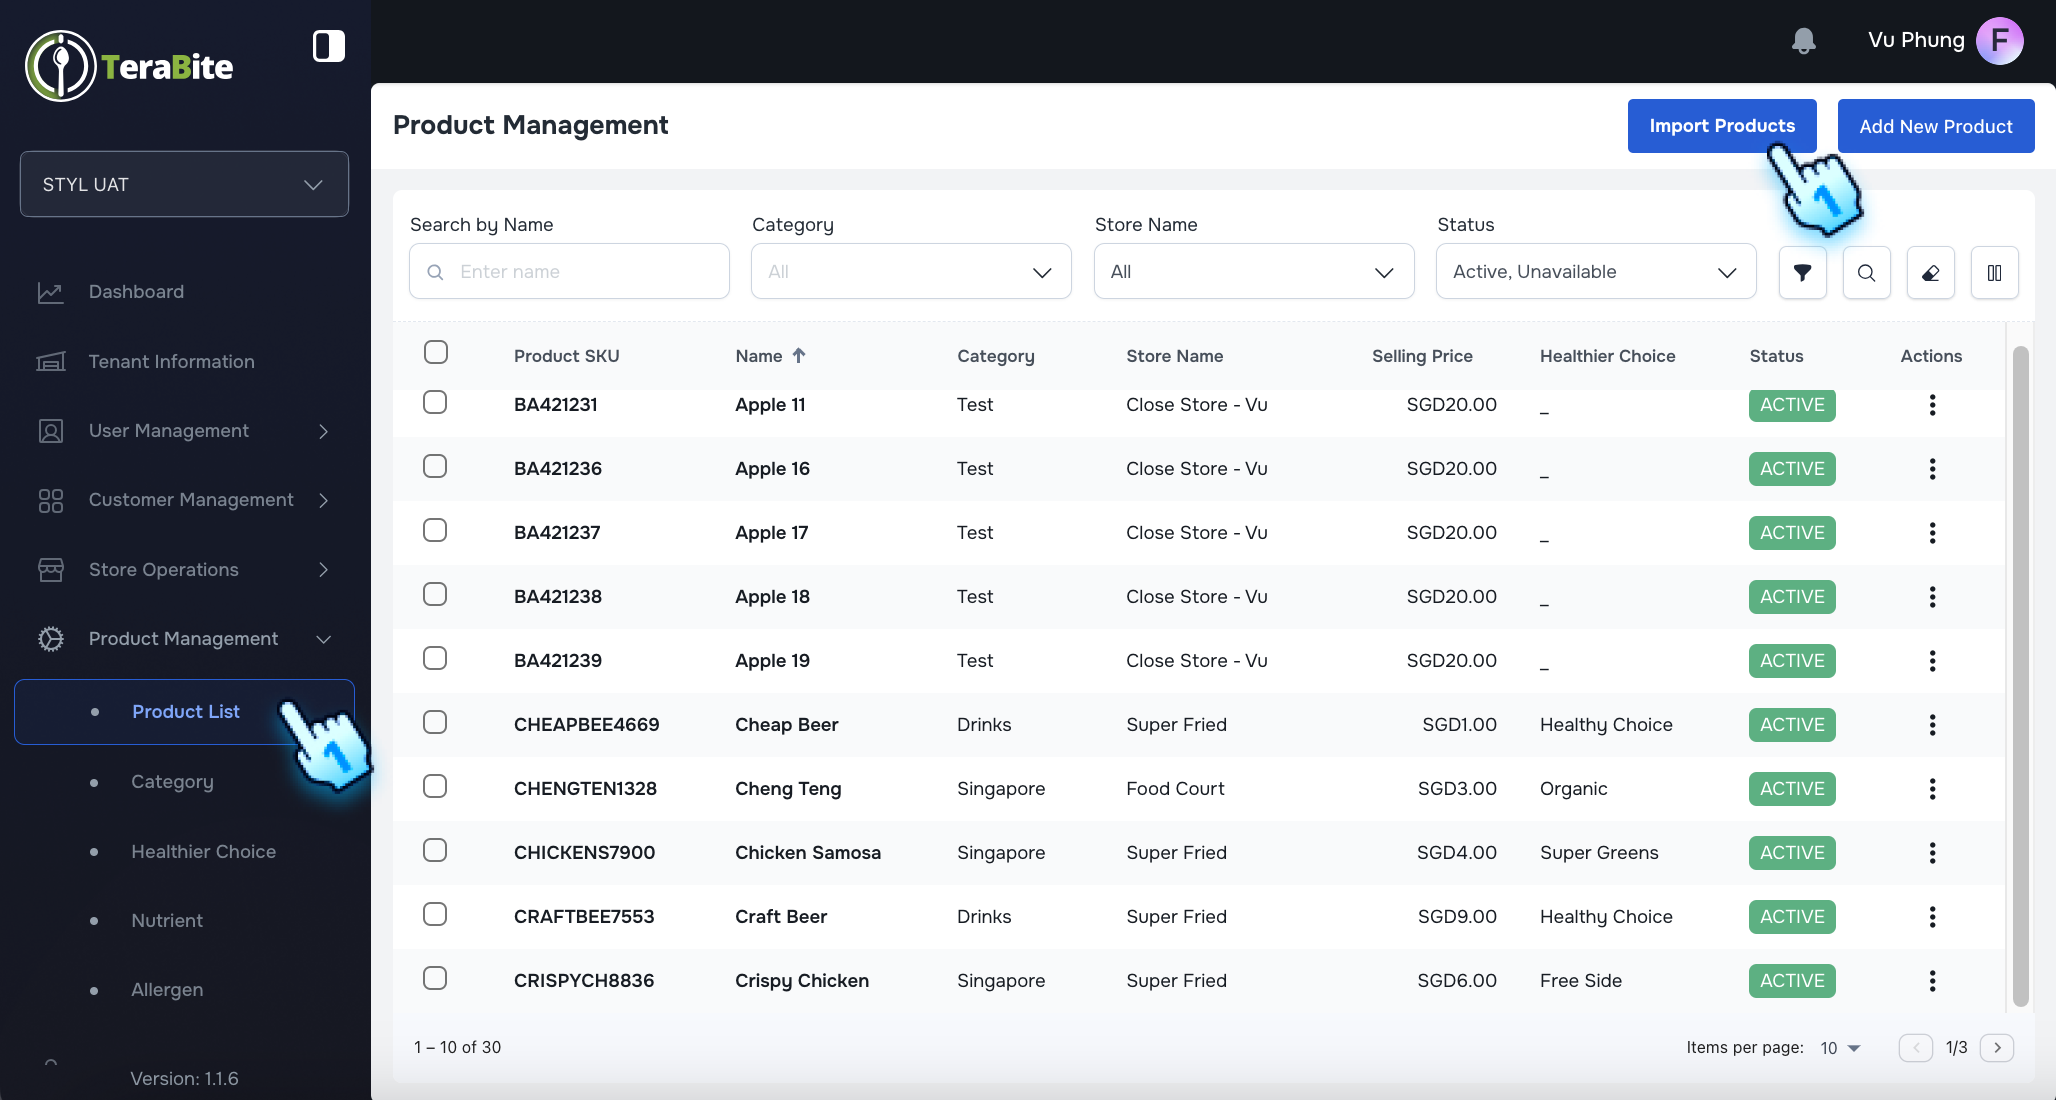
- Access Import Functionality
- Navigate to Product List section of Product Management module
- Click on the "Import Product" option.
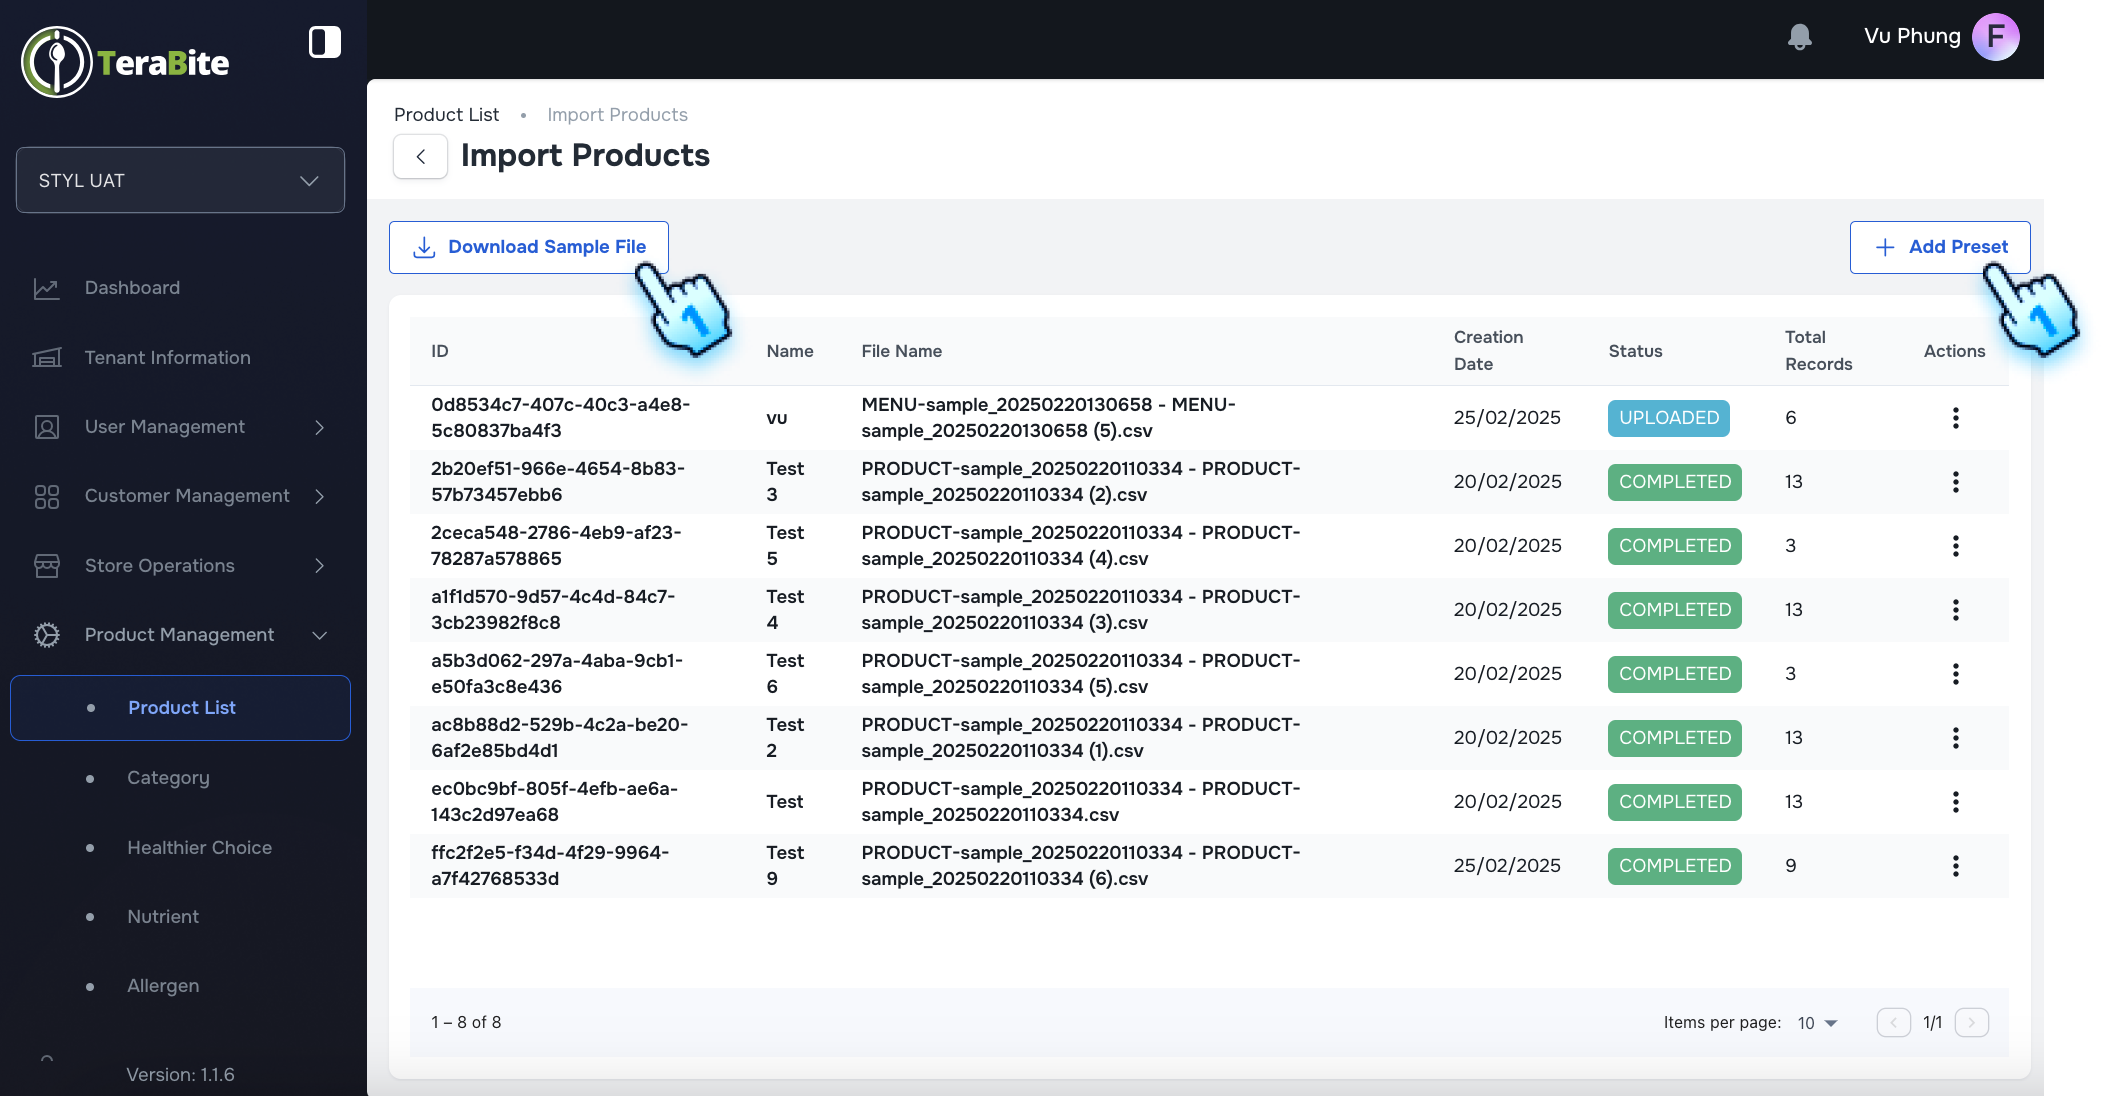
- Download Sample File
- Click on Download Sample File to fill required information as a Preset
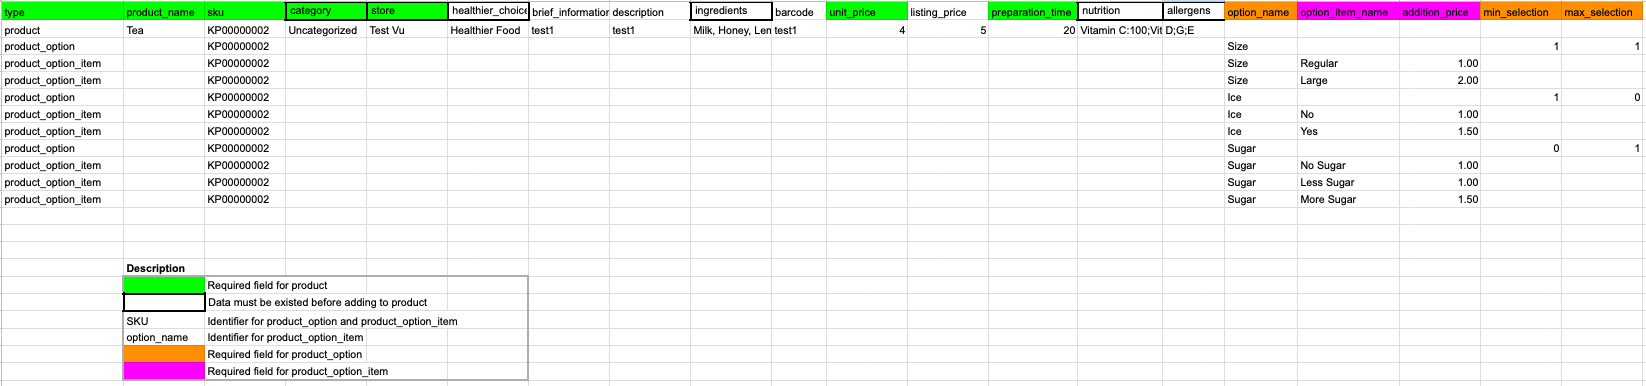
- Prepare import filef
- Add Product row
- Add rows for each product with the following required fields:
- Type: Set as "product" (required).
- Product Name: Enter the name (e.g., Kopi) (required).
- SKU: Assign a unique SKU (e.g., KP00000001)(required).
- Unit Price: Enter the unit price and Round to 2 decimal places (required).
- Listing Price: Enter the unit price and Round to 2 decimal places.
- Preparation time: Enter preparation time by minute (Eg. 10 => 10 minutes) (required).
- Necessary Fields: Store, Healthier choice, Nutrient, Allergent must be correct with the existing data. It means these data must be available on the system.
- Other free text field: brief_information, description, ingredients barcode Note:
- Add rows for each product with the following required fields:
- Importing a Tenant Product: If you leave the Store field blank in your import file, the product will be created as a Tenant Product.
- Importing a Store Product: If you specify a store in the import file, the product will be created as a Store Product.
- Create Related Product Option Rows
- For each product, add corresponding rows for product options with:
- Type: Set as "product_option".
- SKU: Use the same SKU as the linked product.
- Option Name: Specify the option name (e.g., Size).
- Min Selection: Define the minimum selection quantity.
- Max Selection: Define the maximum selection quantity.
- For each product, add corresponding rows for product options with:
- Create Product Option Item Rows
- For each product option, add option items by adding rows with:
- Type: Set as "product_option_item".
- SKU: Use the same SKU.
- Option Name: Use the same option name as above.
- Option Item Name: Specify individual option items (e.g., Regular, Medium, Large).
- Additional Price: Enter any additional price for the item.
- For each product option, add option items by adding rows with:
- Add Preset
- Click on "Add Preset" button
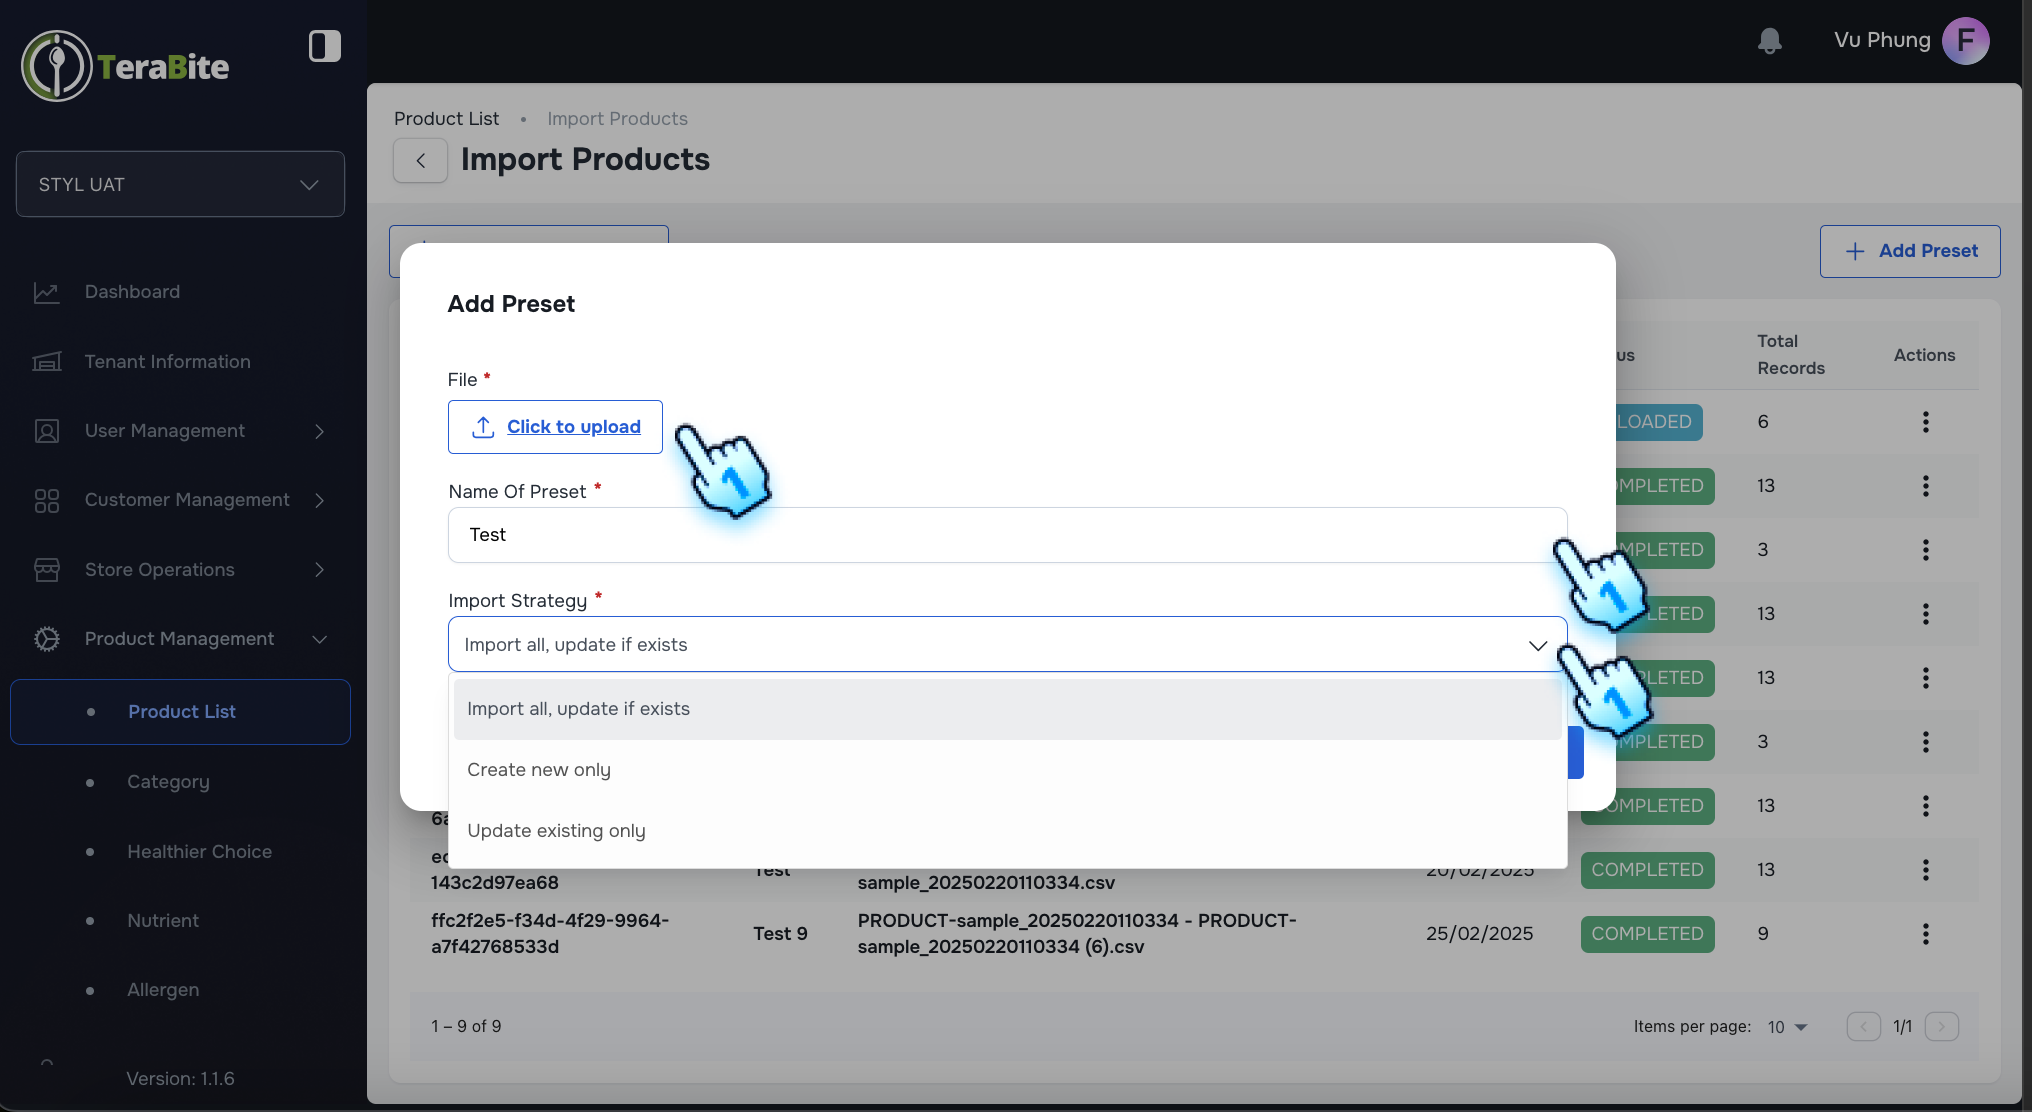
- Upload File
- Click on the "Upload" button.
- Select File
- Choose the preset file from your device that filled with product information.
- Name and Select Import Strategy
- Name the preset and select an import strategy from the following options:
- Import All, Update if Exists
- Create New Only
- Update Existing Only
- Save and Review
- Click the "Save" button to upload the preset only
- Import Preset
- Click Import button to import the preset
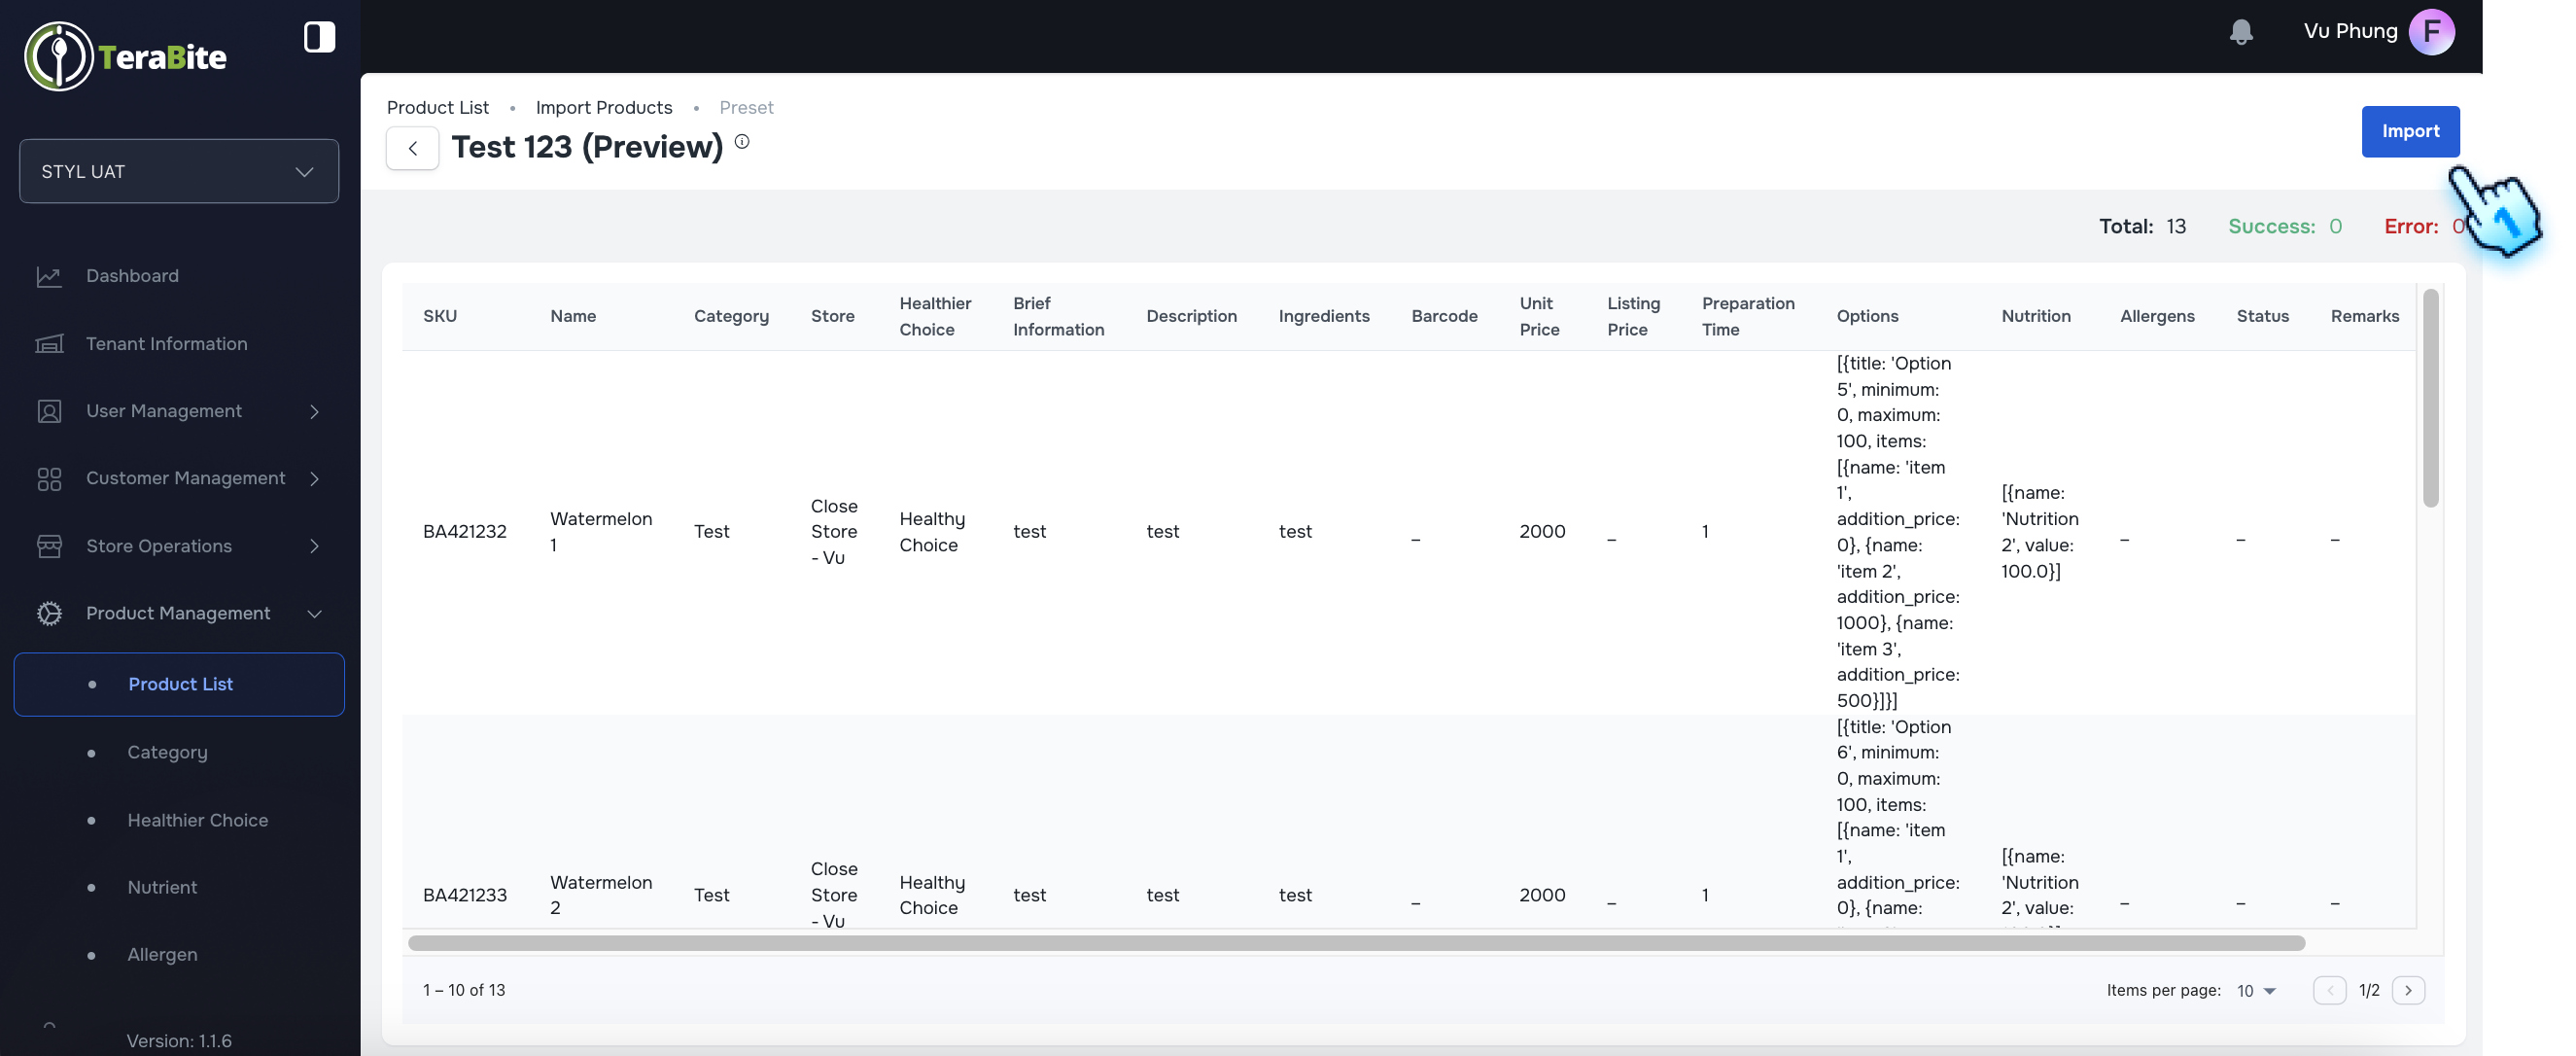
- Review Imported Preset Details
- After importing, review the product list in the preset, including any error messages for fail product that may appear along with the summary of the progress such as Total, Success, Fail.
- Data Update
- Success imported product data will be updated successfully.
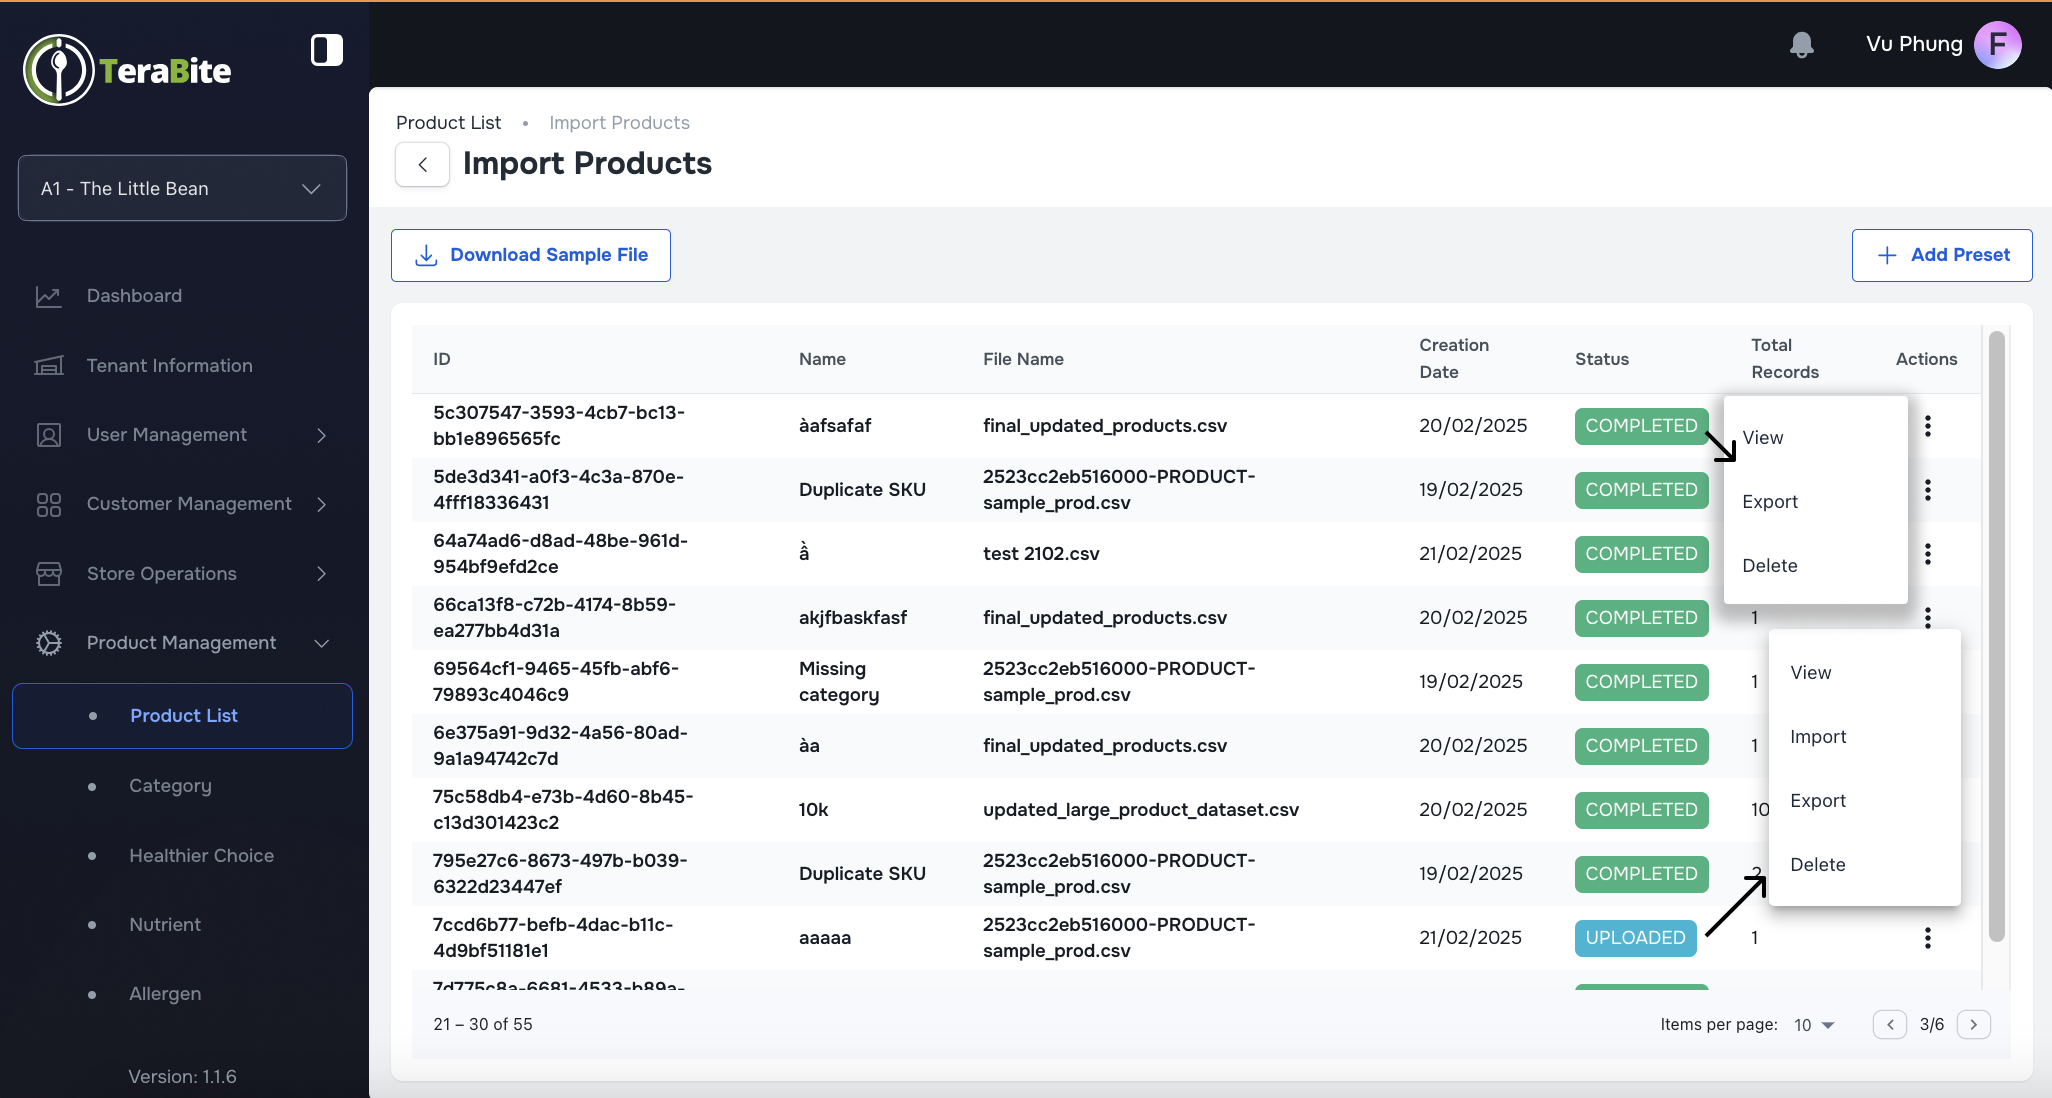
- Perform Actions Based on User Status
- Click on the three-dot menu in each row to reveal available actions for each user based on their status as below:
- Uploaded: Options are View, Import, Export, and Delete.
- Completed: Options are View, Export, and Delete.
- Error: Options are View, Export, and Delete.
#
Conclusion
The product upload process allows operators to efficiently manage product data by importing and updating products via CSV files. By following these steps, users can ensure accurate product information and seamless integration with the other systems.
#
Screen flow
#
Add a New Product