#
Source of Fund
#
Description
This section outlines the procedures for managing funds, including adding new funds, searching and filtering funds, and editing fund details.
#
Add New Fund - Successfully Add a Fund with Valid Data
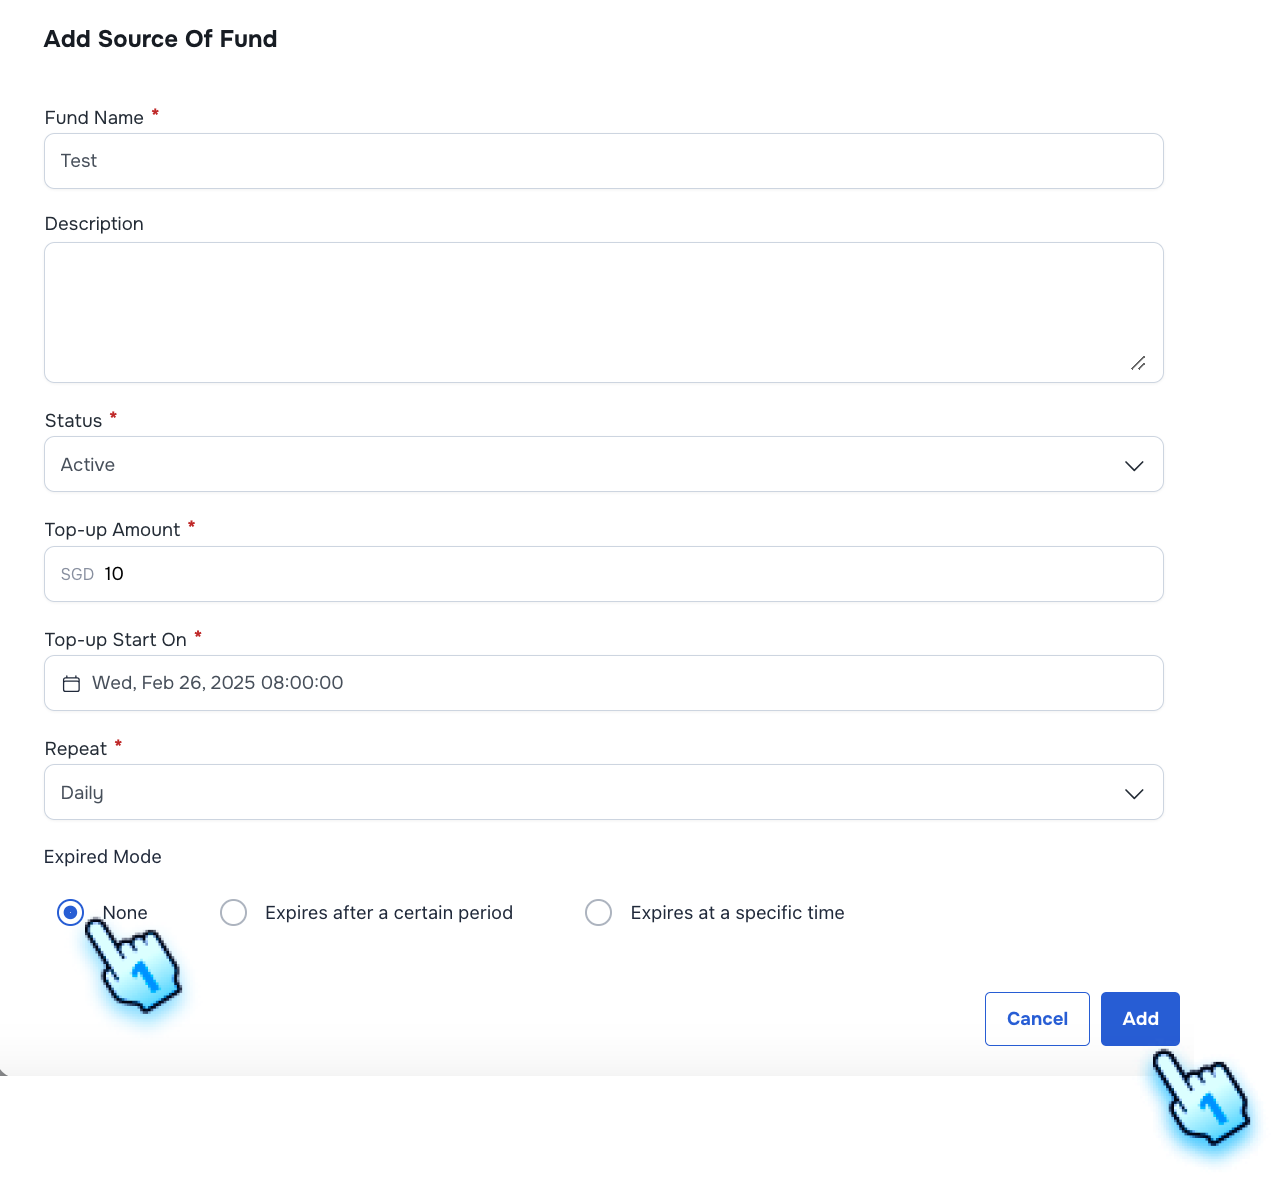
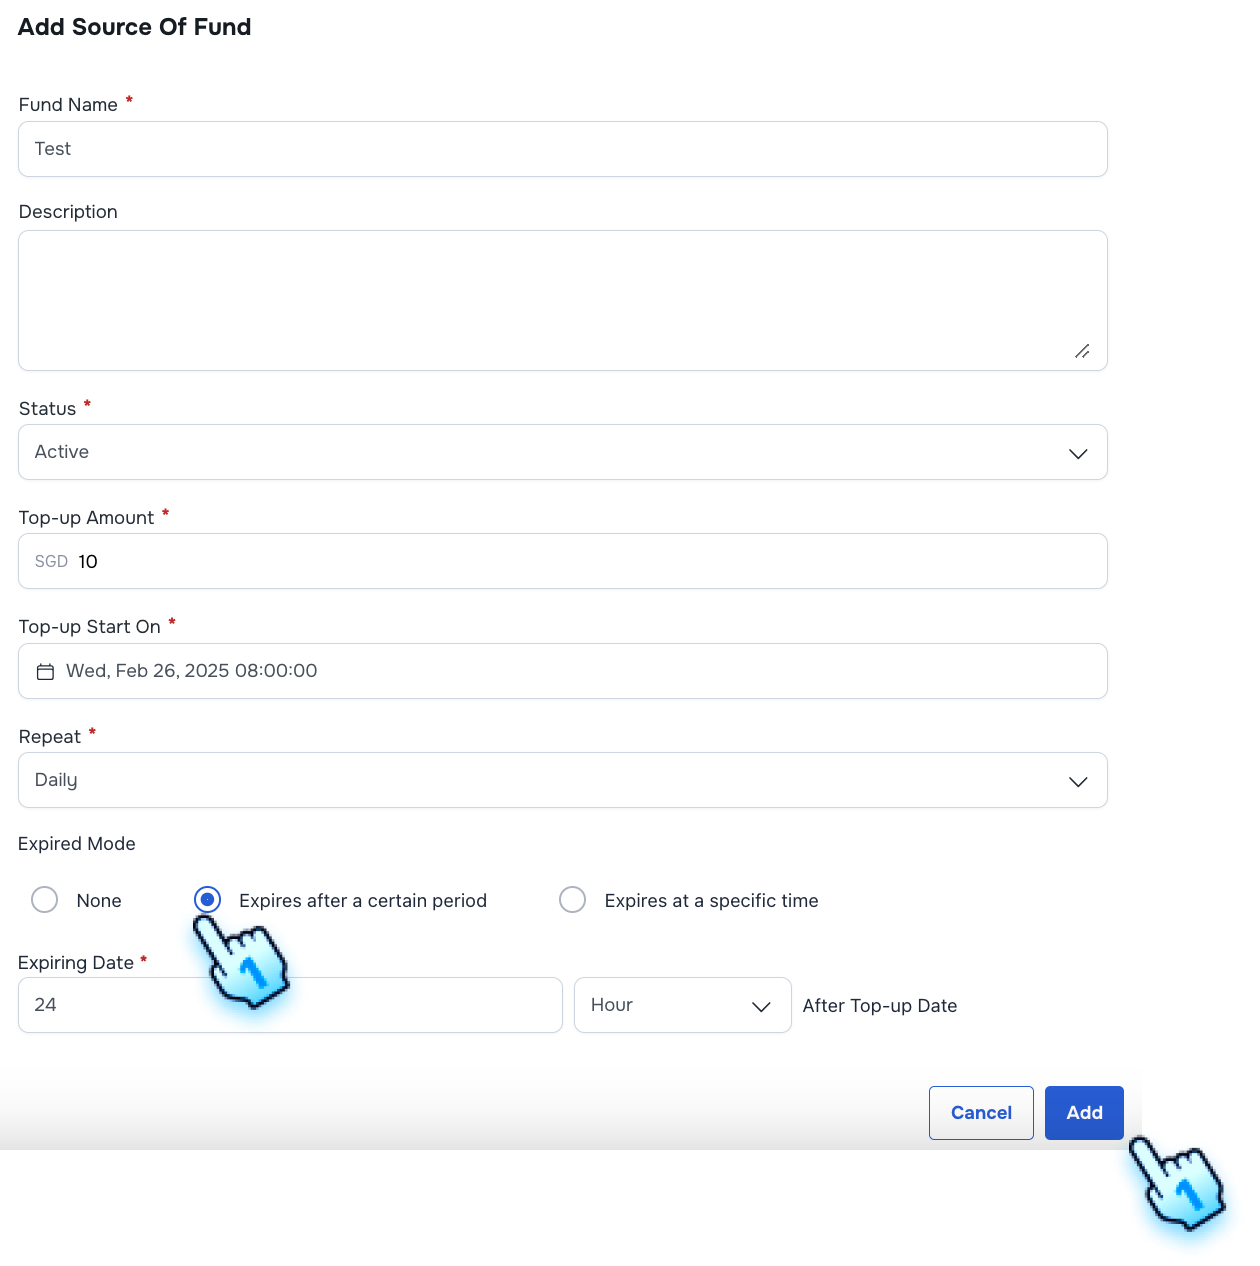
- Access Add Fund Form
- Navigate to the Source of Fund List of Source of Fund module.
- Click on "Add New Fund" button
- Enter Fund Details
- Enter Fund name.
- Select status Active or Inactive
- Enter Topup Amount
- Select the Top-up Start date and time
- Select Repeat by Daily, Weekly, or Monthly
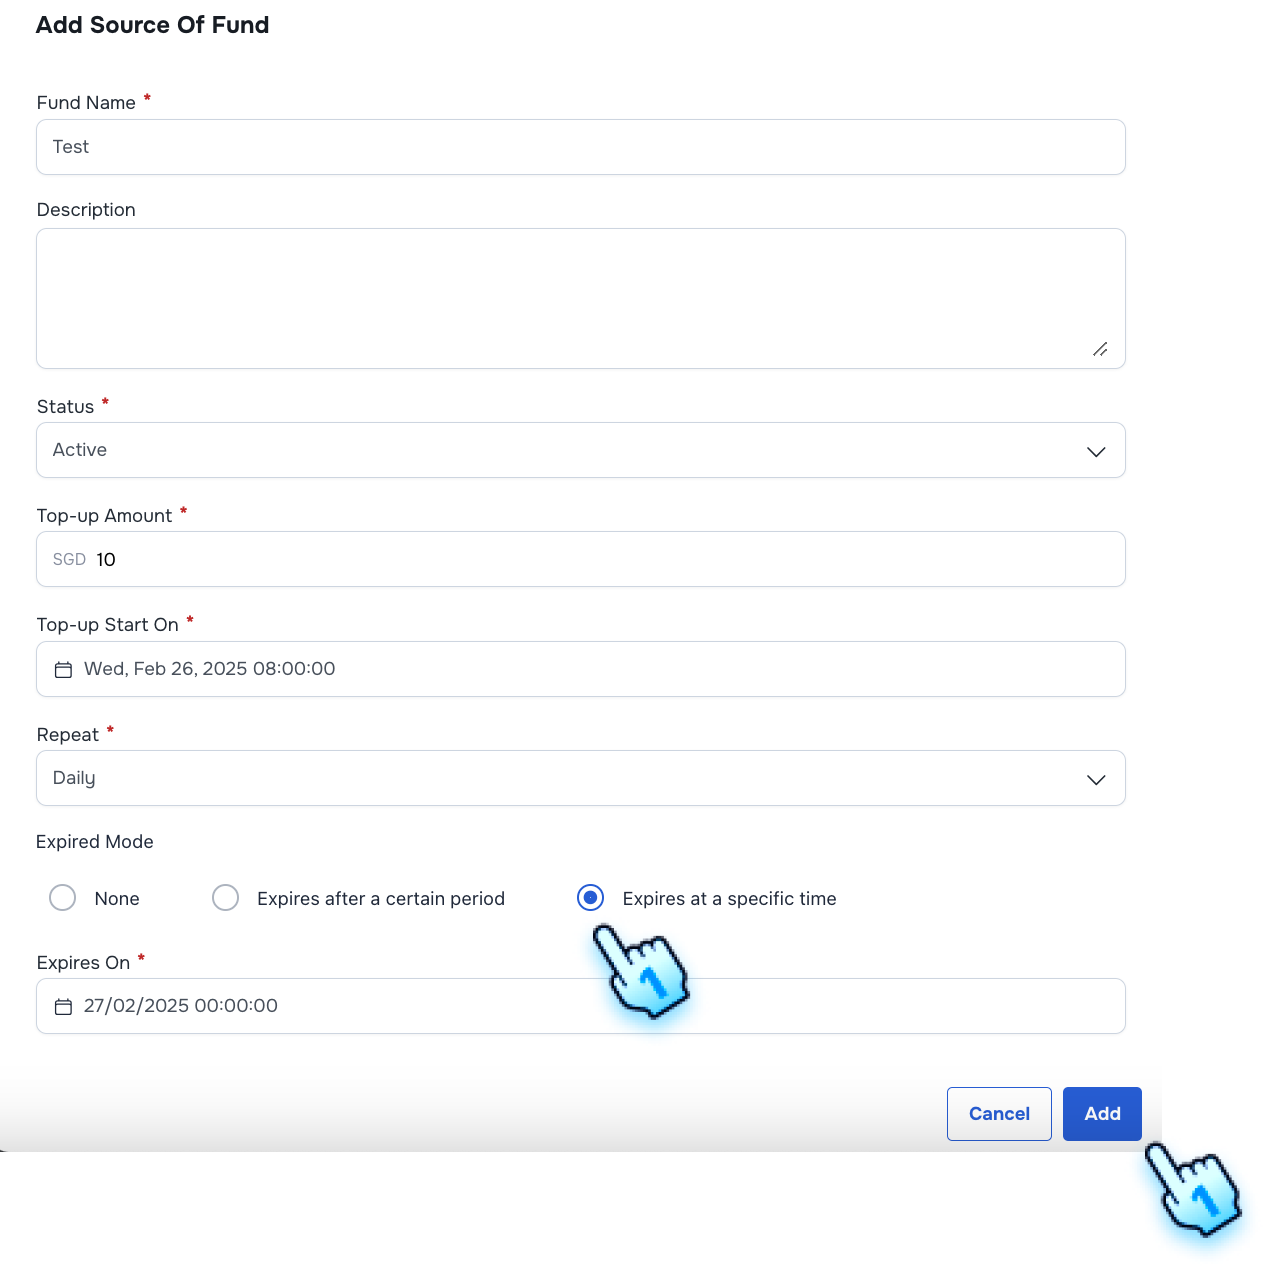
- Select Expired Mode including:
- None: Unlimited
- Expires after a Certain periods: Enter the number of Hour, Day, Week, Month, Year to expire
- Expires at a specific time: Select the time to expires
- Submit Form
- Click "Add" button to submit the form.
- The fund will be added successfully.
#
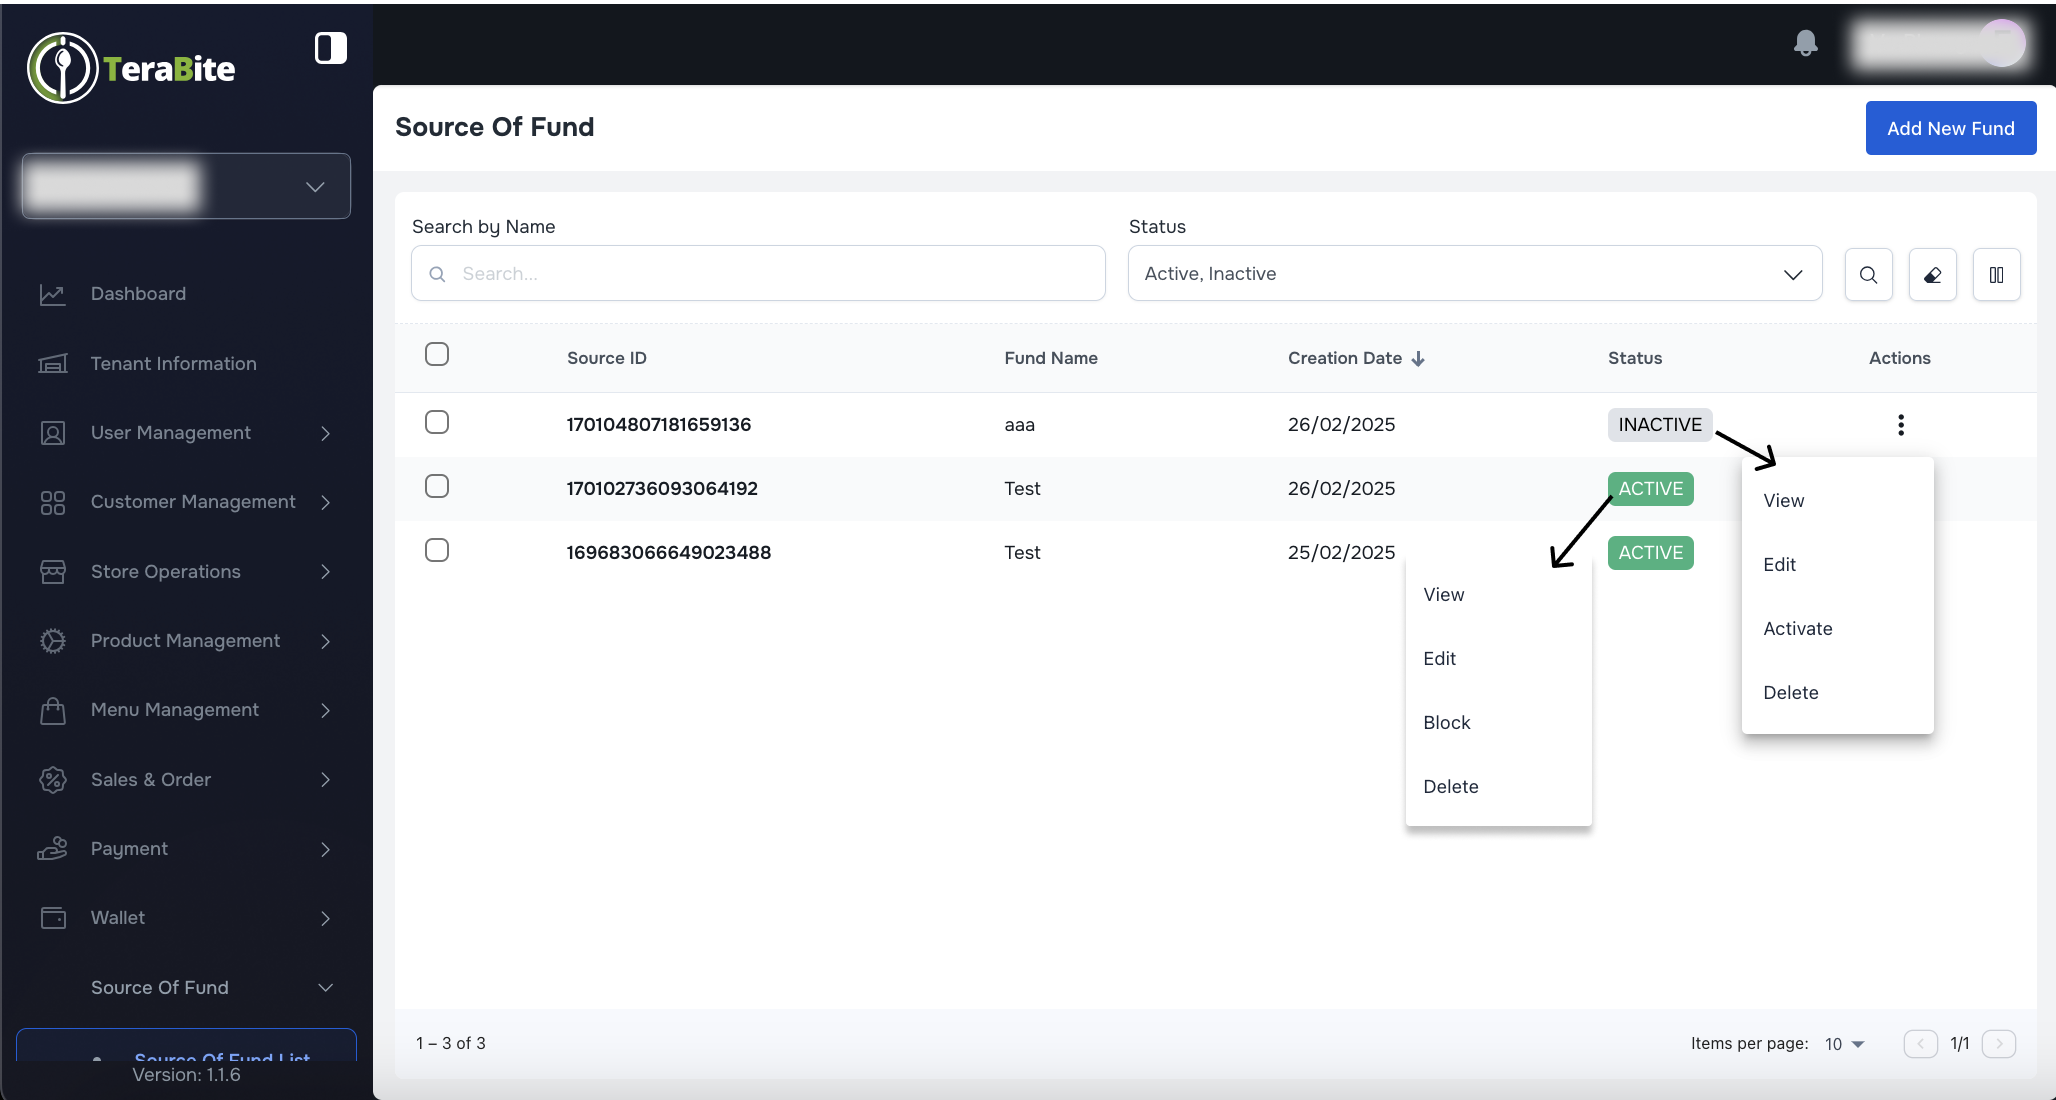
Manage Source of Fund
- Edit Source of Fund
- Navigate to the edit fund page from three-dot menu or View page
- Enter or select updated details (except for Source ID).
- Click "Save" to update the fund details.
- The fund details will be updated successfully.
- Block a Source of Fund
- Click the three-dot menu and select "Block."
- Confirm Block in A confirmation dialog.
- Delete a Source of Fund
- Click the three-dot menu and select "Delete."
- Confirm Delete in A confirmation dialog
- Source of Fund is deleted from the list
#
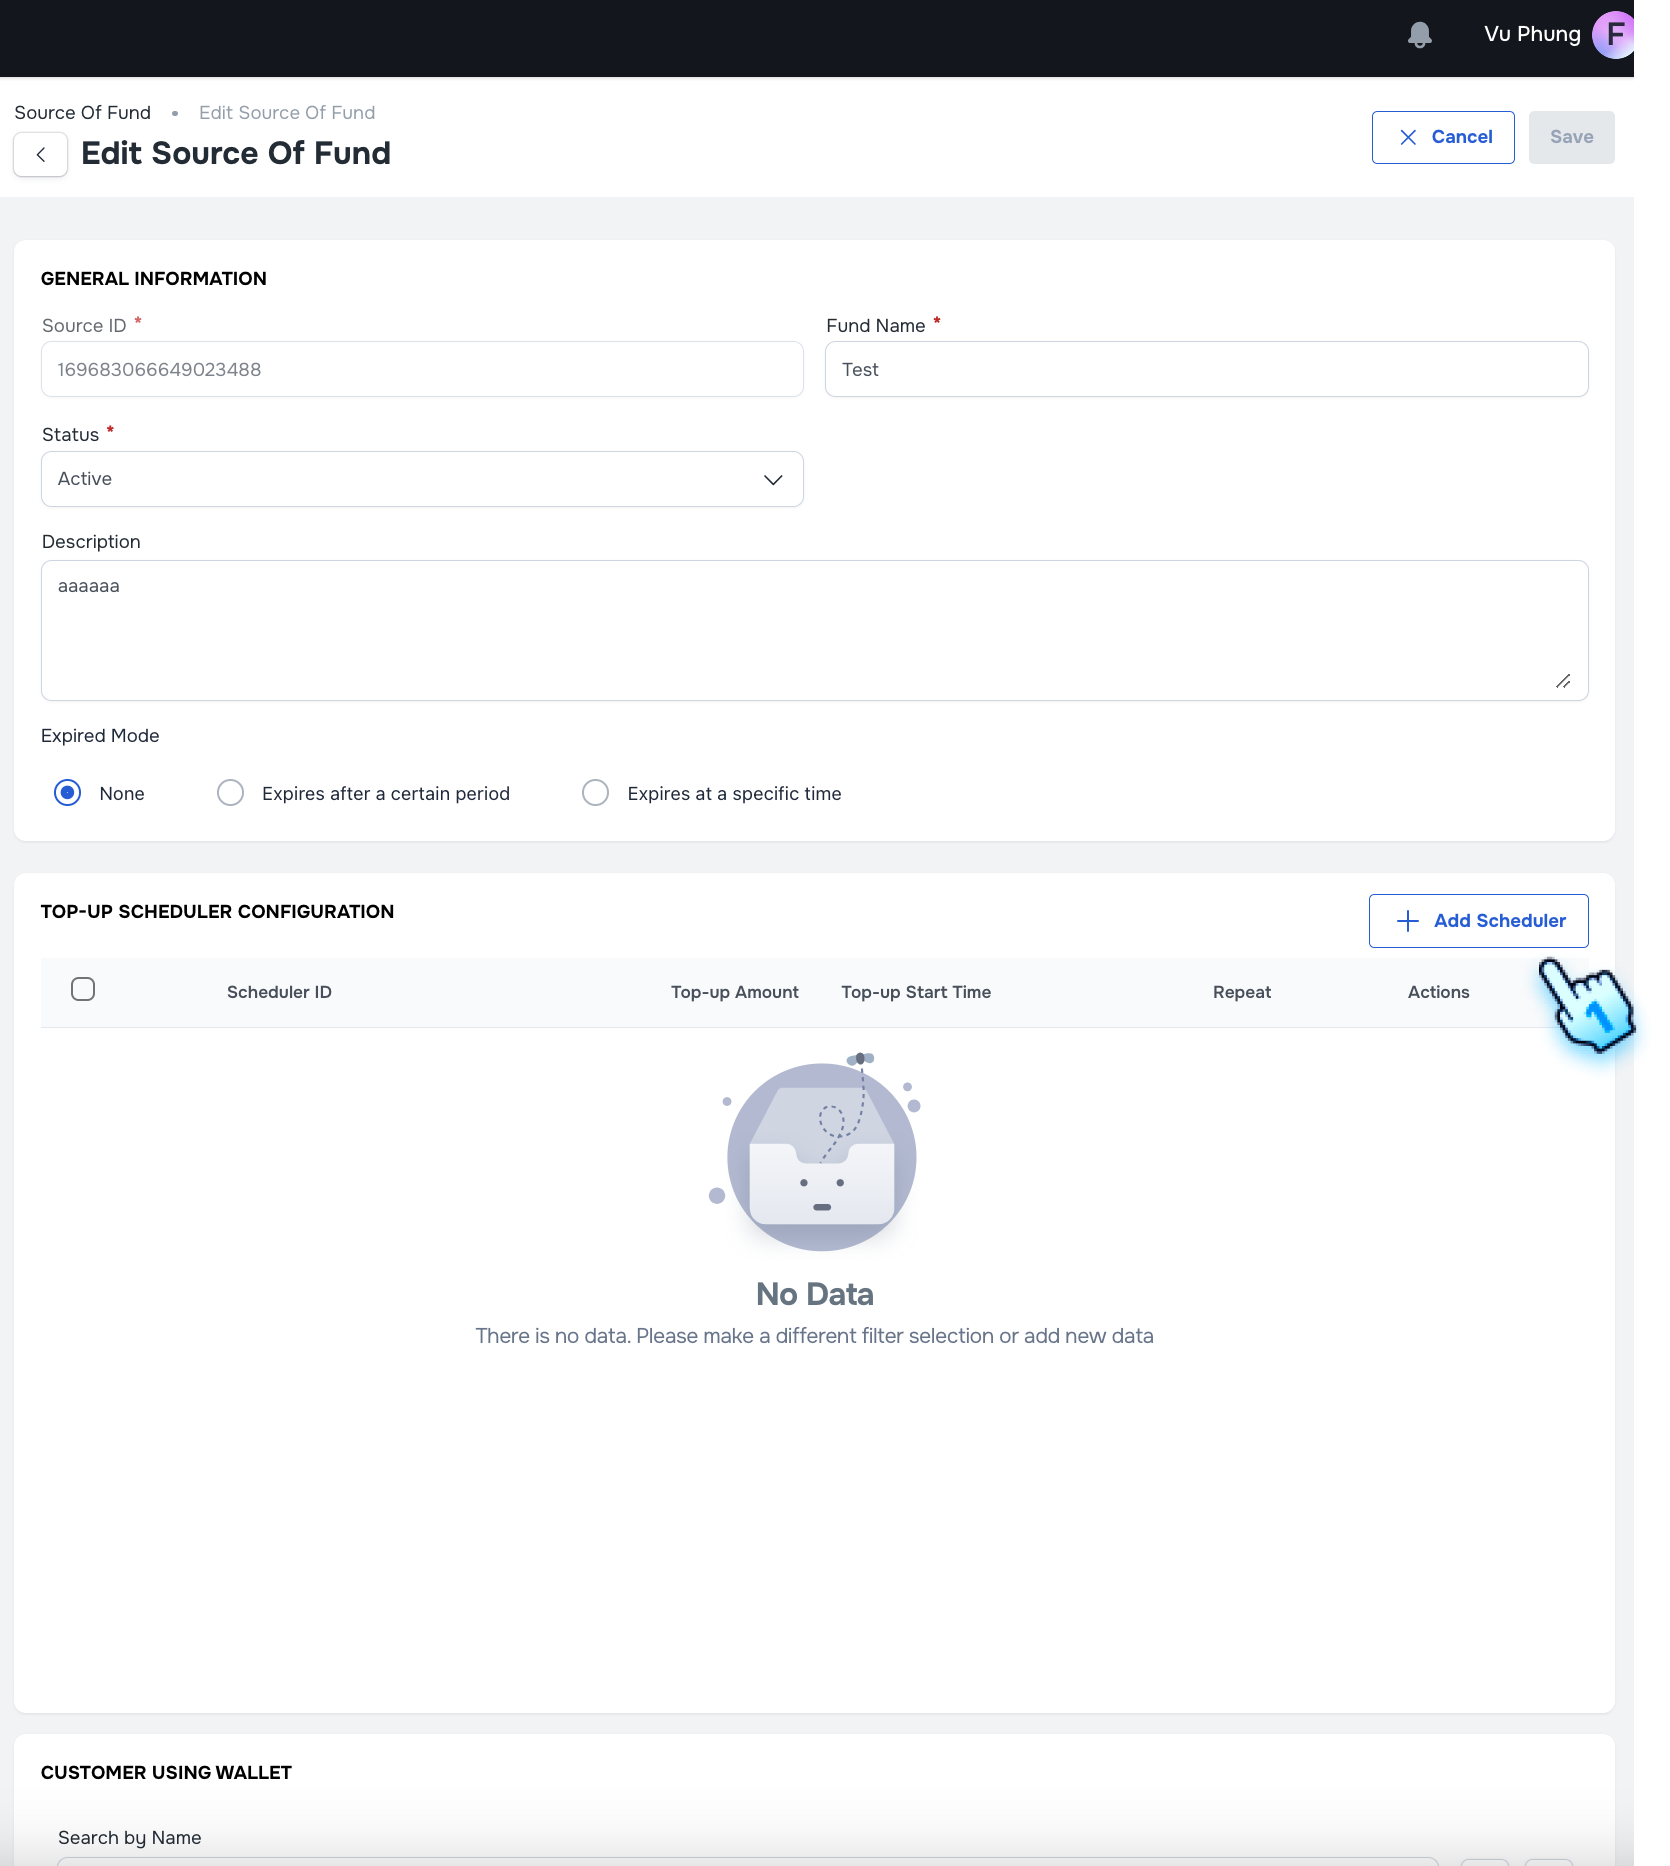
Scheduler Management
- Access Edit Fund Page
- Navigate to the edit fund page.
- Add Scheduler into the Fund
- Click "Add Scheduler" button
- Submit the form
- Enter Topup Amount
- Select the Top-up Start date and time
- Select Repeat by Daily, Weekly, or Monthly
- Click "Add" button to submit the form
- Edit Scheduler
- Navigate to the edit scheduler from three-dot menu
- Enter or select updated details.
- Click "Save" to update the scheduler details.
- The scheduler details will be updated successfully.
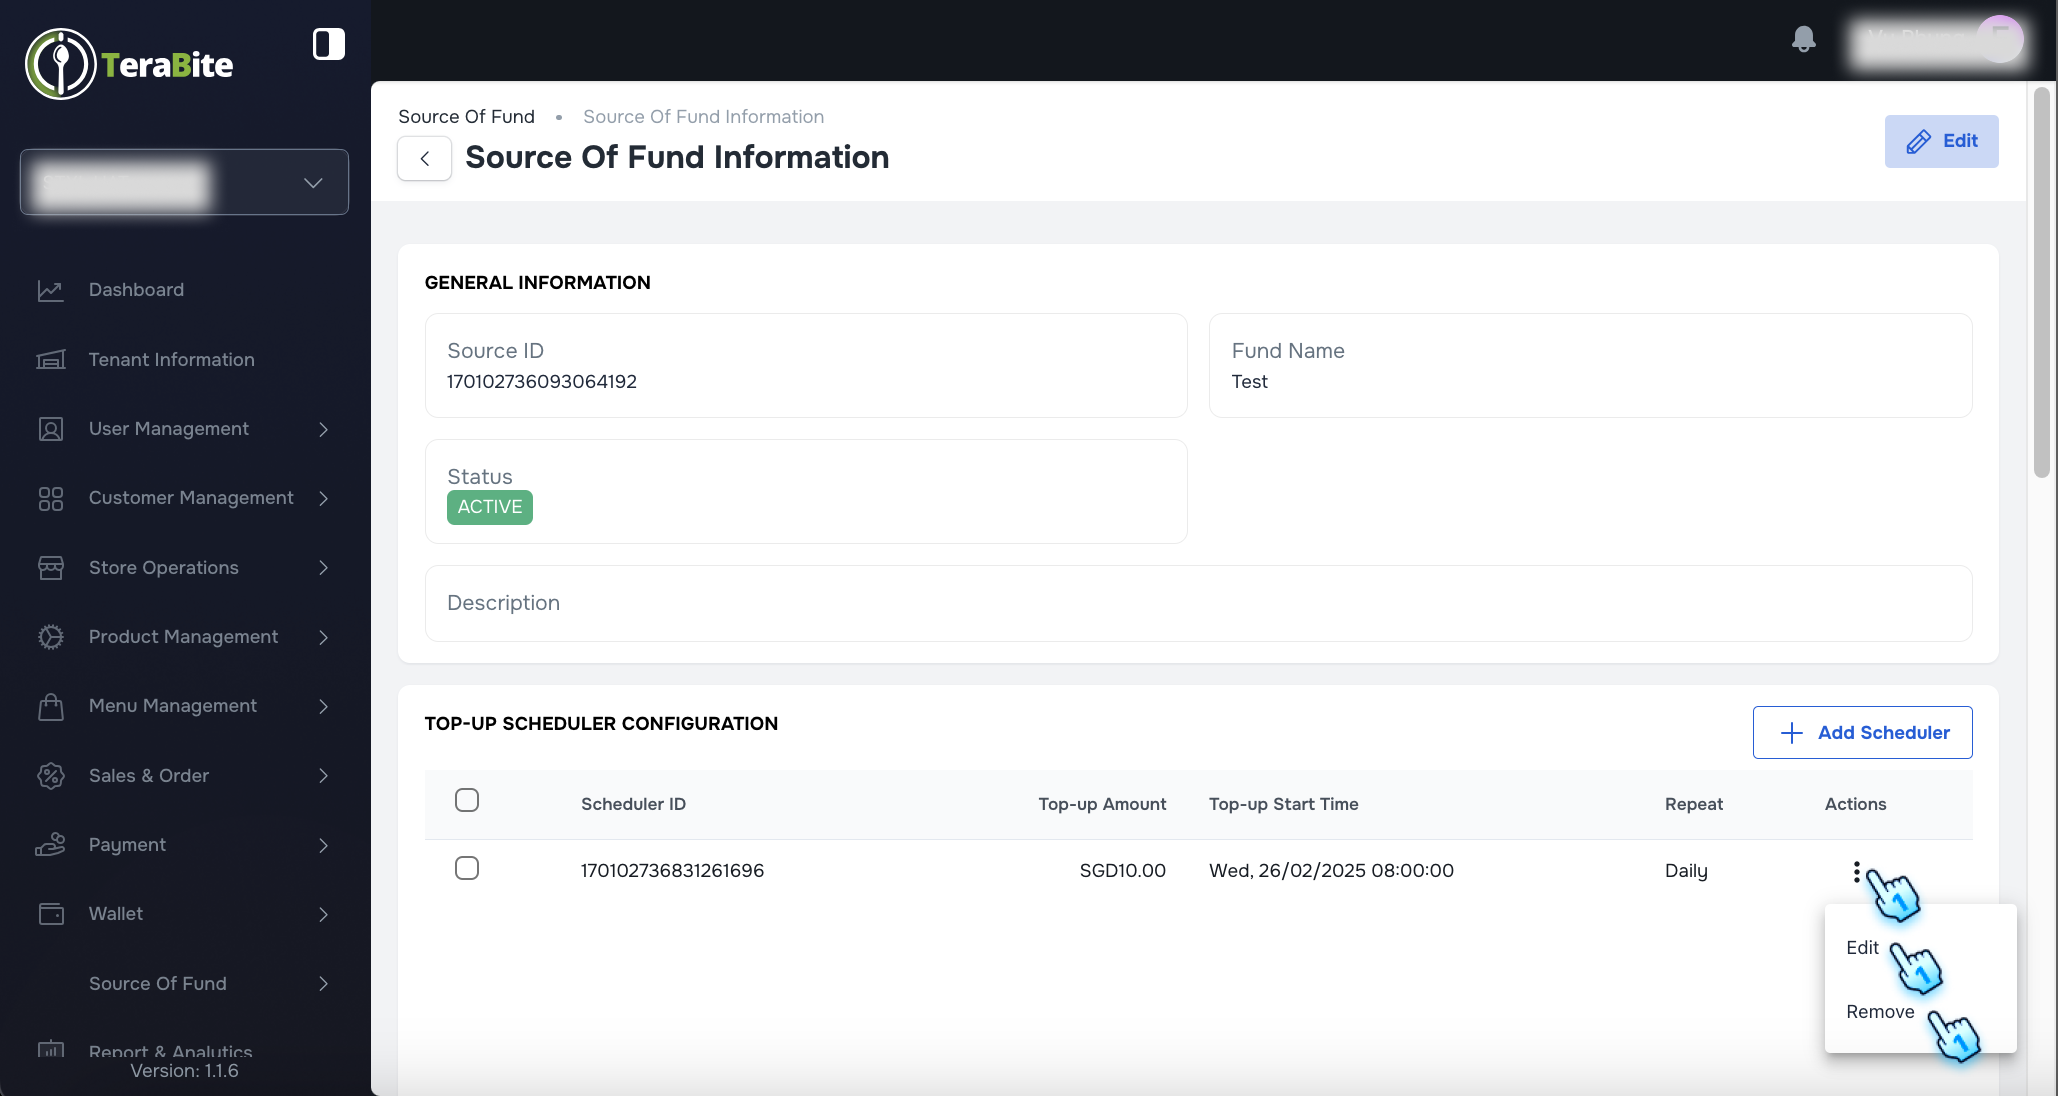
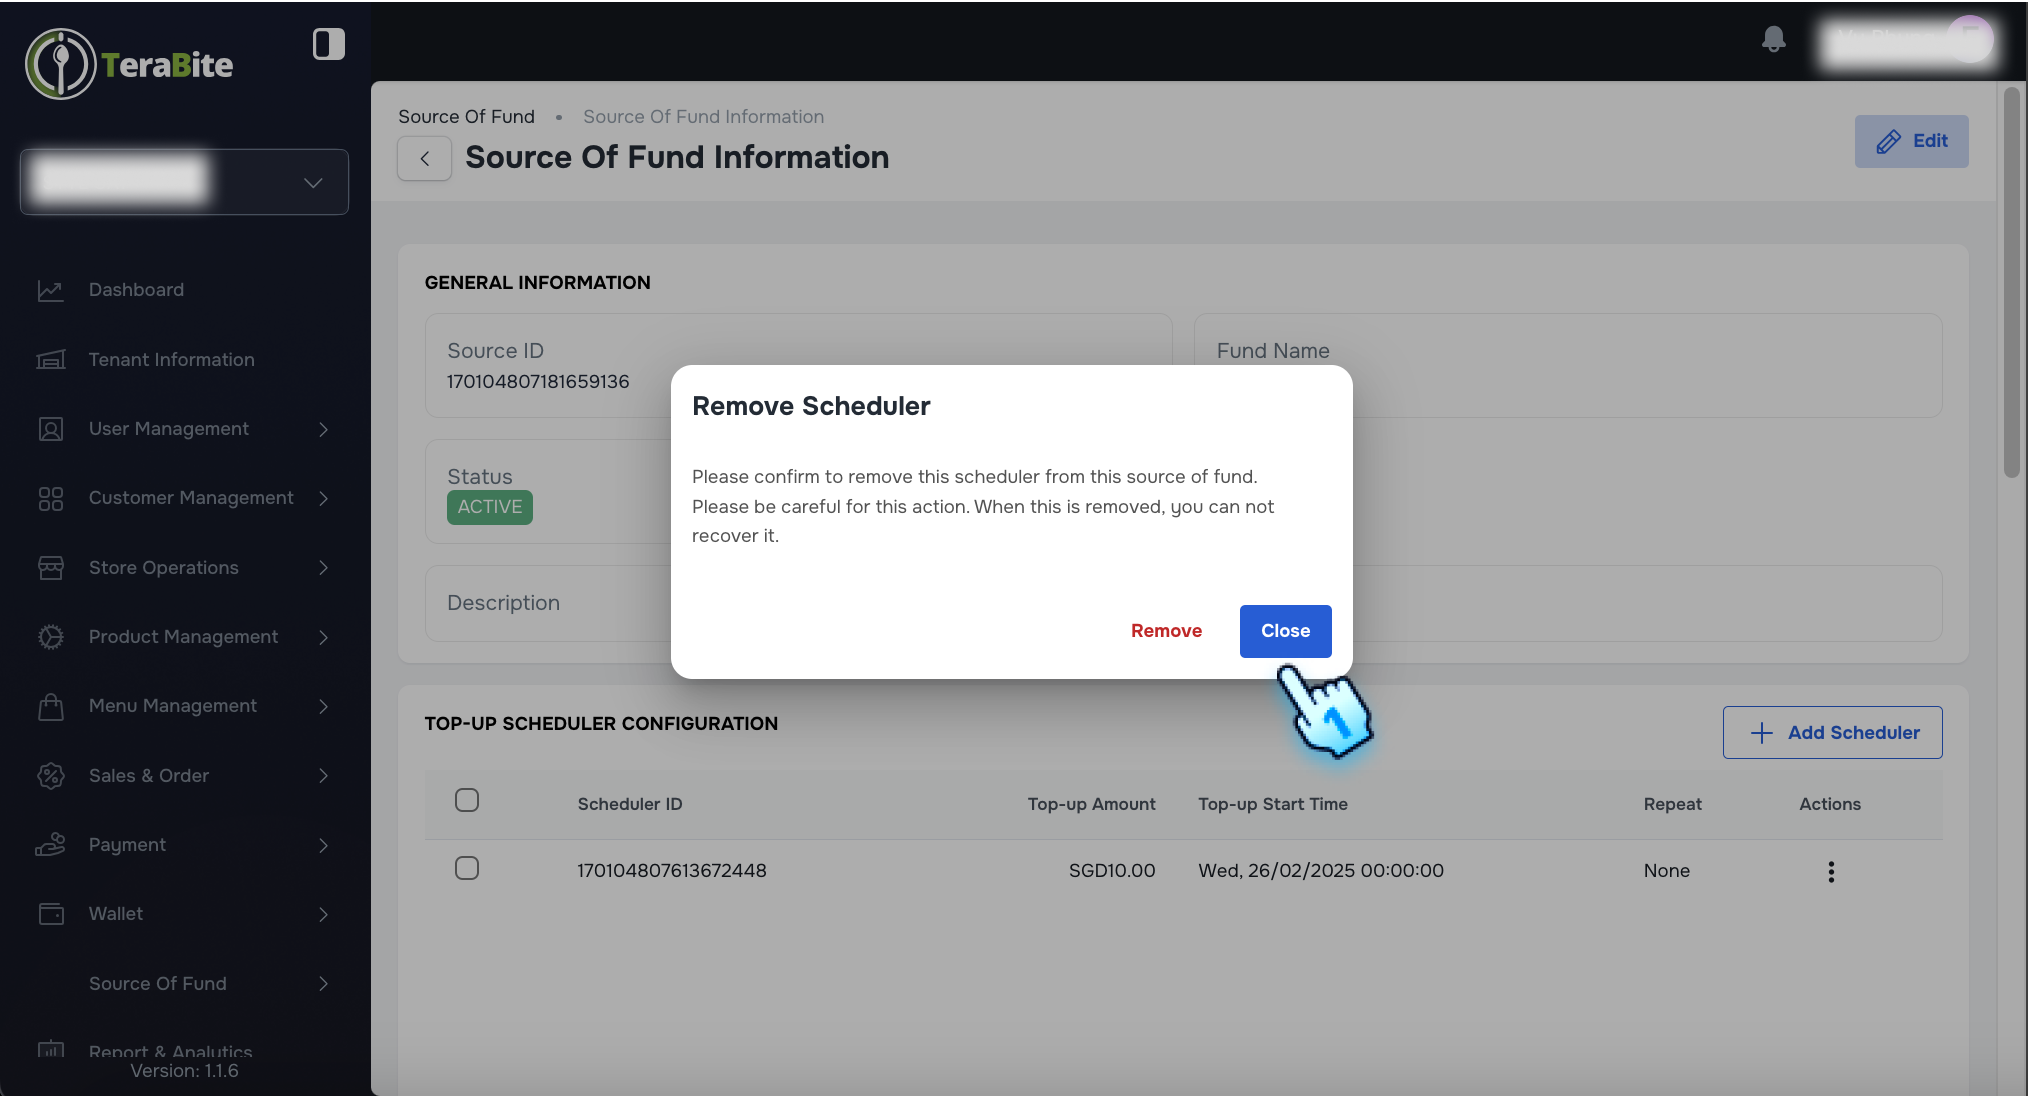
- Remove a Scheduler
- Click the three-dot menu and select "Remove."
- Confirm Delete in A confirmation dialog
- The scheduler is removed from the list
#
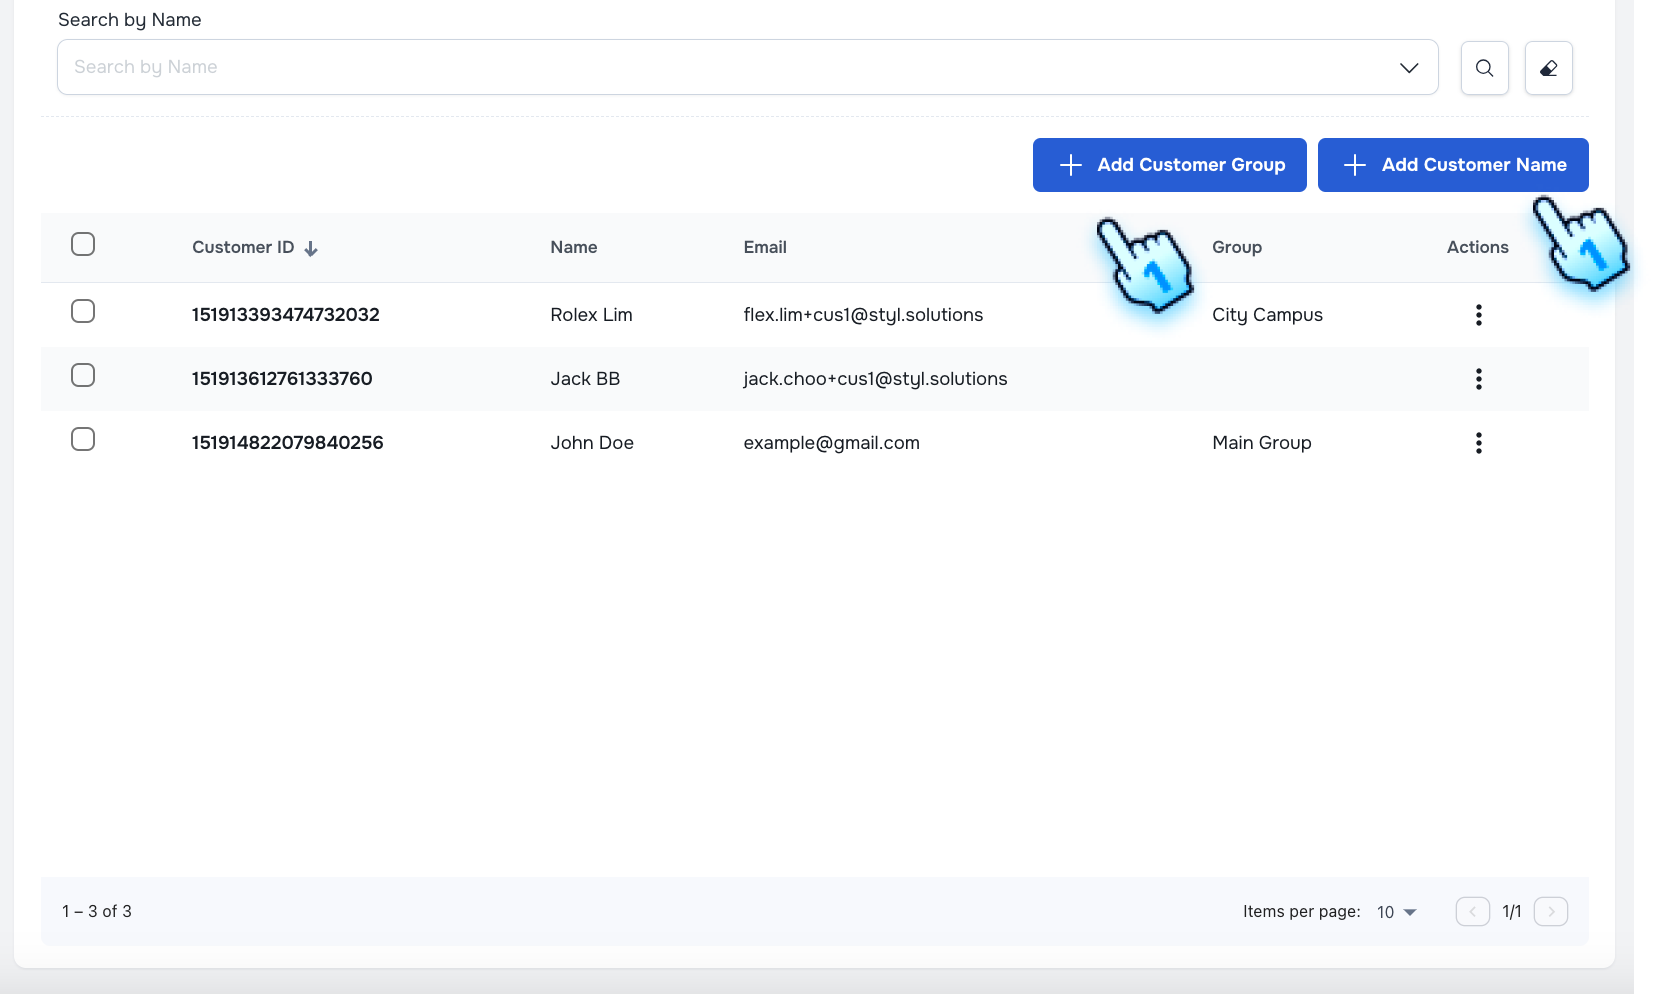
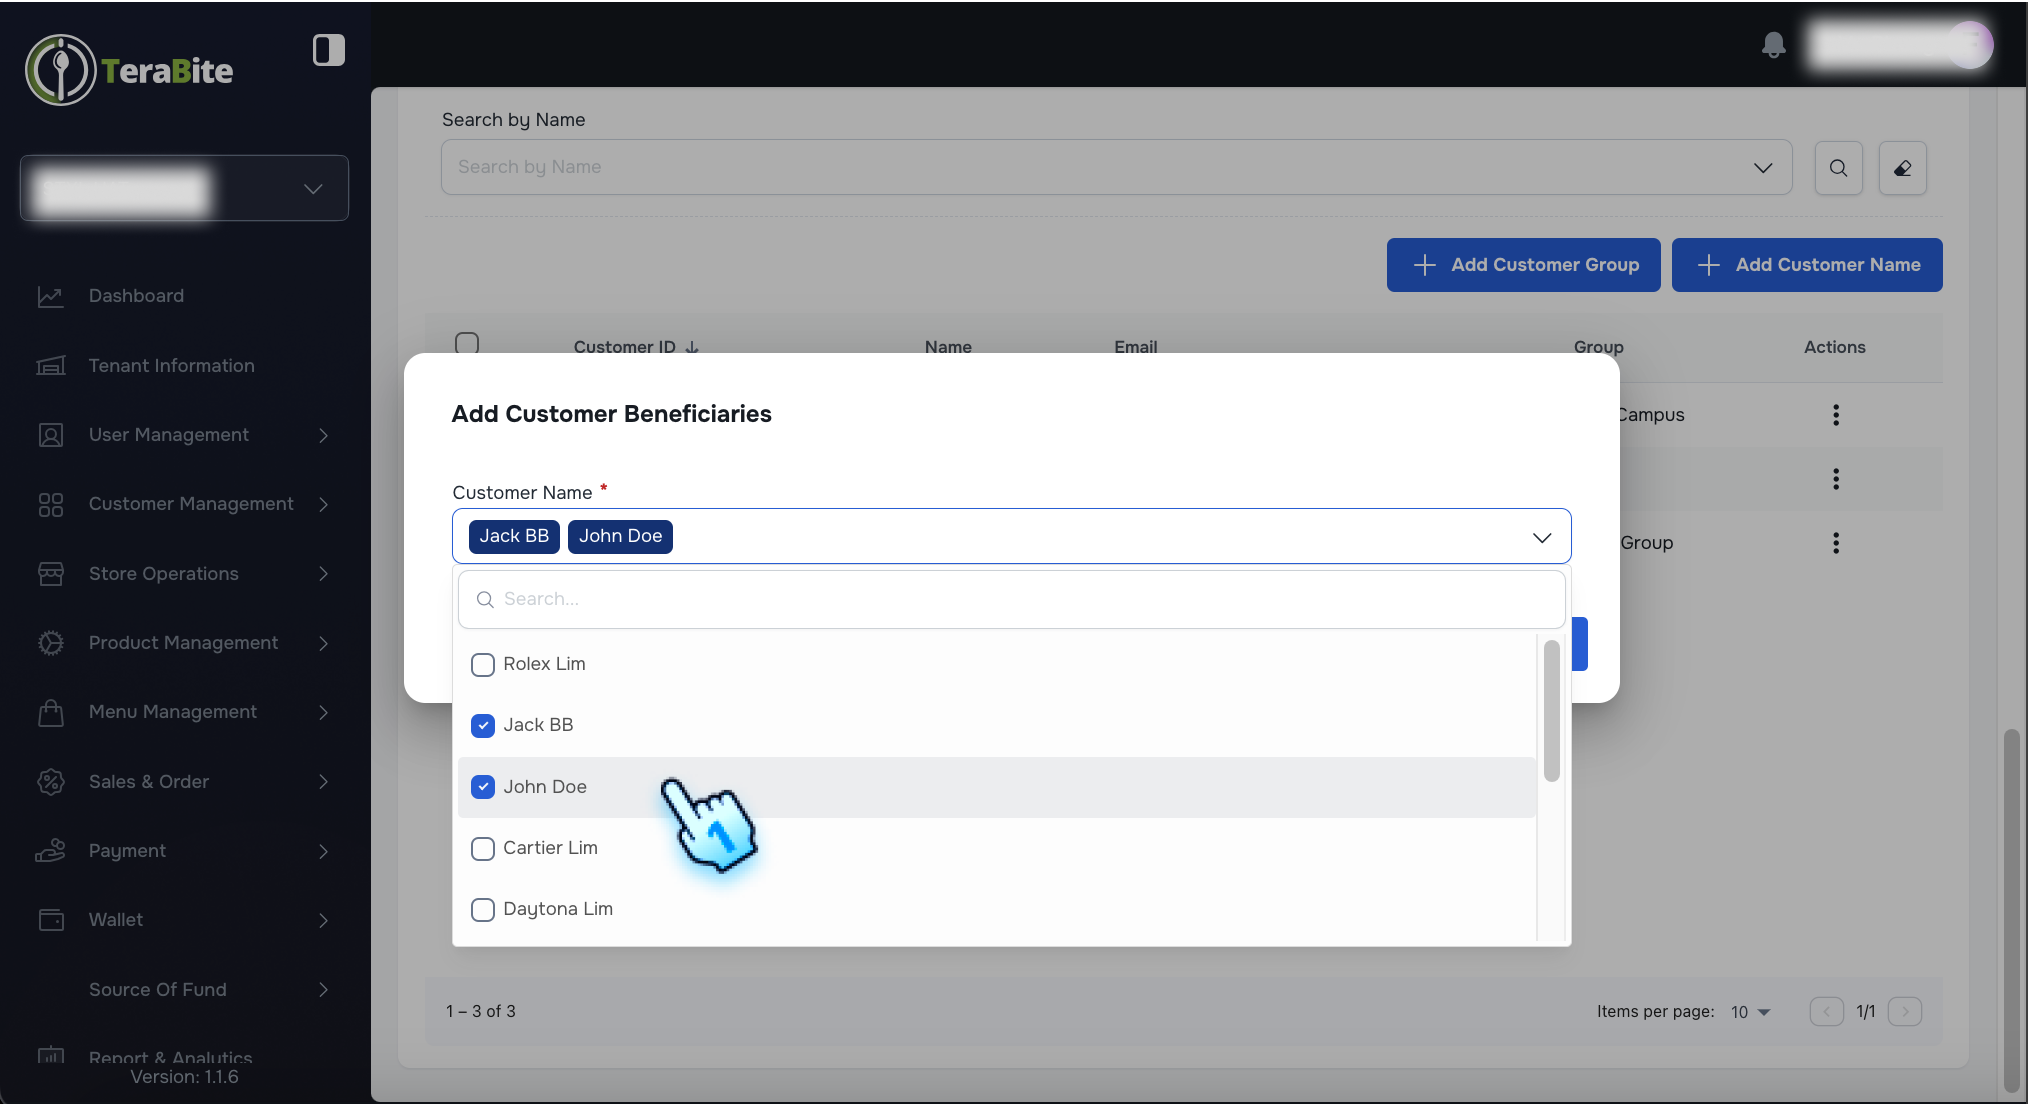
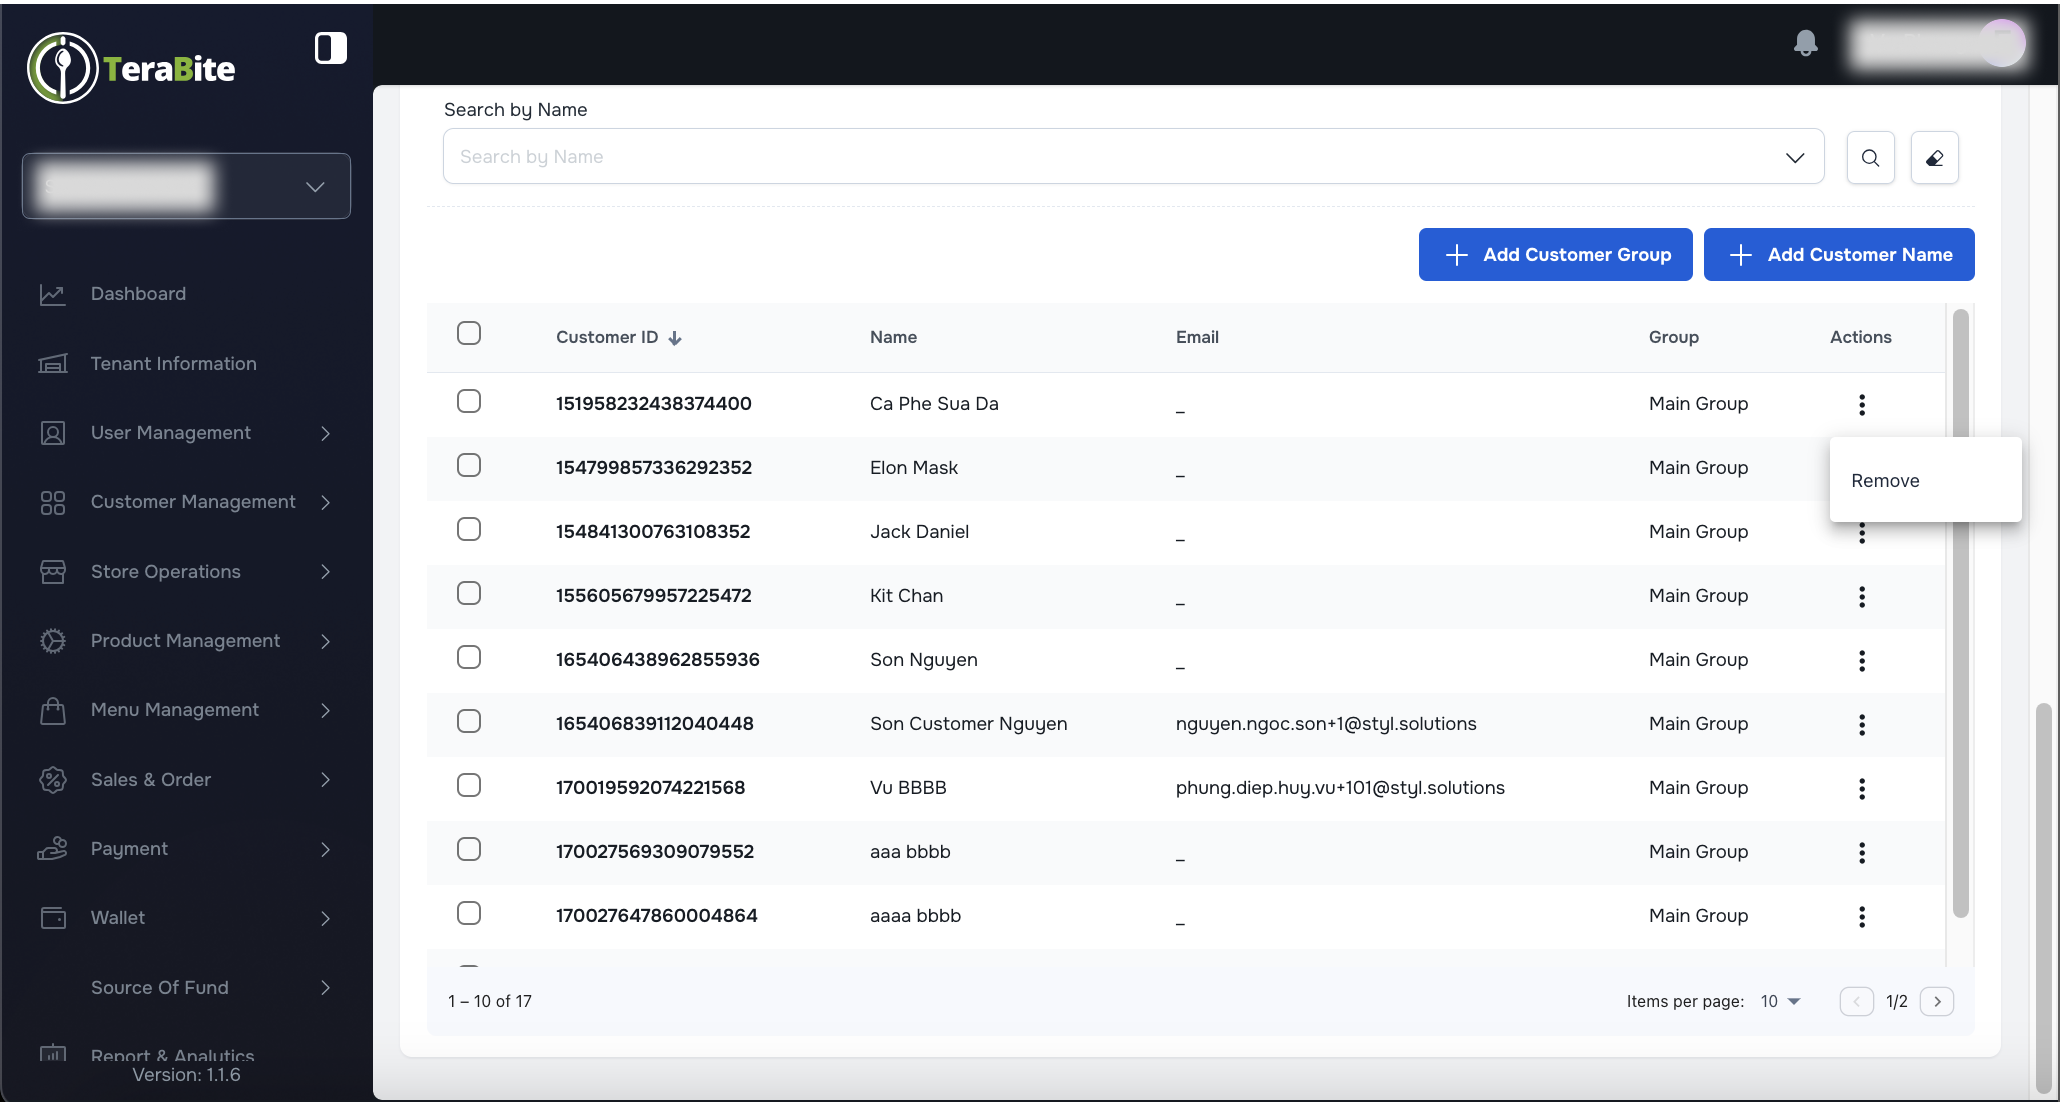
Assign Customer to Source of Fund
- Assign customer by selecting customers
- Navigate to the edit fund page.
- Select one or multiple customers to add to the fund.
- Click "Add" to submit the assignment.
- The customers will be added successfully and displayed in the list.
- Assign customers by customer group
- Navigate to the edit fund page.
- Select customer group to add all customers in the group to the fund.
- Click "Add" to submit the assignment.
- The customers will be added successfully and displayed in the list.
#
Conclusion
The source of fund management process allows users to add, search, filter, and edit funds efficiently. By following these steps, users can ensure accurate fund management and maintain up-to-date financial records.
#
Screen flow
#
Add New Fund - Successfully Add a Fund with Valid Data

#
Manage Source of Fund
#
Scheduler Management

#
Assign Customer to Source of Fund