#
Staff Management
#
Description
This document outlines the procedures for creating staff members, viewing and editing their details, and managing their statuses within the system.
#
Create Staff
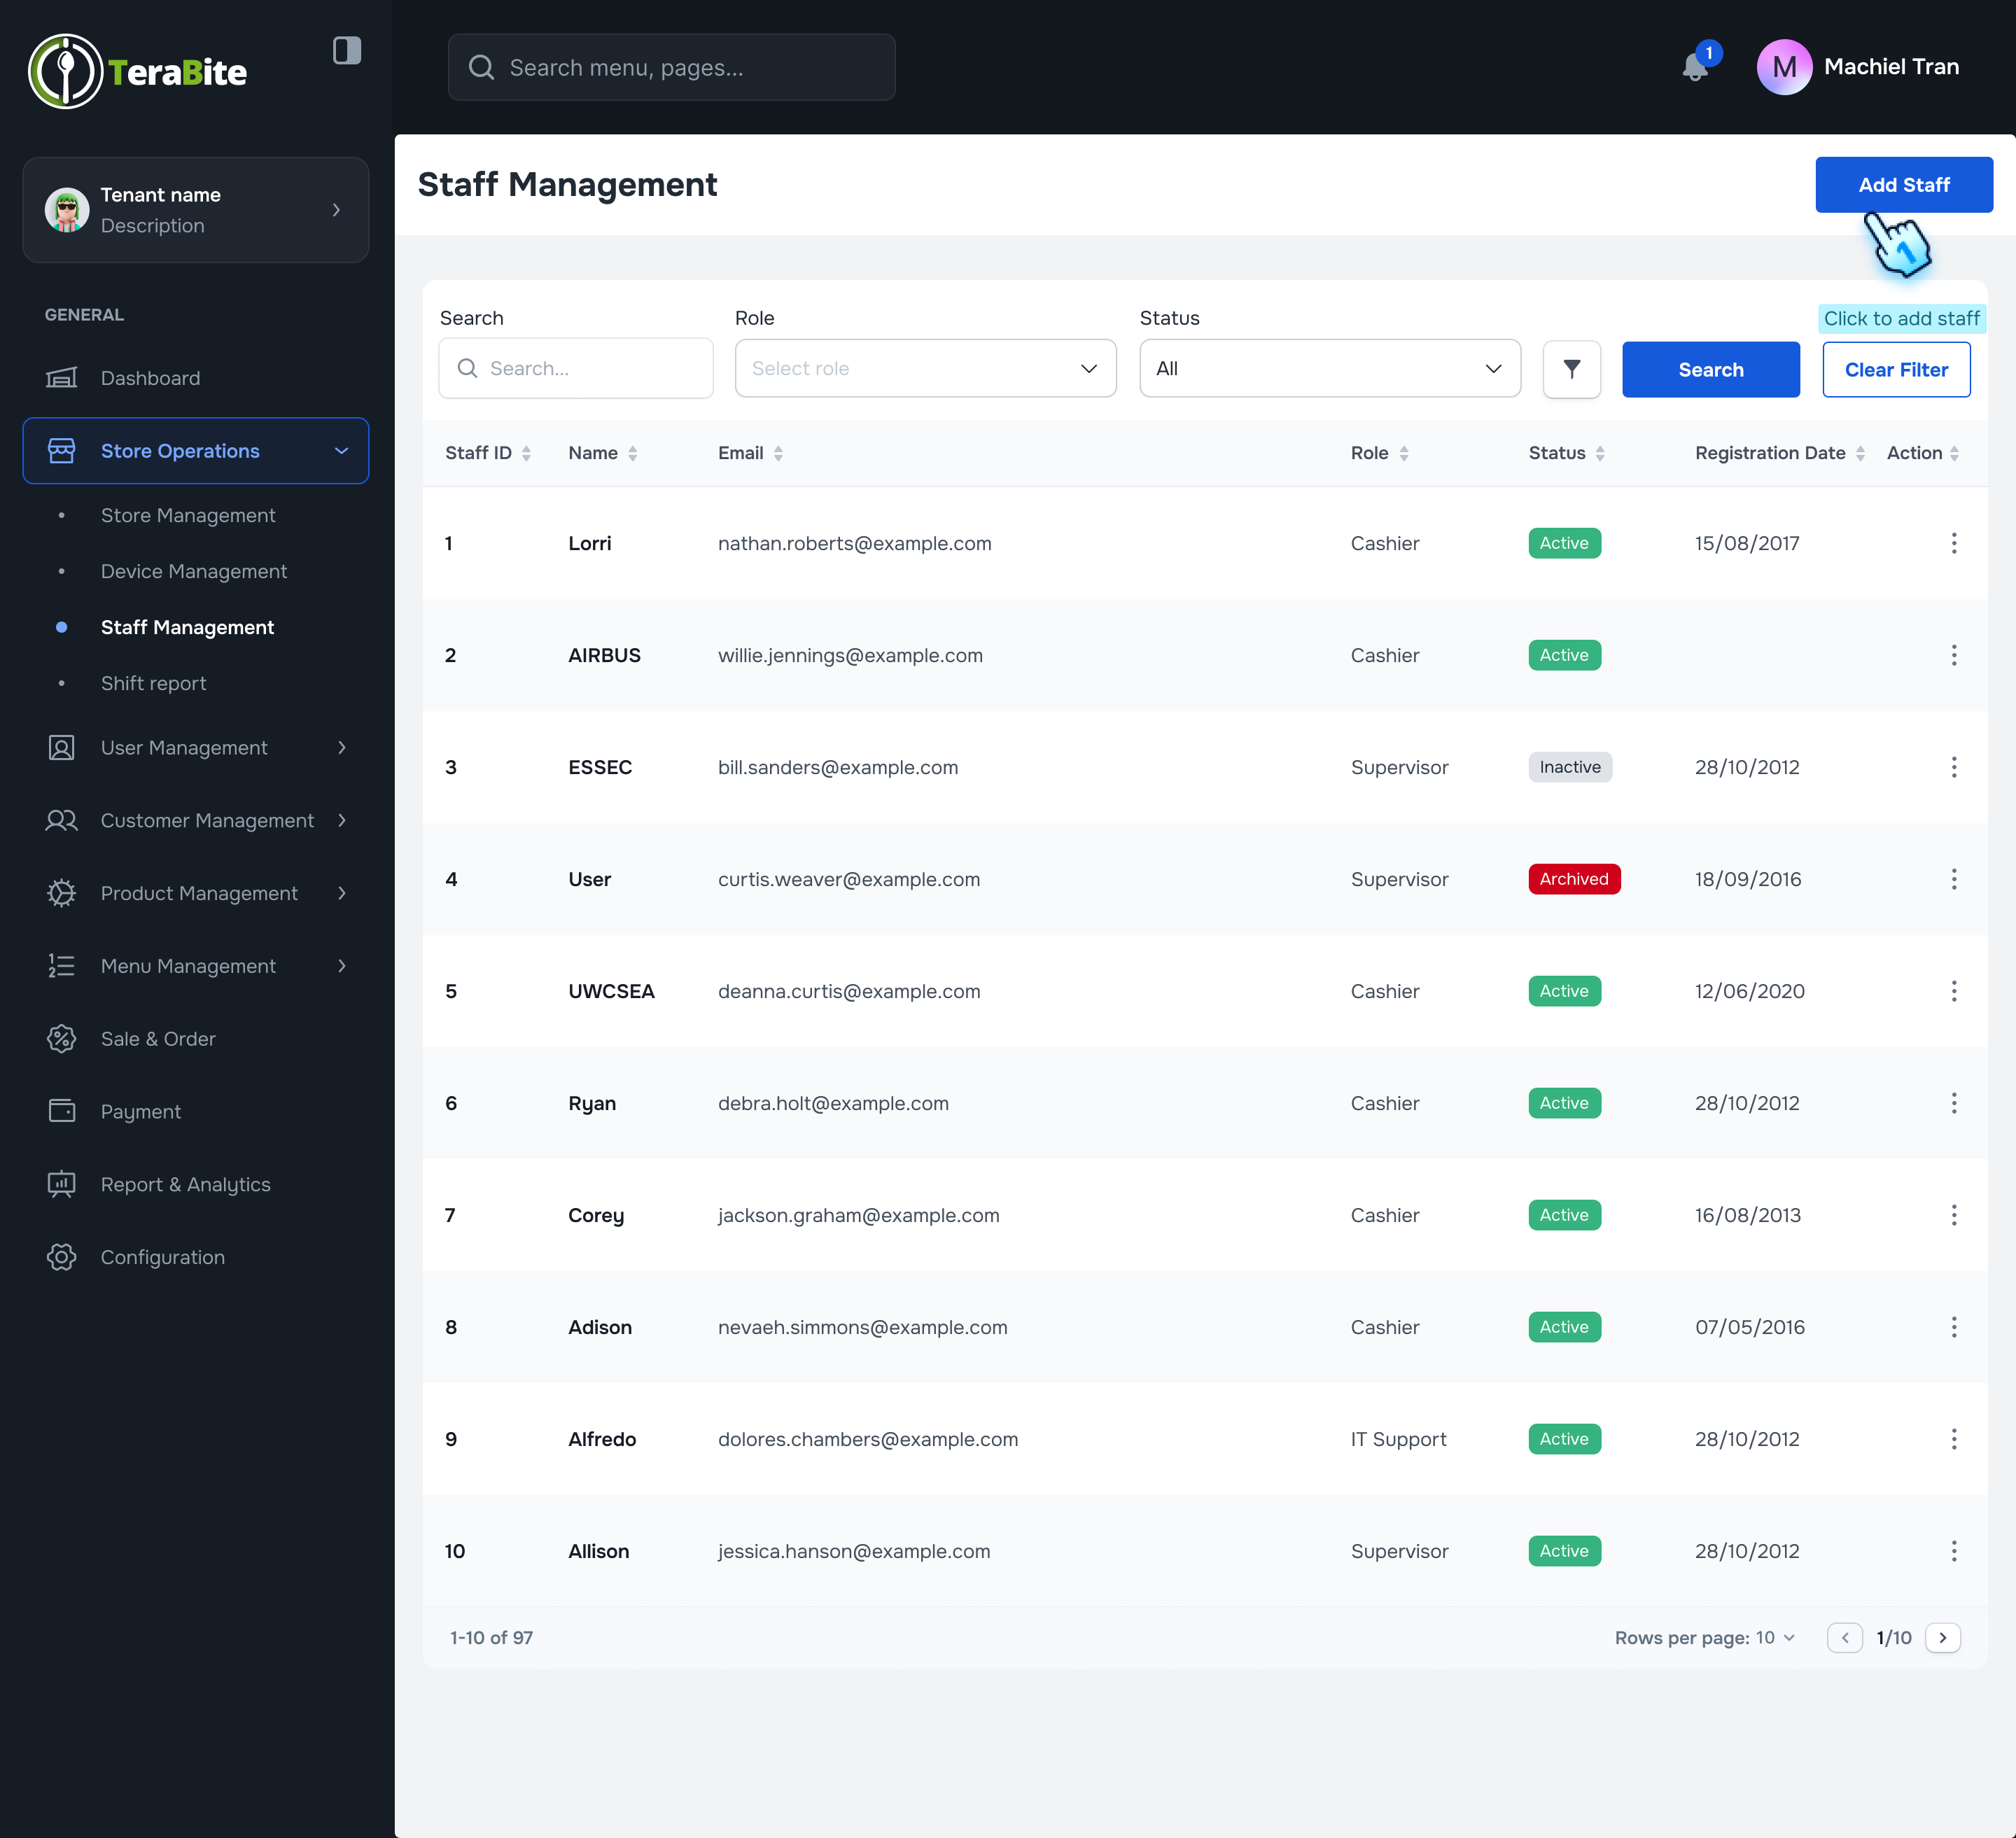
- Access Staff Management
- Navigate to the Staff Management section.
- Initiate Staff Addition
- Click on the "Add Staff" button.
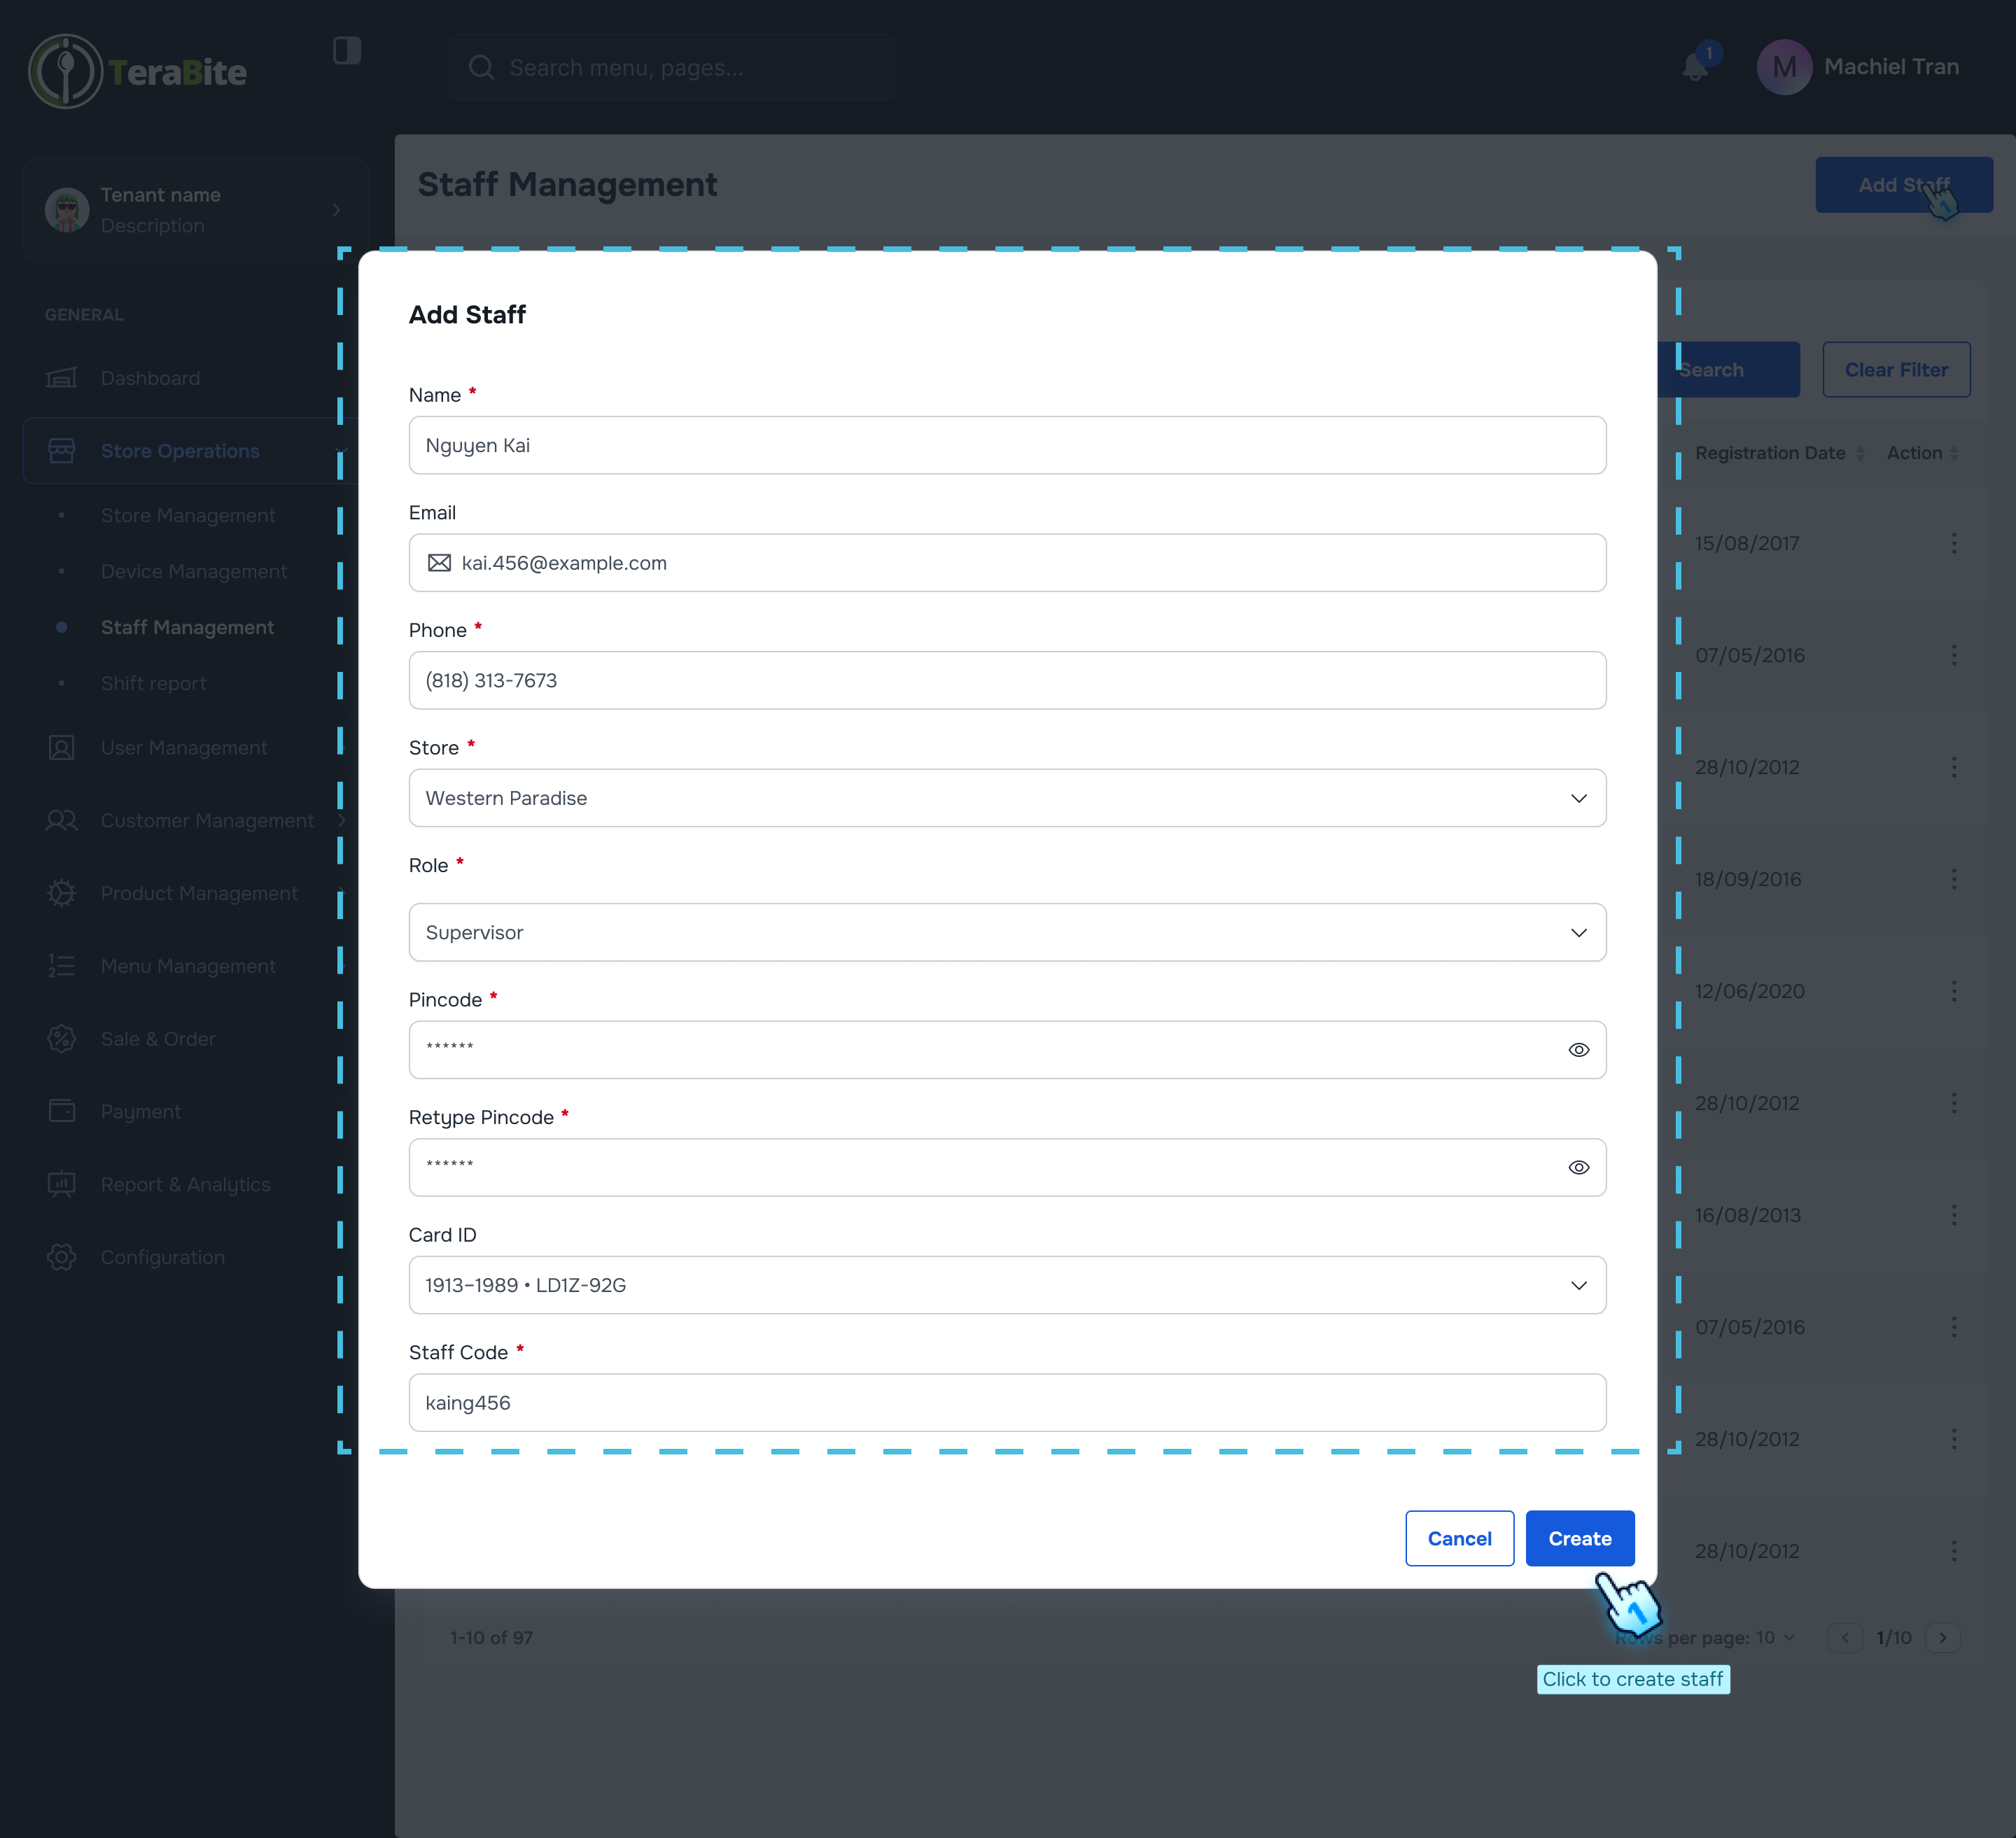
- Fill Required Information
- Complete all required fields in the staff information form.
- Submit Staff Information
- Click the "Create" button to finalize the addition of the staff member.
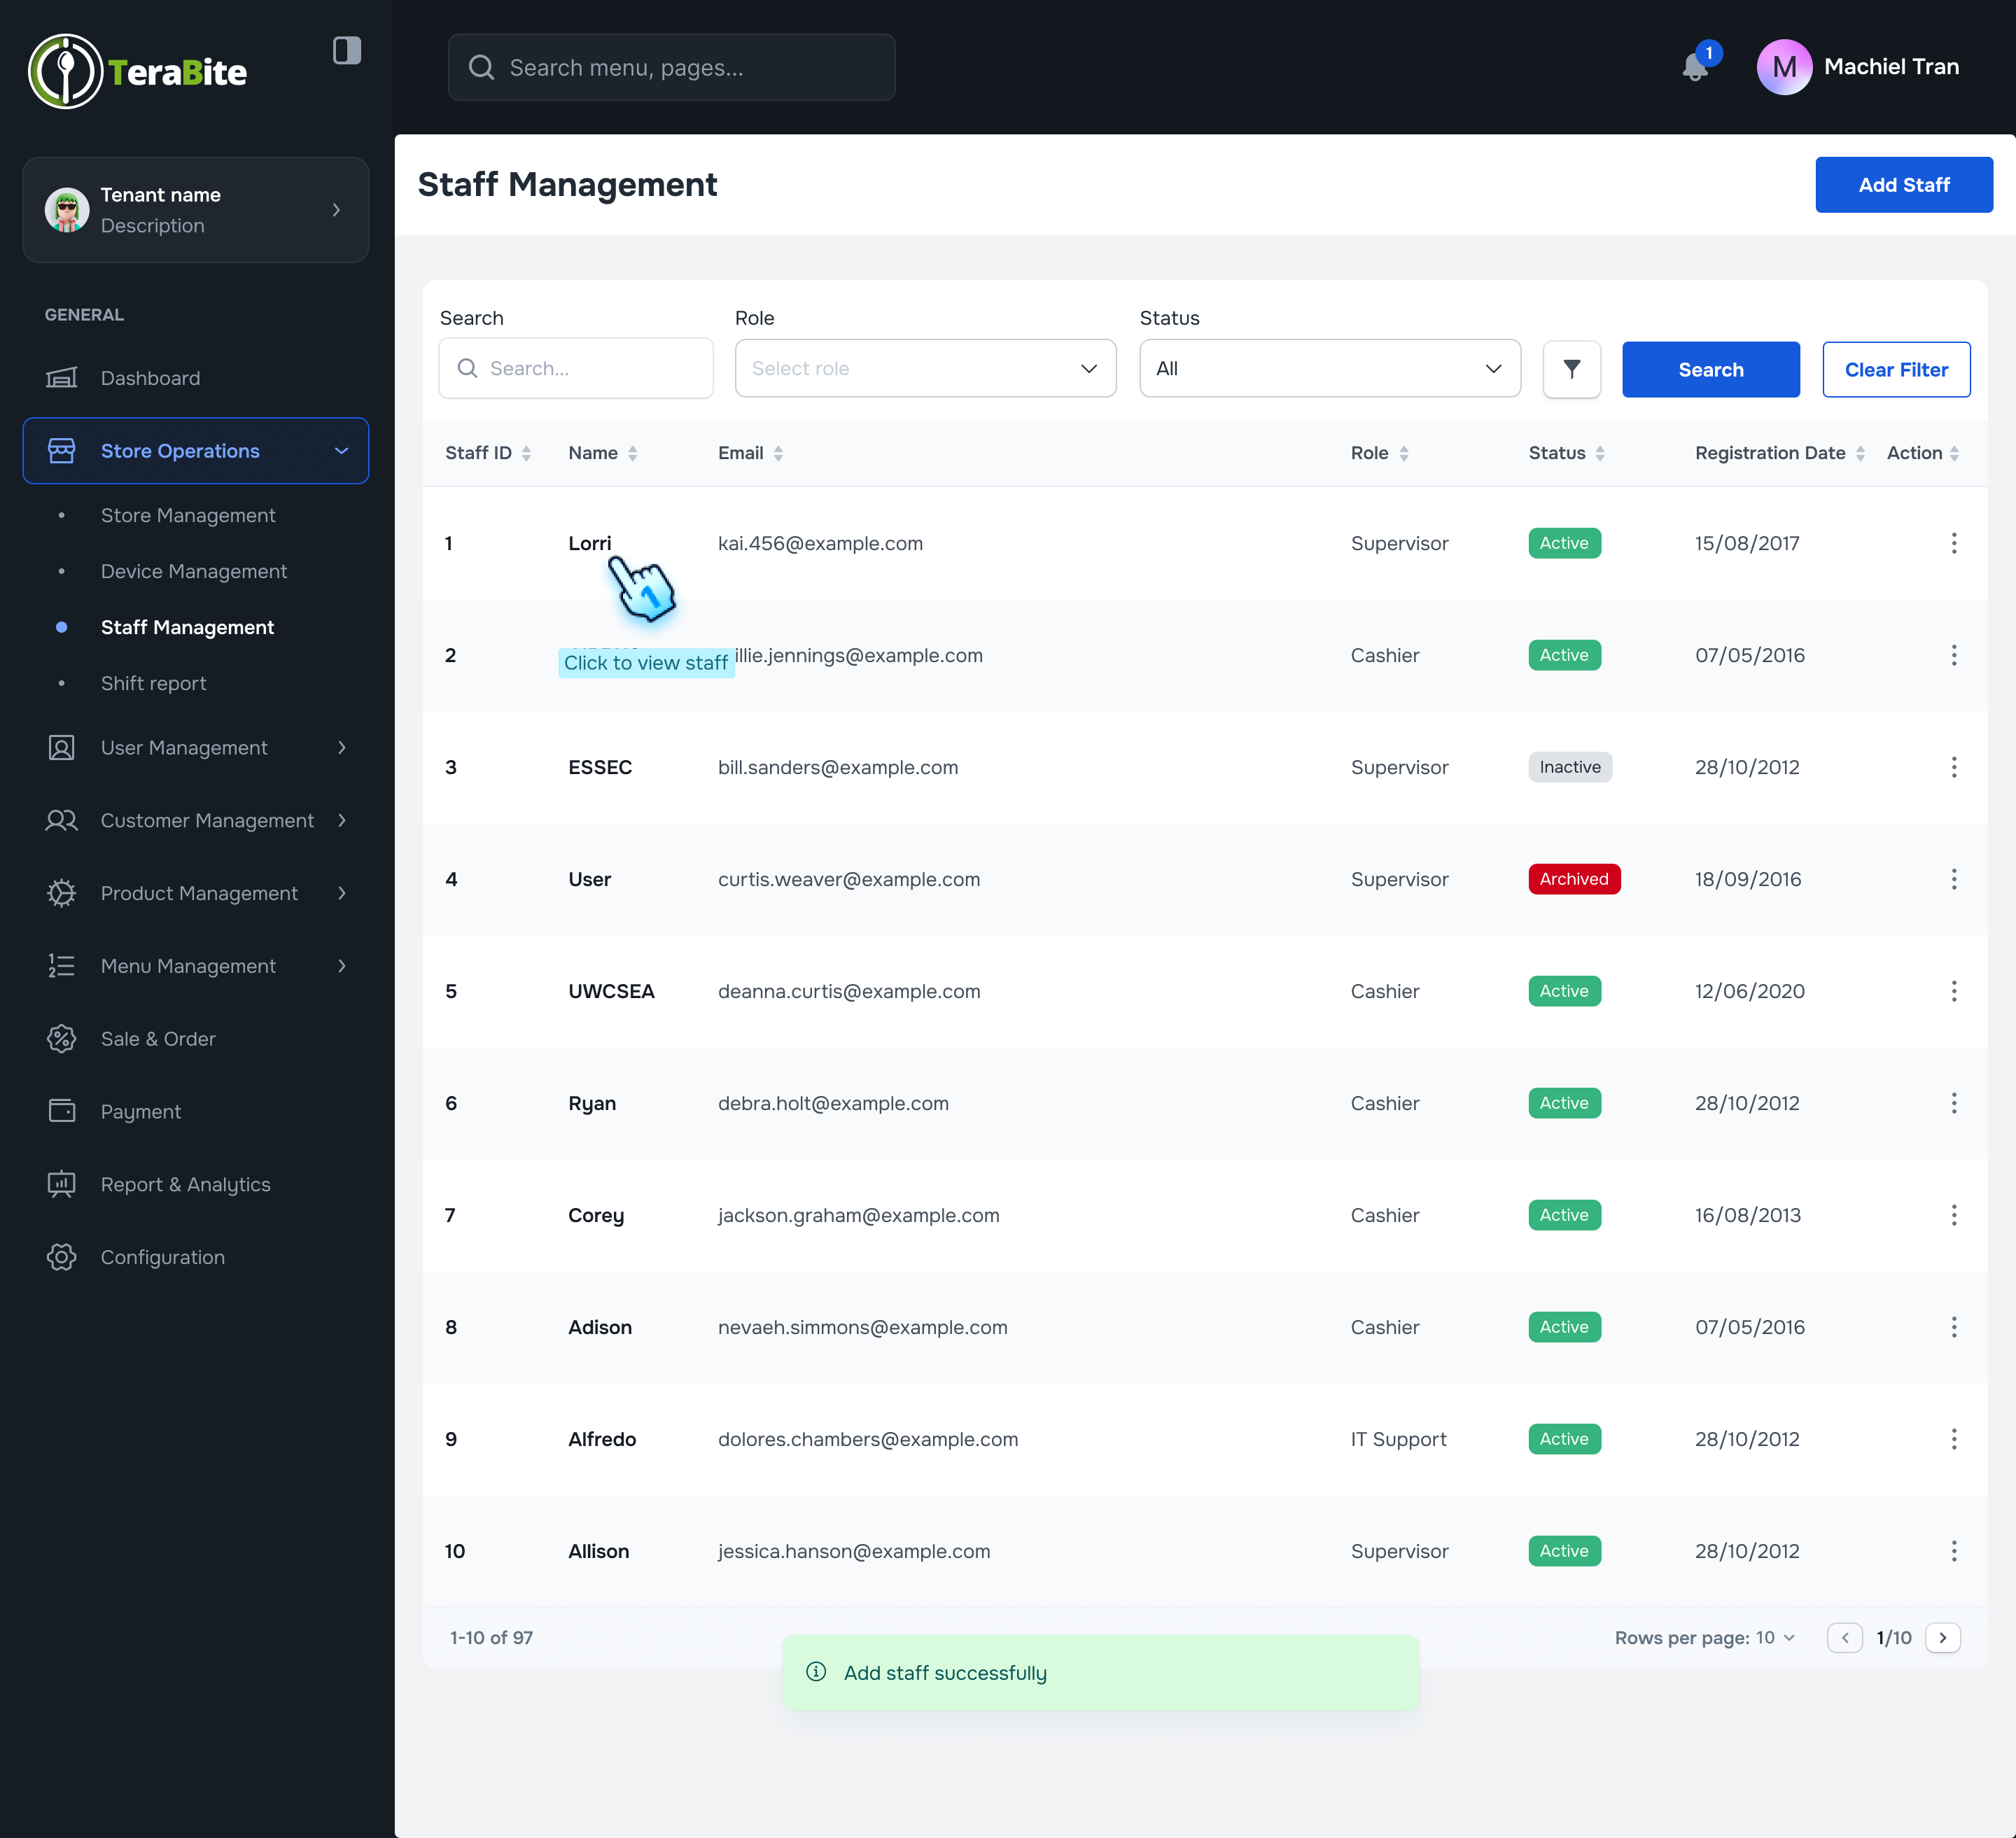
- Confirmation of Creation
- A confirmation message will be displayed indicating that the staff member has been created successfully.
#
View Staff and Edit Details
- Access Staff Details
- Click on the staff name to view their detailed information.
- Review Staff Details
- Review the displayed staff details for accuracy.
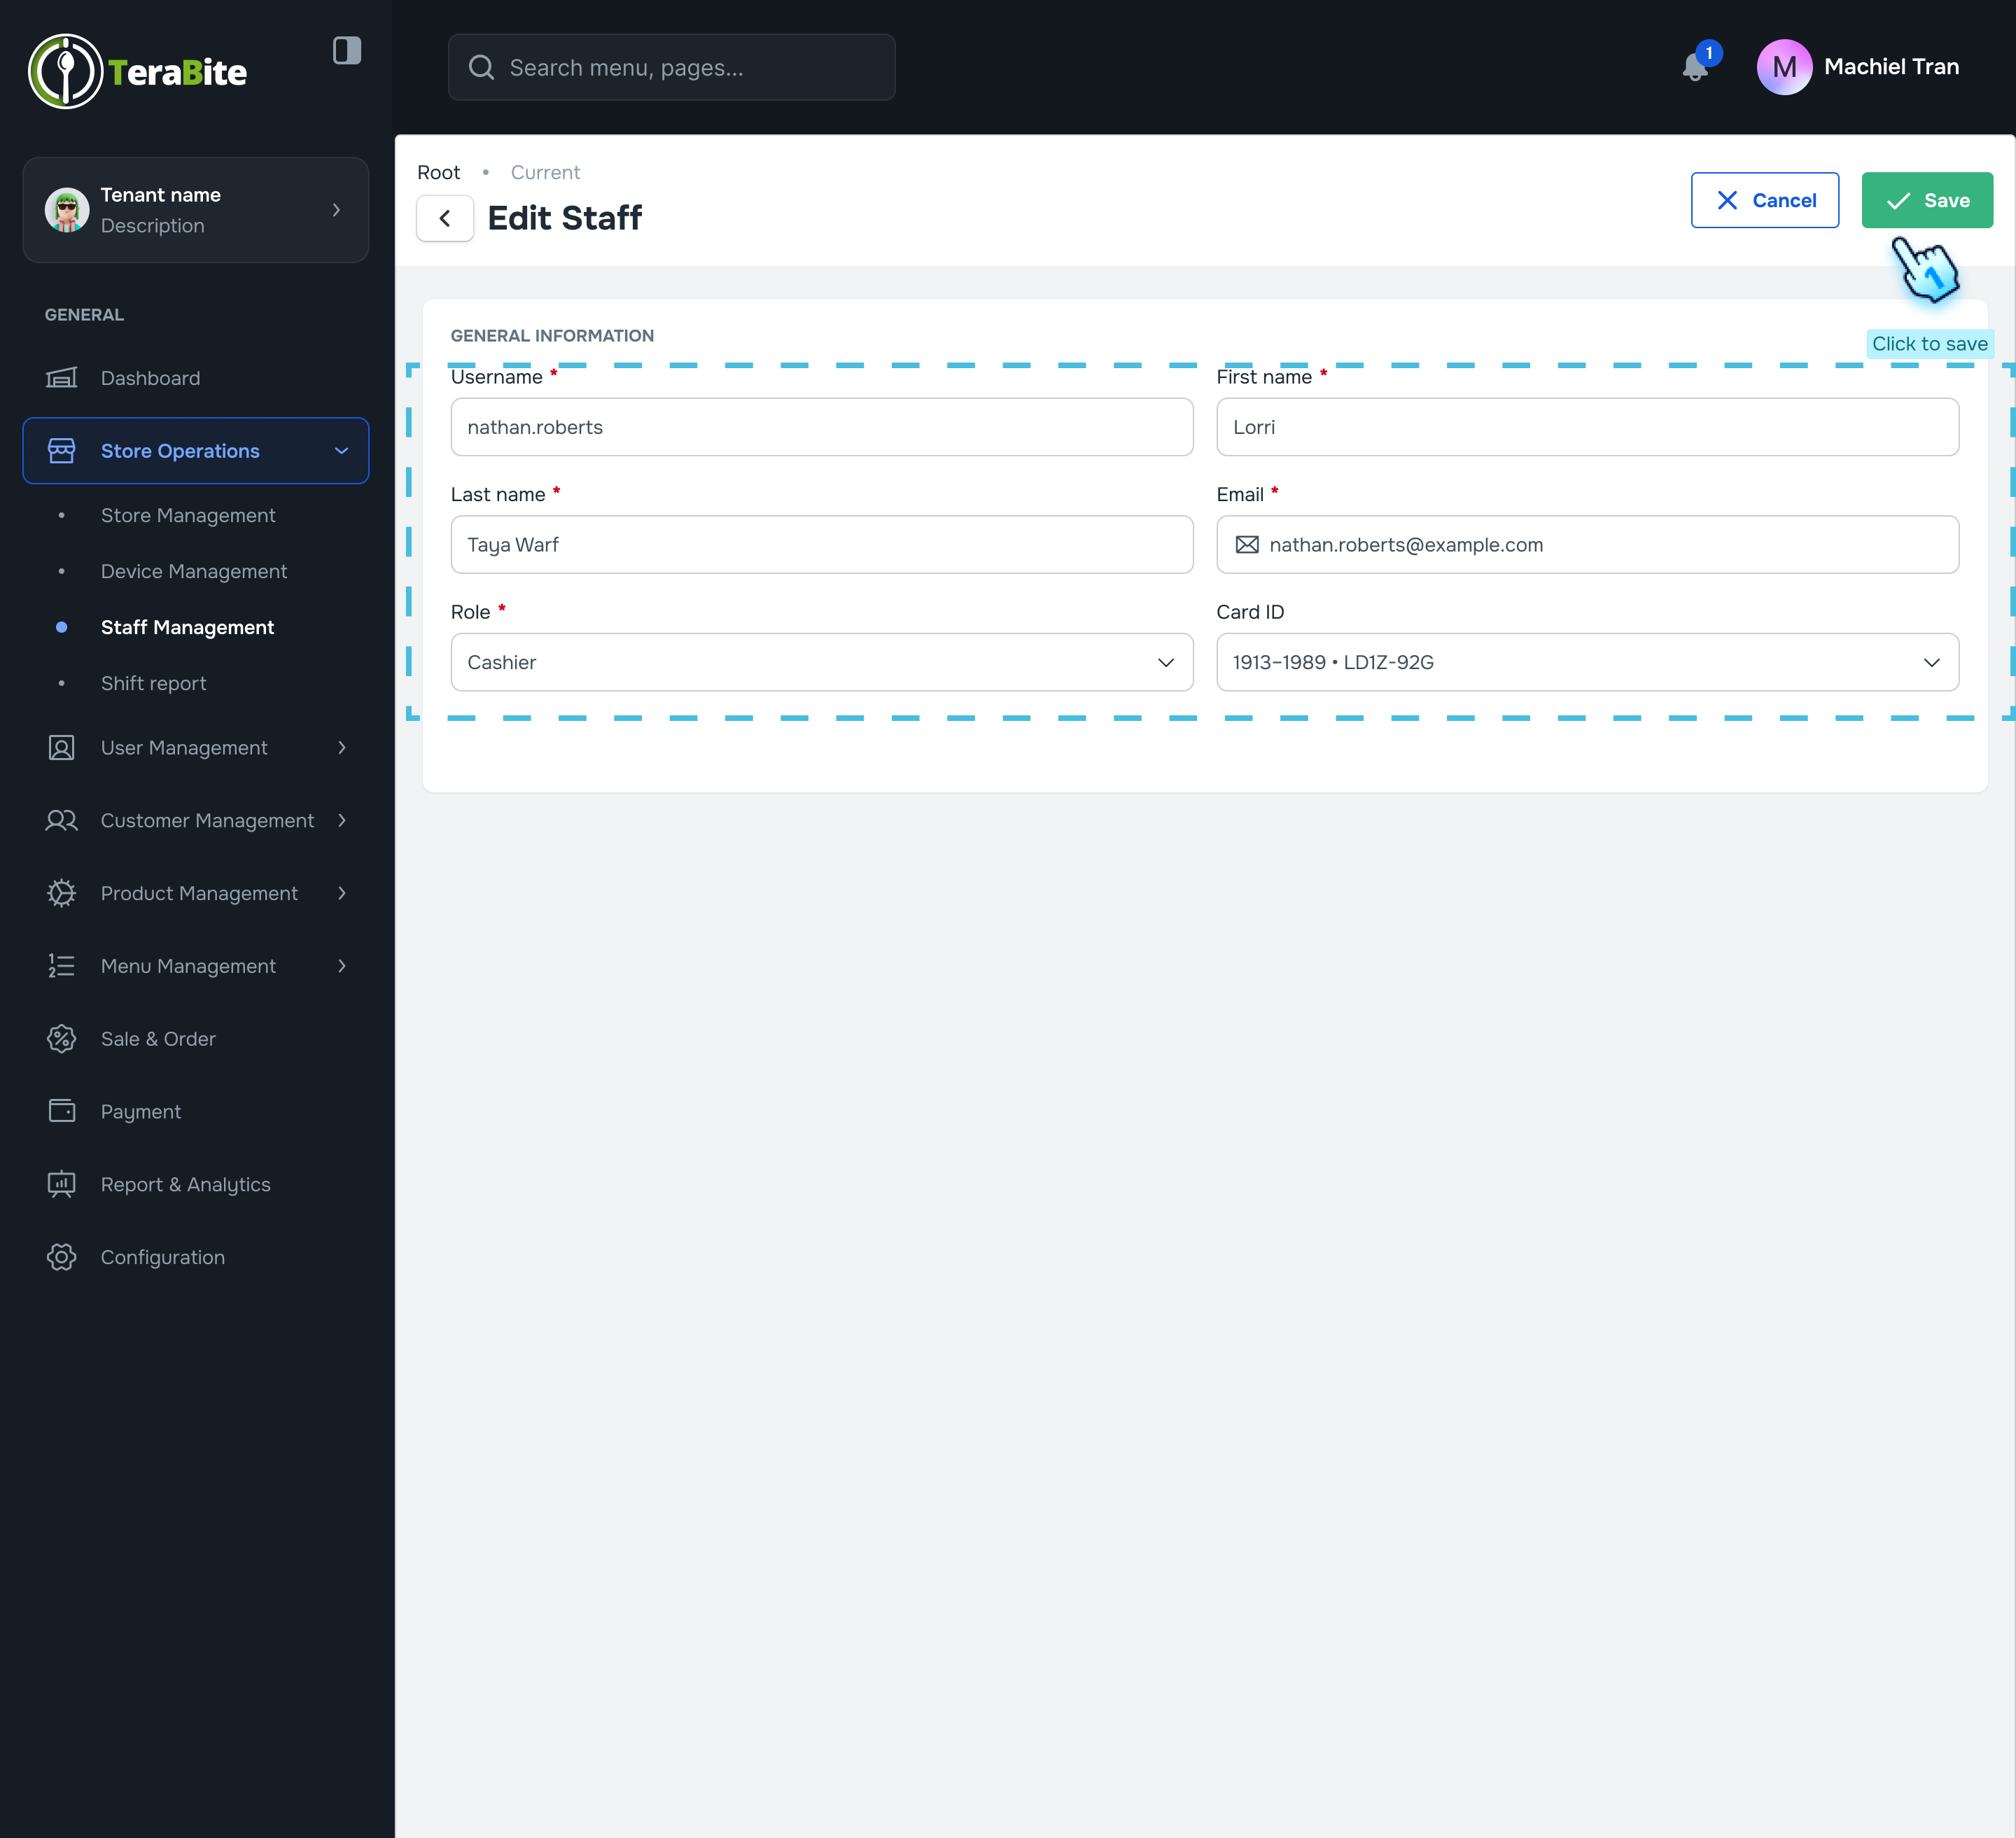
- Edit Staff Information
- Click the "Edit" button if any changes are necessary.
- Save Changes
- Modify the required information and click the "Save" button to apply changes.
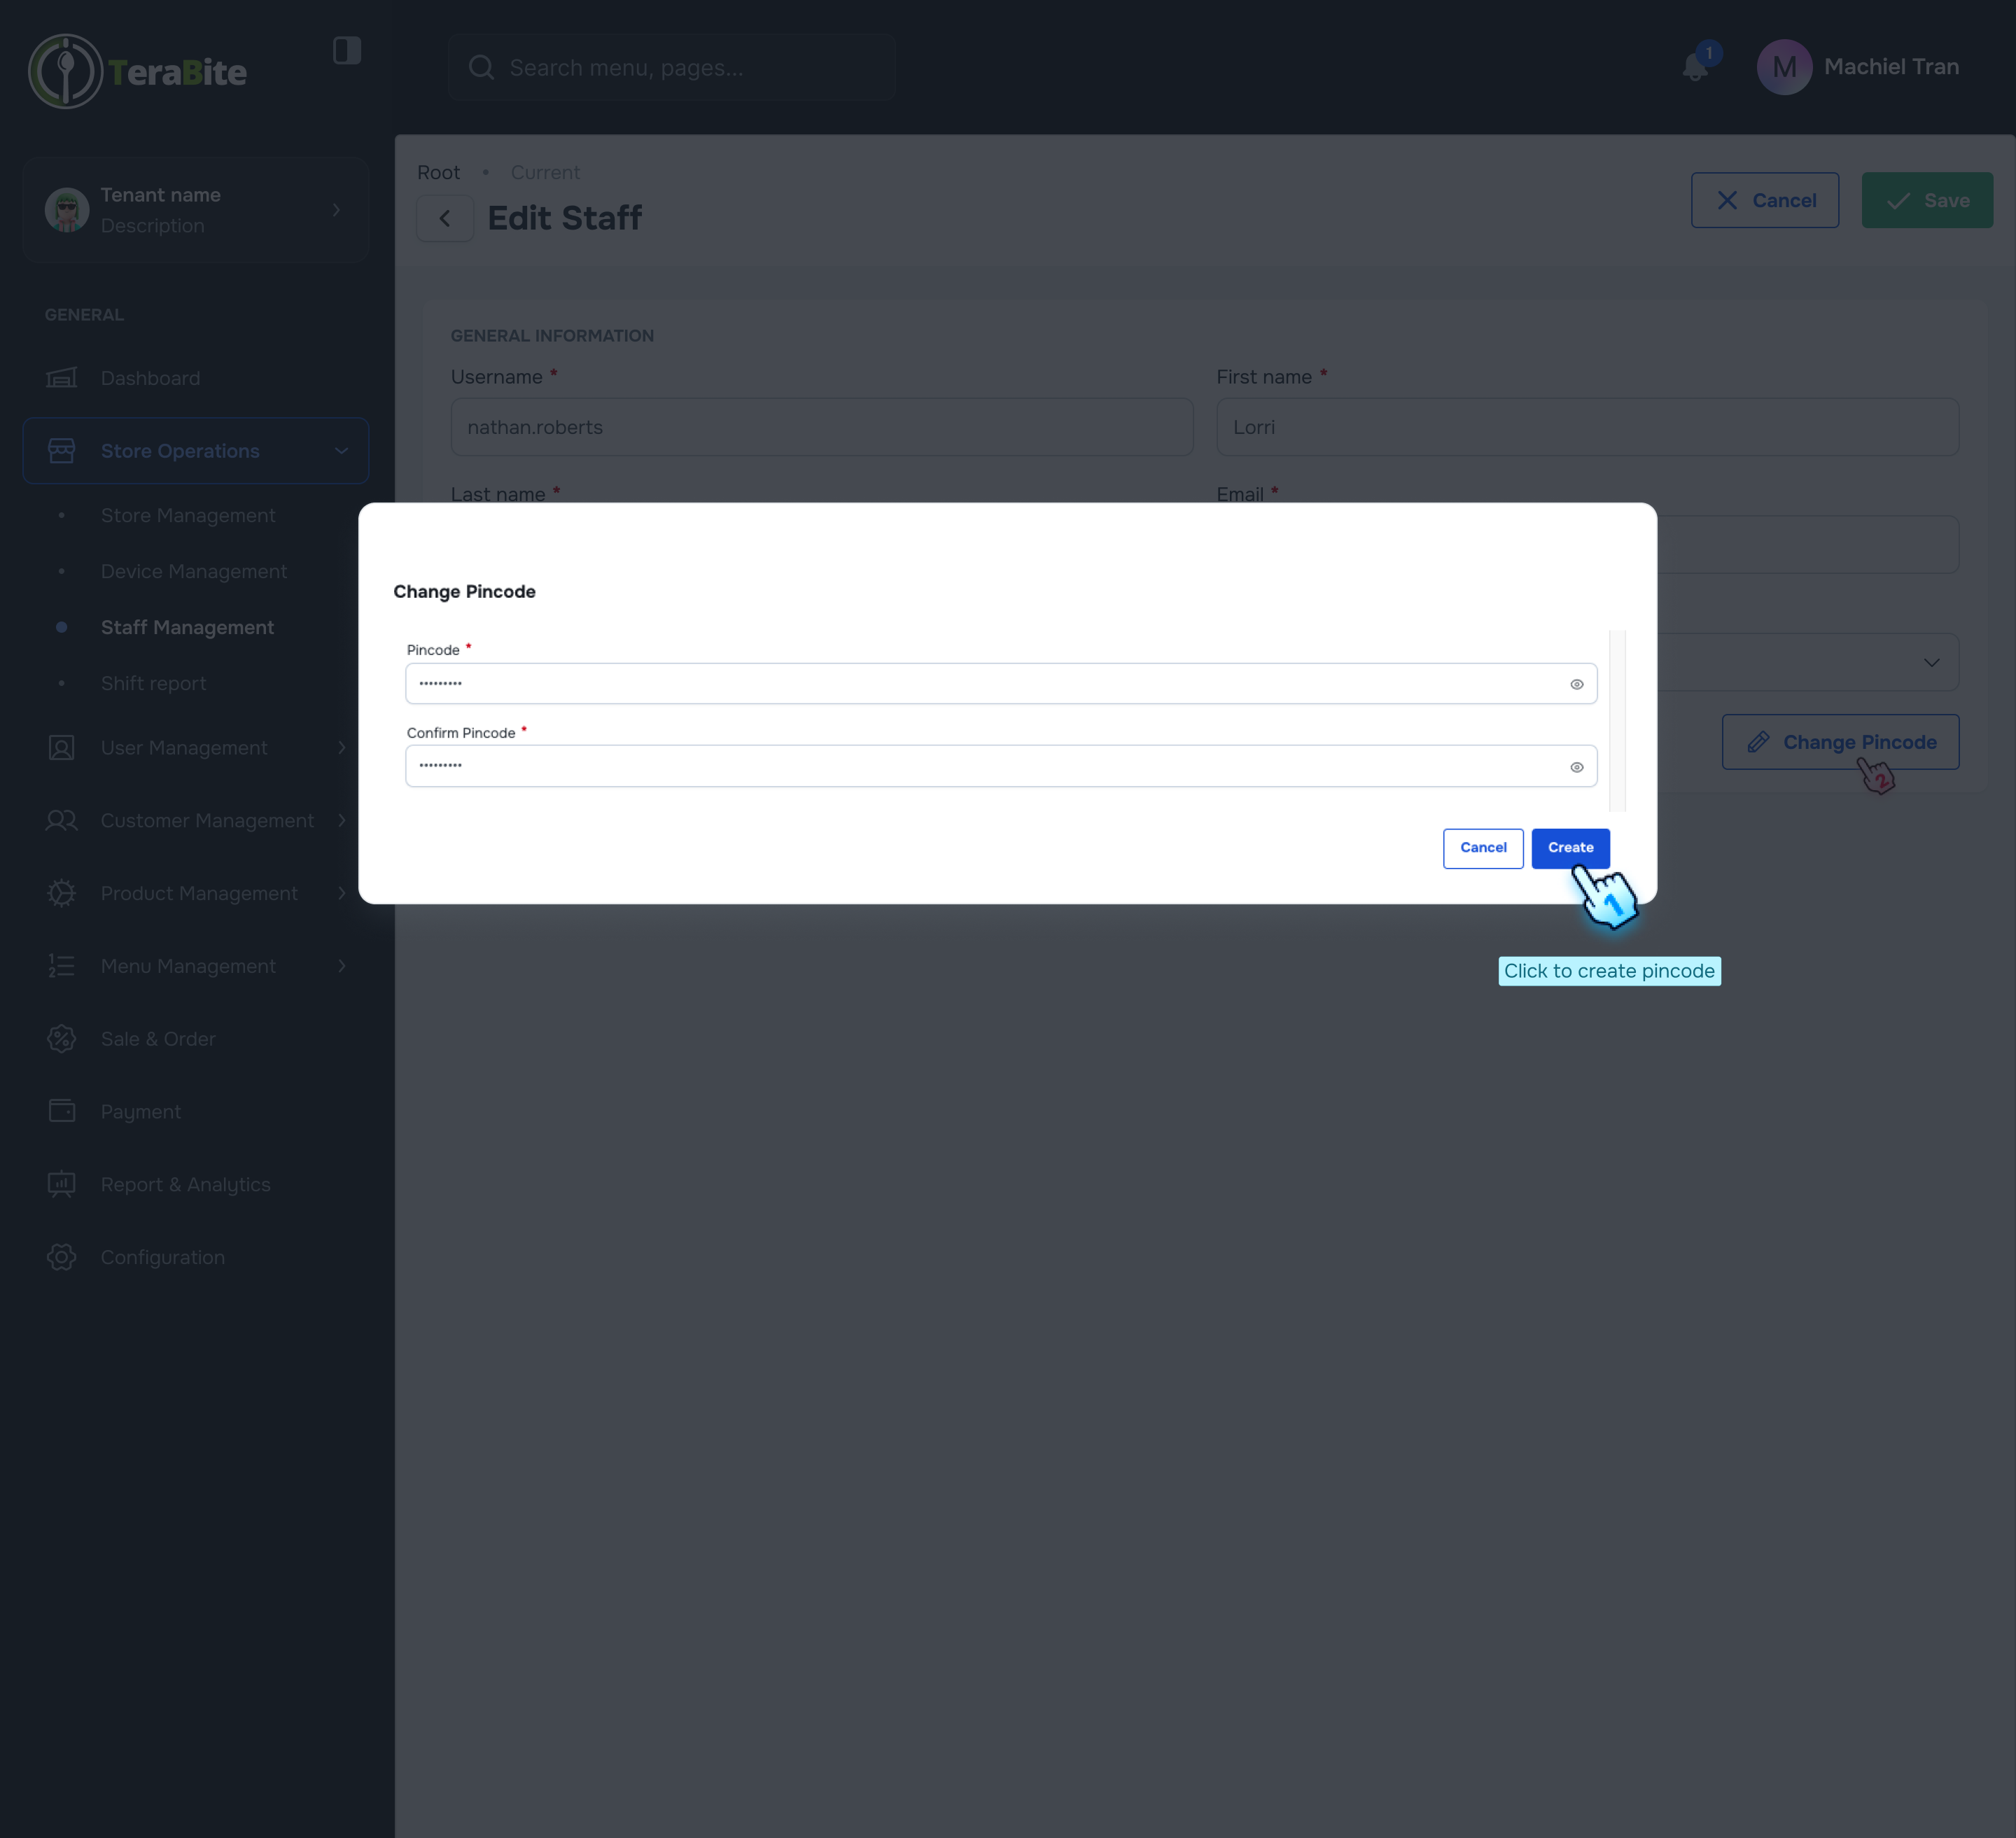
- Change Pincode
- Click on "Change Pincode" if you want to update the staff member's pincode.
- Enter the new pincode and re-enter it for confirmation.
- Check the checkbox if you want to send the new pincode to the staff's registered email.
- Click "Create" to finalize the pincode change.
#
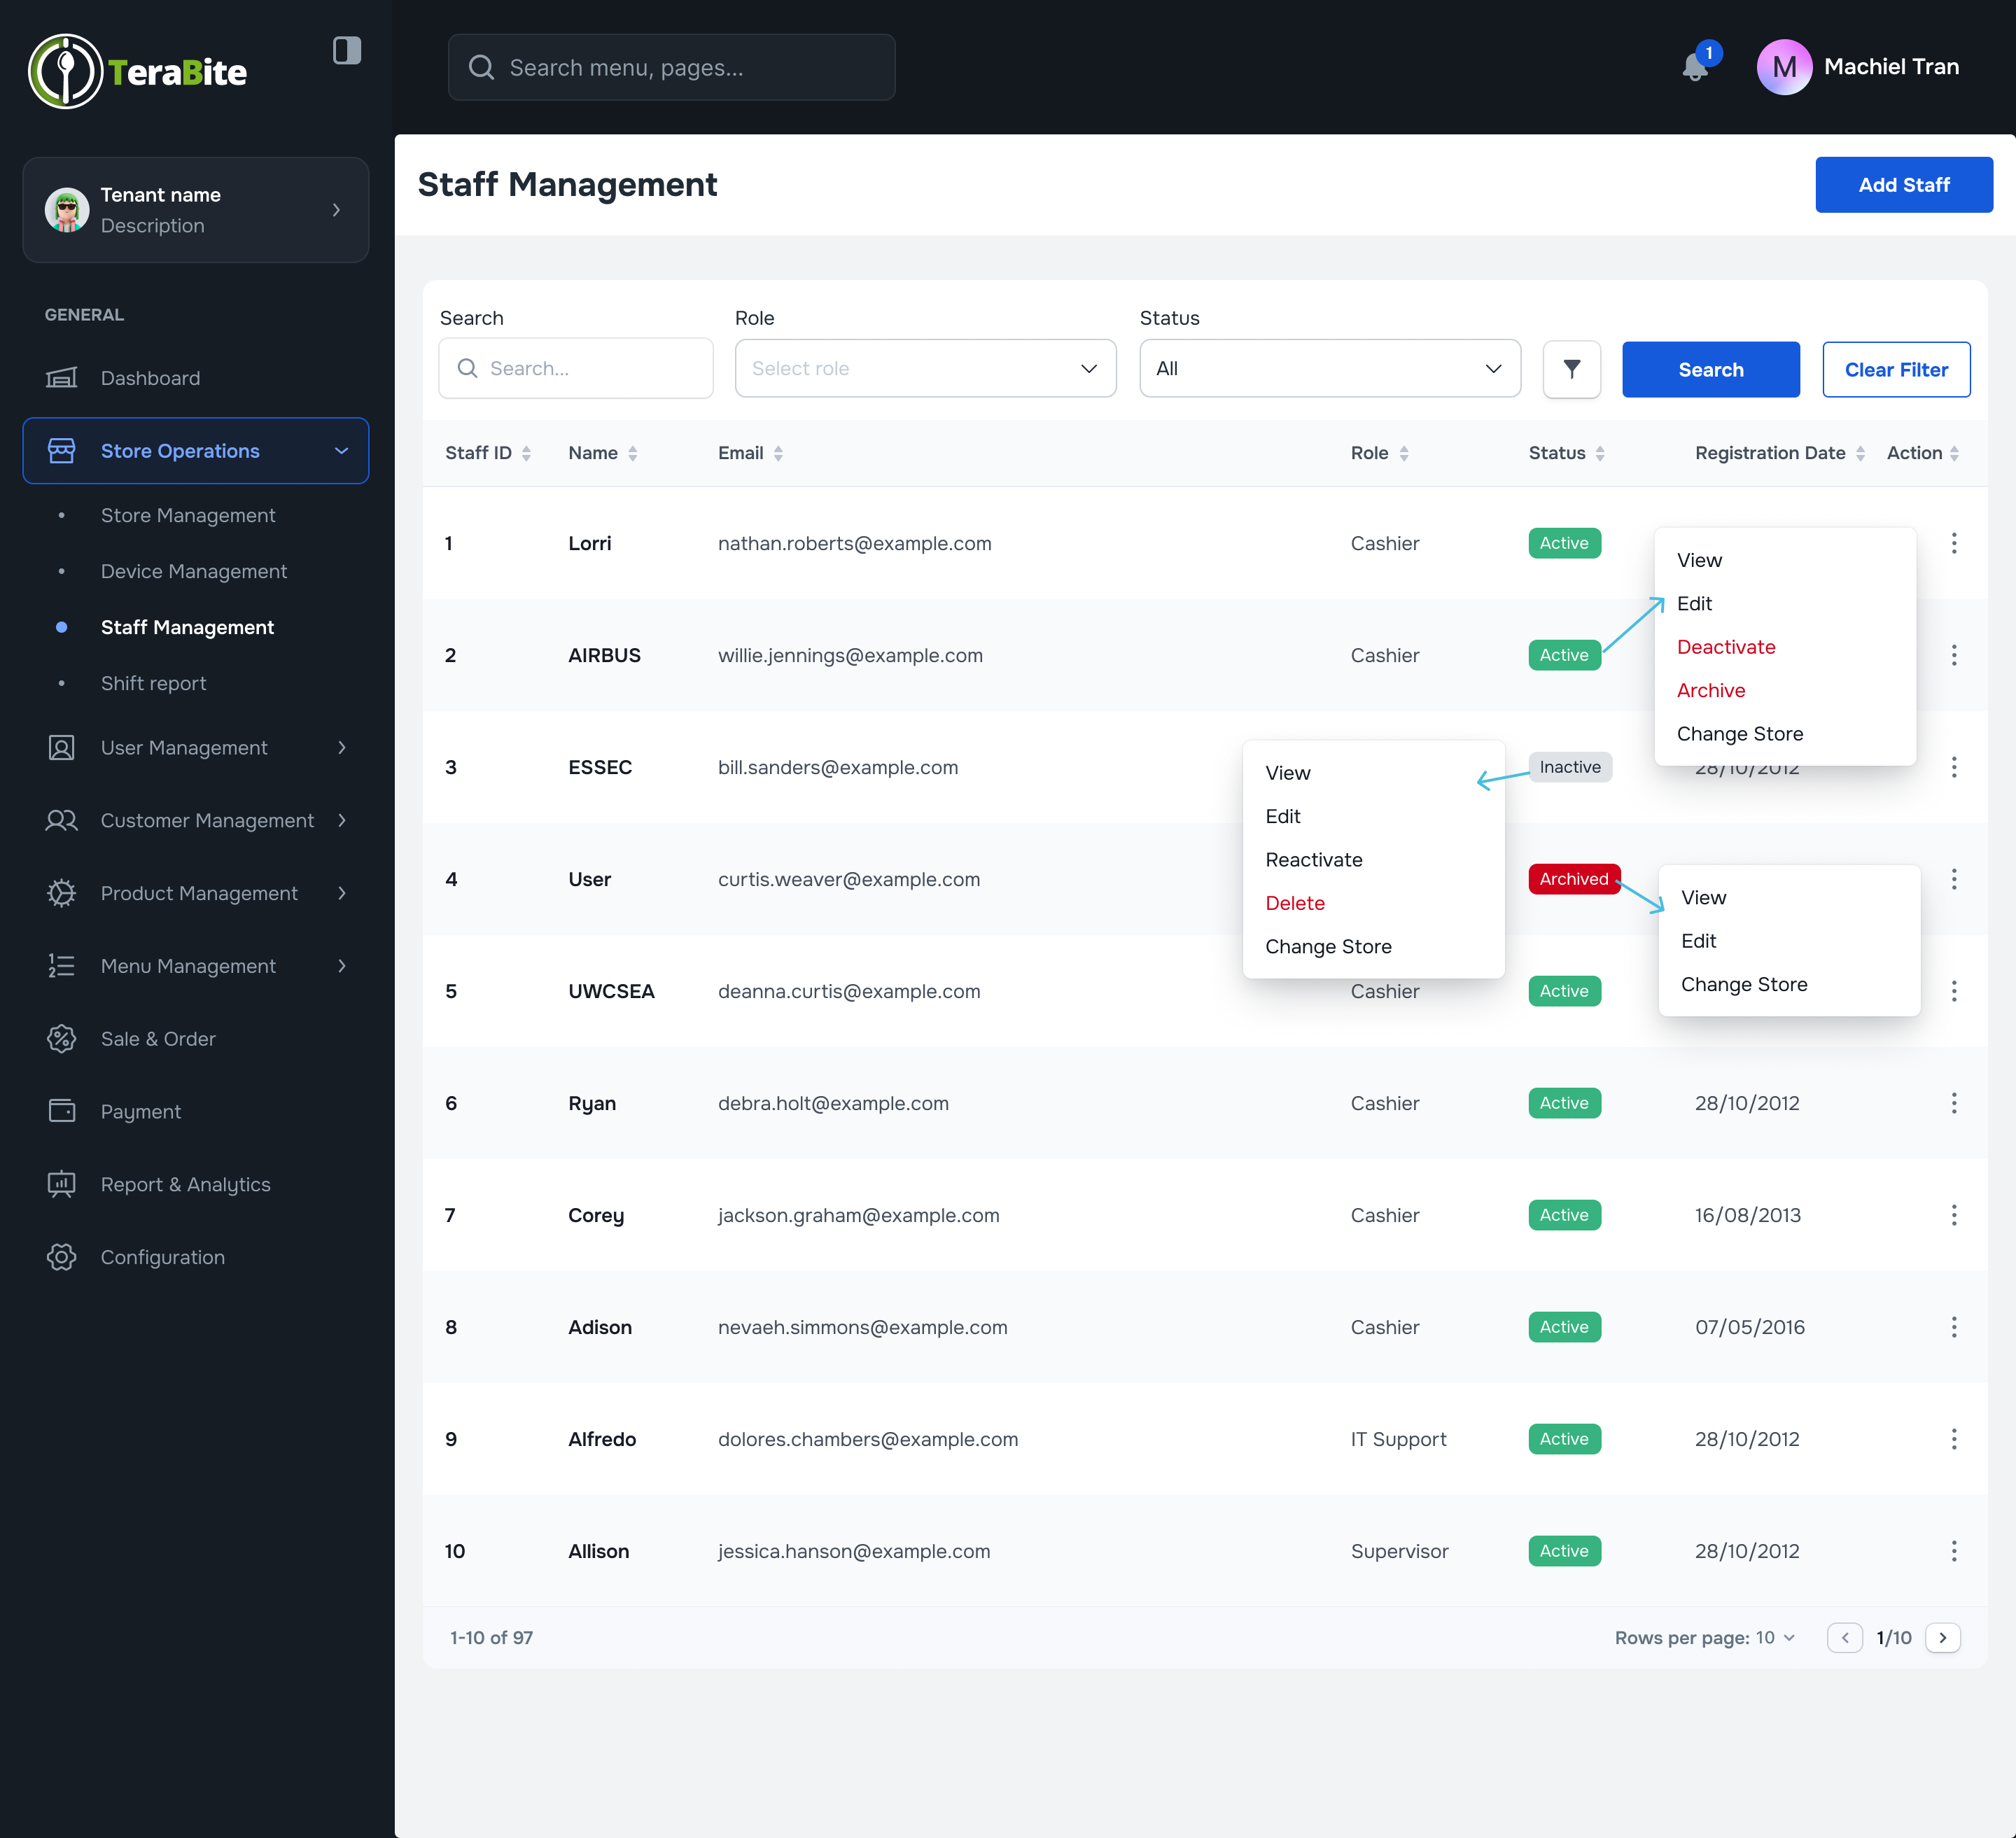
View Staff List and Change Status
- Access Staff List
- Navigate to the Staff List section, where staff members are displayed with their respective statuses: Active, Inactive, and Archived.
- Perform Actions Based on Staff Status
- Click on the three-dot menu in each row to reveal available actions for each staff member based on their current status.
- Actions per Status:
- Active: Options are View, Edit, Deactivate Staff, Archive Staff, and Delete.
- Click on "Deactivate Staff" and confirm by clicking the "Deactivate Staff" button in the confirmation dialog.
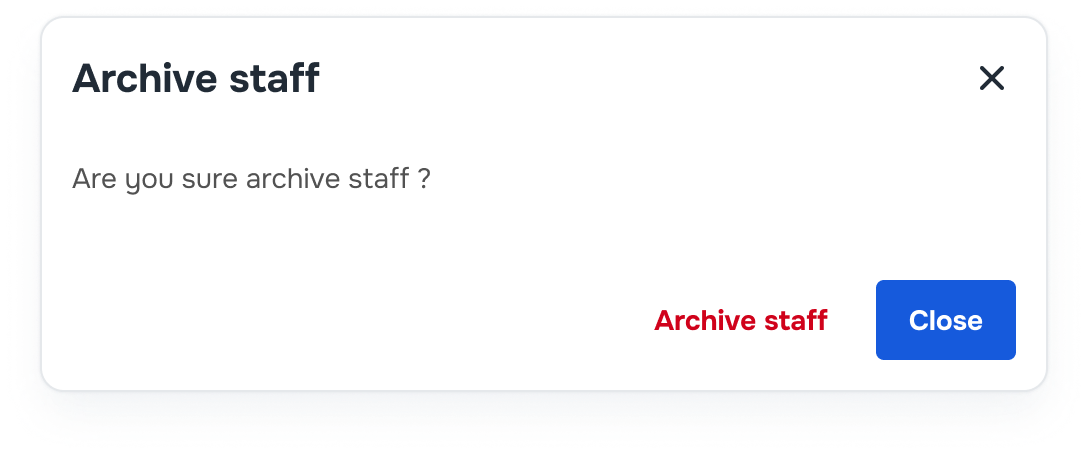
- Click on "Archive Staff" and confirm by clicking the "Archive Staff" button in the confirmation dialog.
- Inactive: Options are View, Edit, Reactivate, and Delete.
- Click on "Reactivate" and confirm by clicking the "Reactivate" button in the confirmation dialog.
- Archived: Options are View, Edit, Change to Active, and Delete.
- Click on "Change to Active" and confirm by clicking the "Change to Active" button in the confirmation dialog.
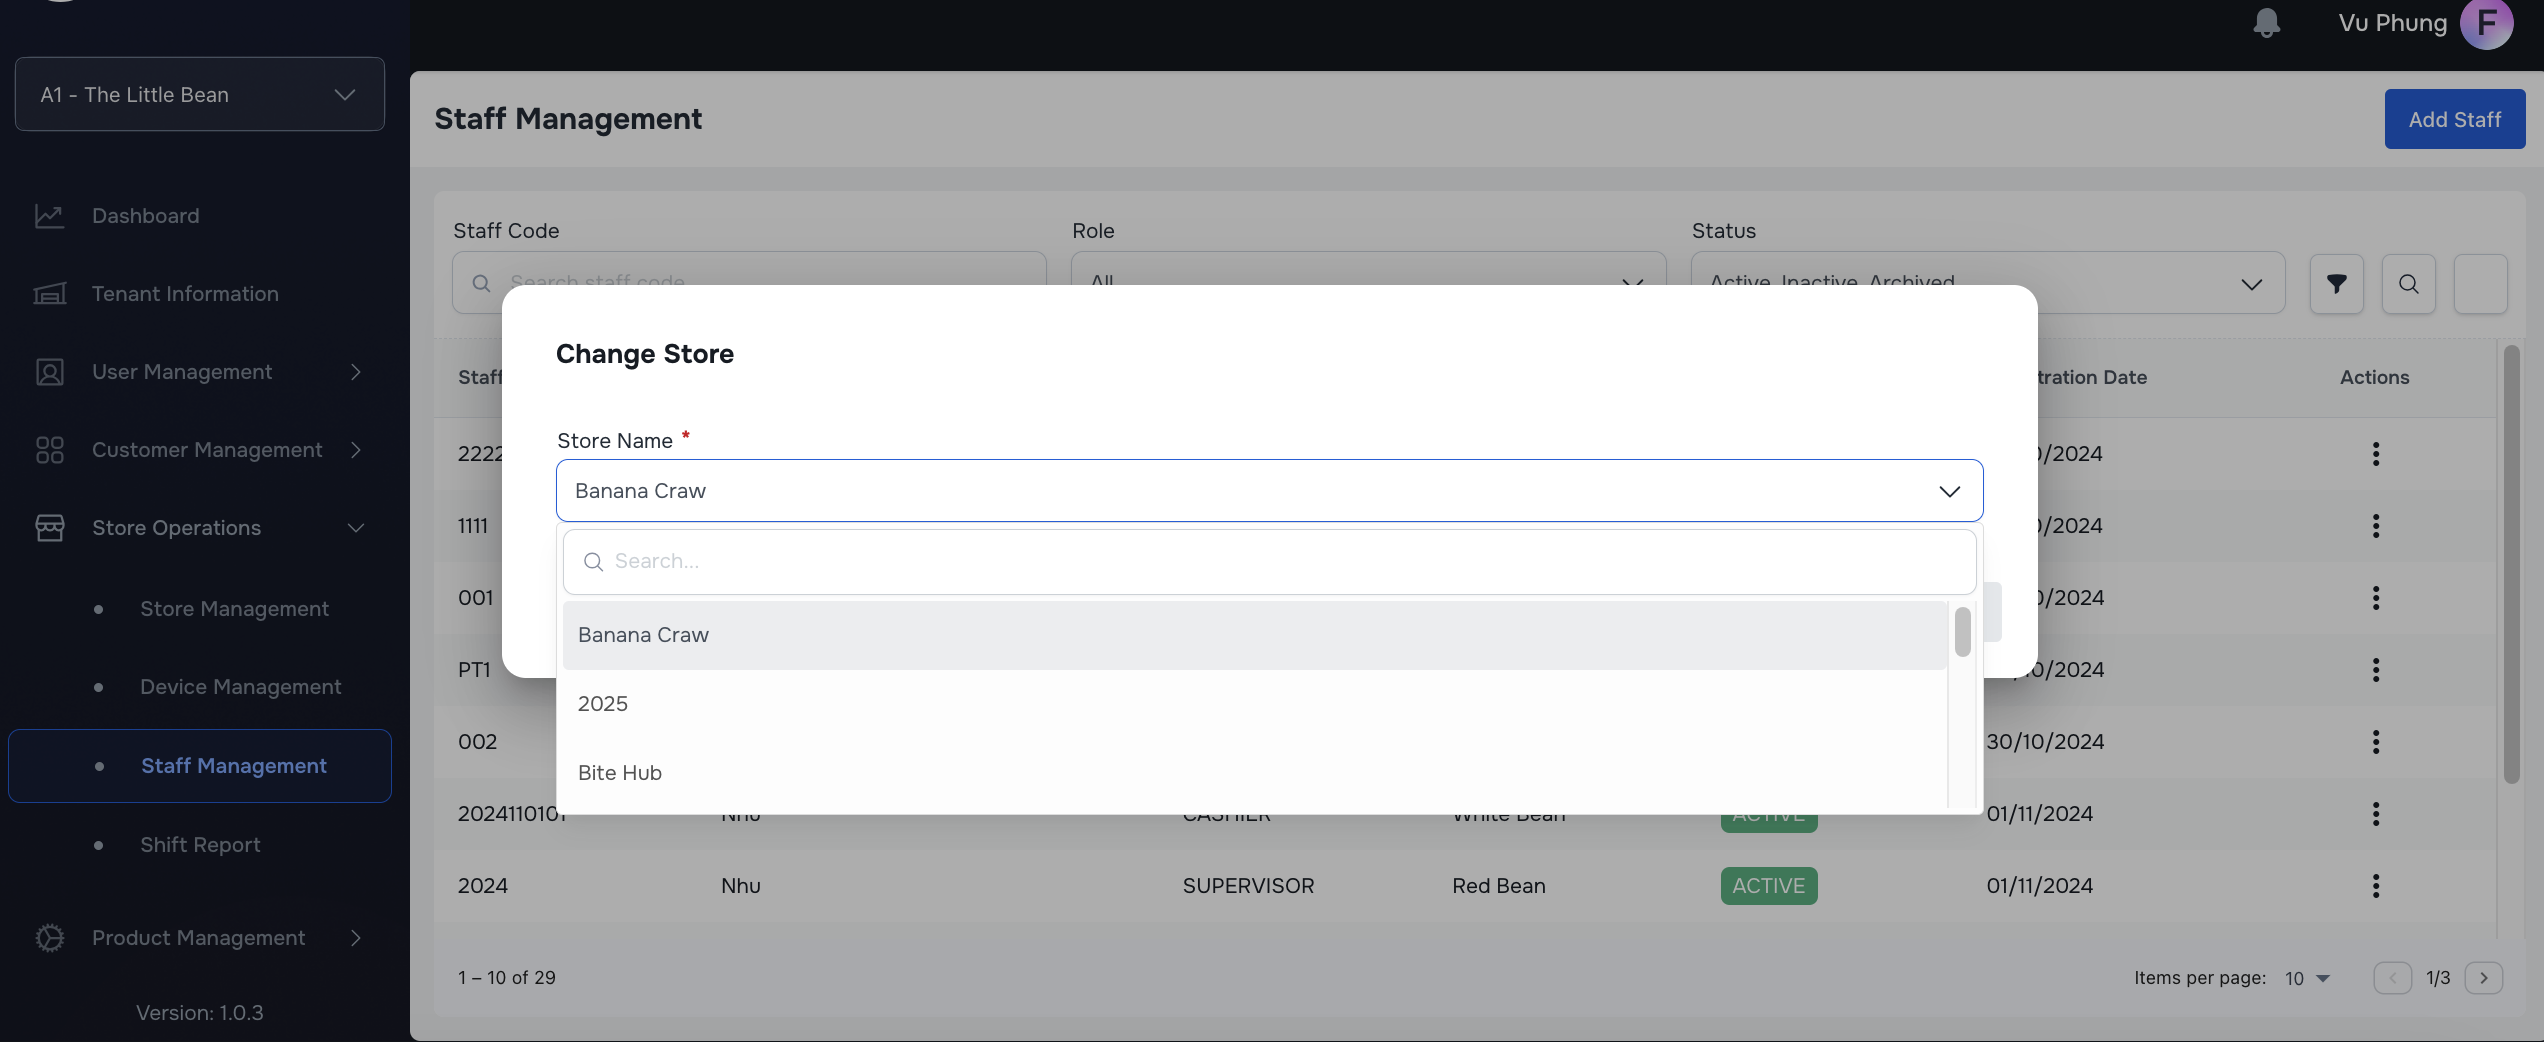
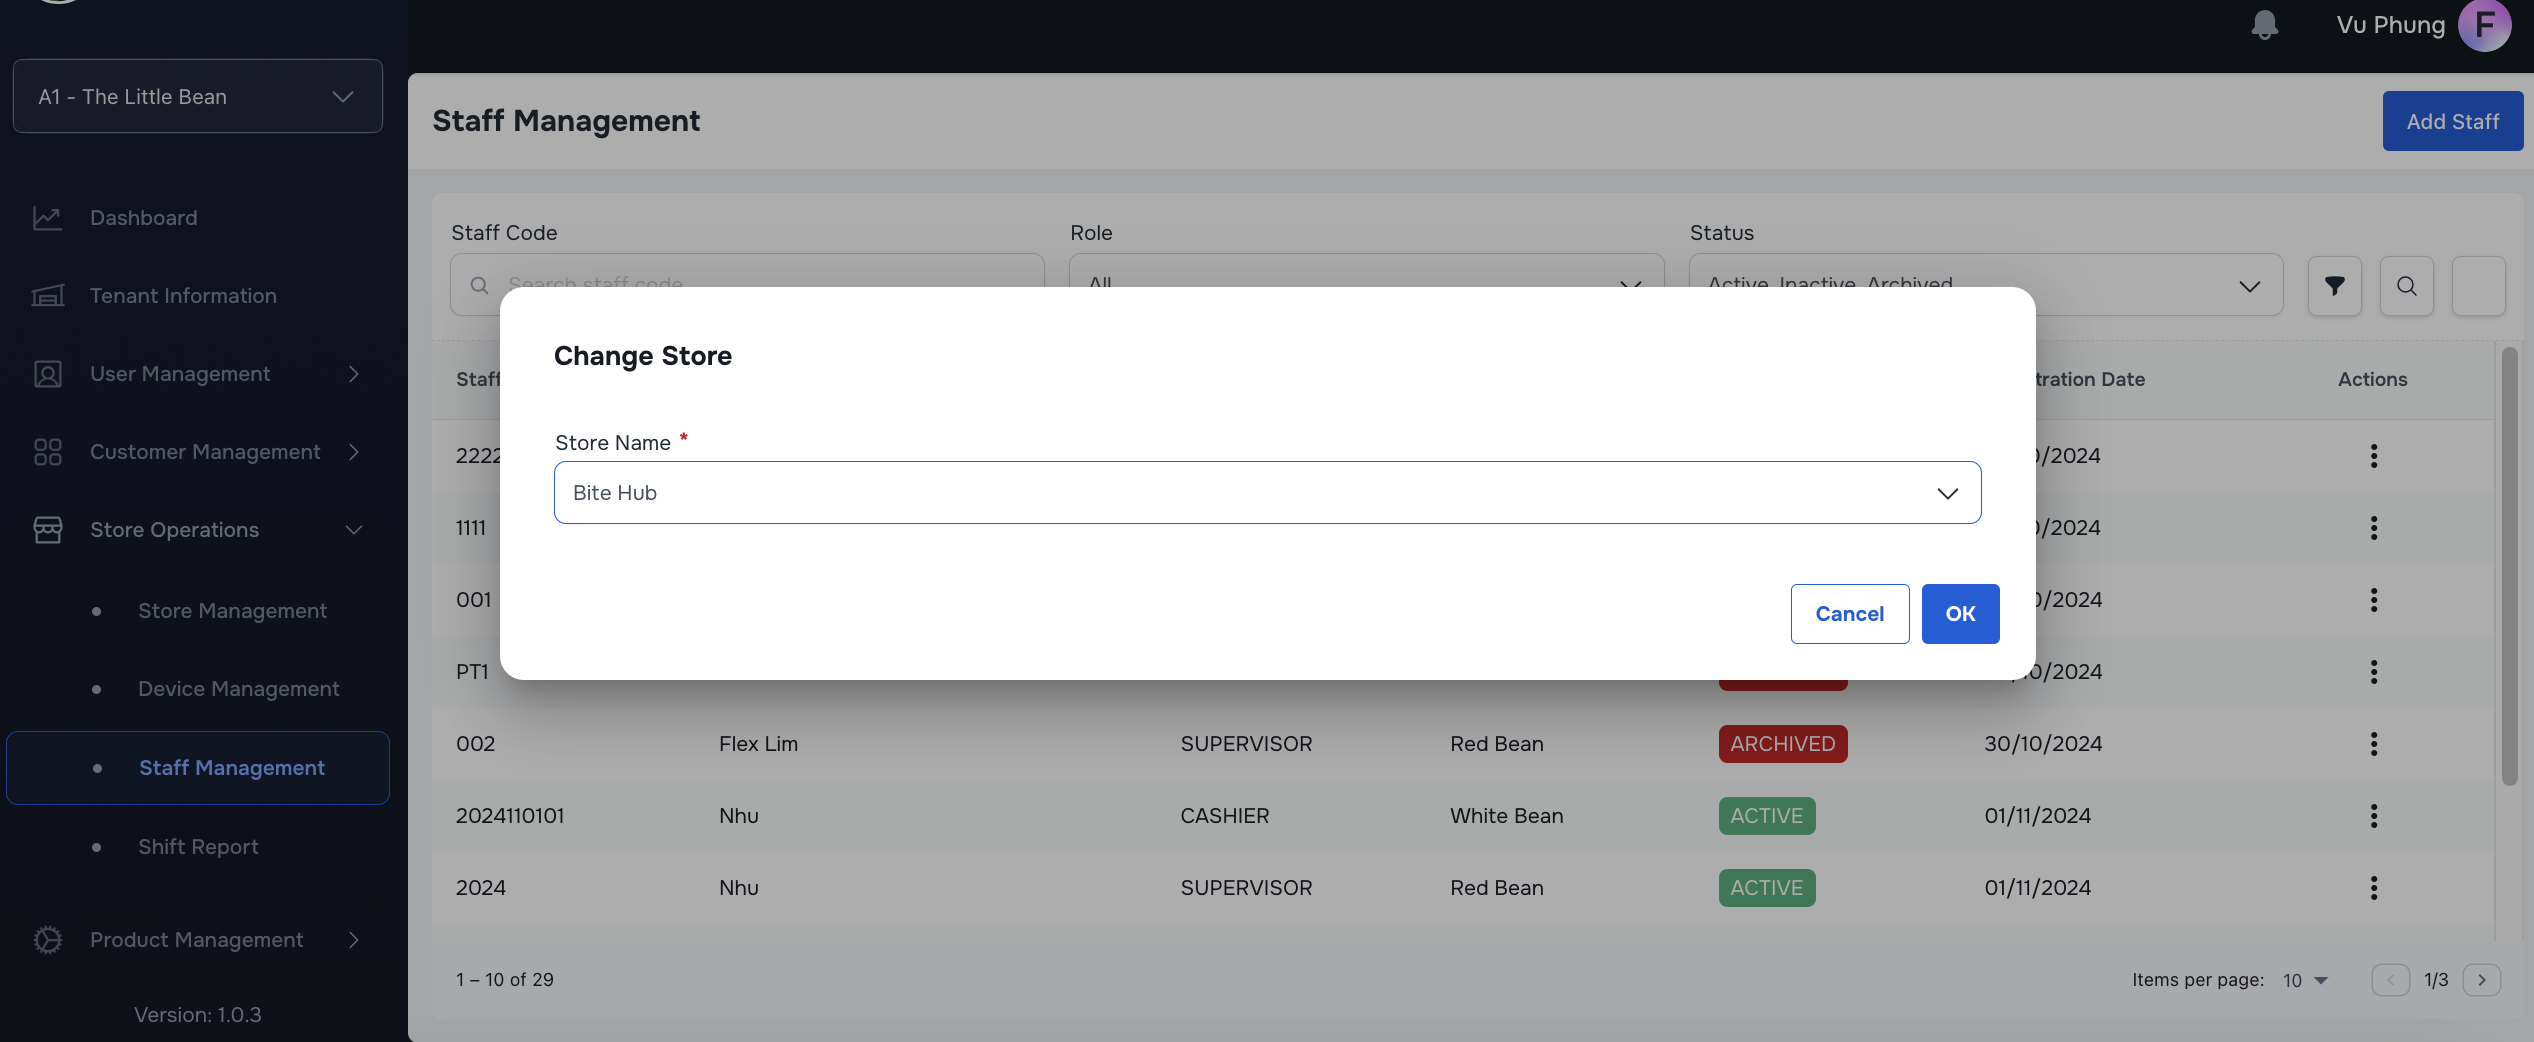
- Change store
- Click on "Change Store" button in the three-dot menu
- Search by storename in the dropdown list
- Select store in the drop-down list
- Click OK button to confirm the change
#
Conclusion
This document provides a structured approach for managing staff members, including their creation, detail editing, and status changes, ensuring efficient staff administration within the system.
#
Screen flow