#
Role and Permission Management (For Business Owners Only)
#
Description
This document outlines the procedures for creating, editing, viewing, and deleting user roles and permissions within the system, specifically for business owners.
#
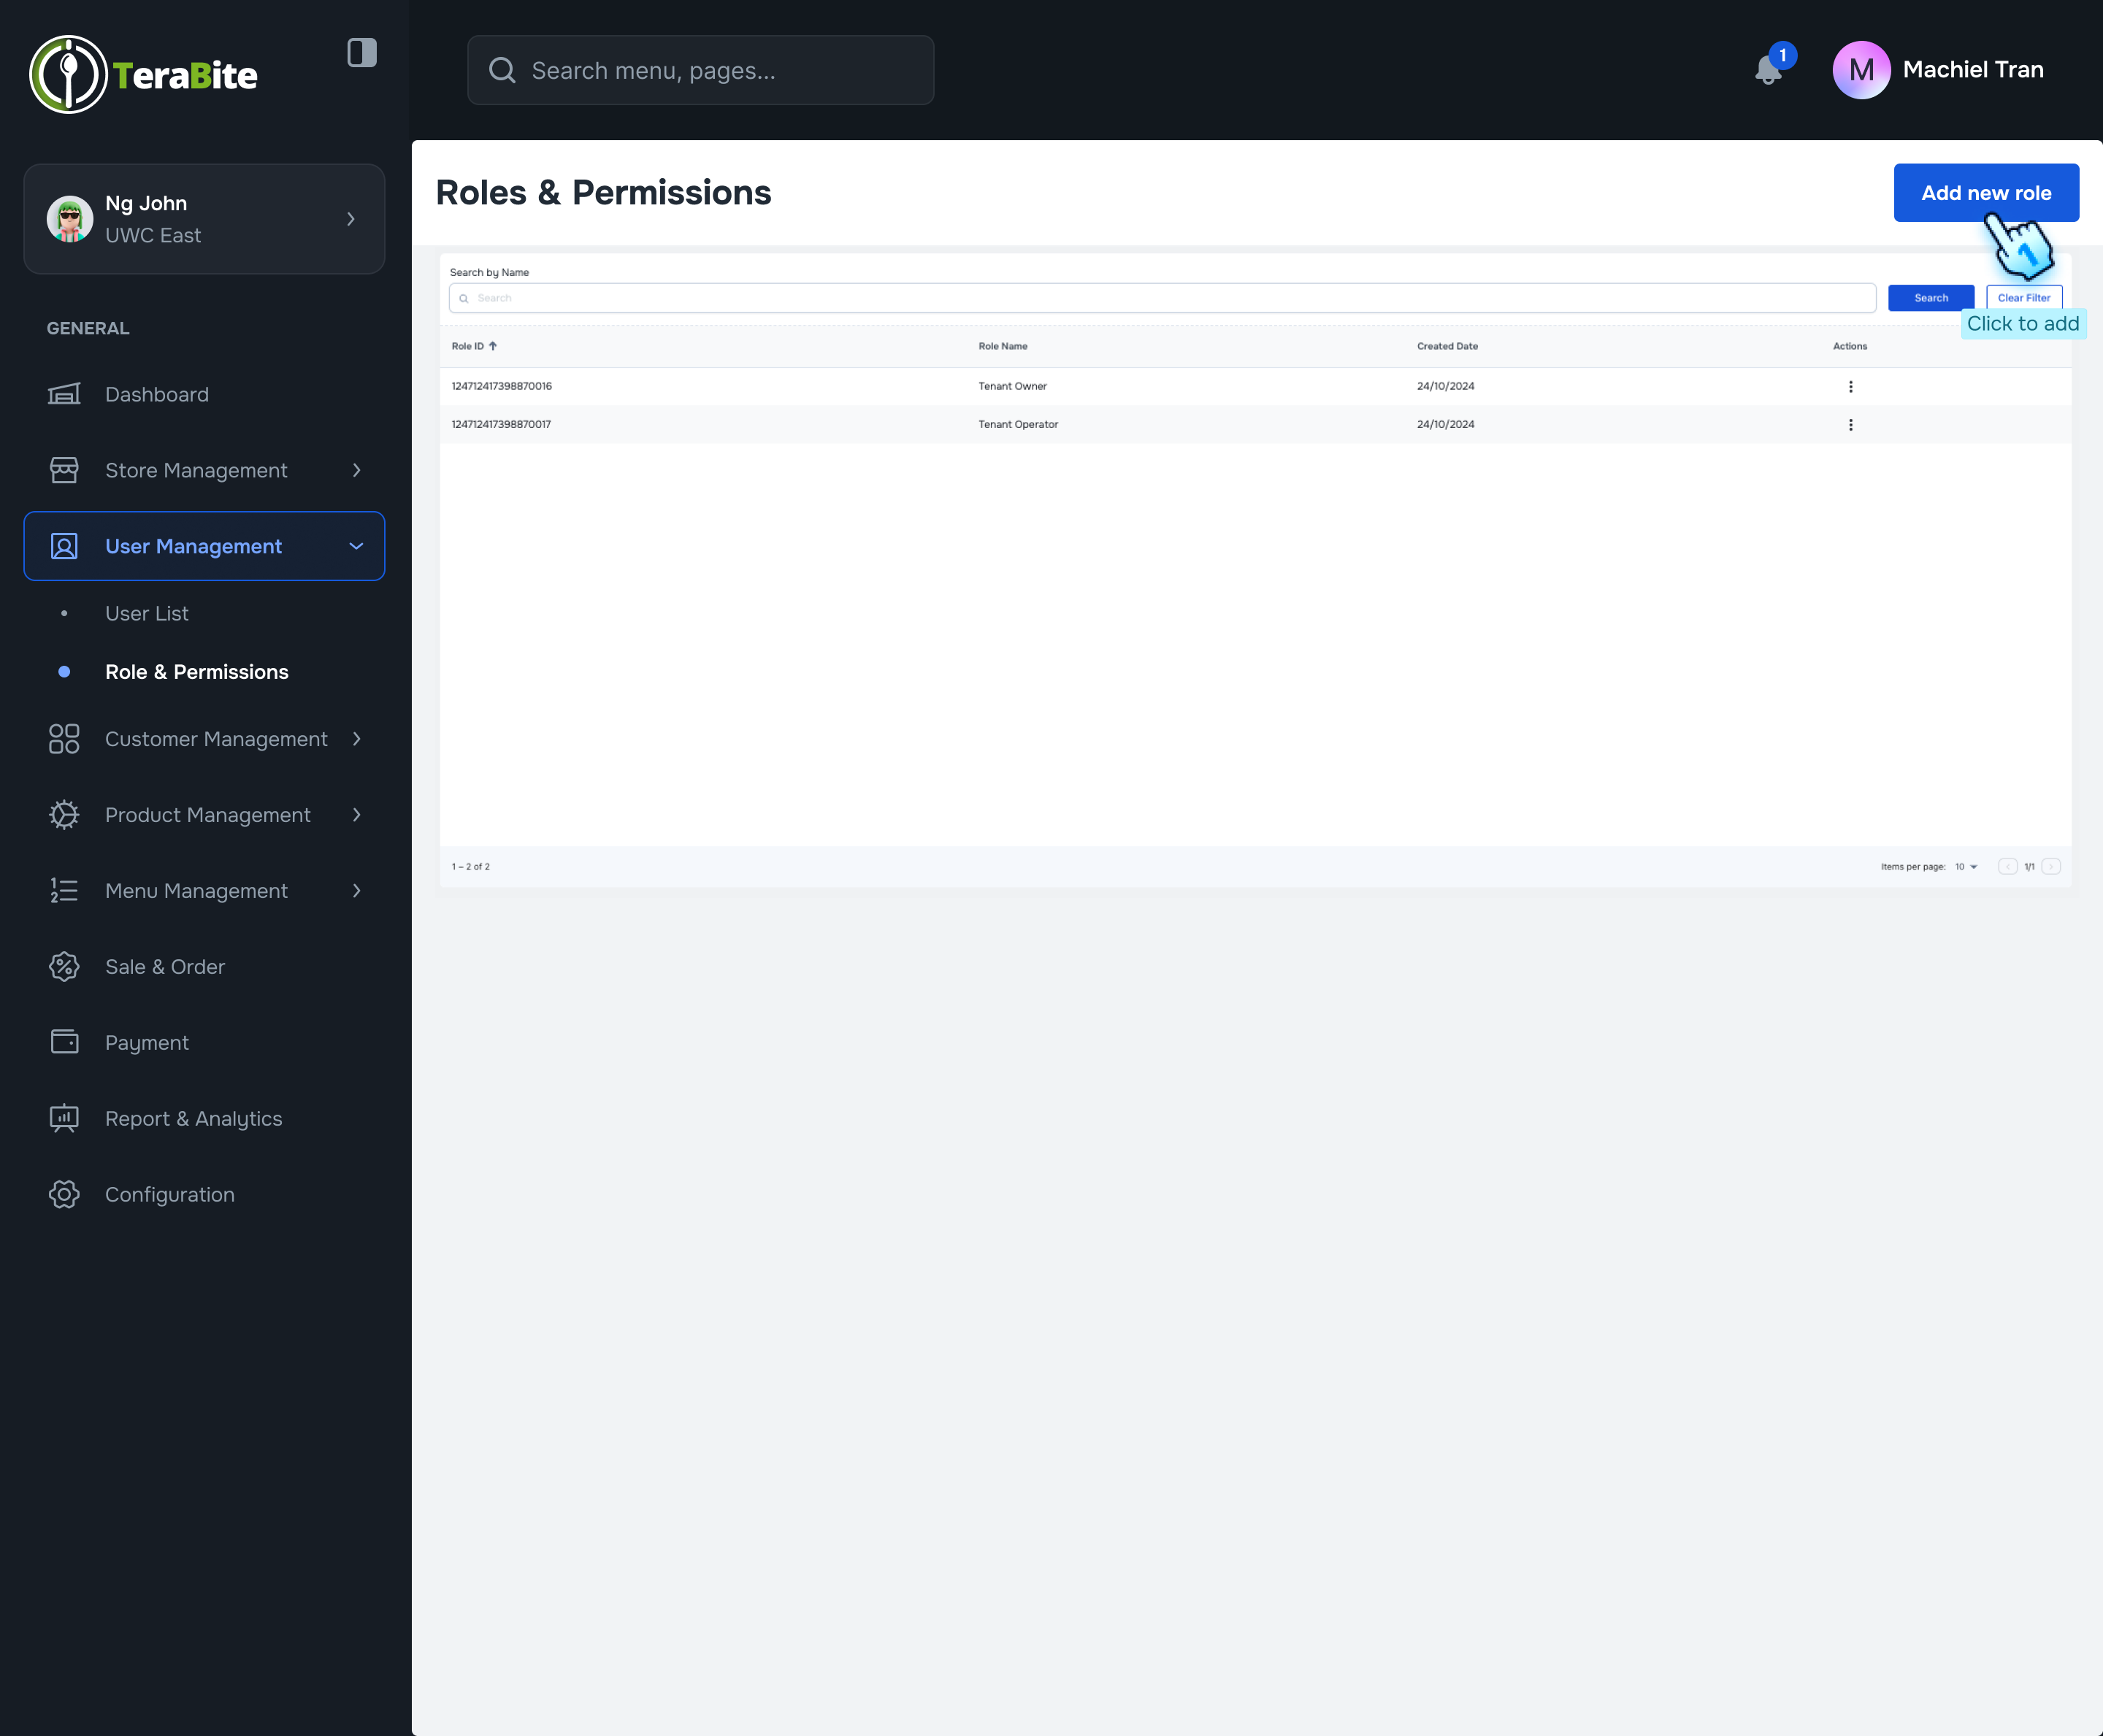
Create a New Role
- Access Role and Permission Module
- Click on the "Role and Permission" module in the dashboard.
- Add New Role
- Click the "Add New Role" button to initiate the role creation process.
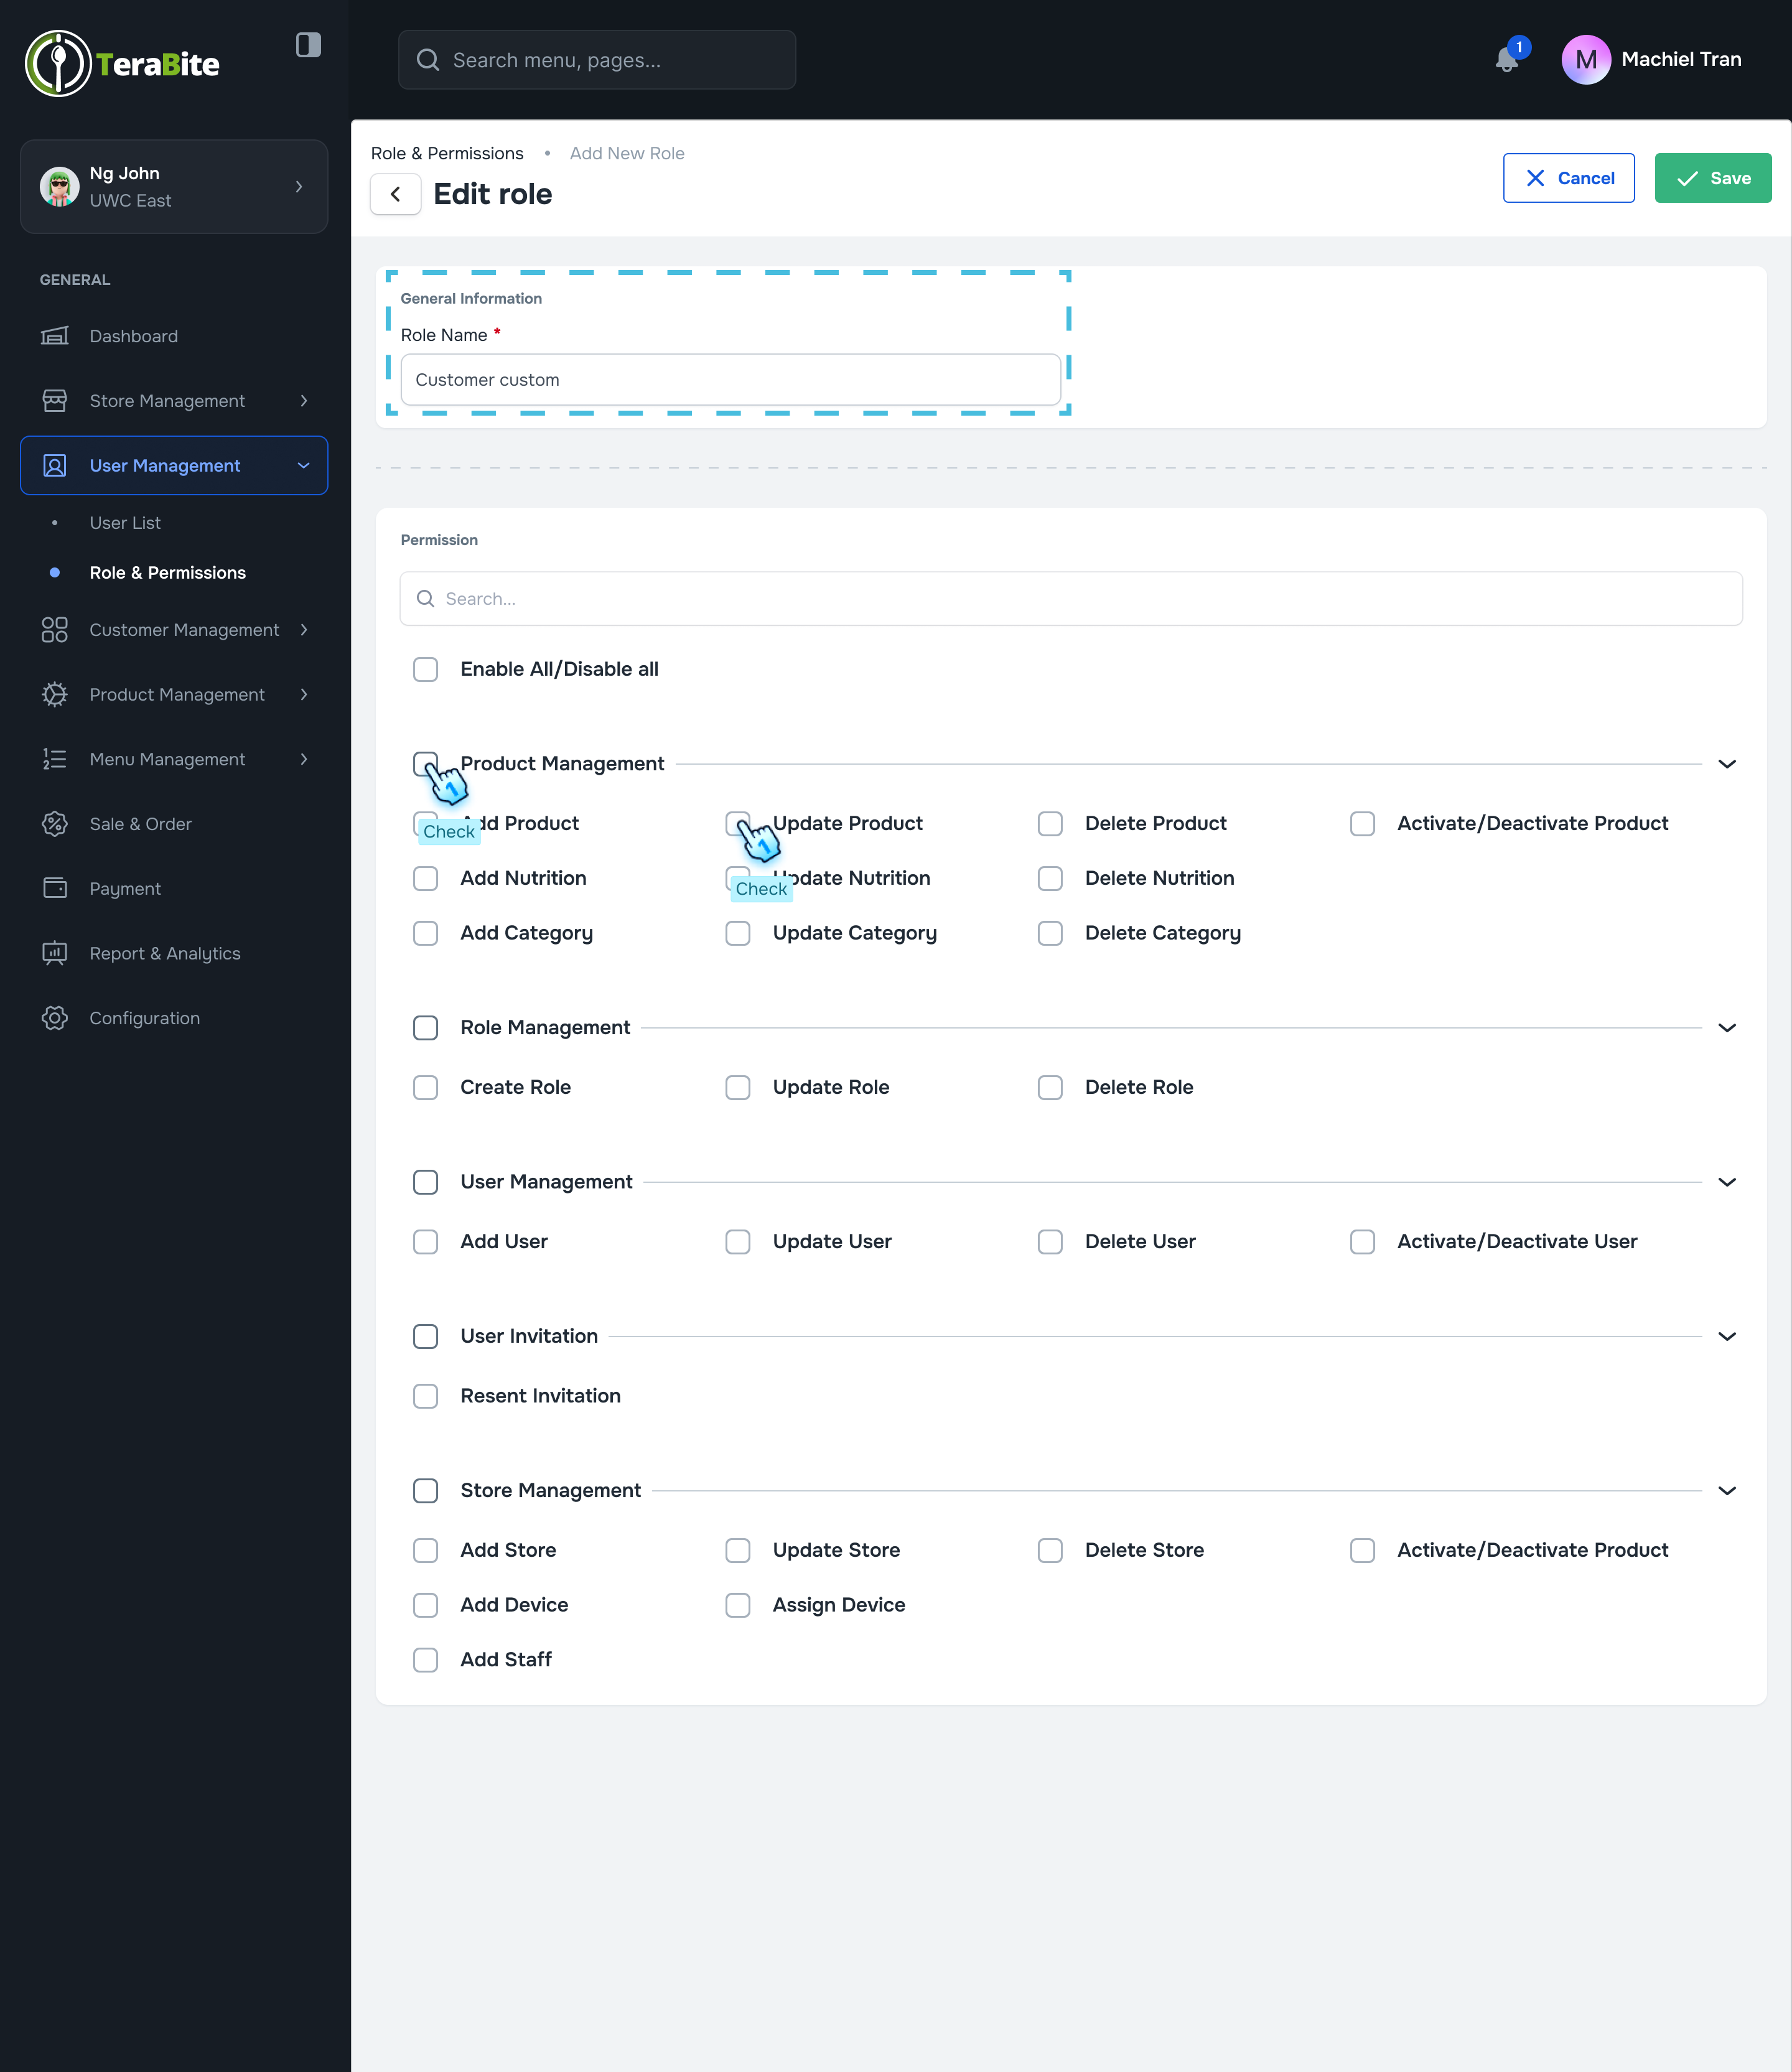
- Enter Role Name
- In the designated field, enter the desired role name for the new role.
- Set Permissions
- Check or uncheck the permissions that this role can have by selecting from the available options.
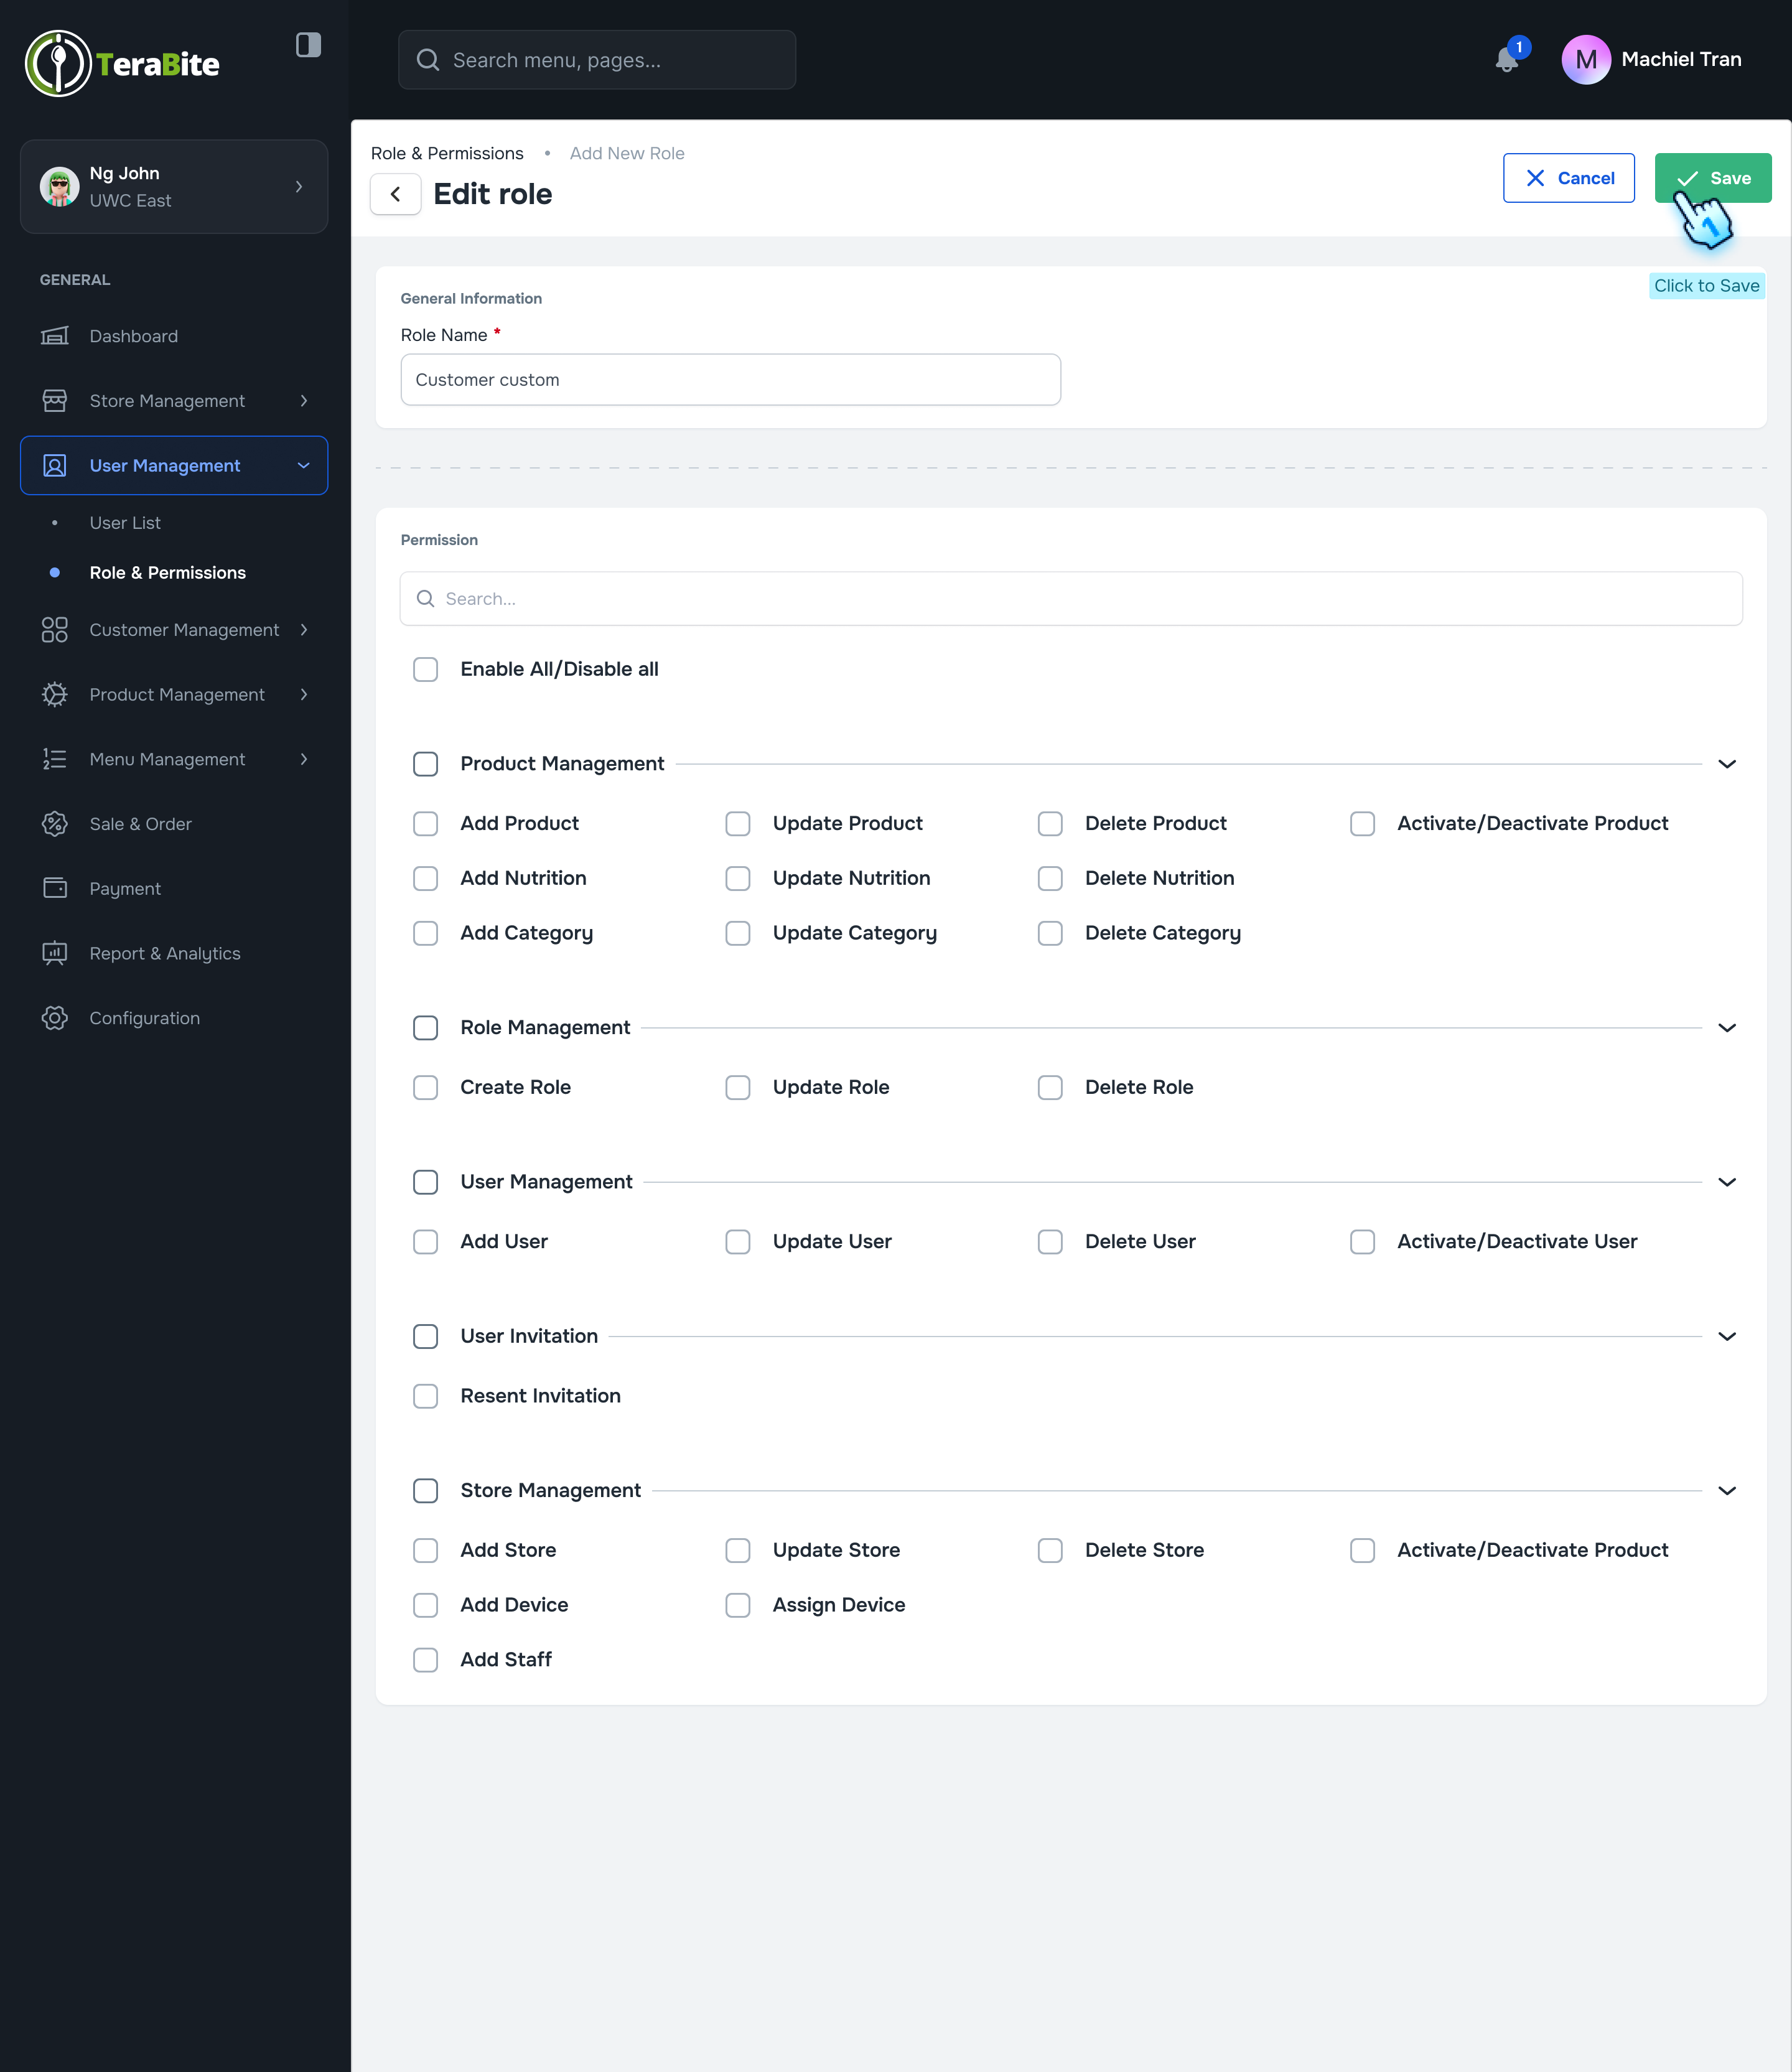
- Save the Role
- Click the "Save" button to finalize the creation of the new role.
#
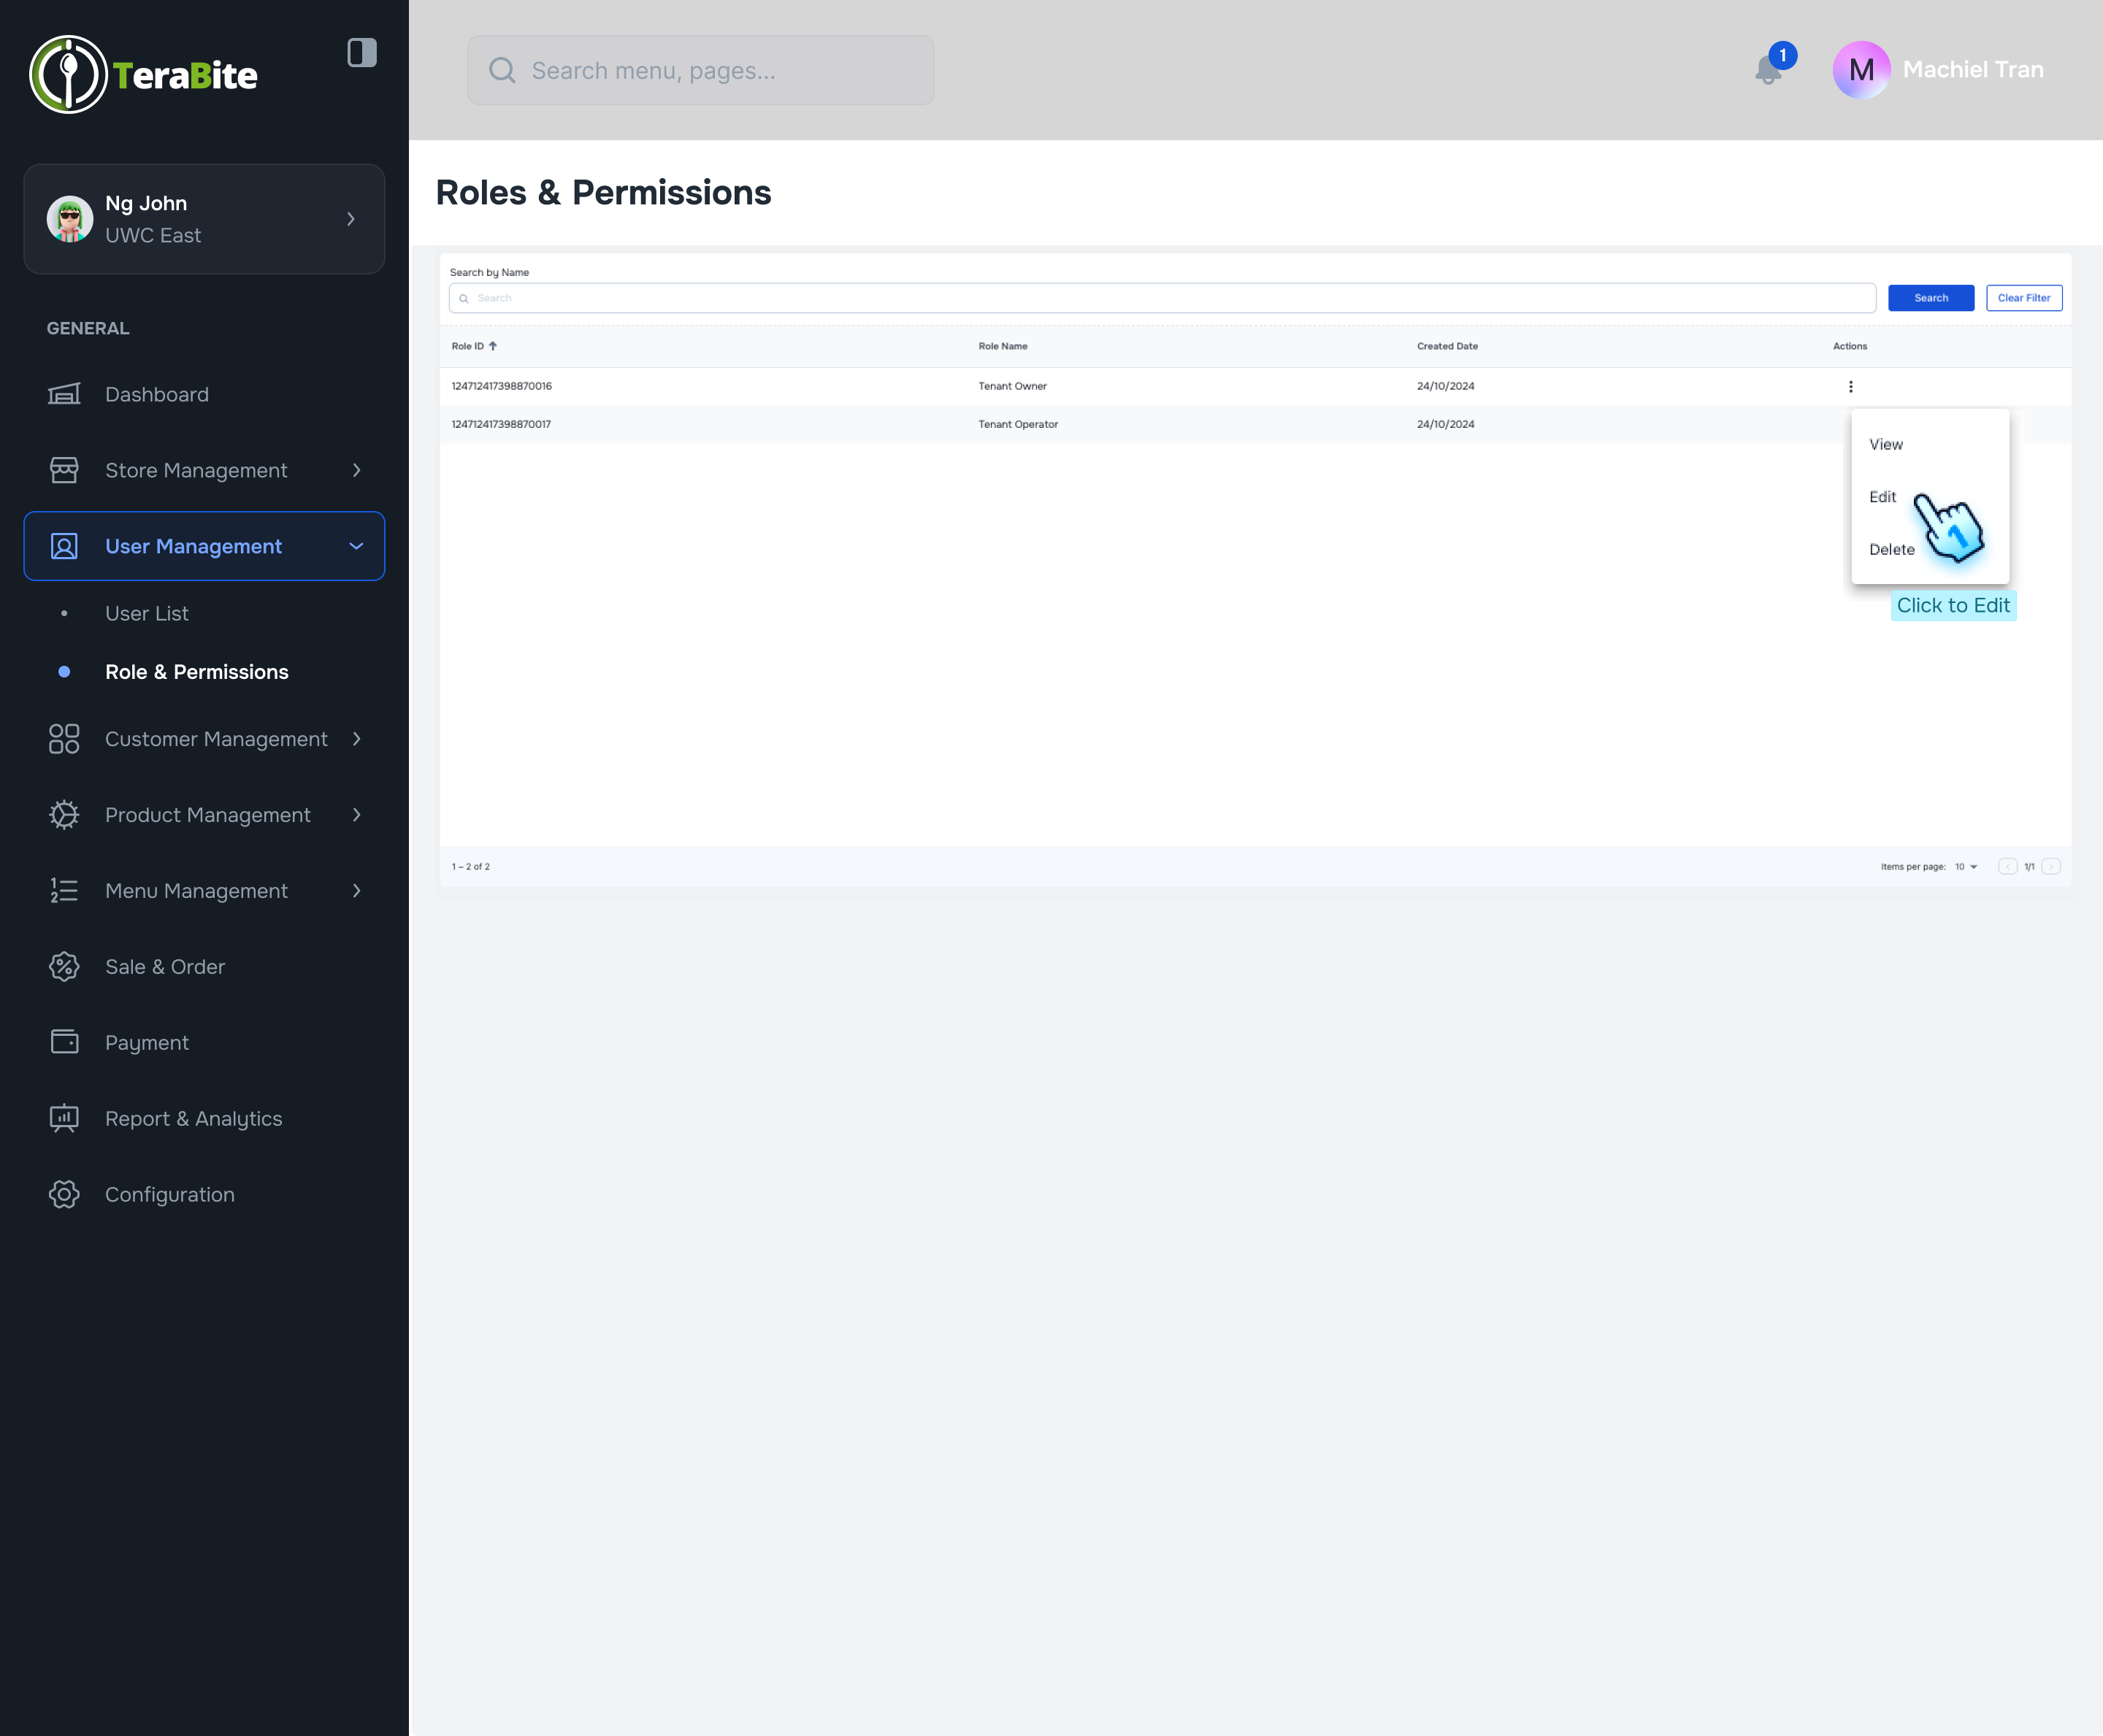
Edit a Role
- Access the Role Menu
- Click on the three-dot menu next to the role you wish to edit.
- Select Edit Action
- Click on the "Edit" action from the dropdown menu.
- Follow Role Creation Steps
- Follow the same steps as outlined in the Create New Role section for:
- Setting permissions (Step 4)
- Saving the role (Step 5)
#
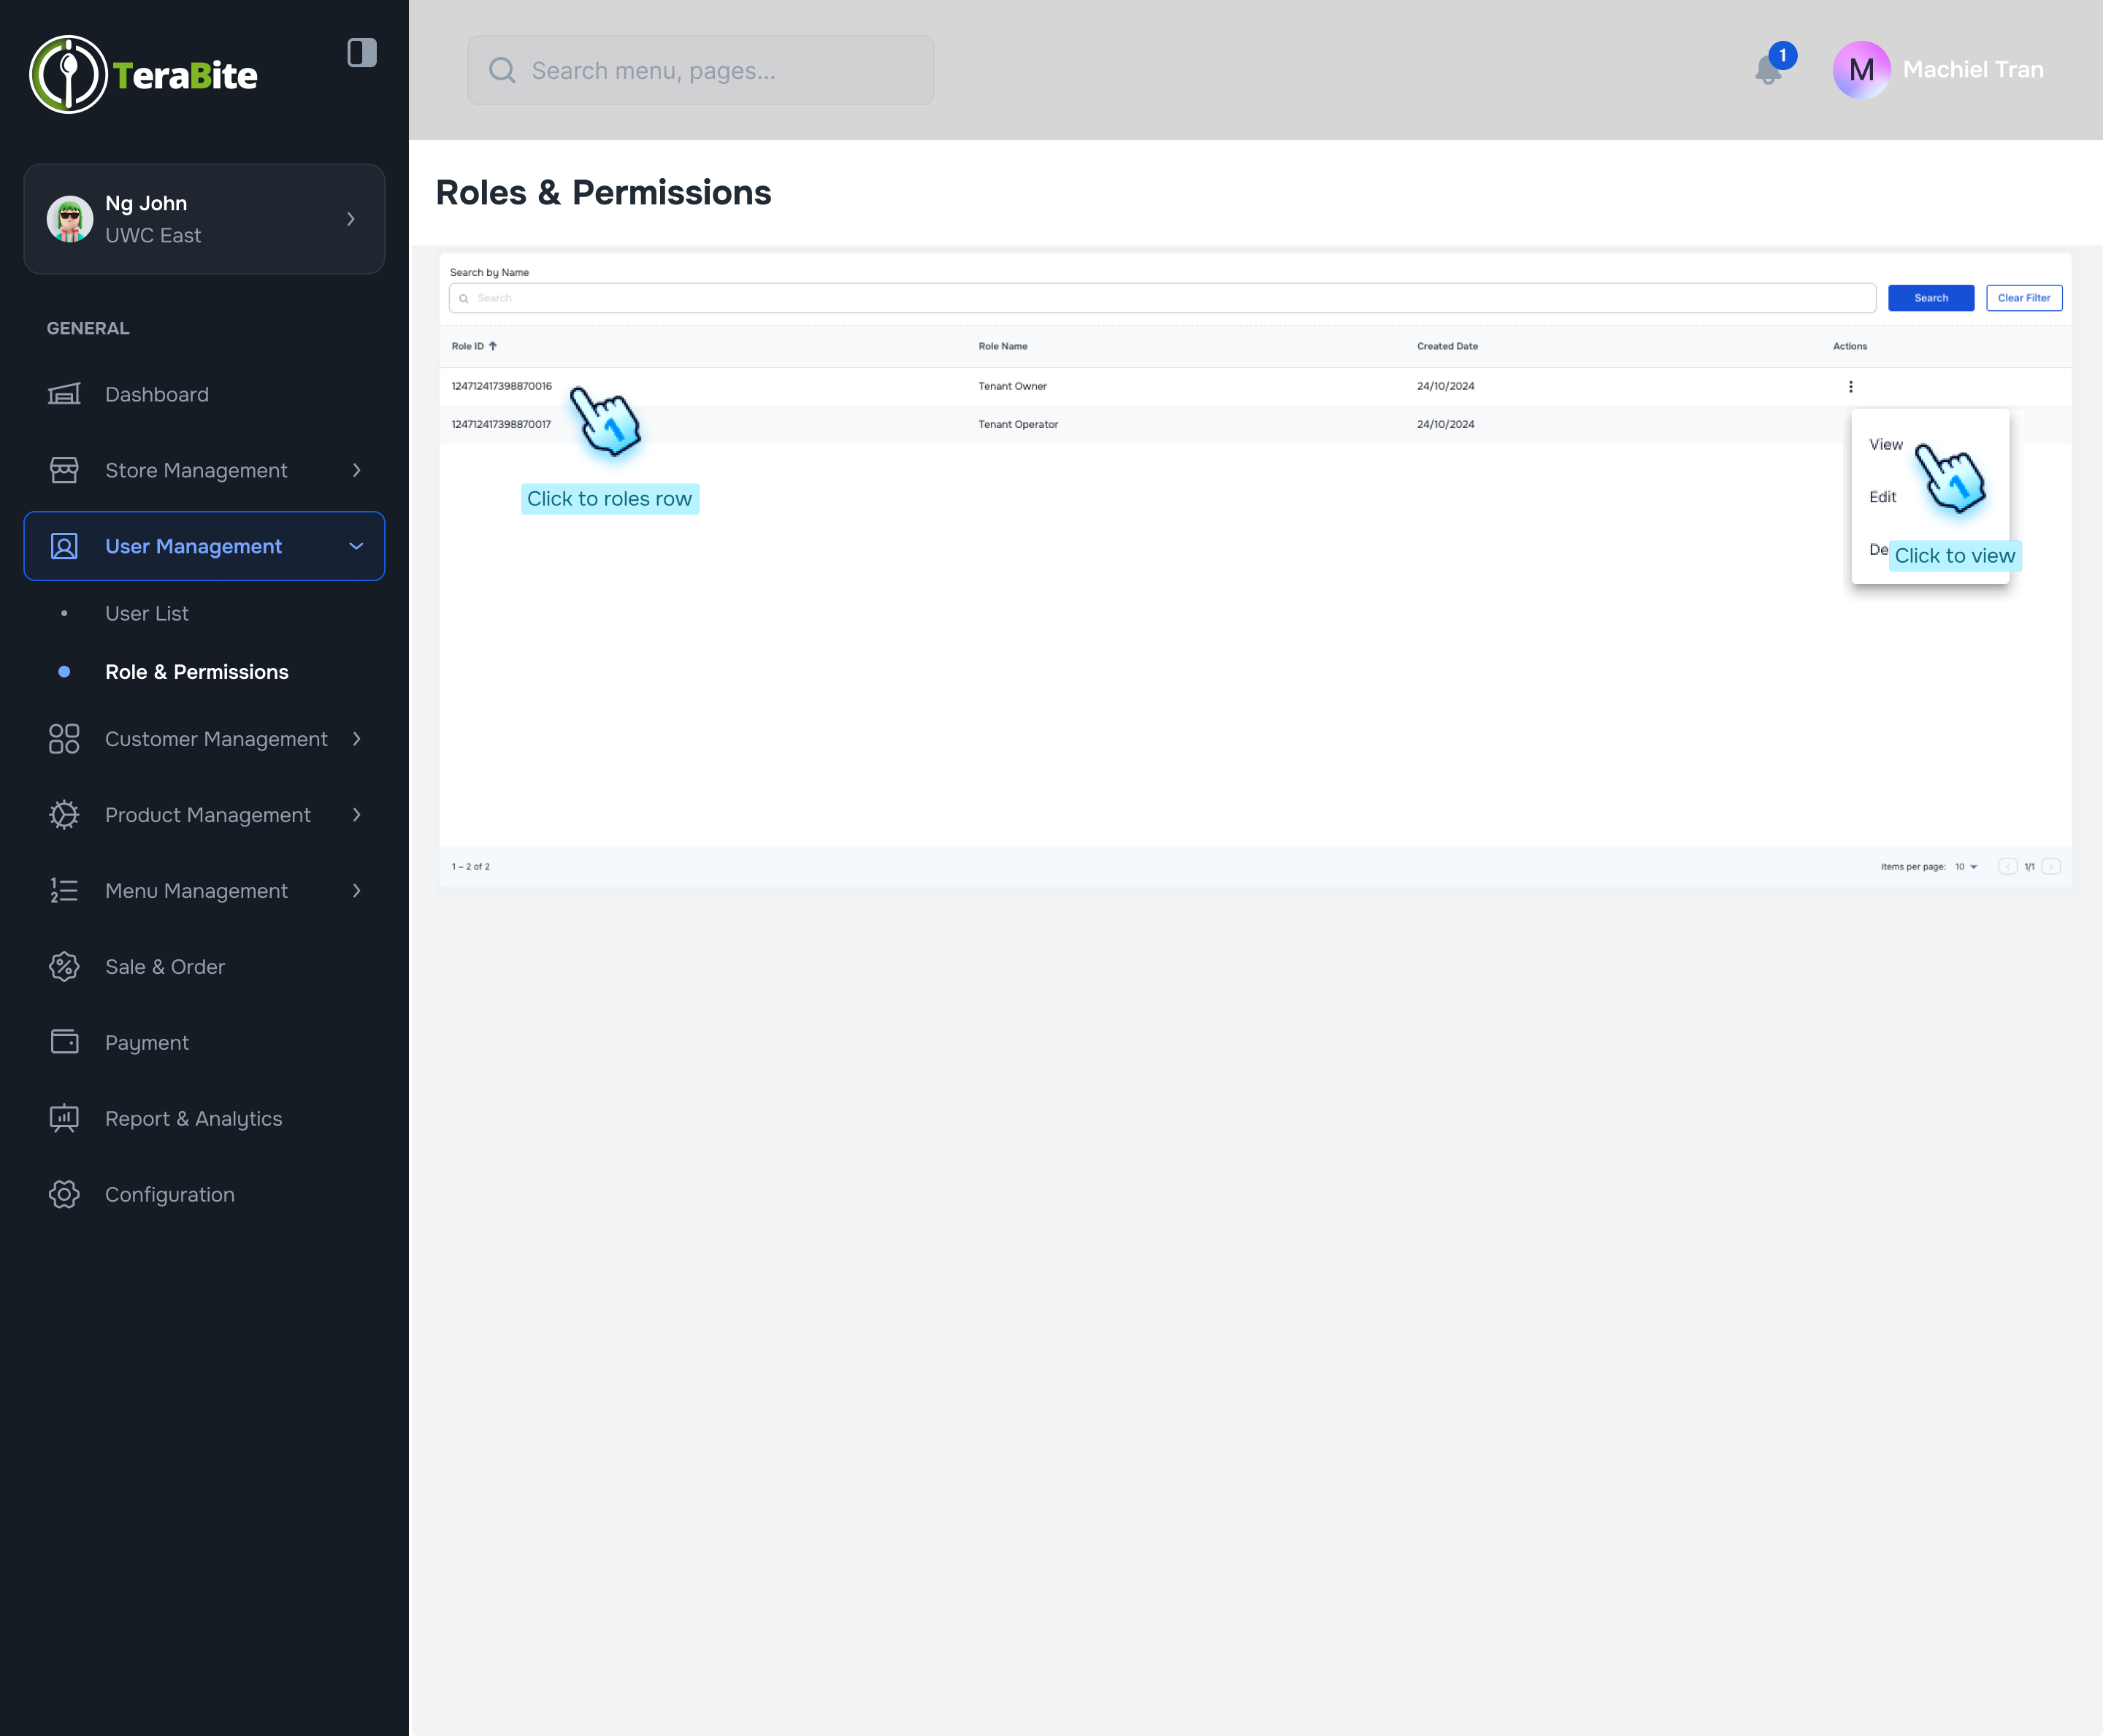
View and Delete a Role
- Access the Role Menu
- Click on the three-dot menu next to the role you wish to view or delete.
- Select View/Delete Action
- Click on the "View/Delete" action from the dropdown menu.
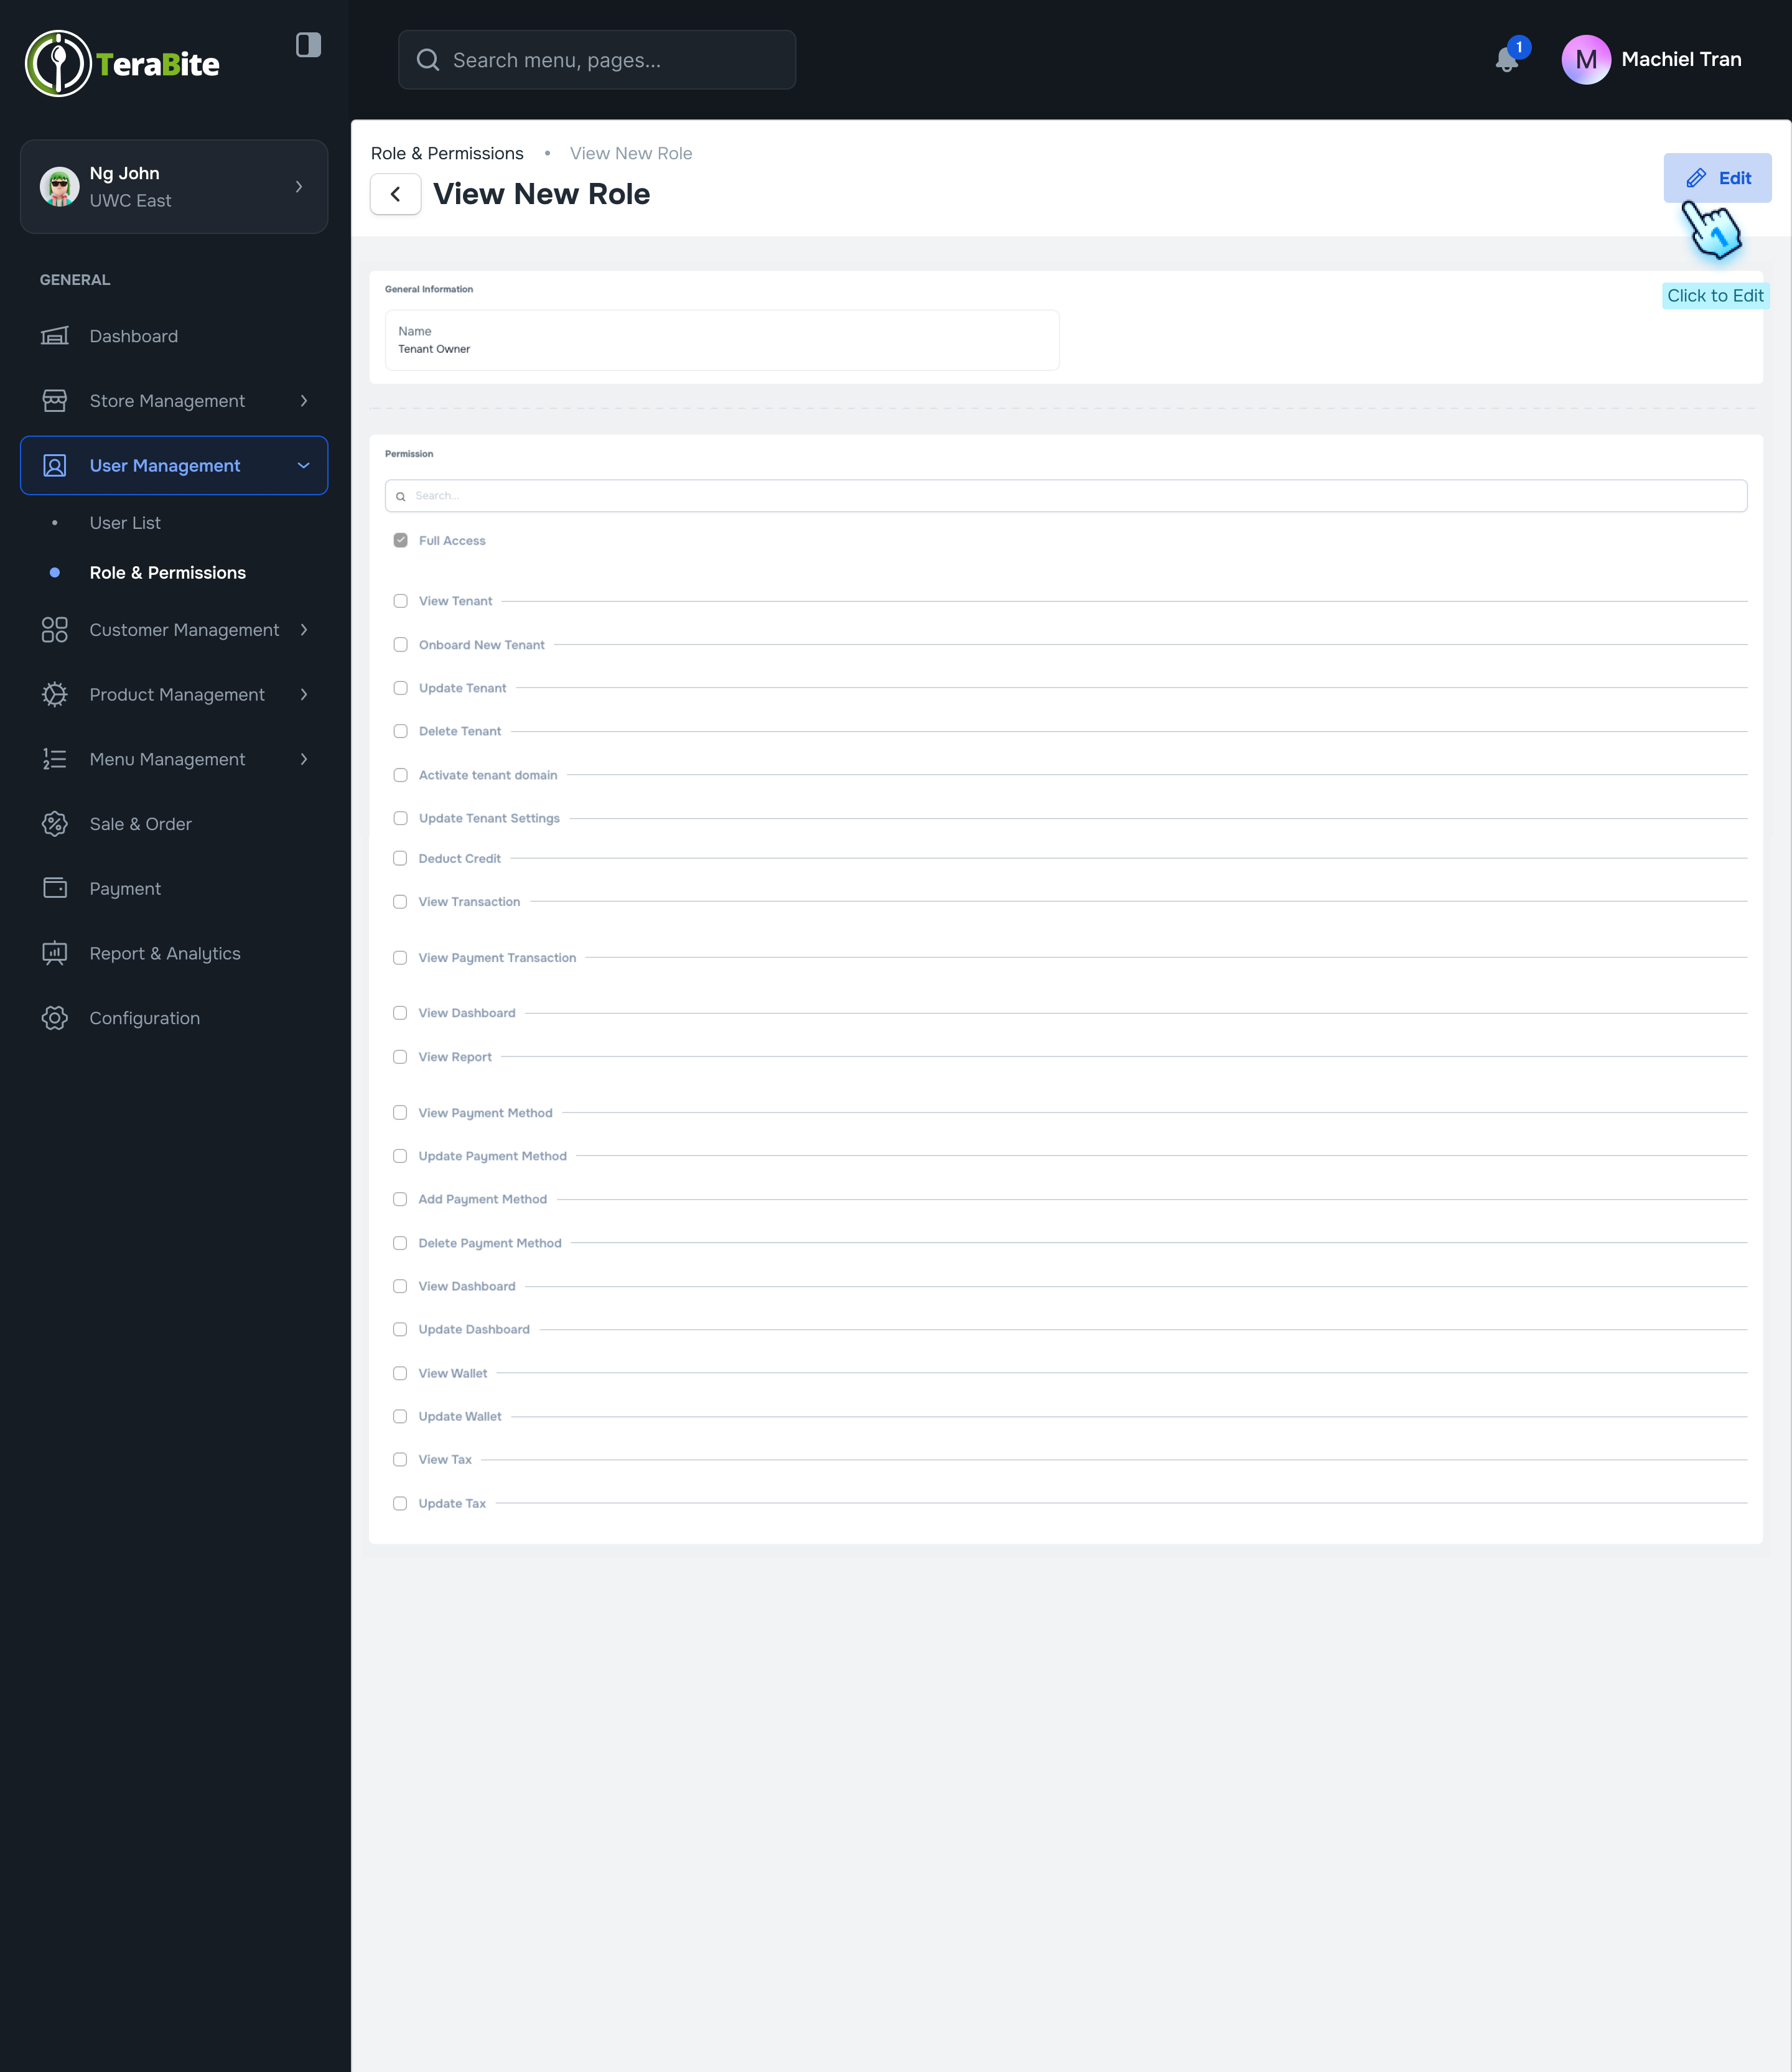
- View Role Permissions
- Review the role details, including the selected permissions associated with the role.
- Edit Role (if necessary)
- If you wish to make changes, click the "Edit Role" button and follow the same steps outlined in the Edit Role section.
#
Conclusion
This document provides a structured approach for business owners to create, edit, view, and delete roles and permissions, ensuring effective management of user access within the system.
#
Screen flow