#
User Invitation and Management
#
Description
This document outlines the procedures for inviting a user to the system and managing the user list, including viewing user details and adjusting user information.
#
Invite user
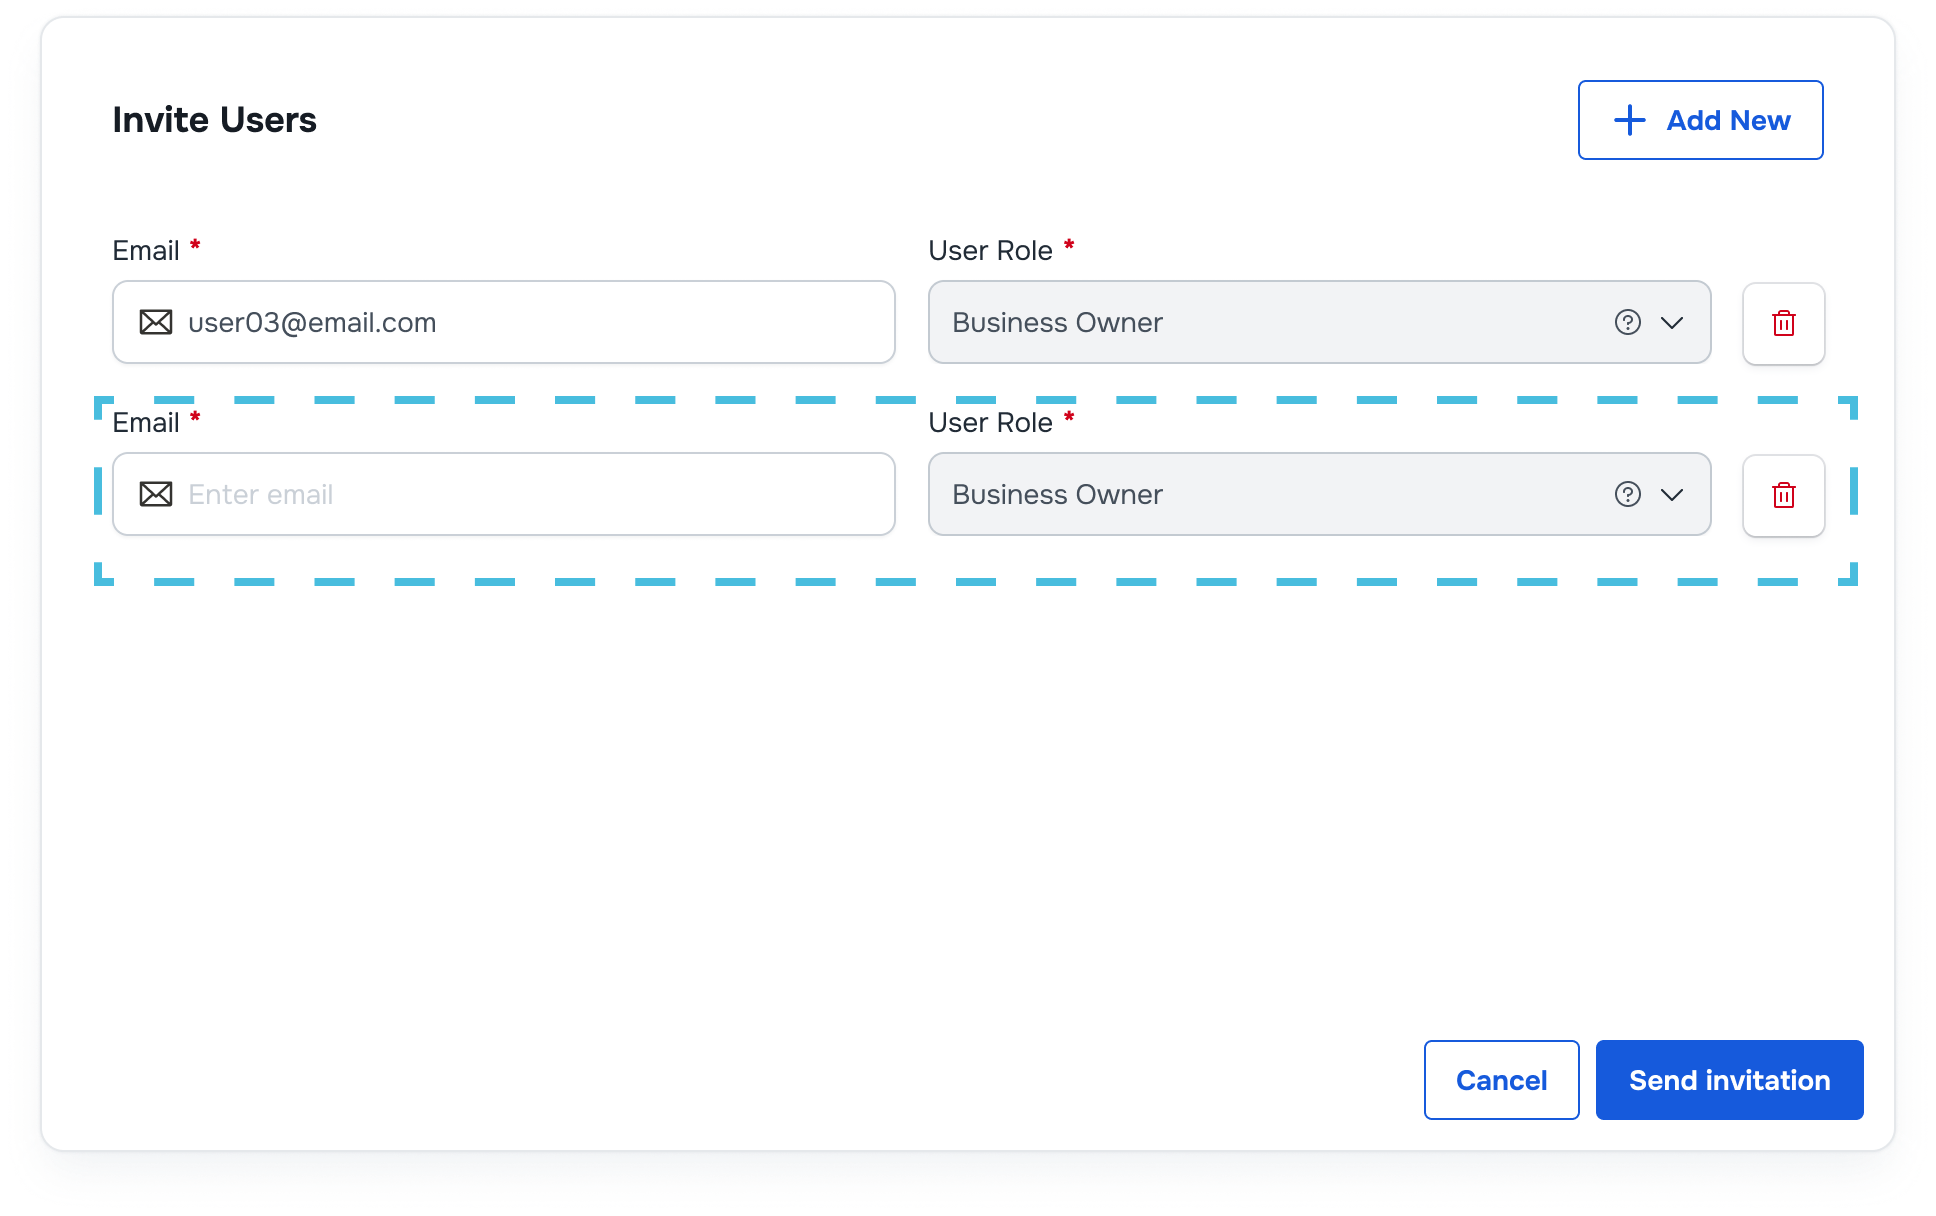
- Initiate User Invitation
- Click the "Invite User" button on the User Management module.
- Enter User Information
- Fill in the email address of the user to be invited.
- Set the appropriate user role for the new user.
- Add Additional Users (if necessary)
- If you need to invite more users, repeat the above steps for each additional user.
- Send Invitation
- Click the "Send Invitation" button to dispatch the invitation email to the user.
#
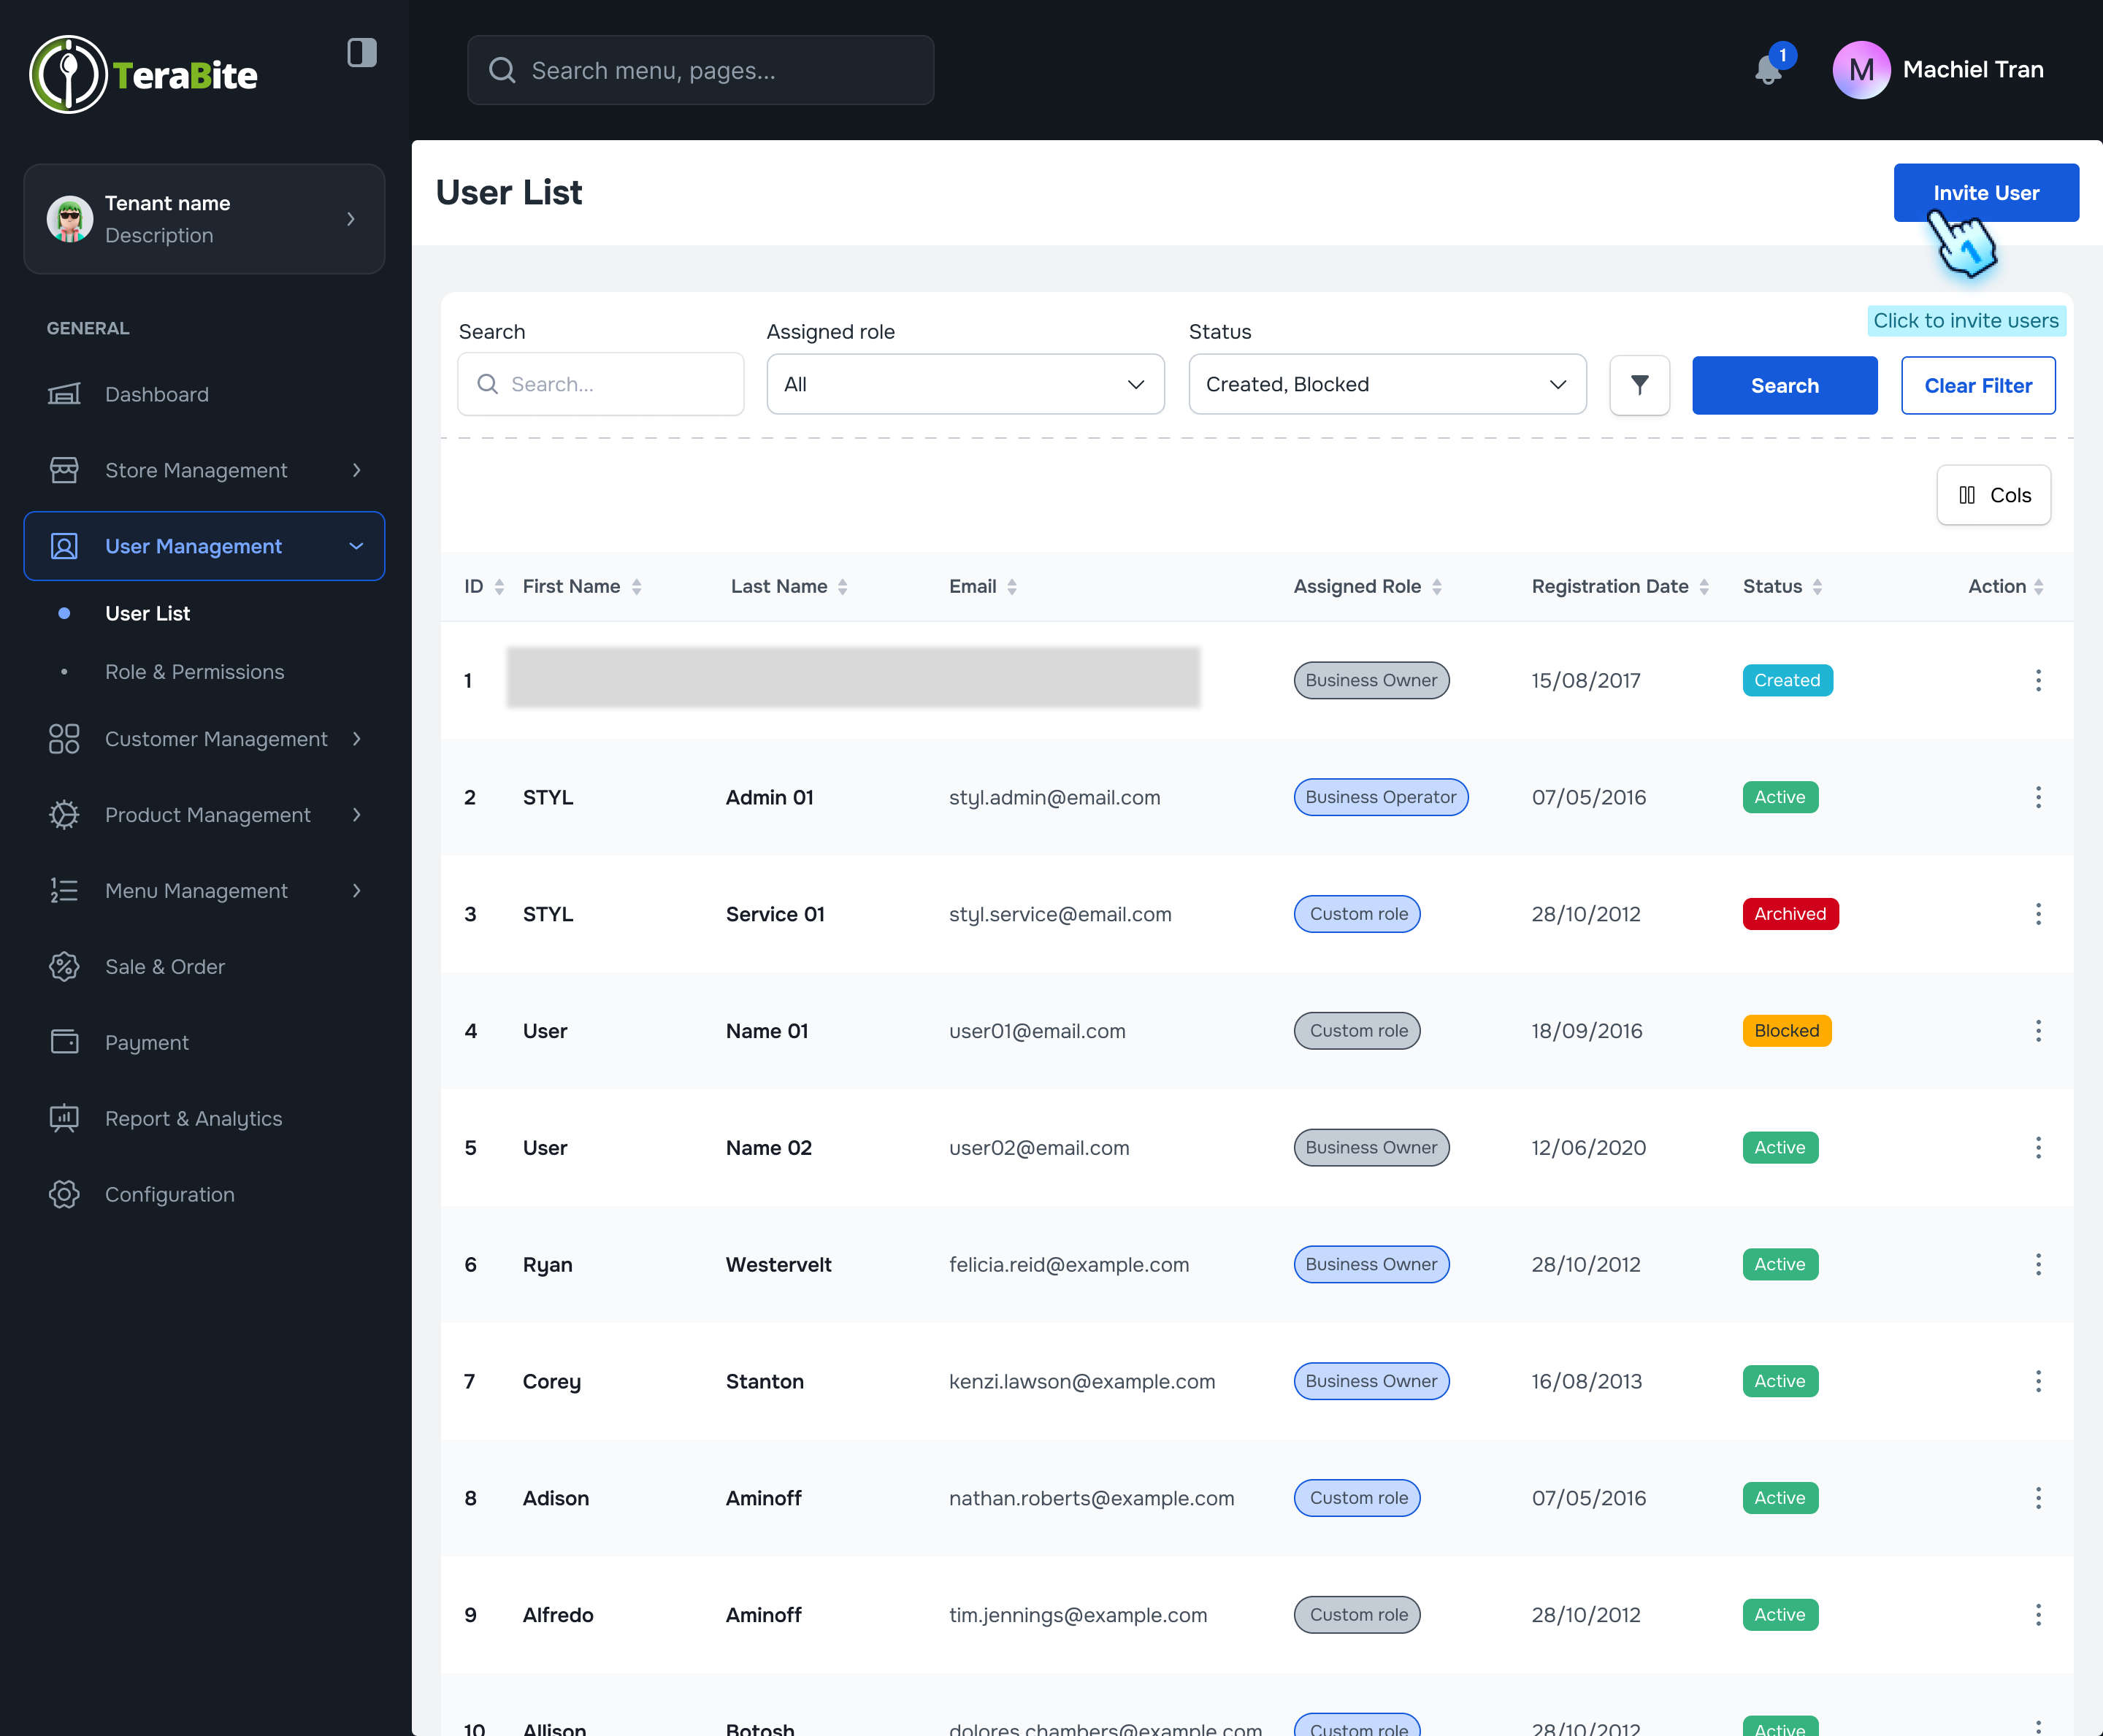
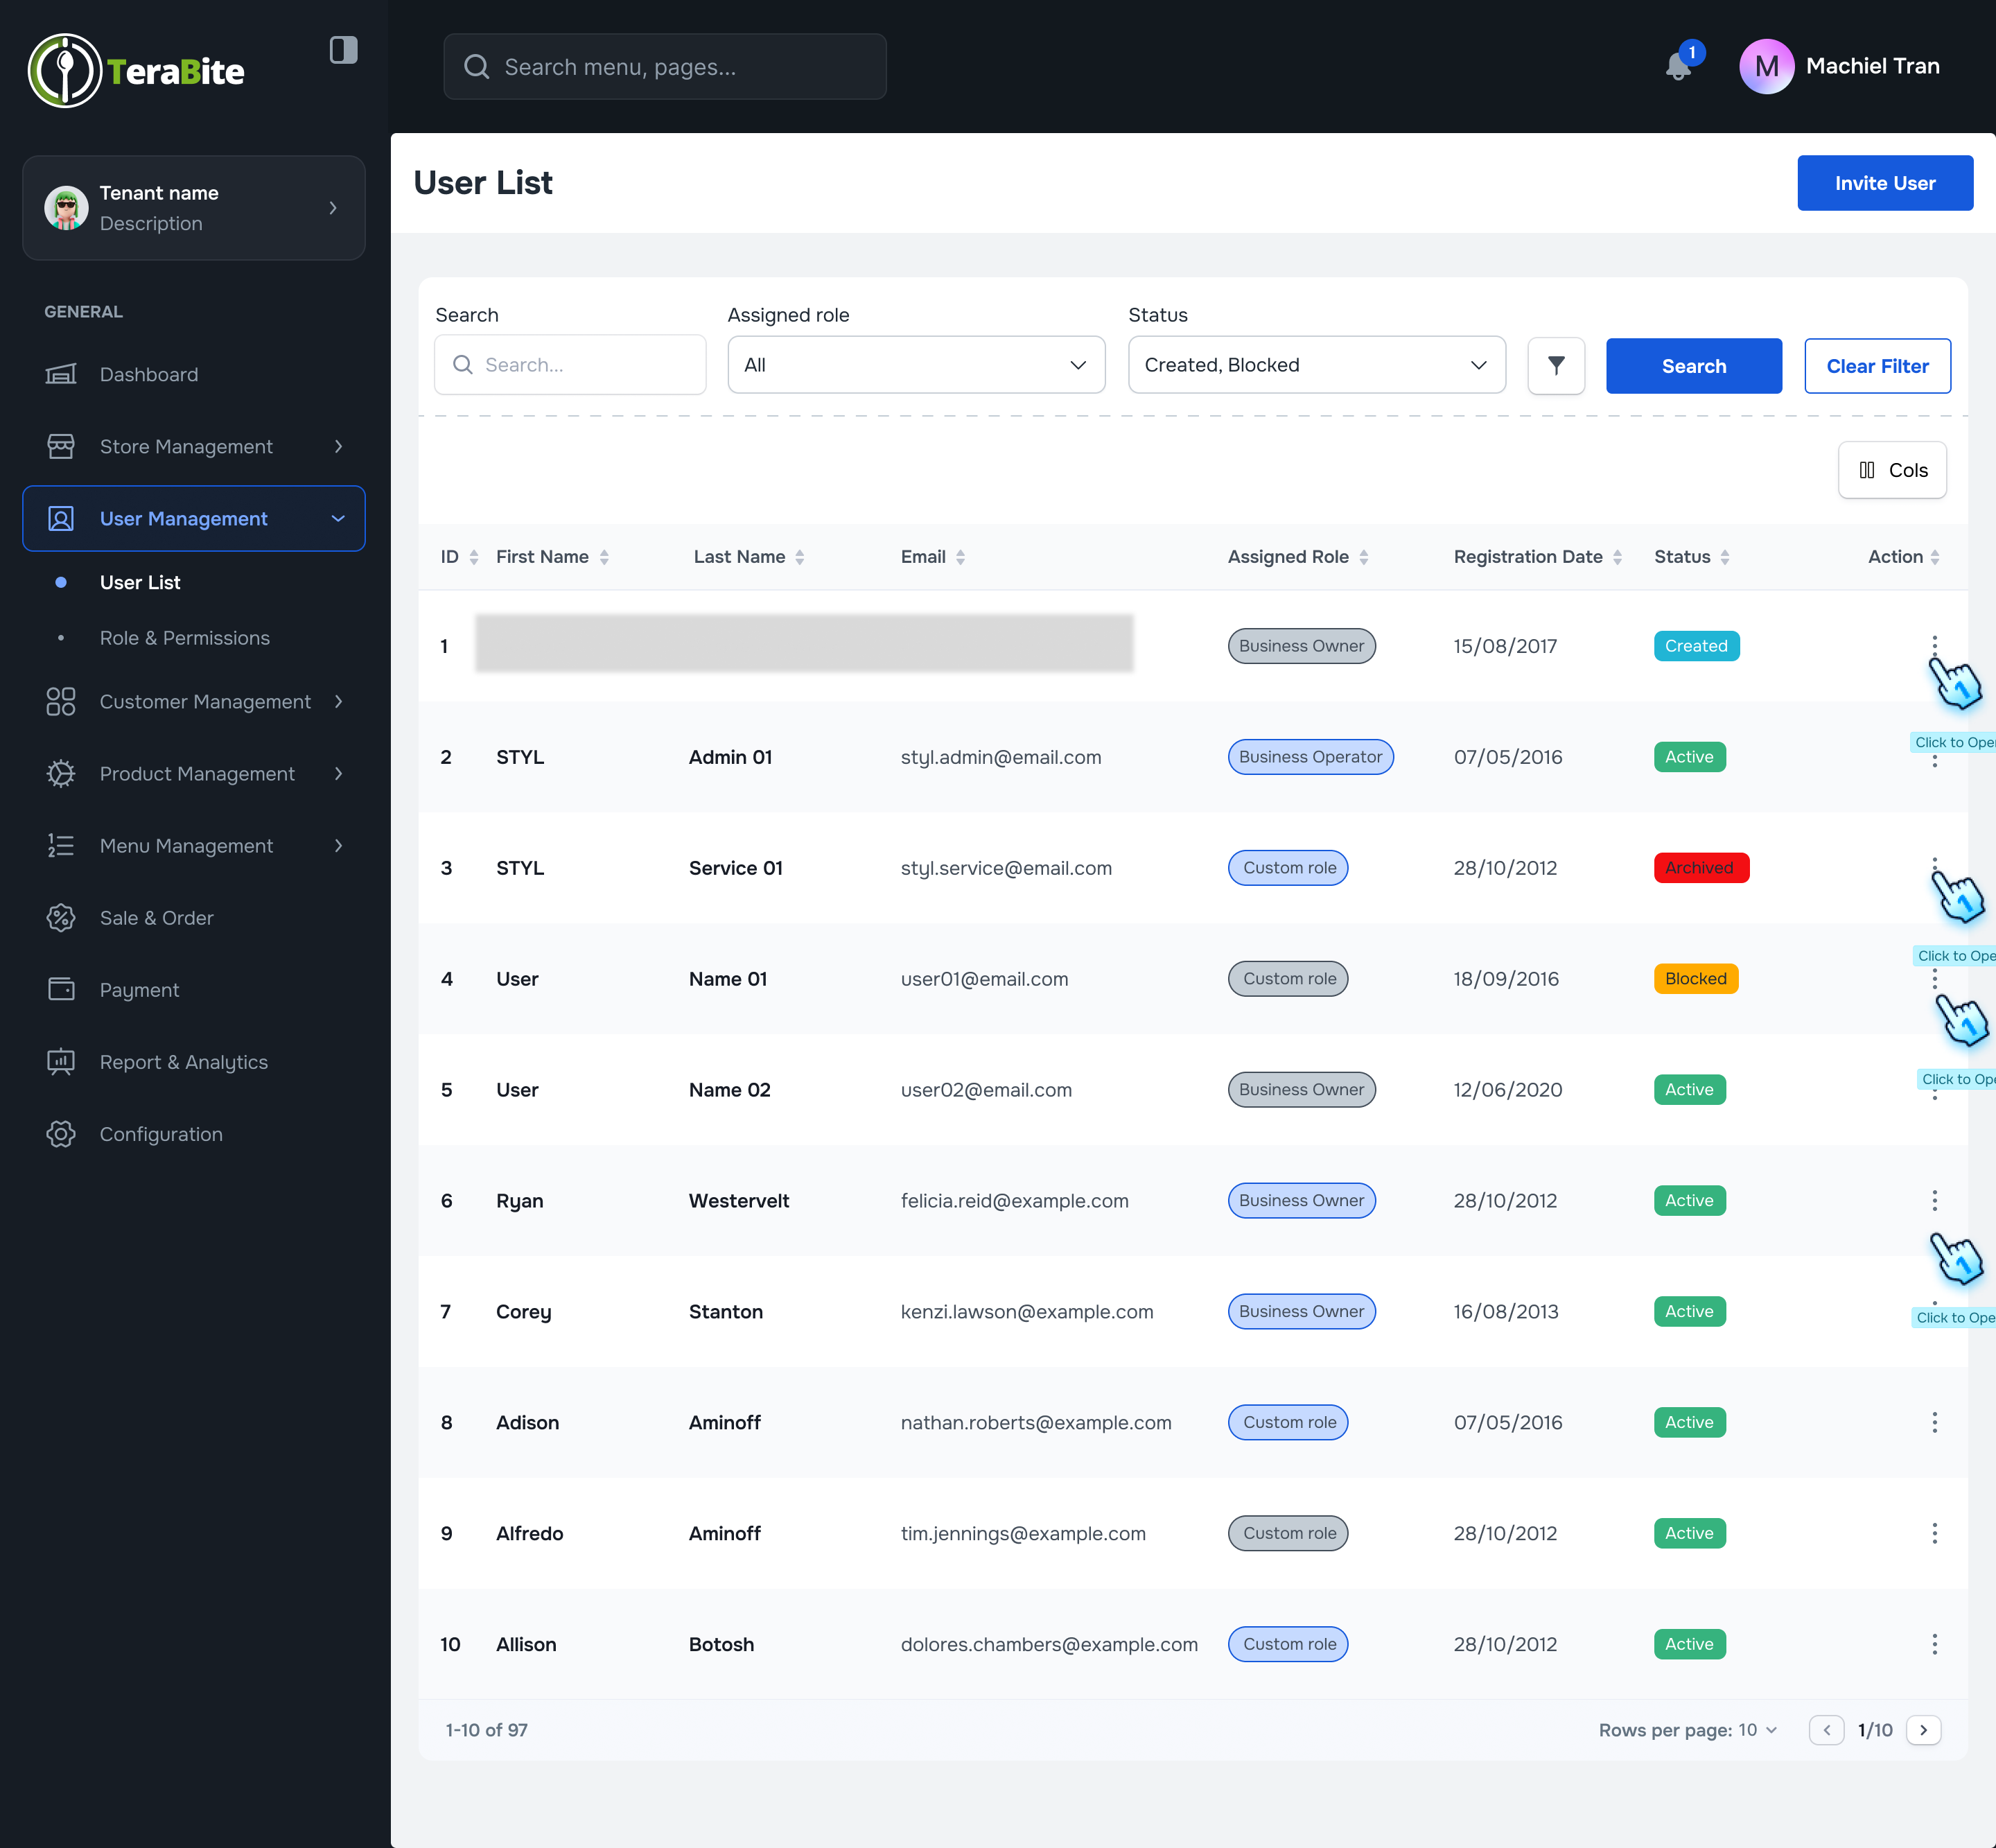
View User List
- Access User List
- Navigate to the User list section where users are displayed with their respective statuses: Created, Active, Archived, and Blocked.
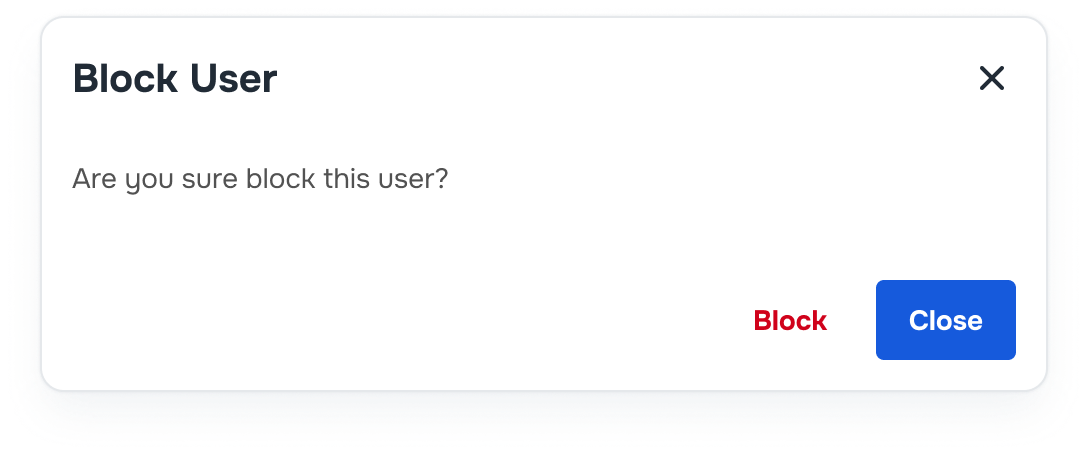
- Perform Actions Based on User Status
- Click on the three-dot menu in each row to reveal available actions for each user based on their status.
- Actions per Status:
- Created: Options are View and Delete.
- Active: Options are View, Archived, Block, and Delete.
- Archived: Options are View, Activate, and Delete.
- Blocked: Options are View,Activate, and Delete.
#
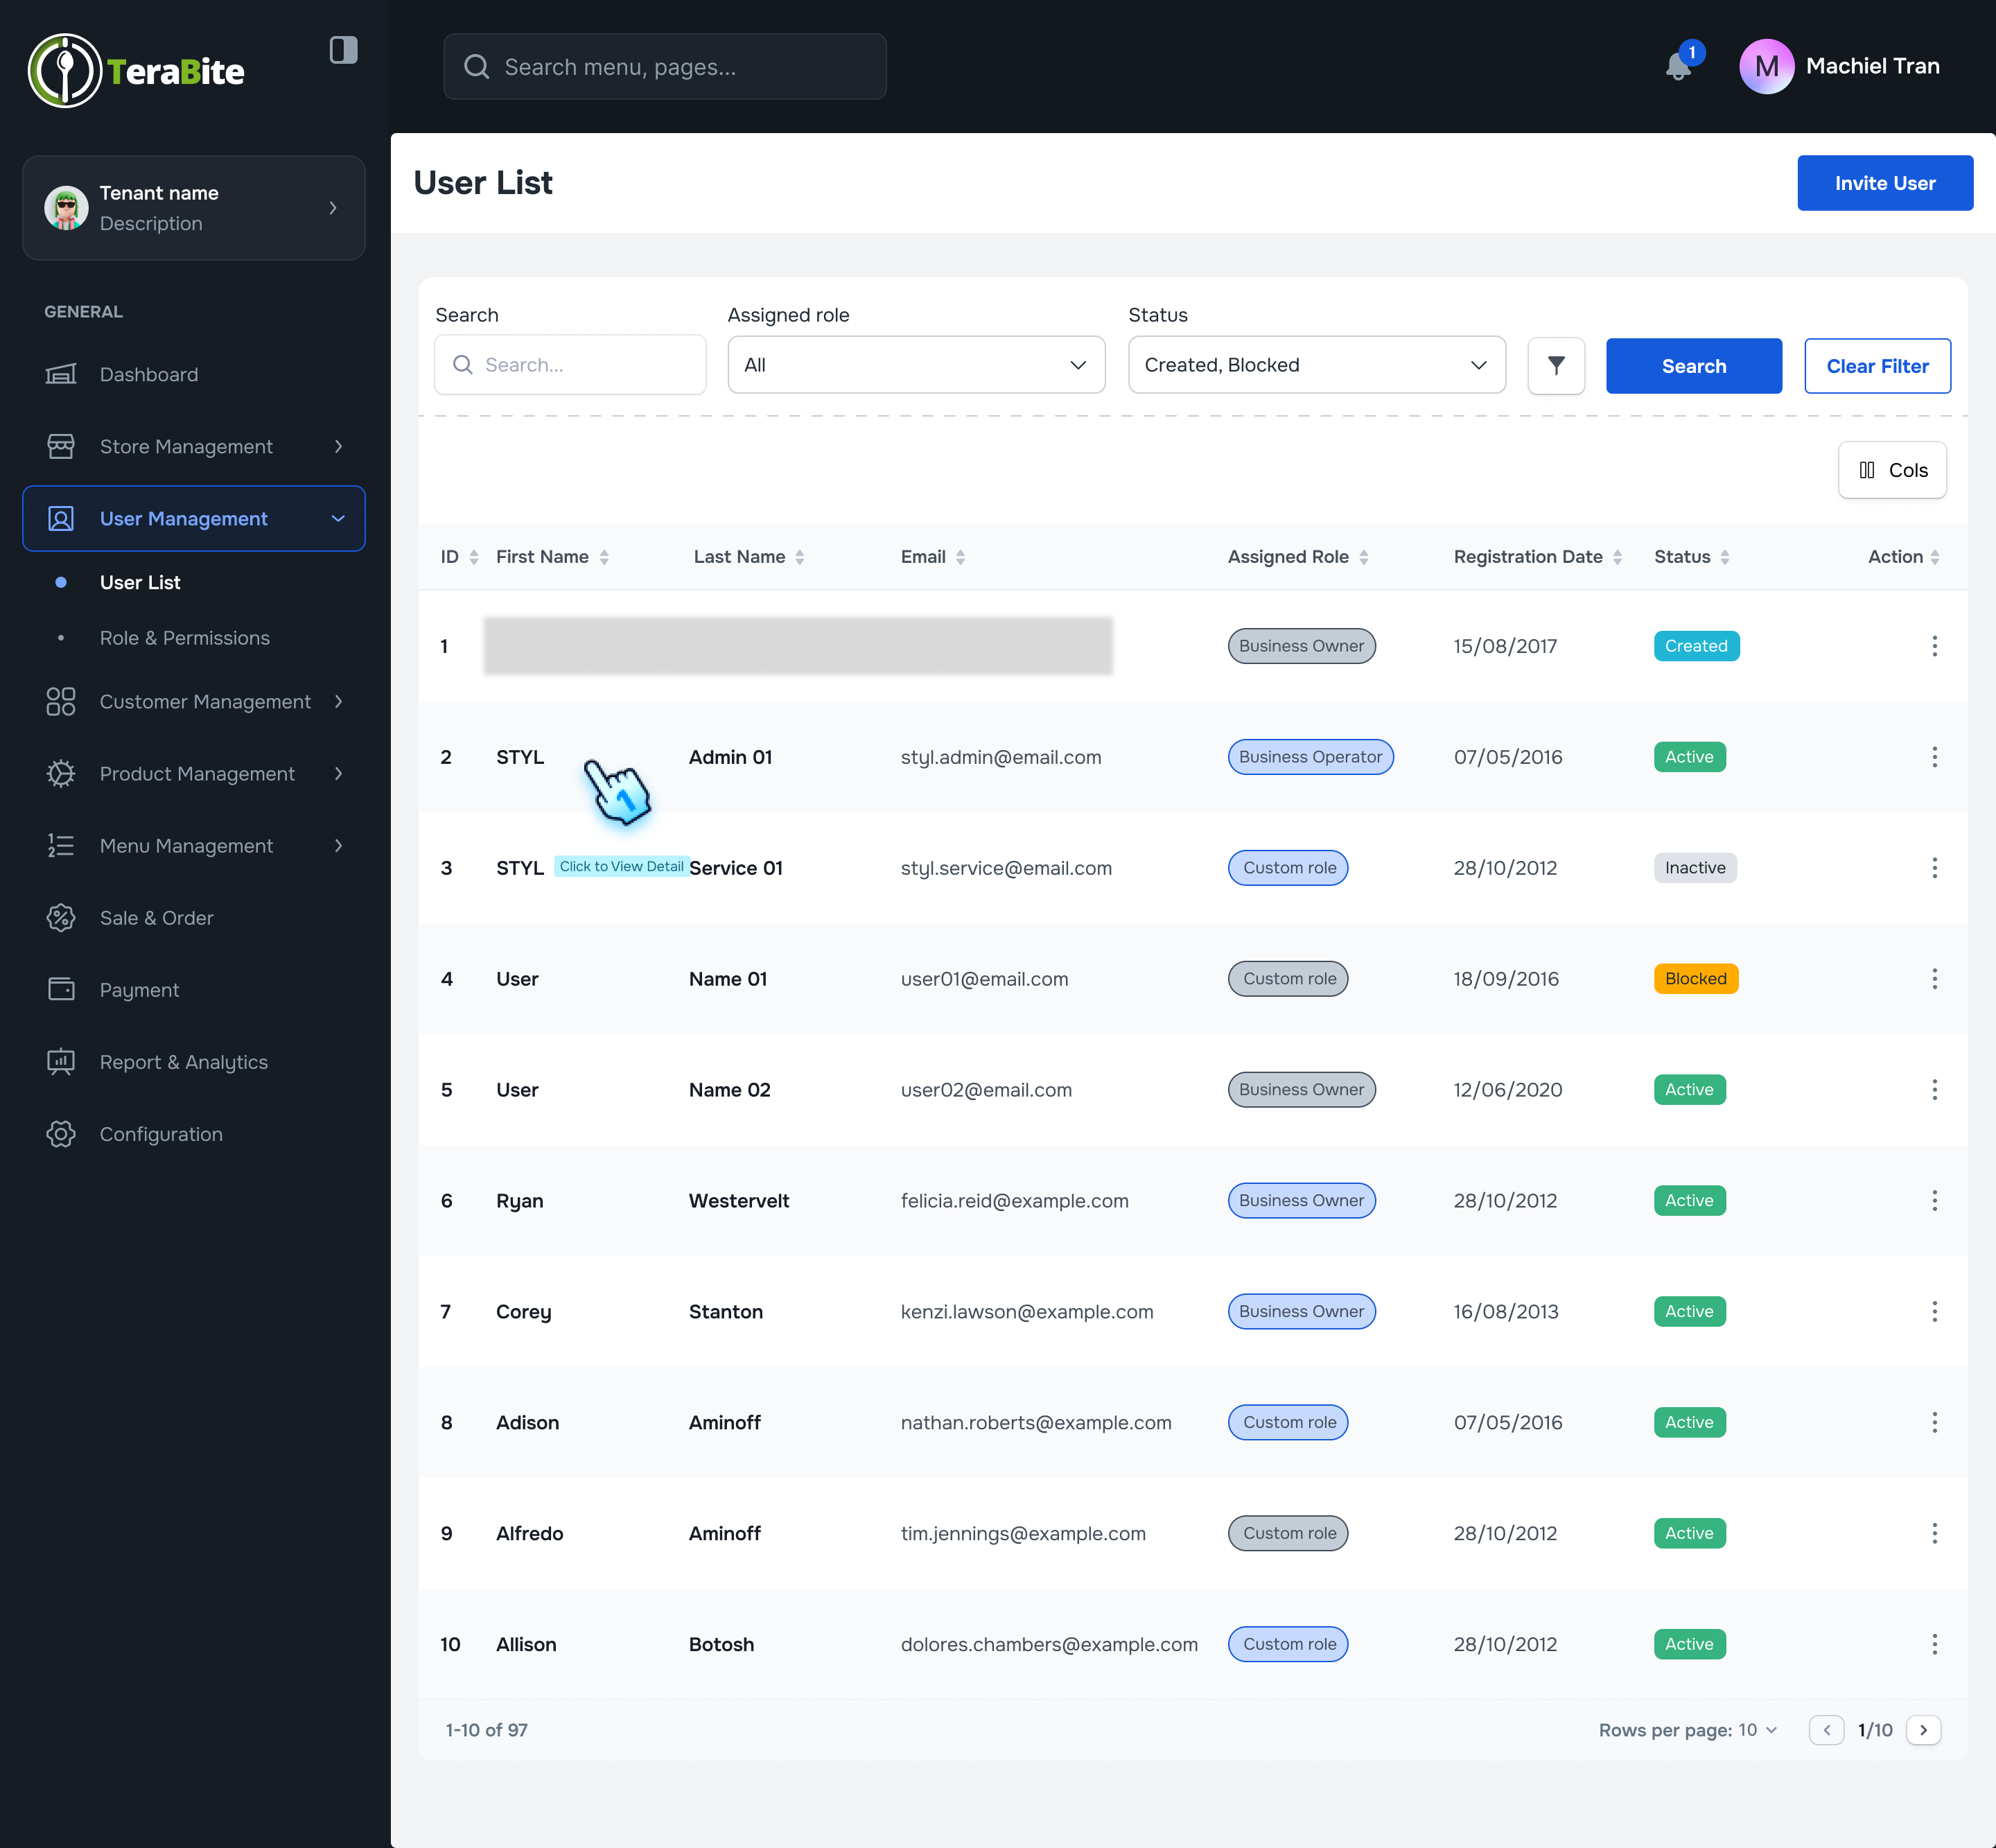
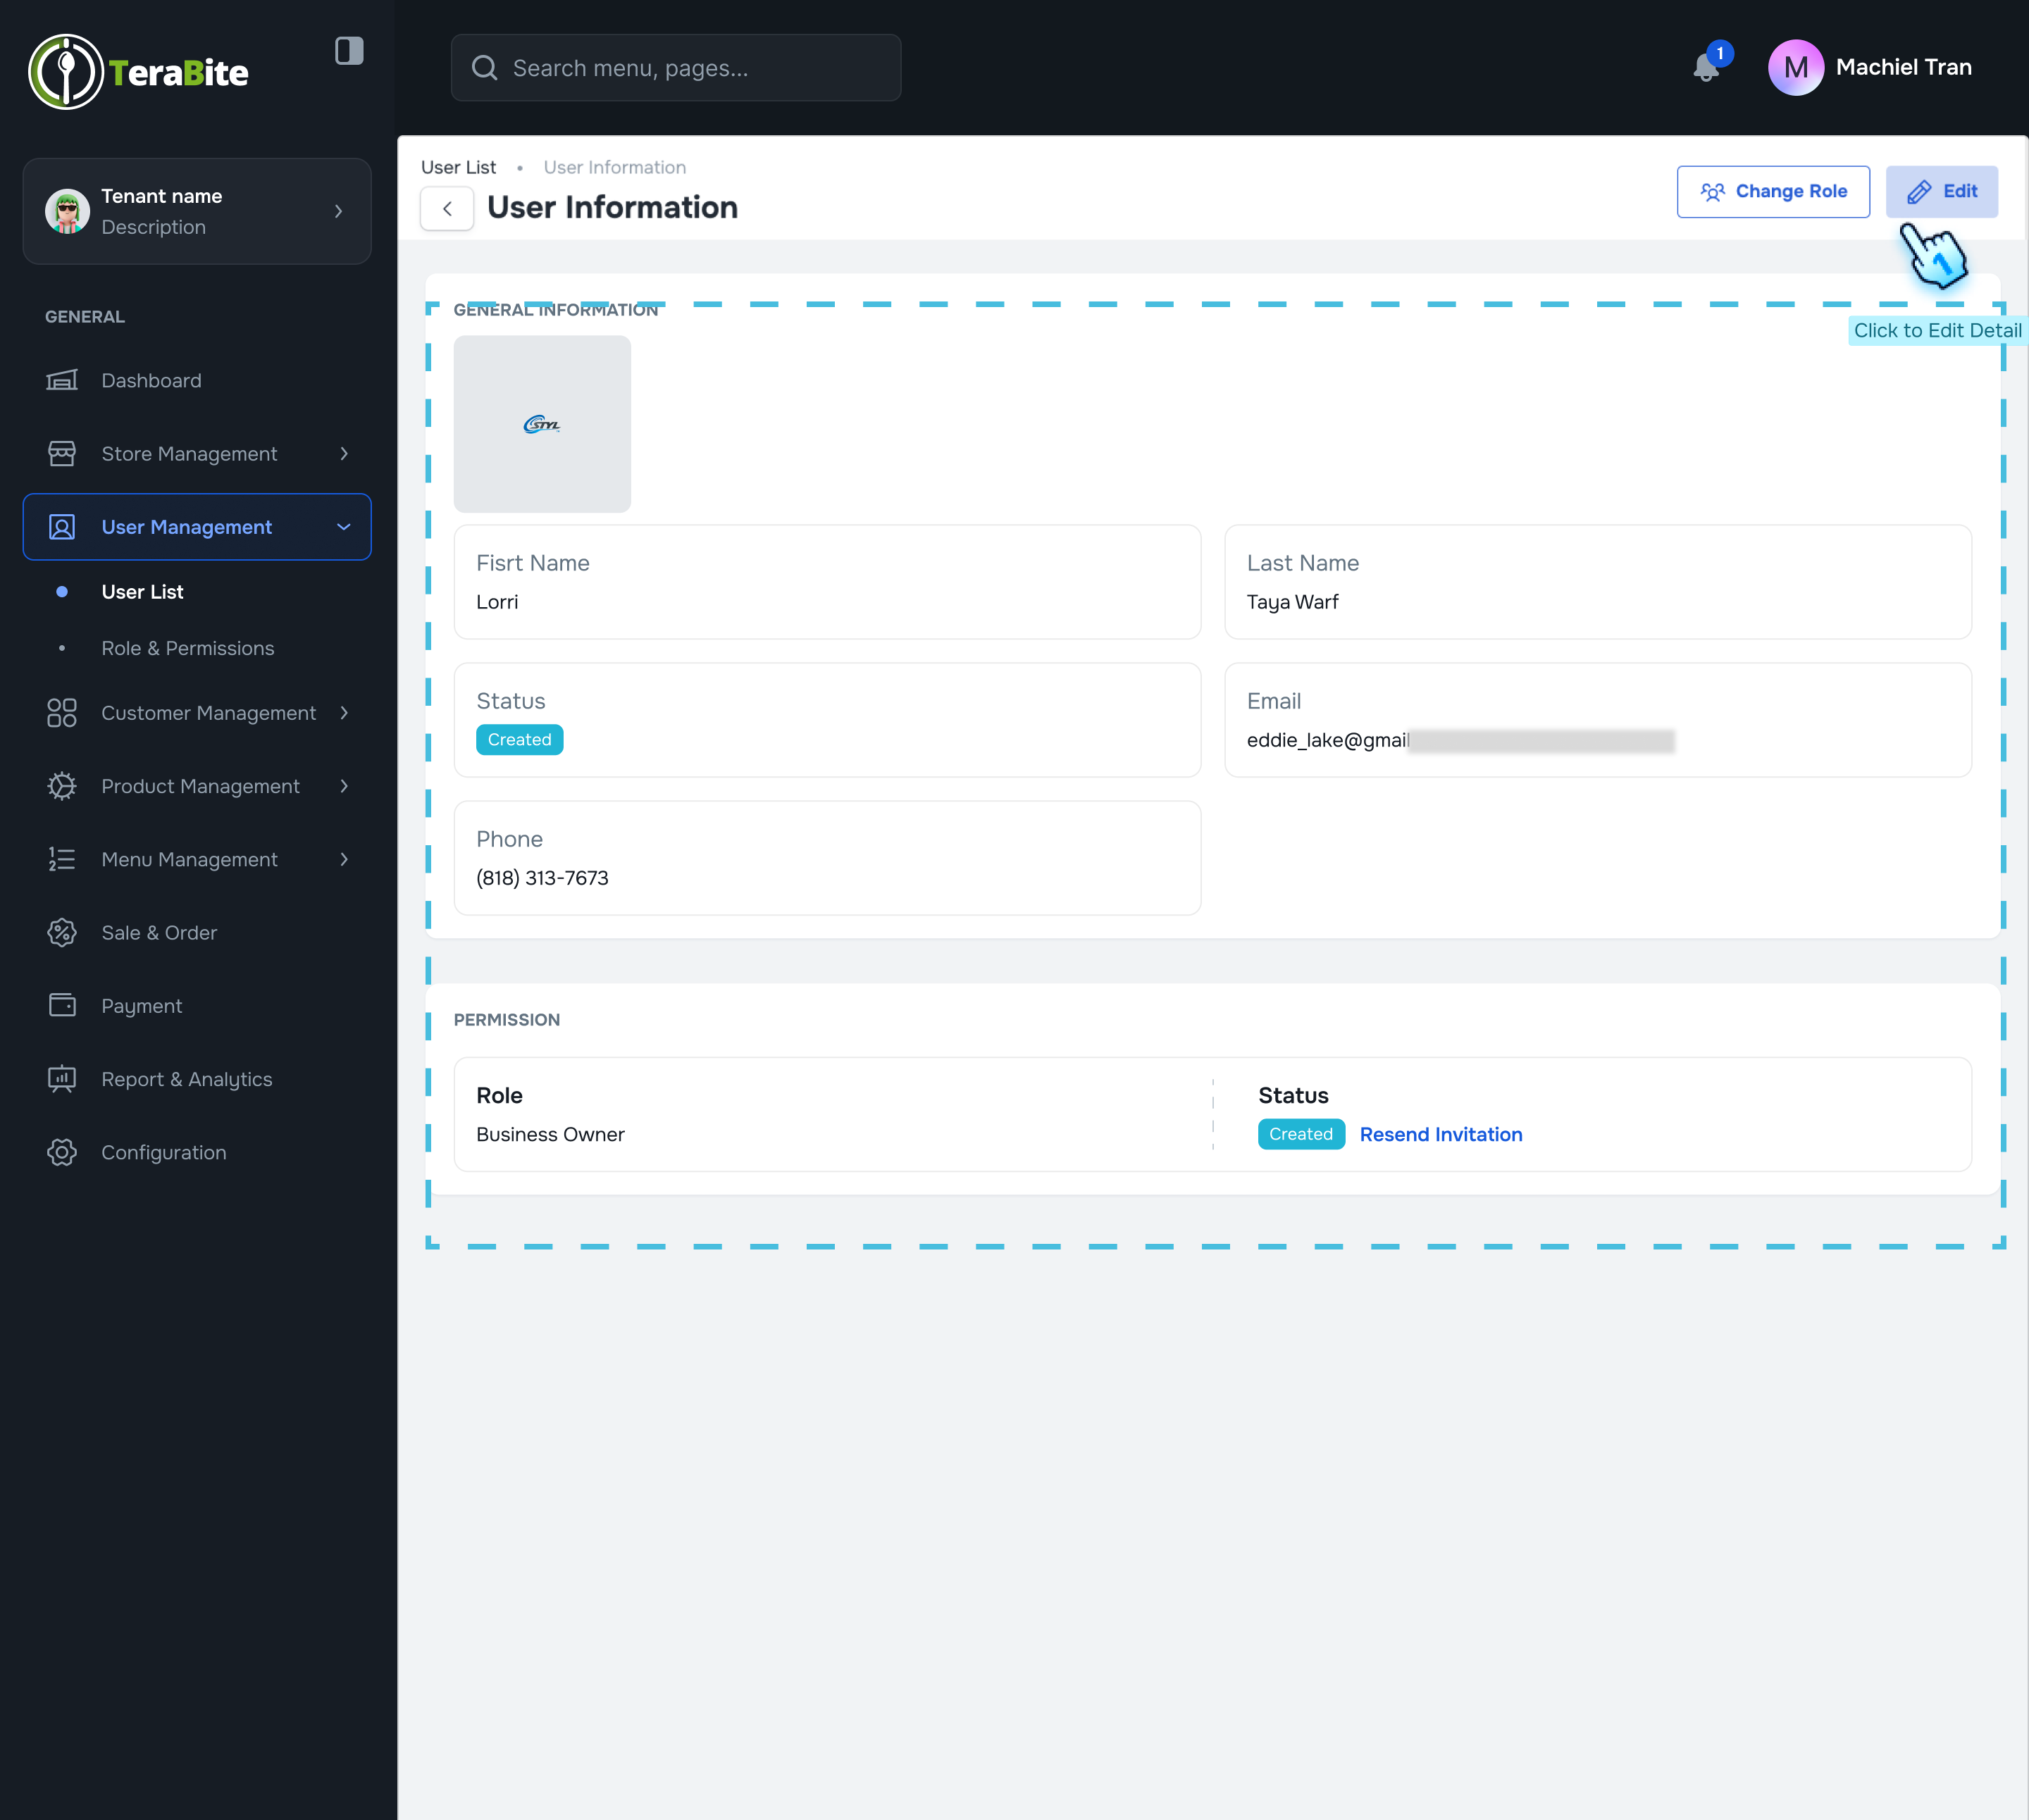
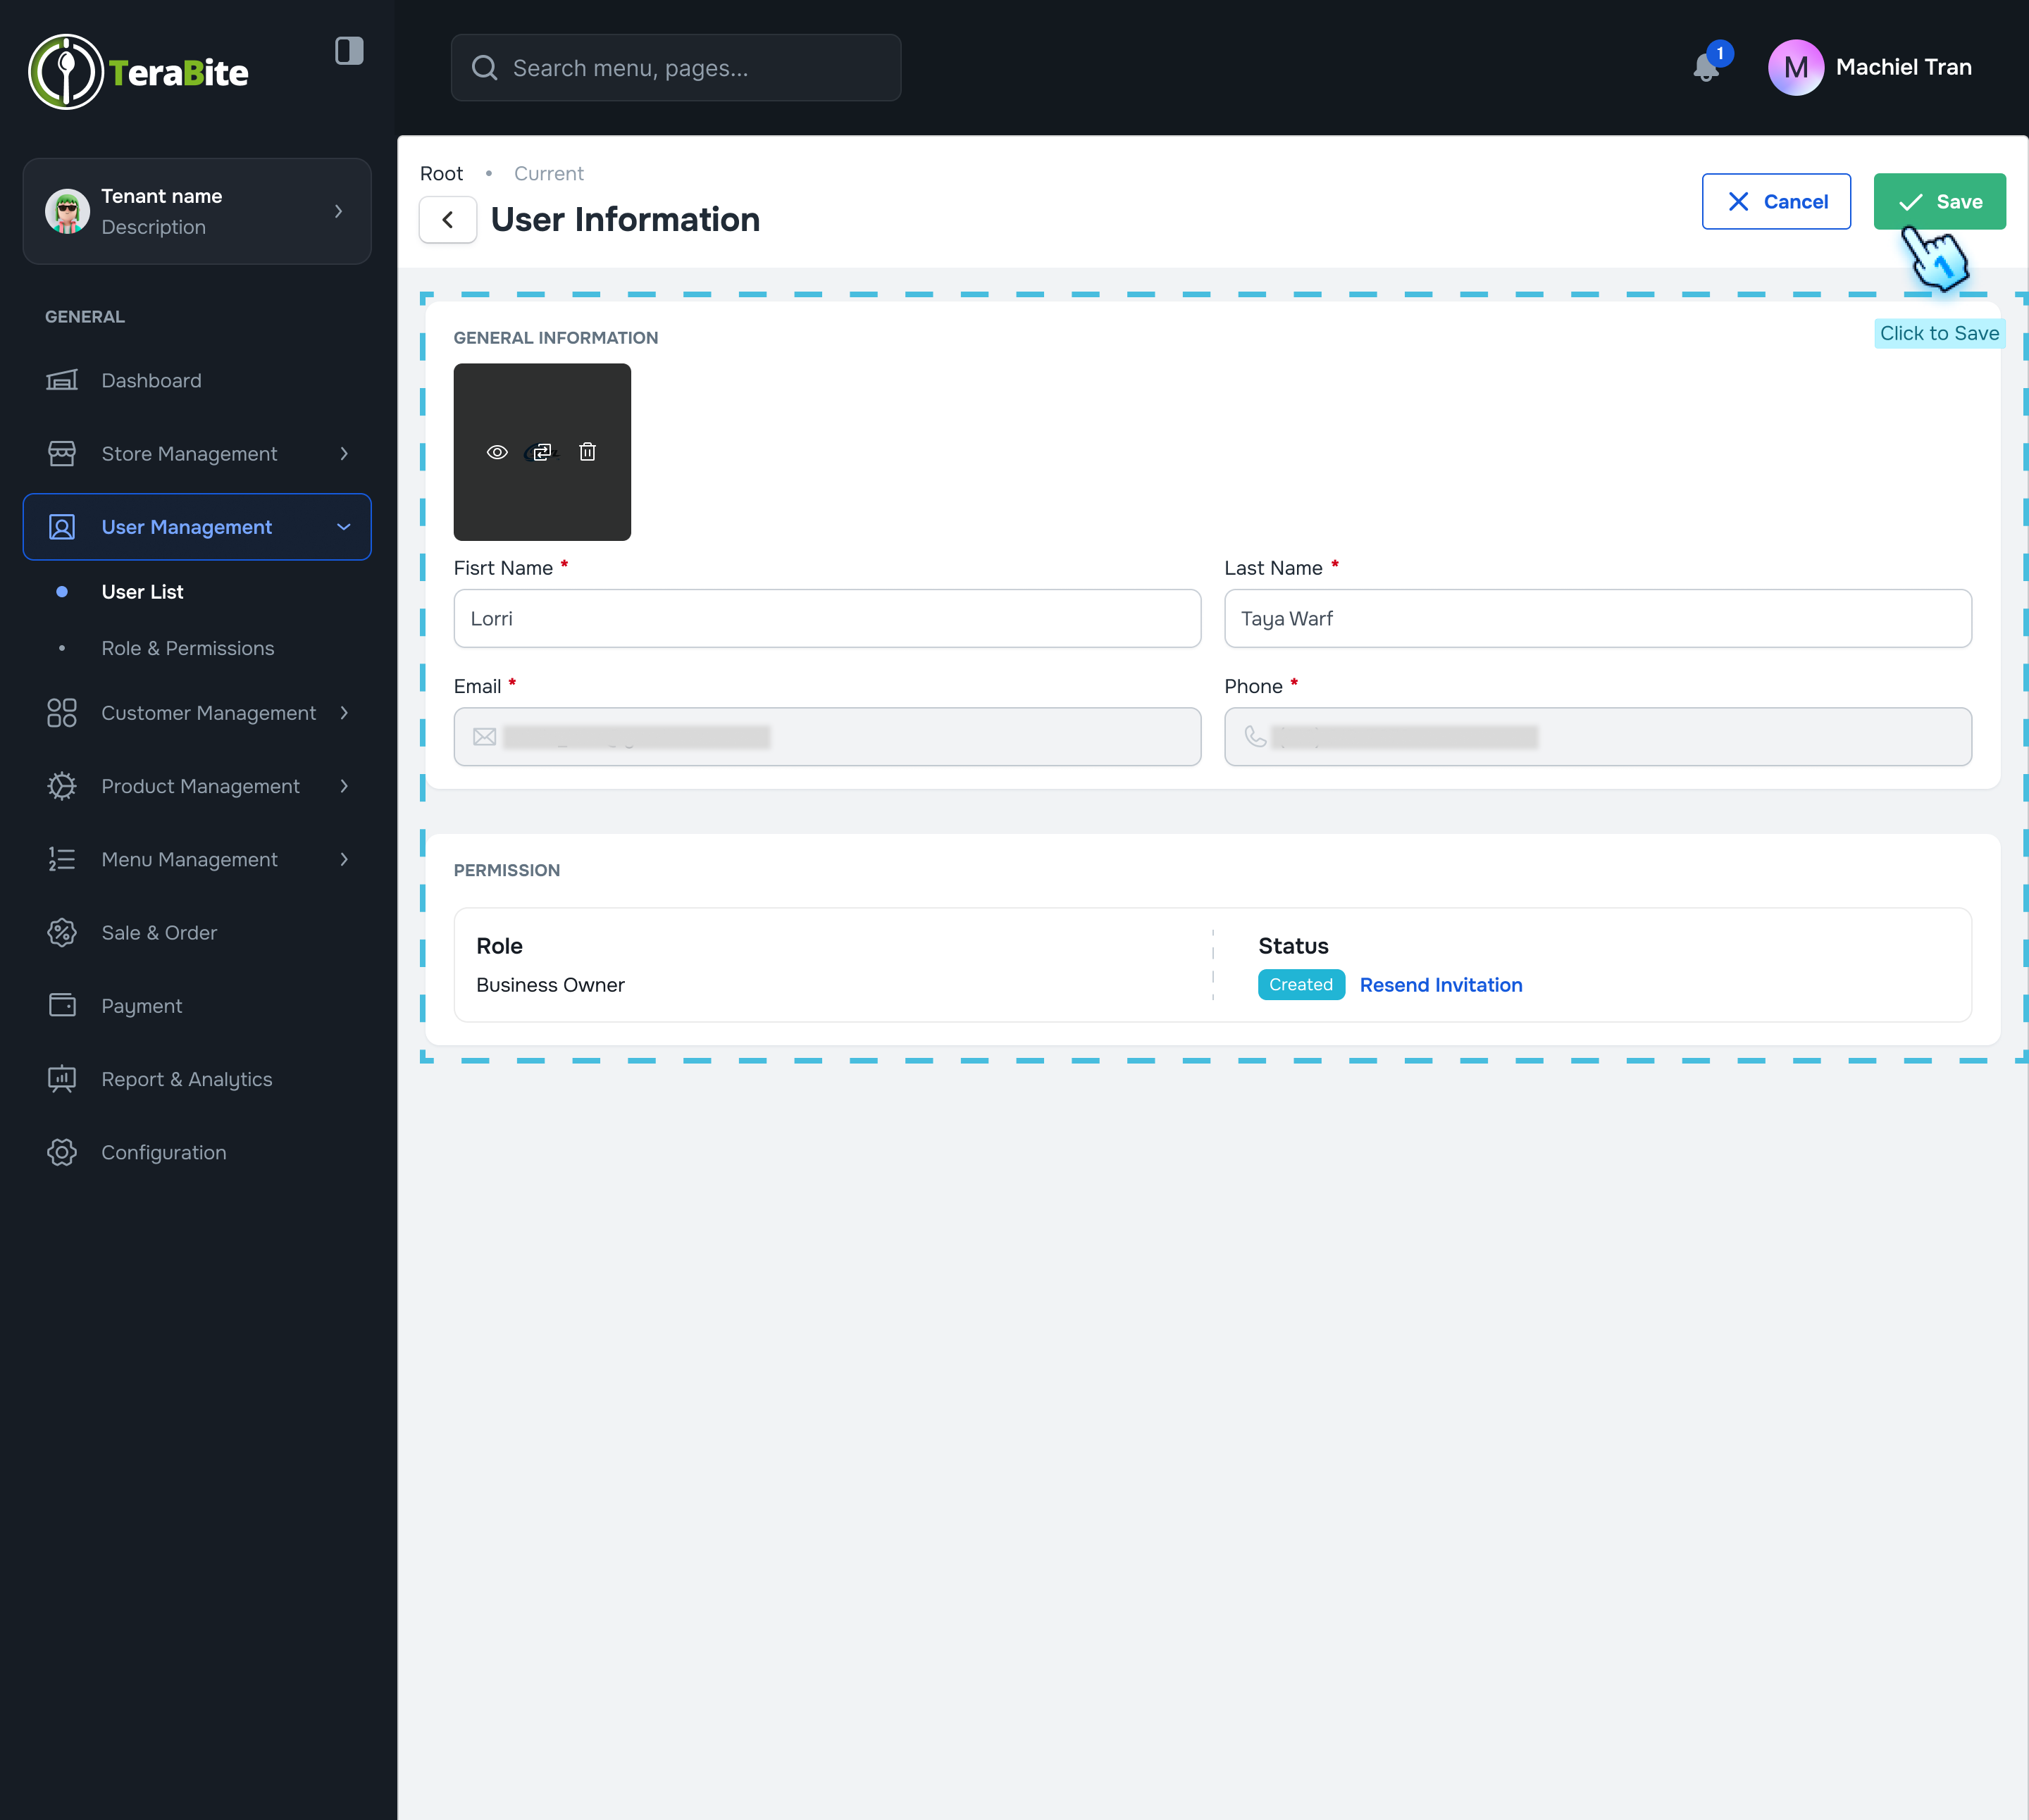
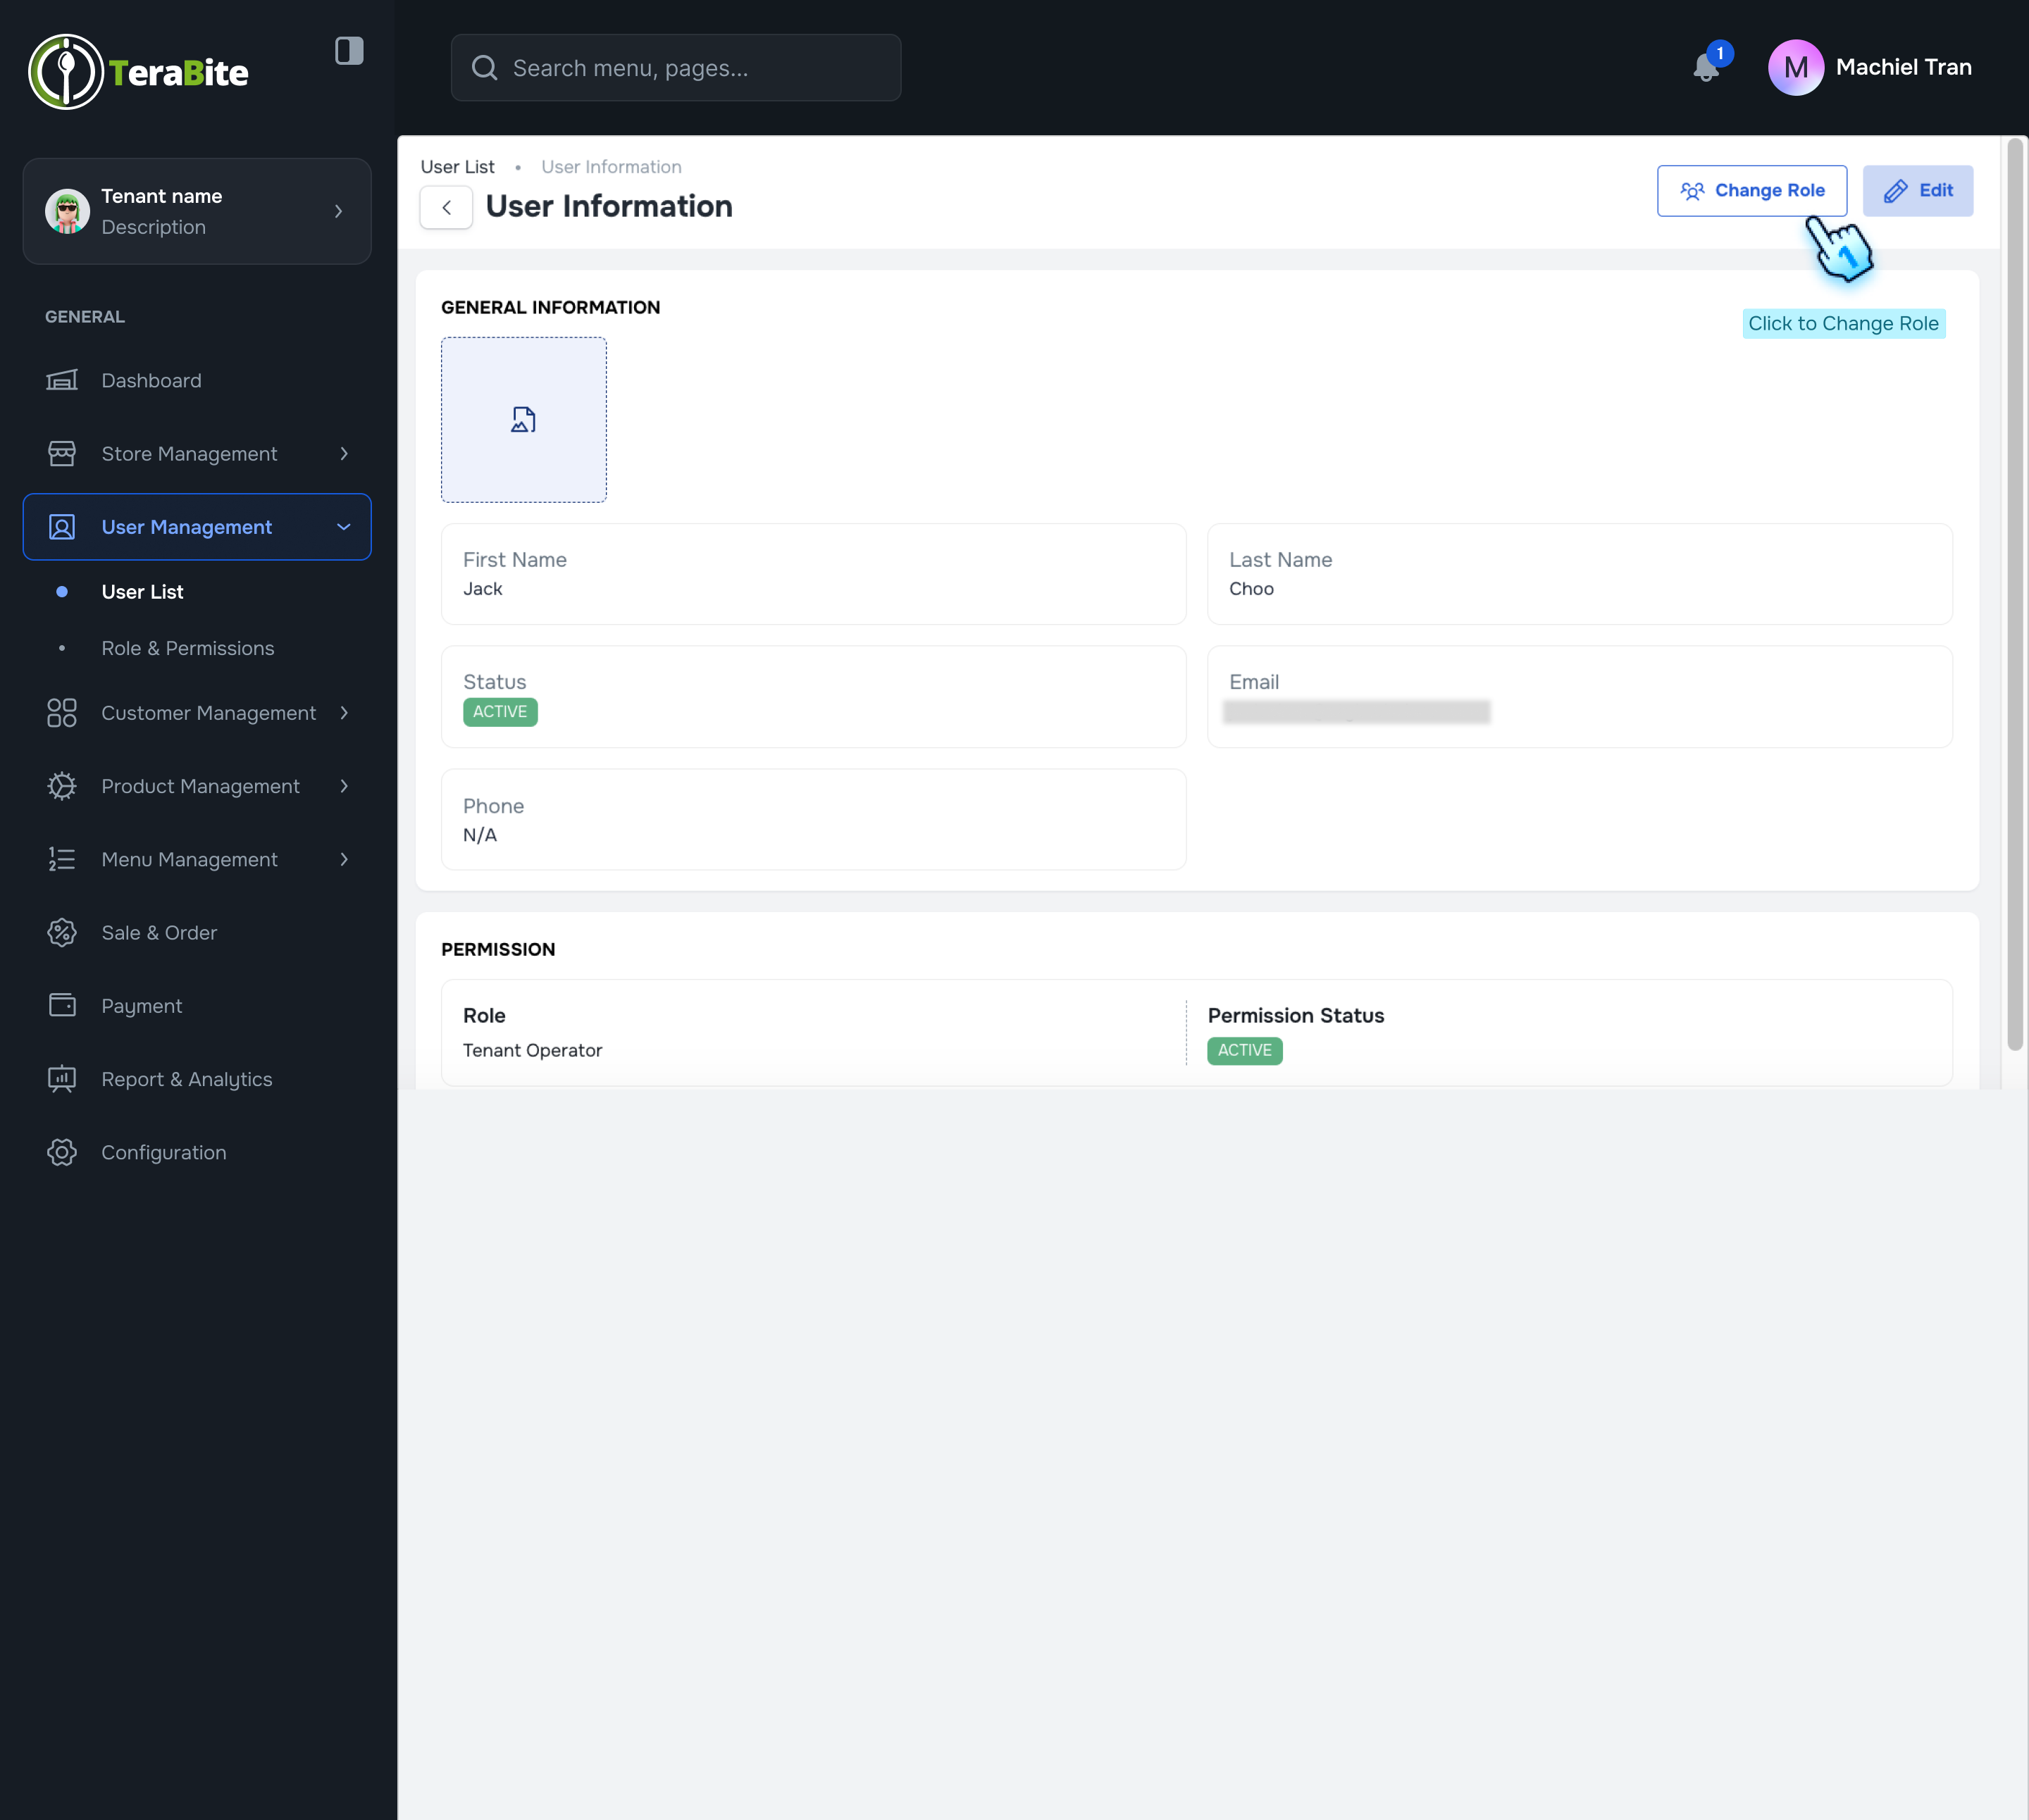
View User Details
- Access User Details
- Click Each user row or "View" button in the three-dot menu
- Review User Information
- The user details will display the following information:
- First Name
- Last Name
- Status
- Phone
- Permissions
- Option to Resend Invitation
- Adjust User Information
- If necessary, only adjust the phone number.
- Save Adjustments
- Click the "Save" button to apply any changes made to the user’s information.
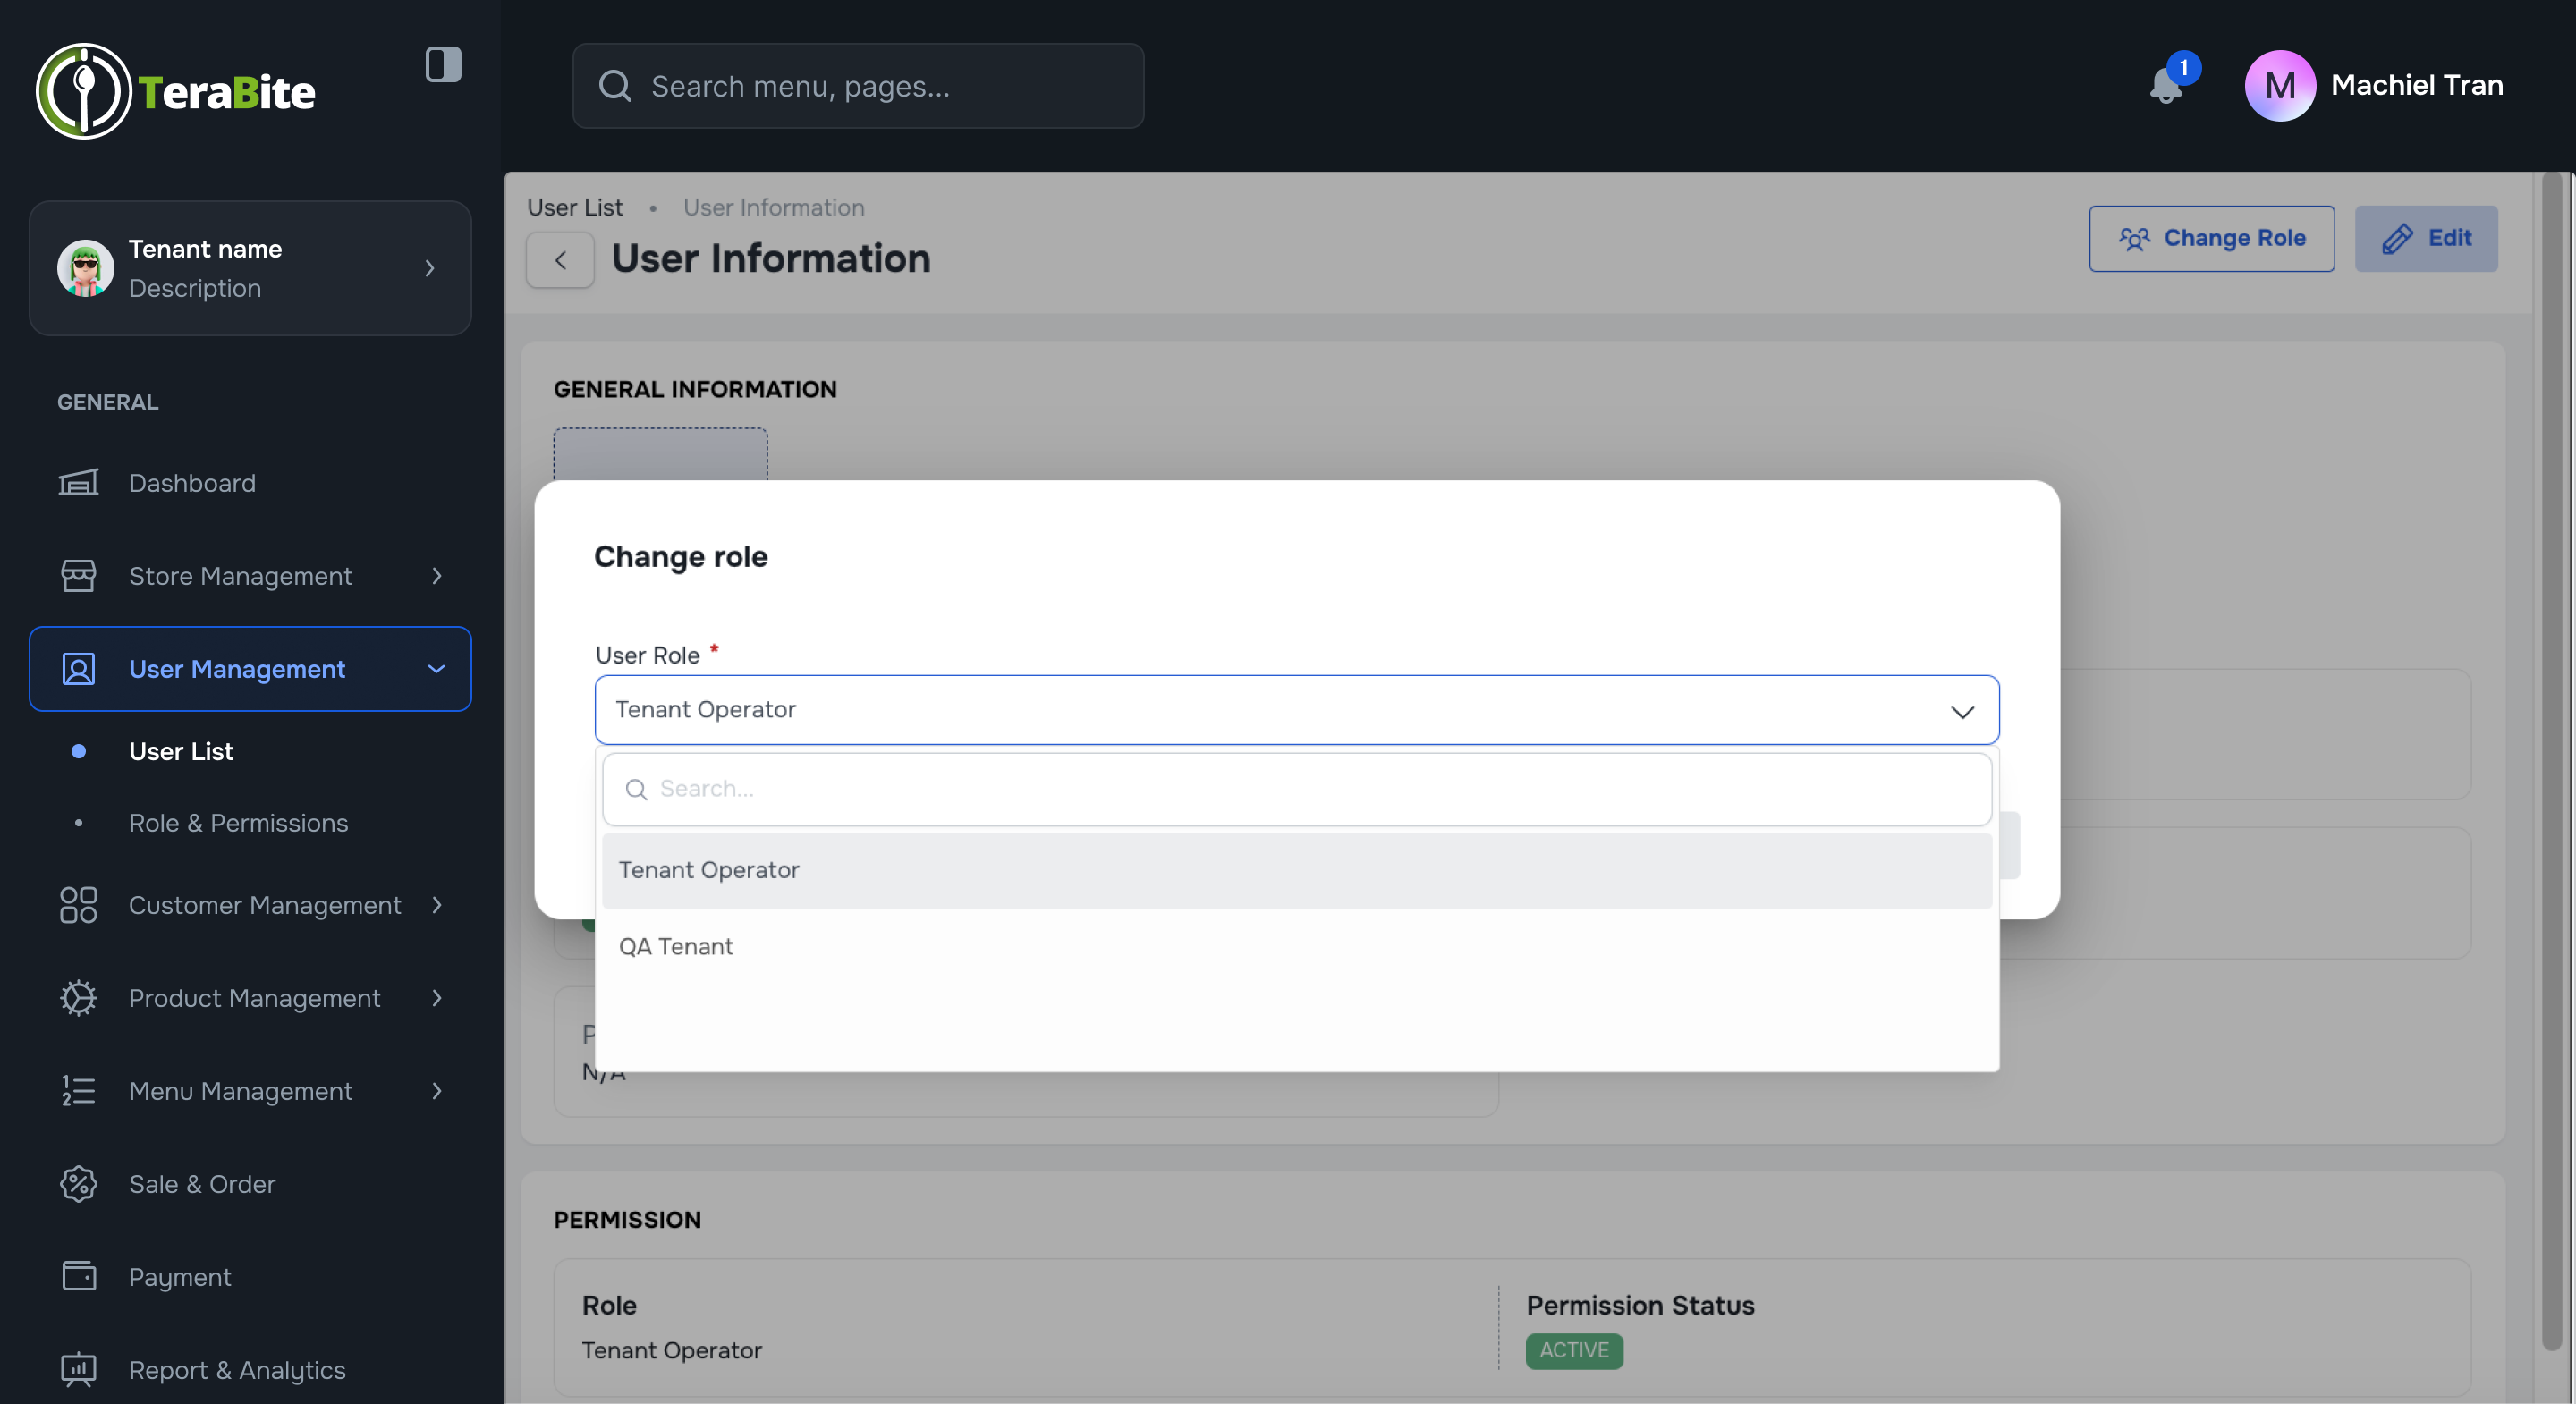
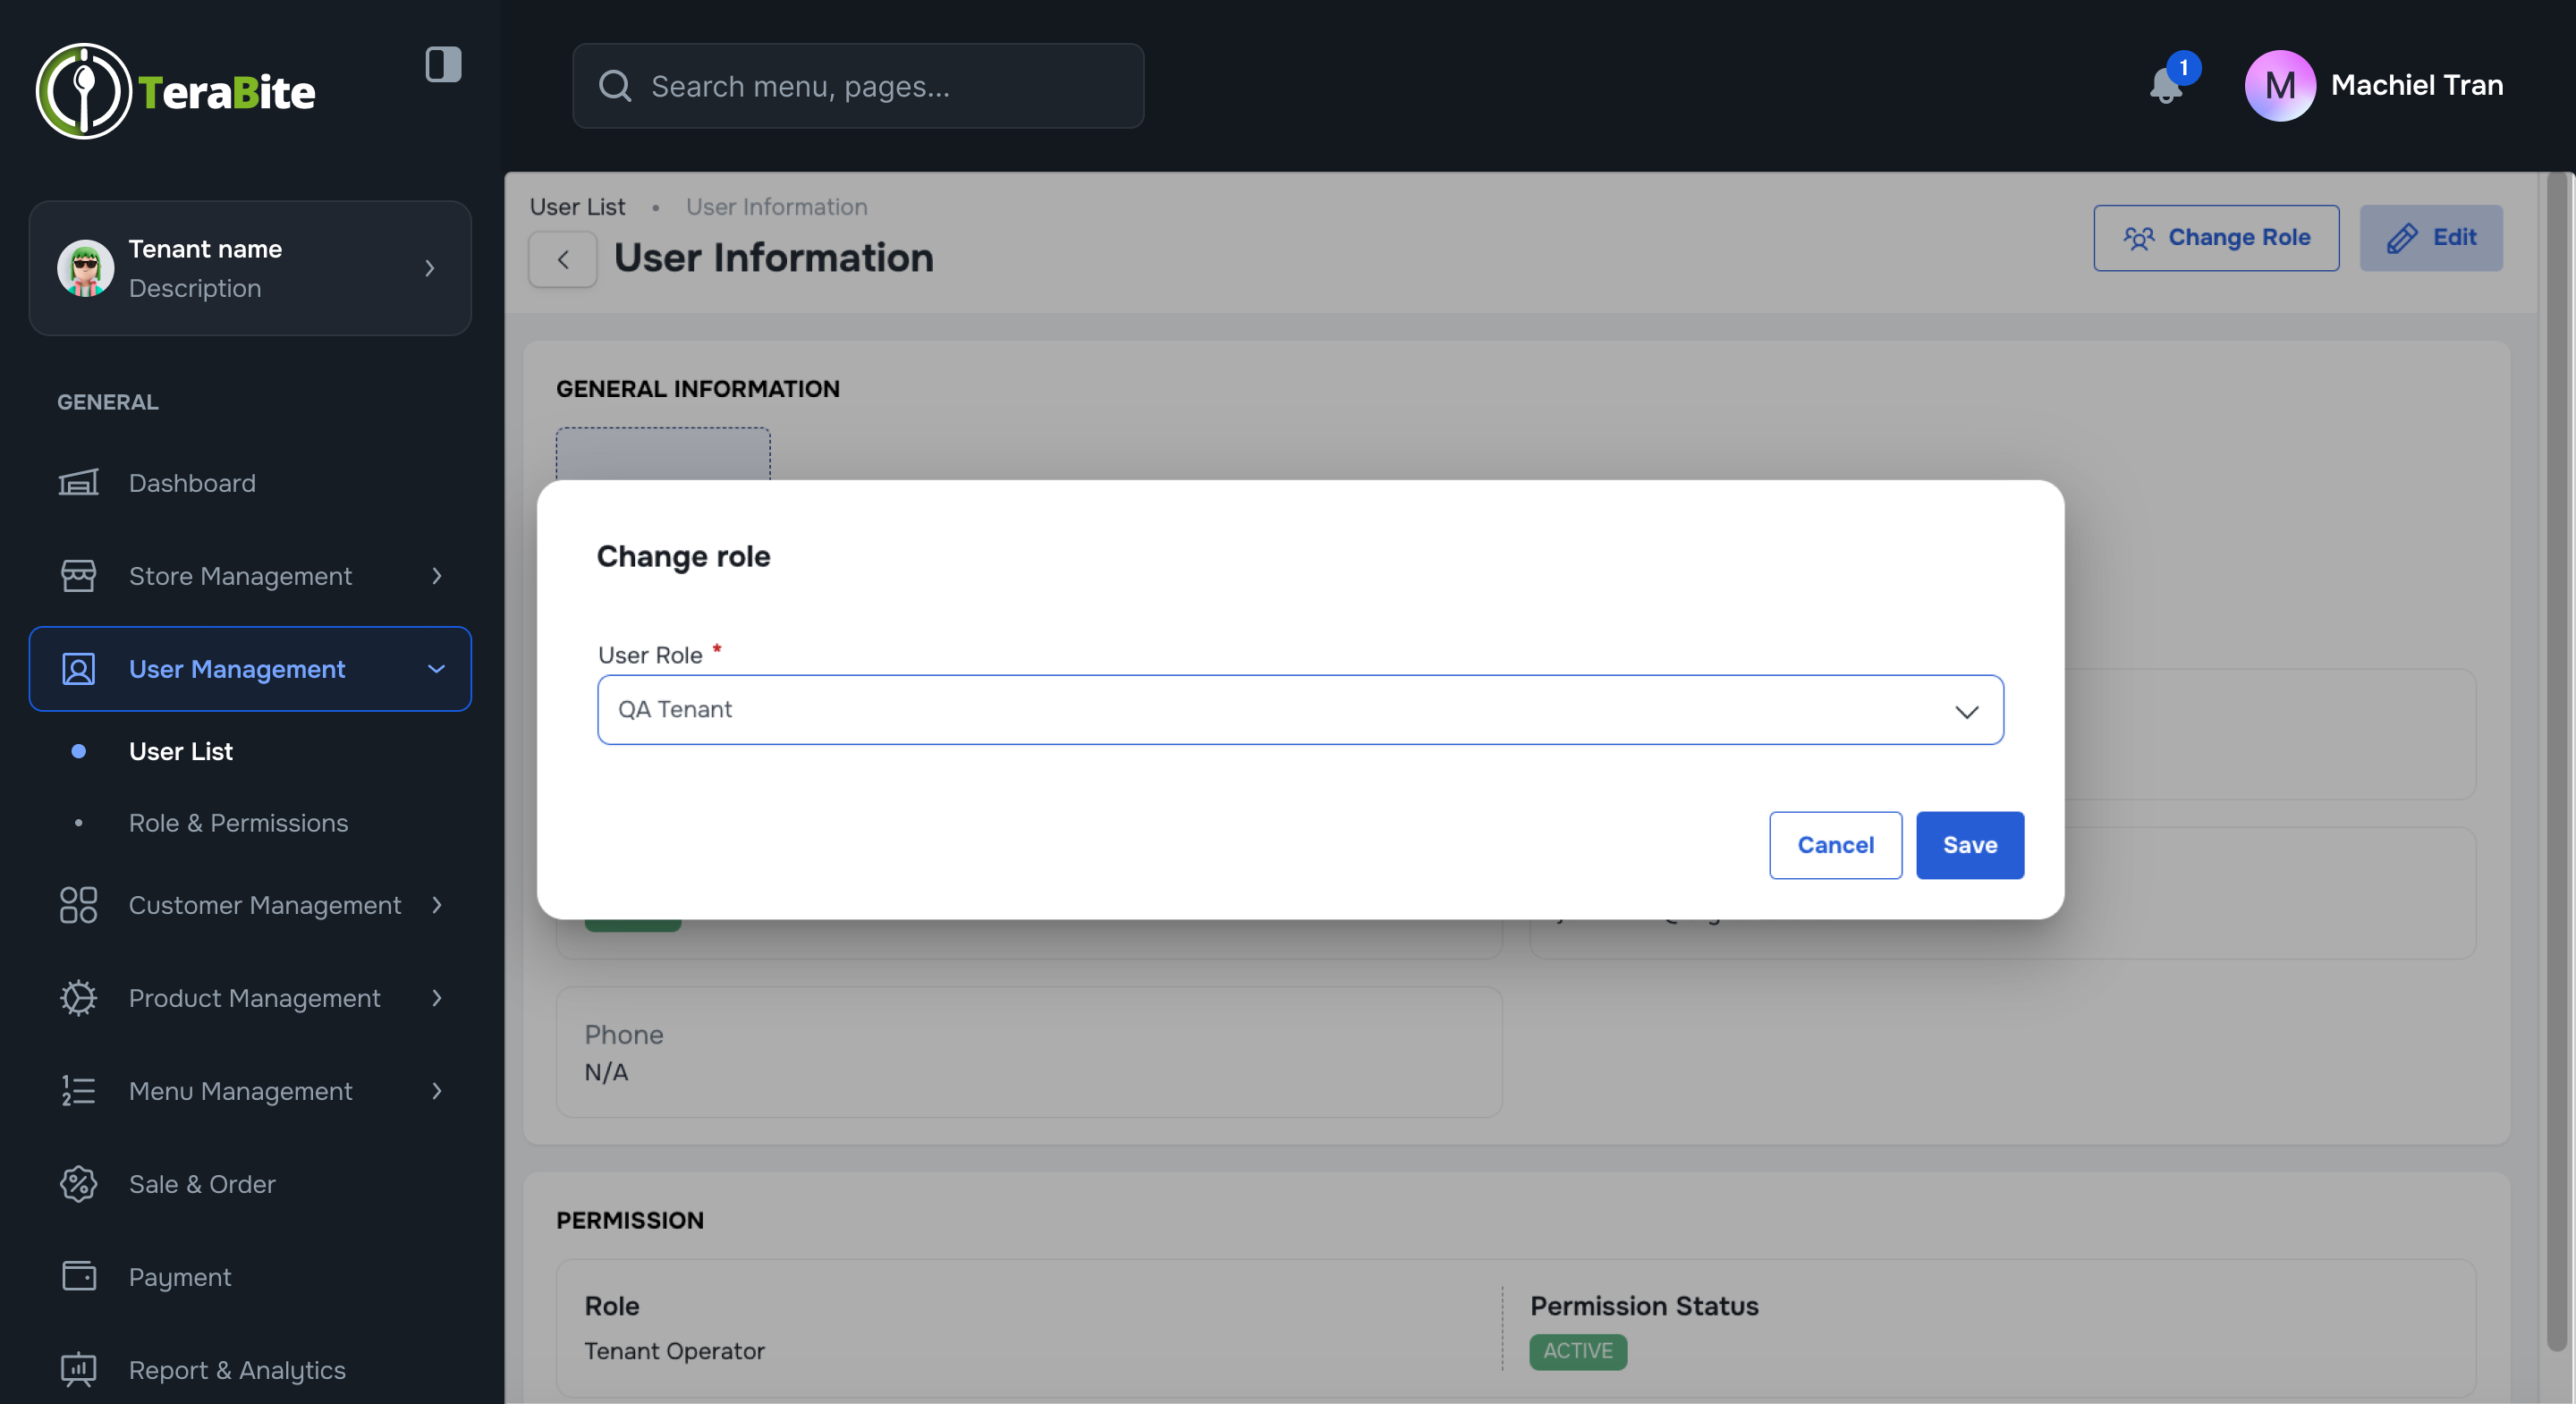
- Change role
- Click the "Change Role" button in the User View Page
- Select Role
- Search and Select new role in the dropdown list
- Save Change
- Click the "Save" button to confirm the change.
#
Conclusion
This document provides a comprehensive procedure for inviting users and managing user statuses within the system, ensuring proper user administration and access control.
#
Screen flow