#
Wallet management
#
Description
This document outlines the procedures for creating wallets and managing wallet actions within the Wallet Module..
#
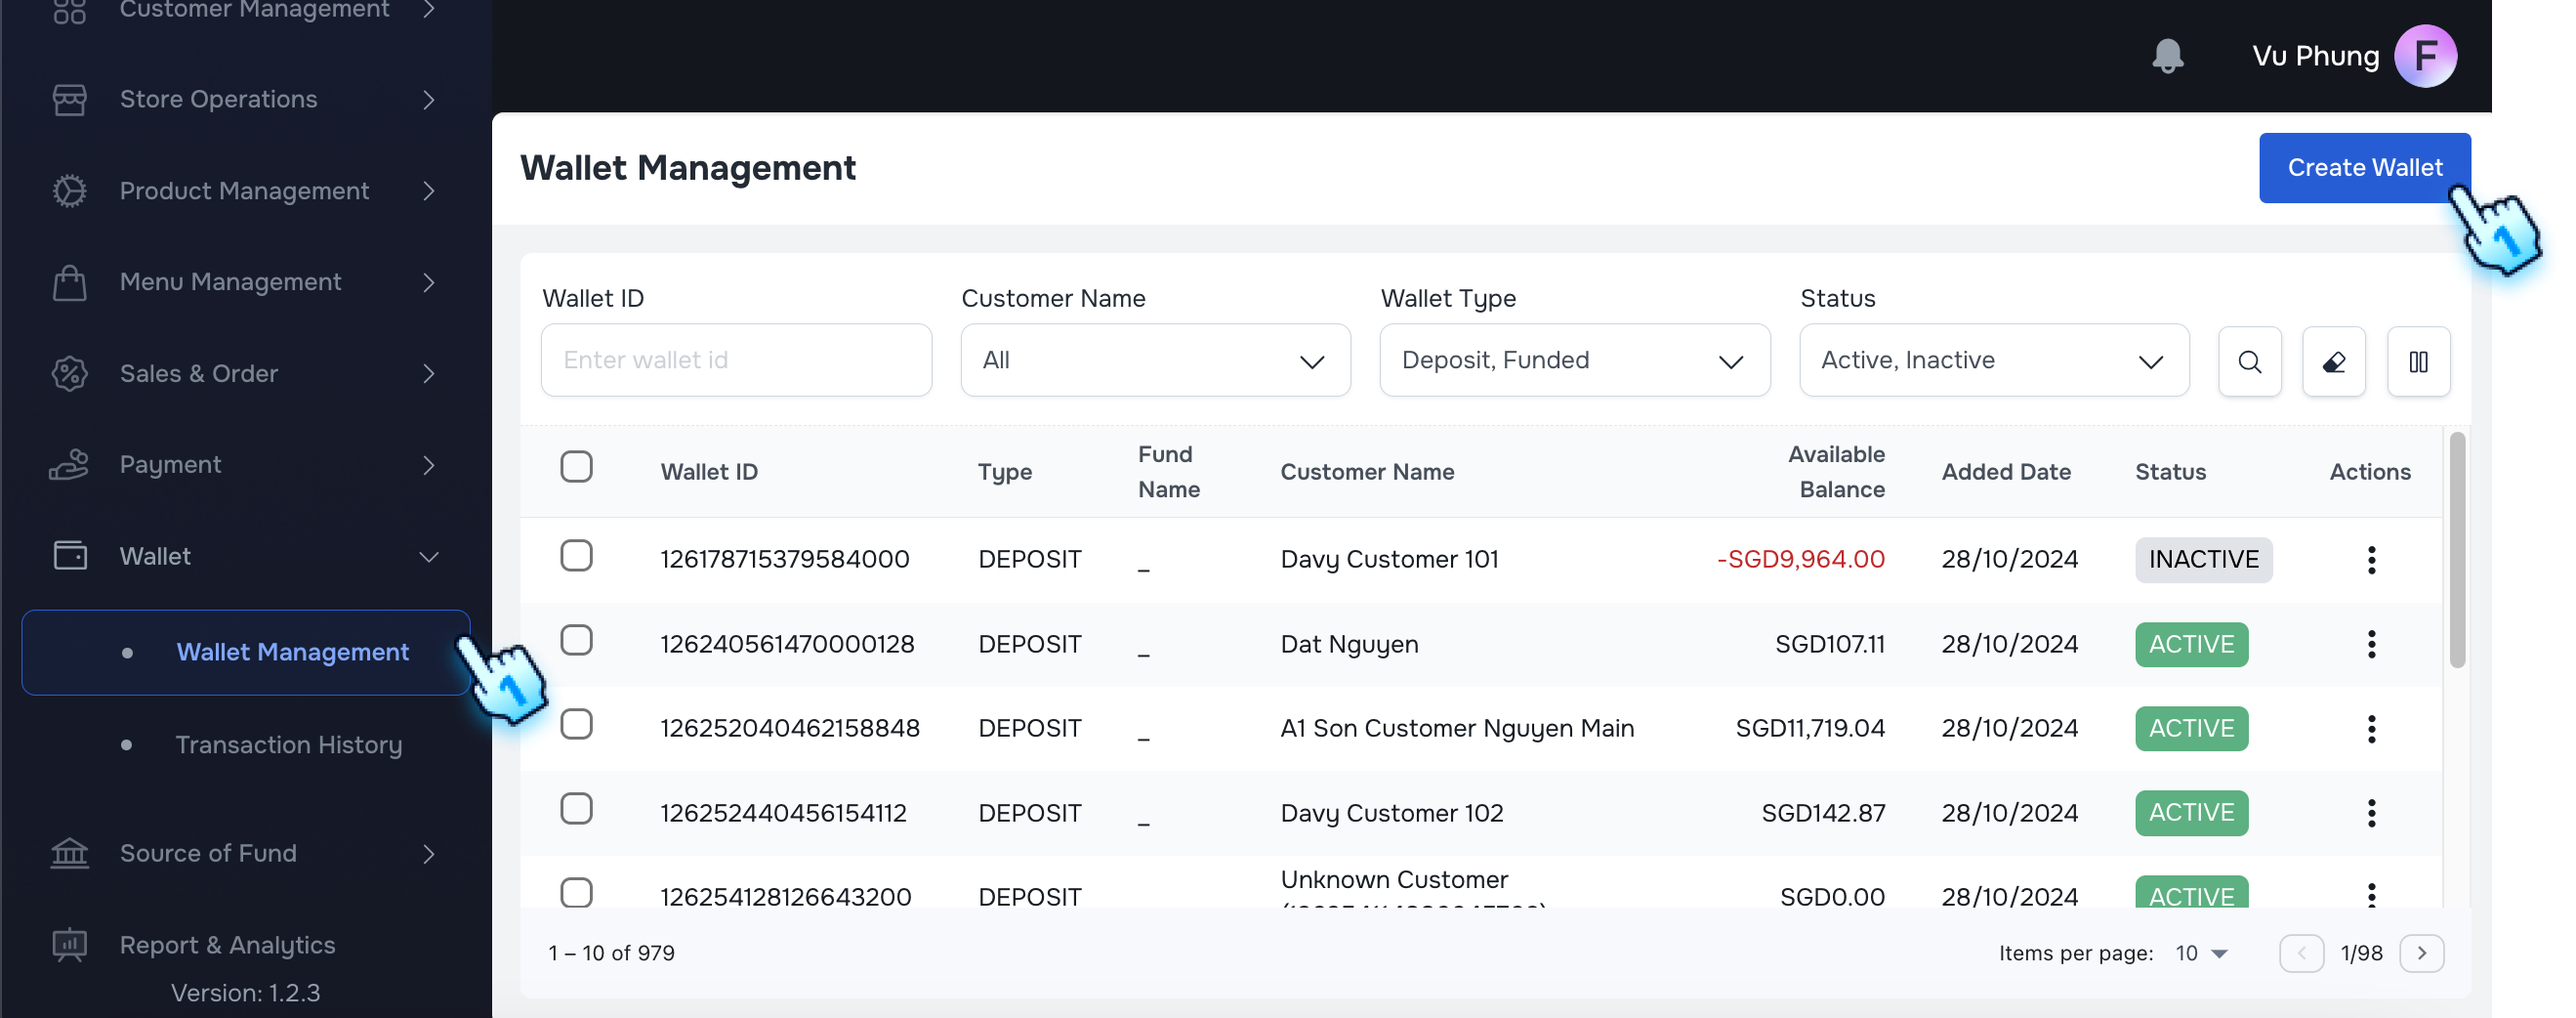
Create Wallet
- Navigate to Wallet
- Access the Wallet Management section from the Wallet Module
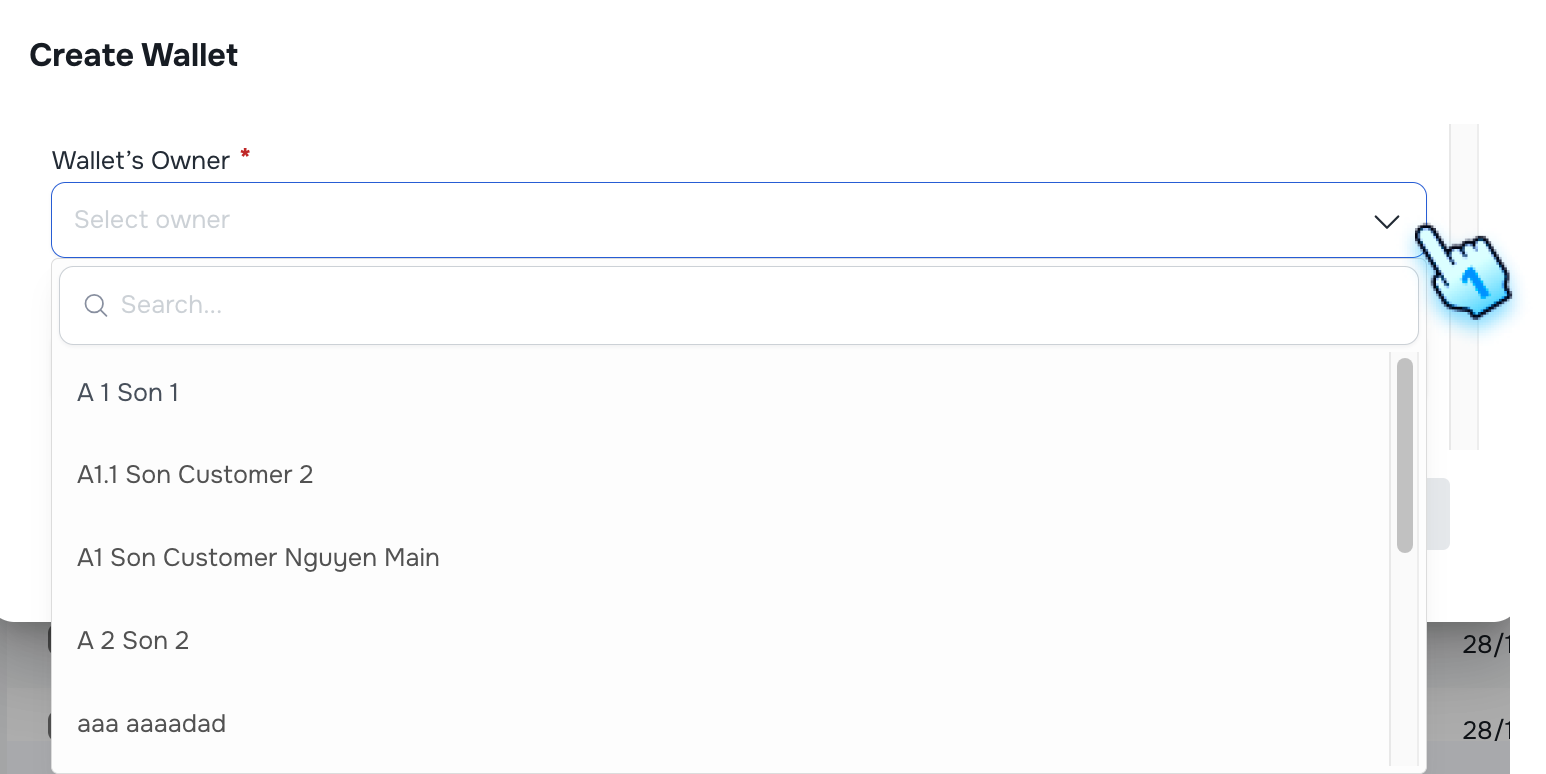
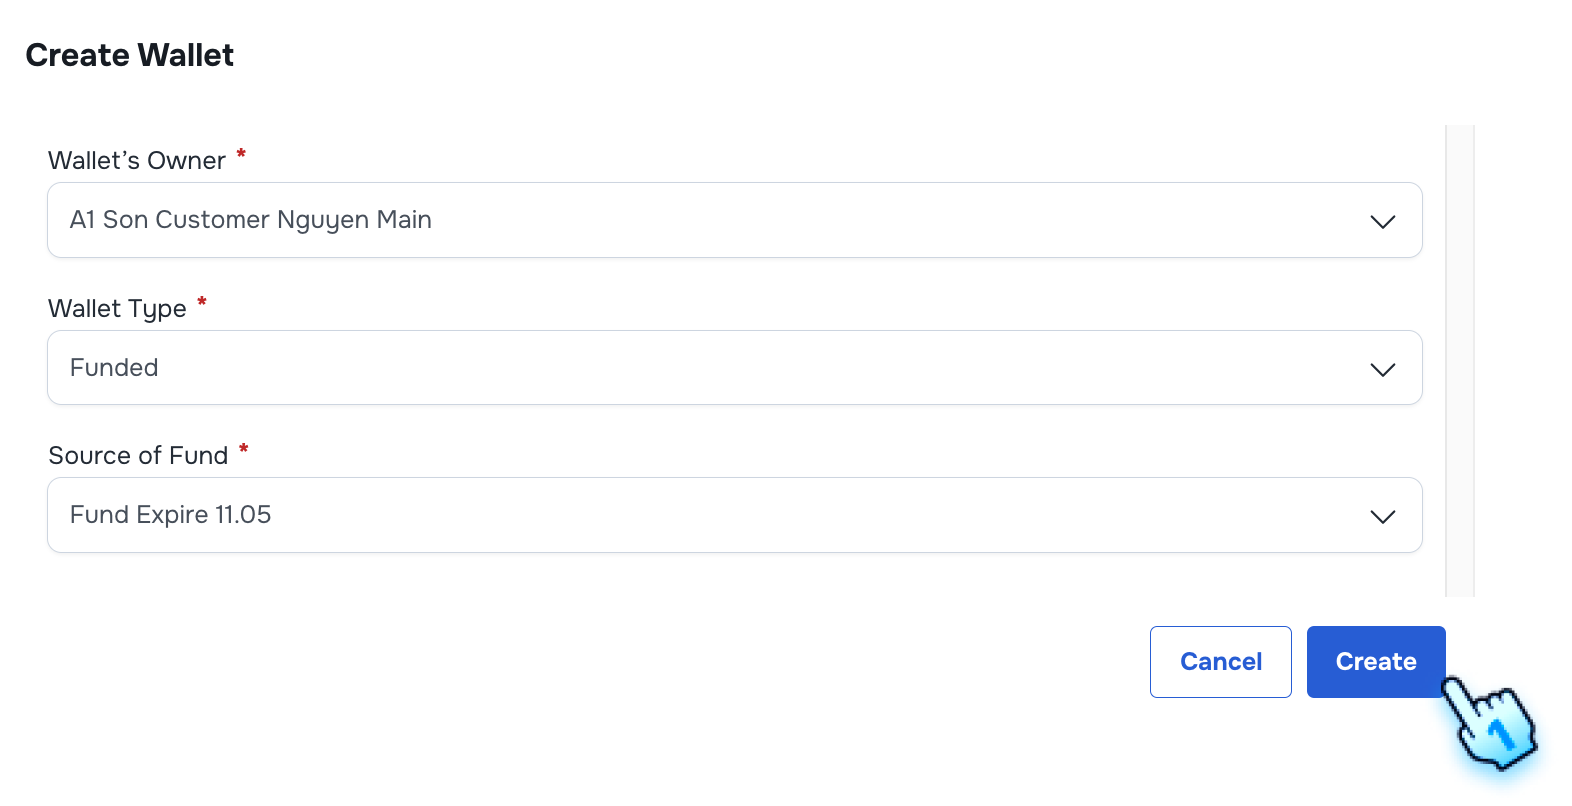
- Select Wallet Owner
- Choose the Wallet Owner to which you wish to create in the drop-down list.
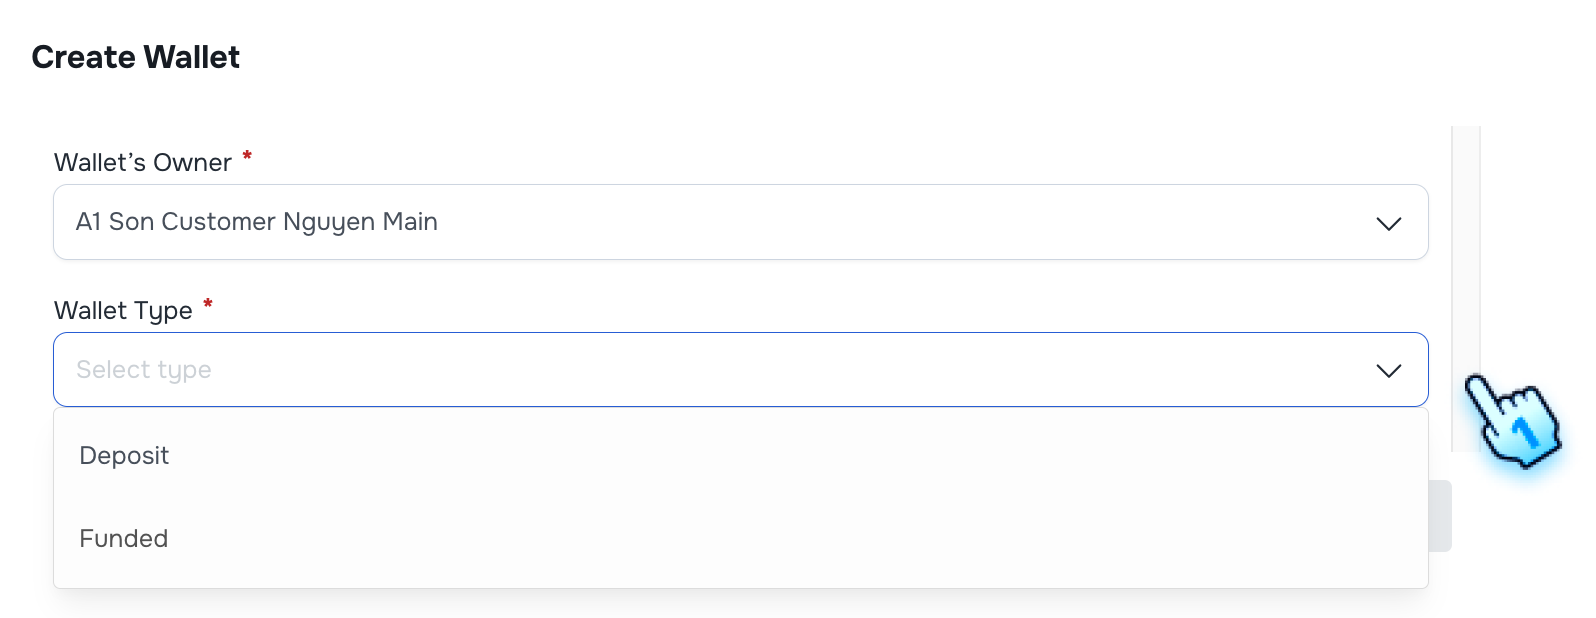
- Select Wallet Type
- Choose the Wallet Type to which you wish to create in the drop-down list.
- Deposit: The Wallet is used to manage Deposit amount
- Funded: The Wallet is used to manage Fund amount
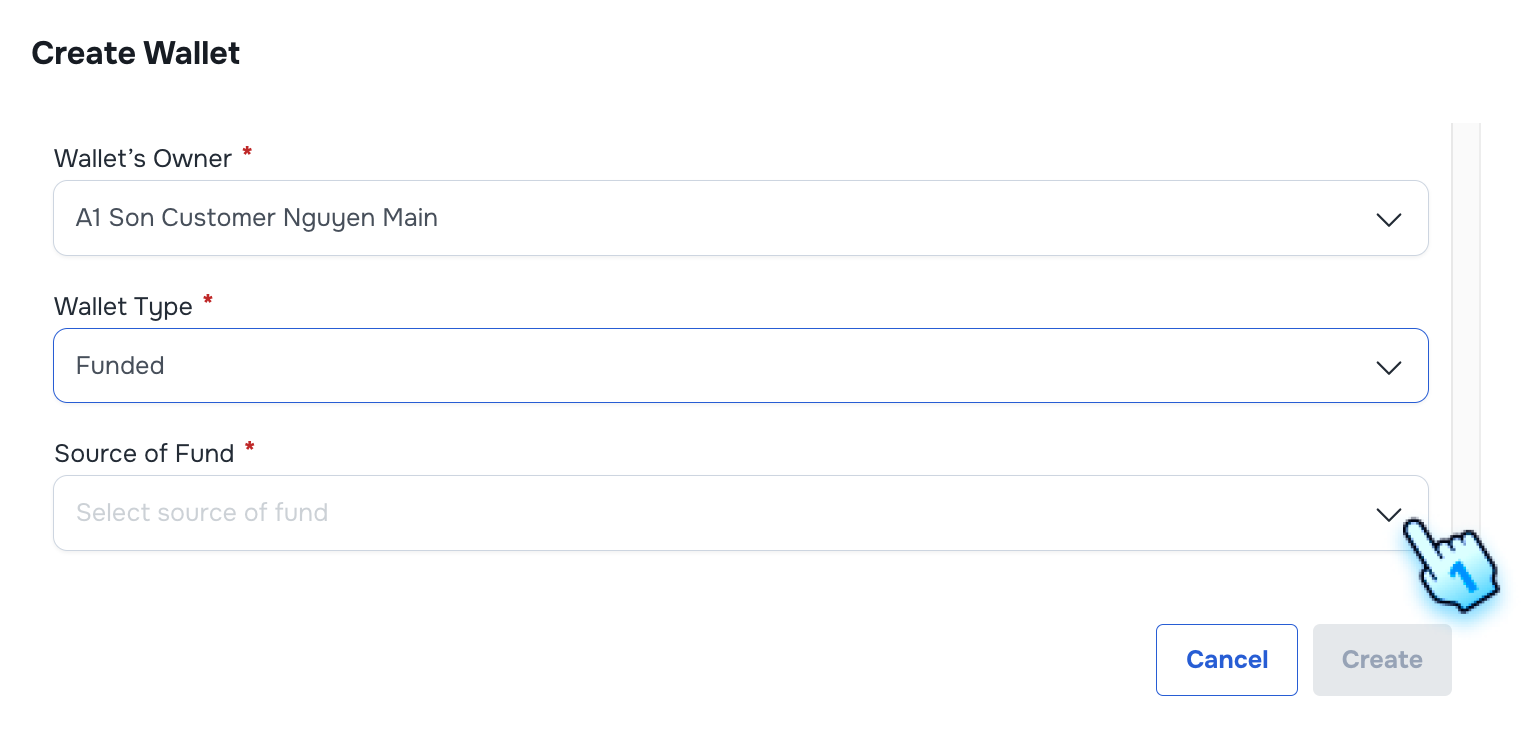
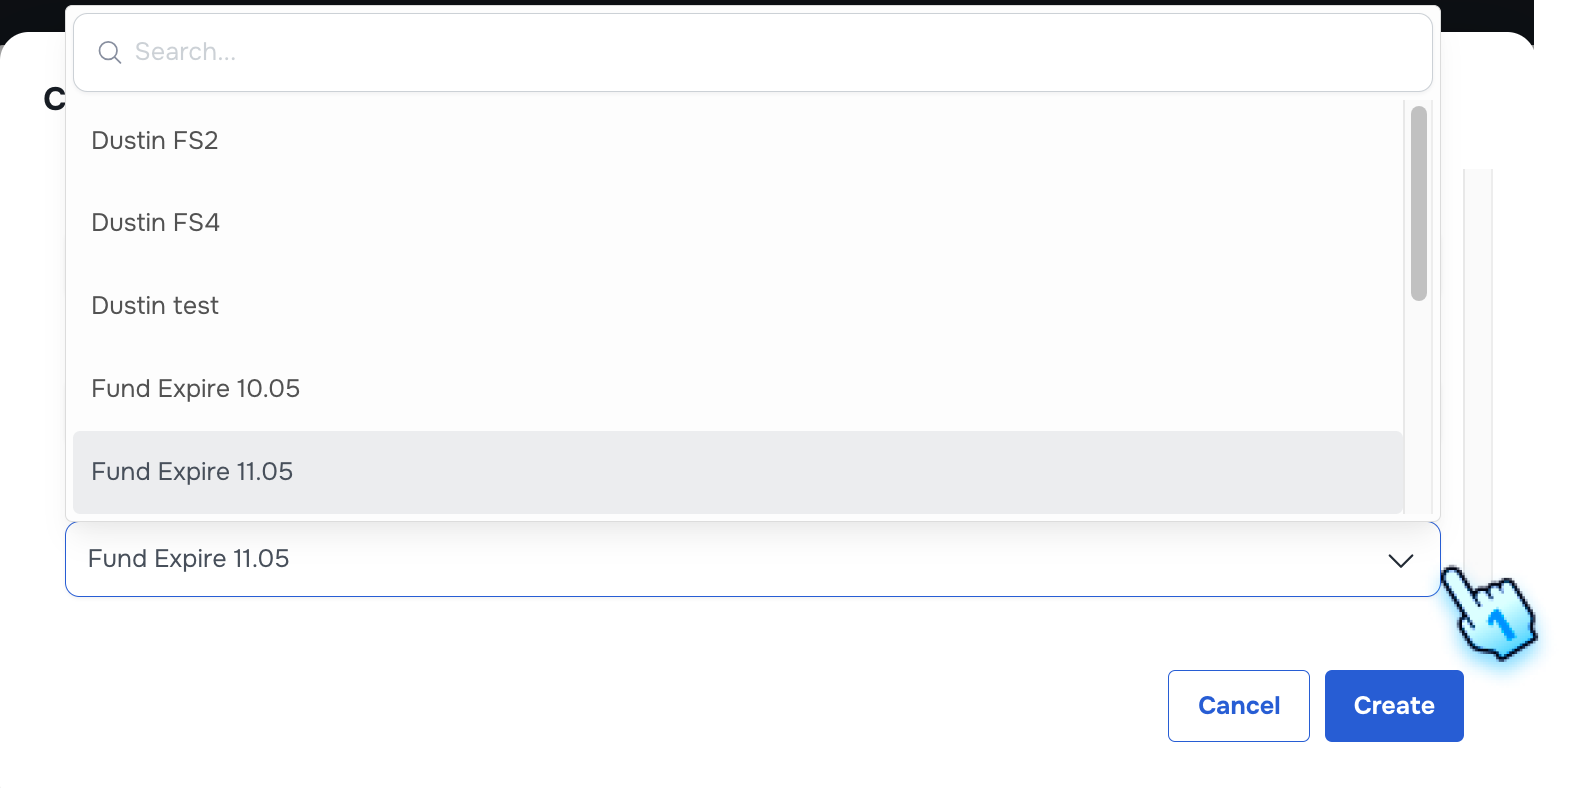
- Select Fund Source for Funded Wallet in the Drop-down list
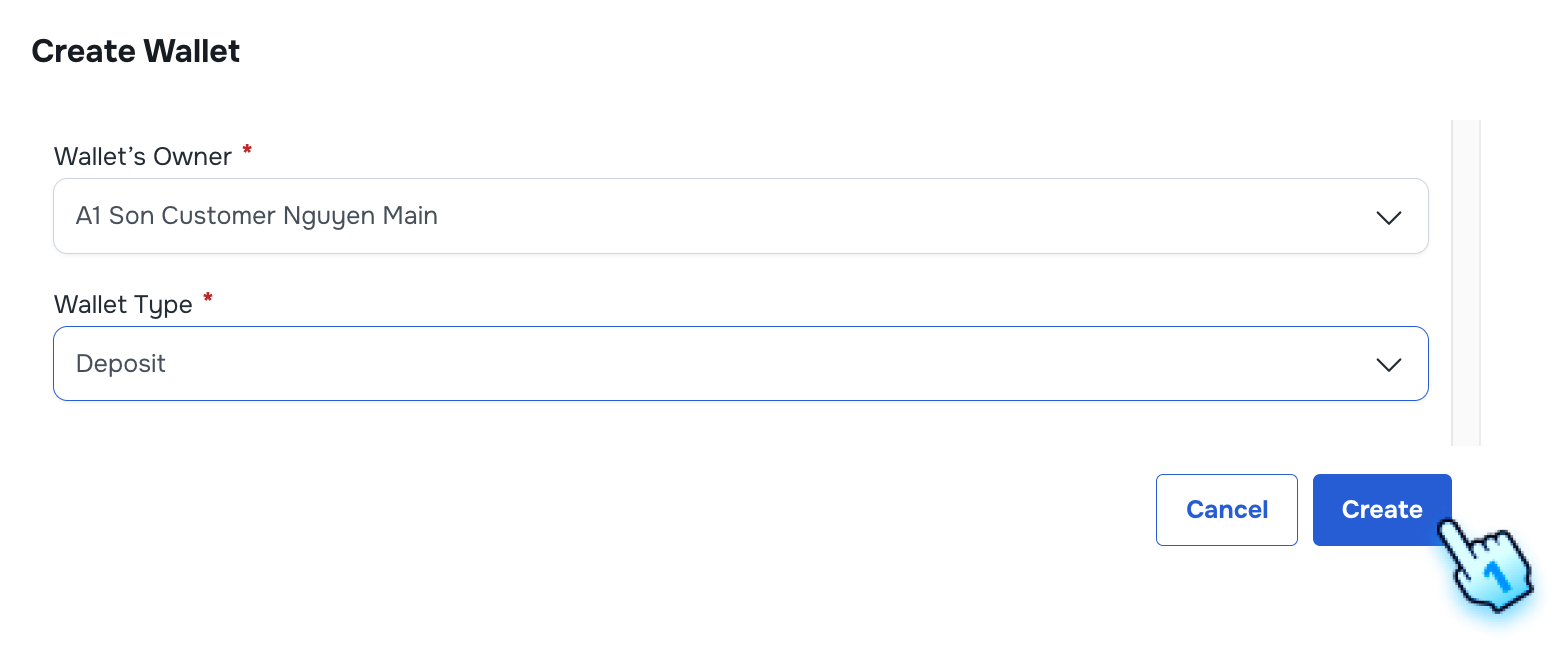
- Complete Wallet Creation
- Click "Create" button to complete the process
#
View Wallet List and Perform actions
- Access Customer List
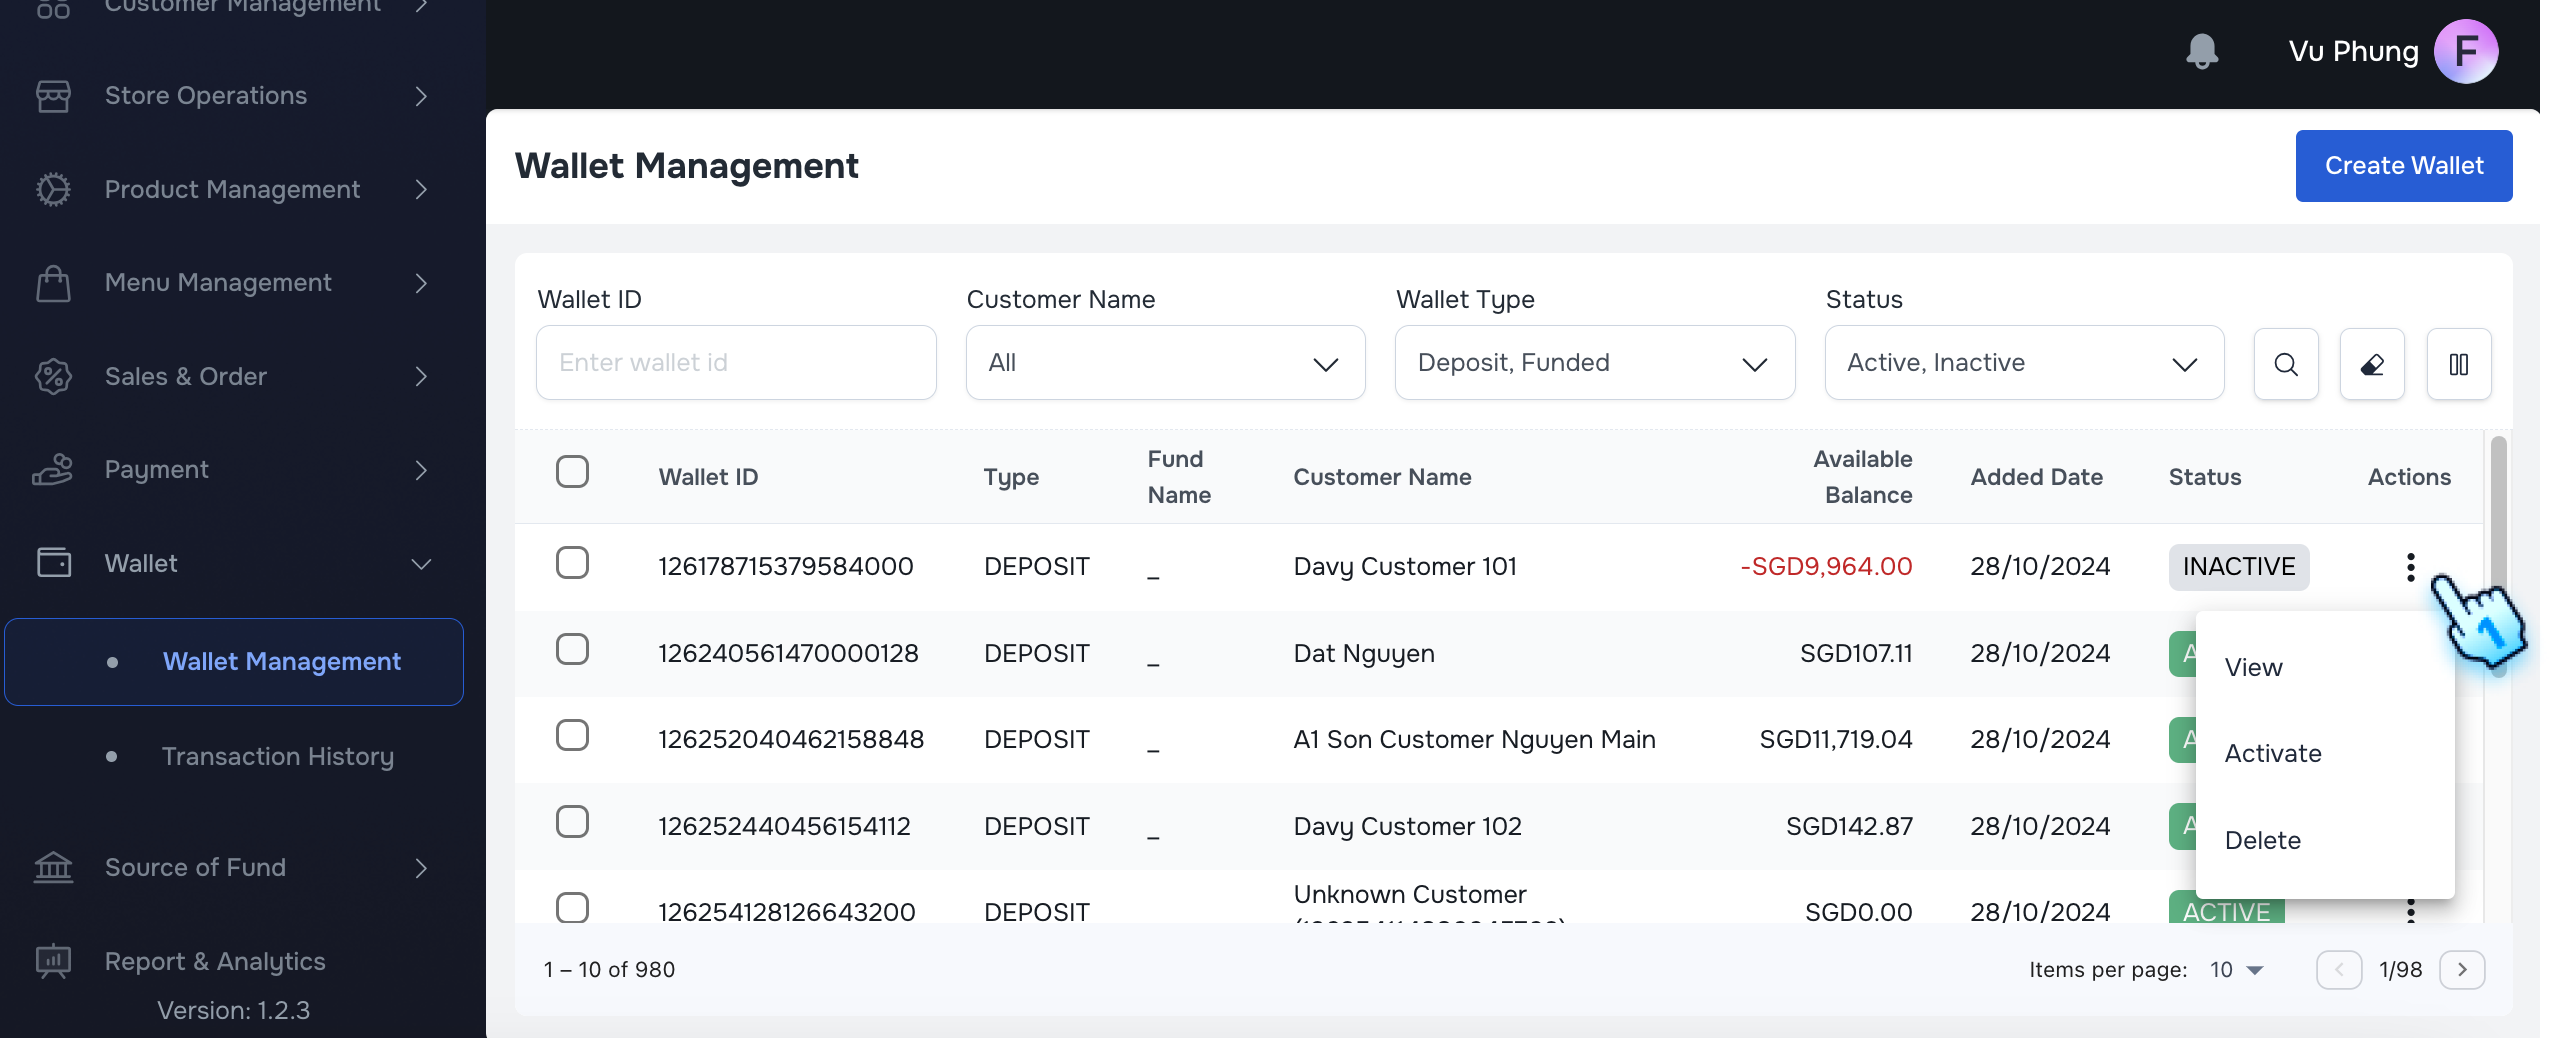
- Navigate to the Wallet List where Wallets are displayed with their respective statuses: Active and Inactive.
- Perform Actions Based on Wallet Status
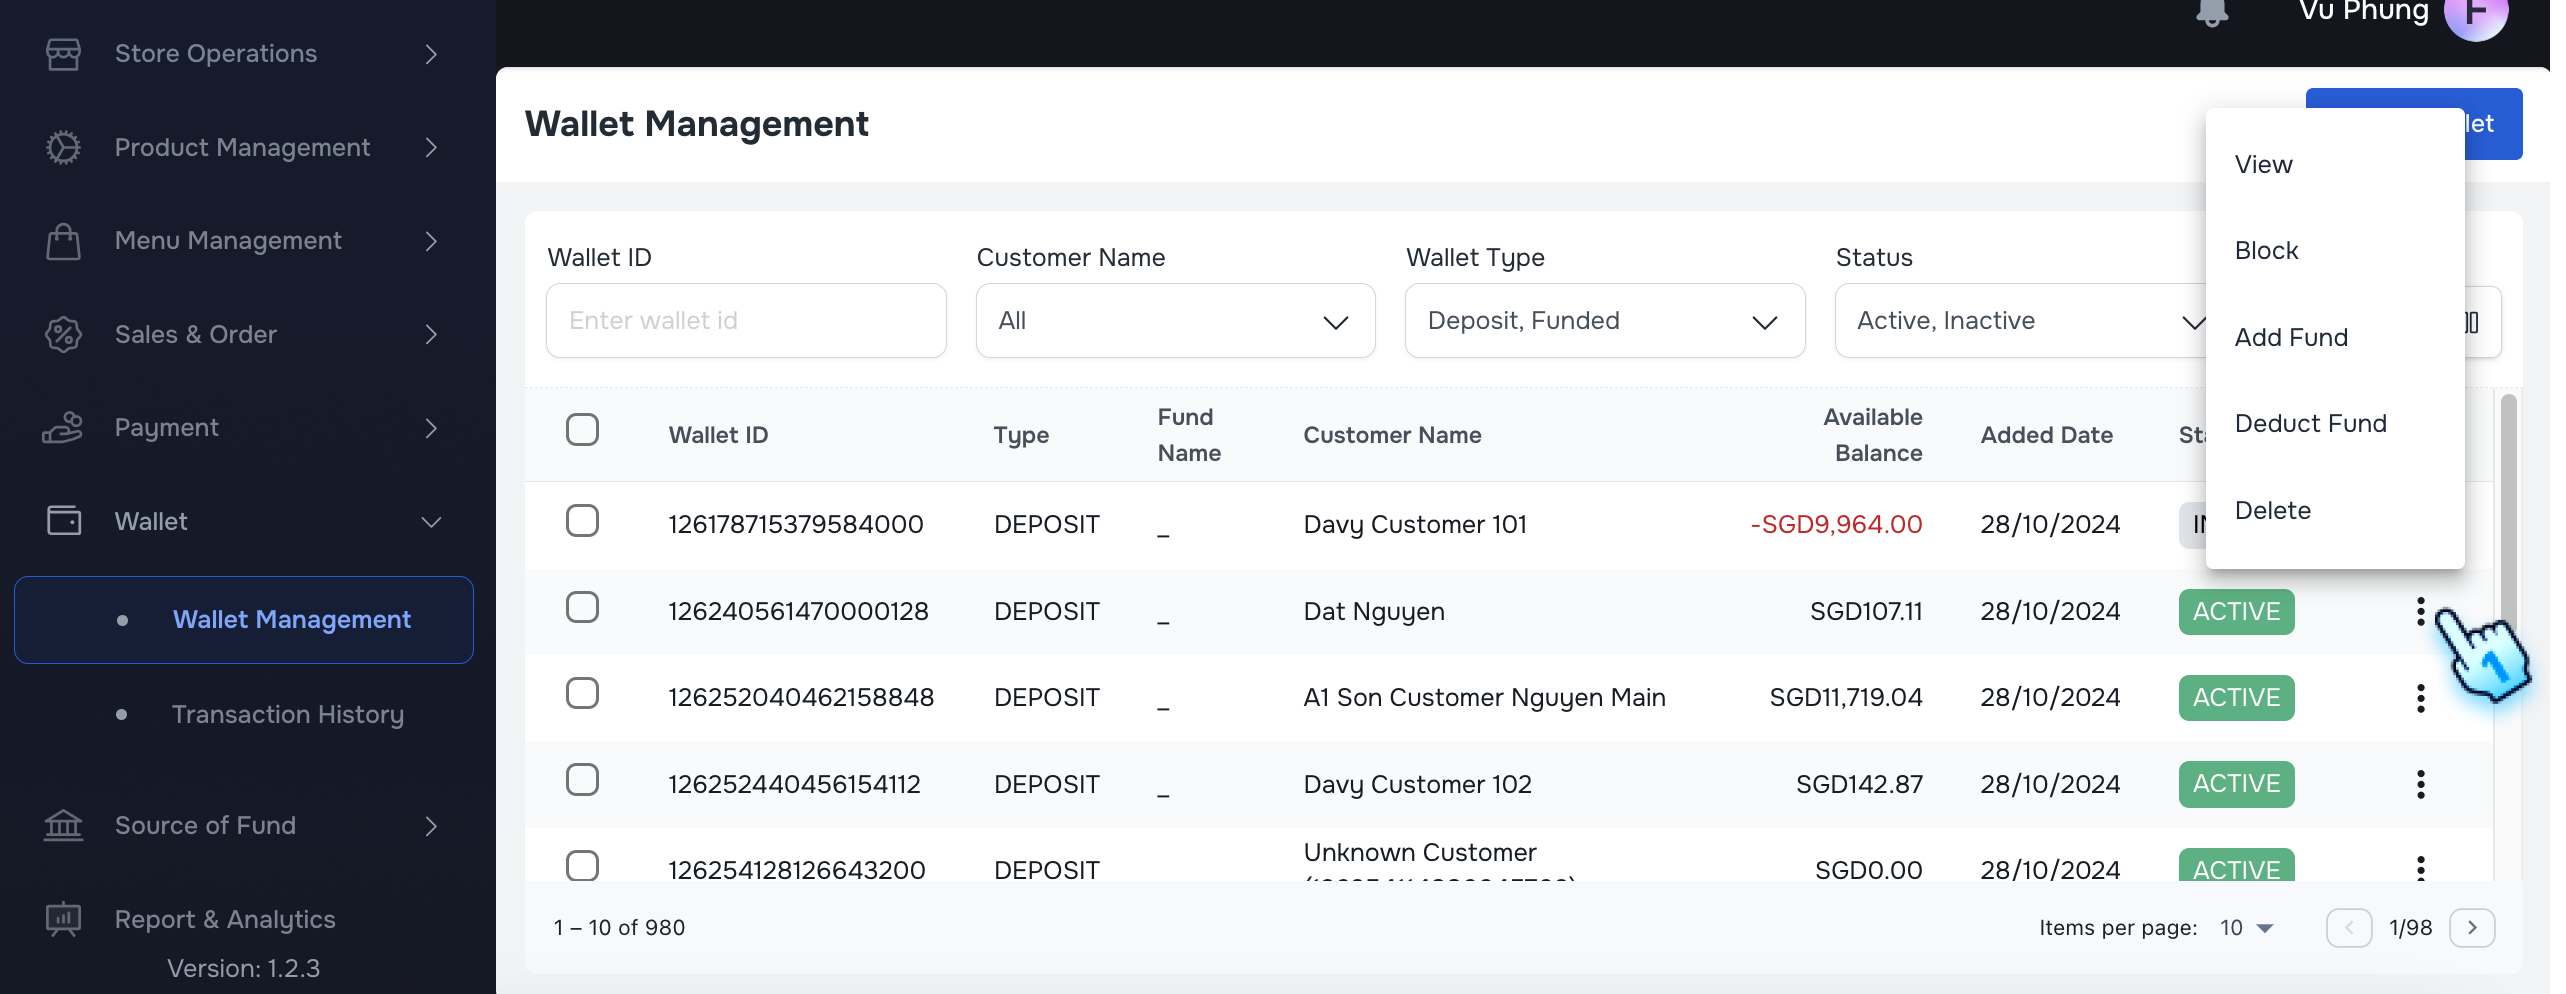
- Click on the three-dot menu in each row to reveal available actions for each user based on their status as below:
- Active: Options are View, Block, Add Fund, Deduct Fund and Delete.
- Inactive: Options are View, Activate, and Delete.
- Delete Wallet
- Select "Delete" from the three-dot menu for each Wallet.
- Confirm Deletion in A confirmation dialog.
- A selected Wallet is removed from the list
- Block Wallet
- Select "Block" from the three-dot menu for each Wallet.
- Confirm Actions in A confirmation dialog.
- Status is changed to Inactivate
- Activate Inactivate Wallet
- Select "Activate" from the three-dot menu for each Wallet.
- Confirm Actions in A confirmation dialog.
- Status is changed to Activate
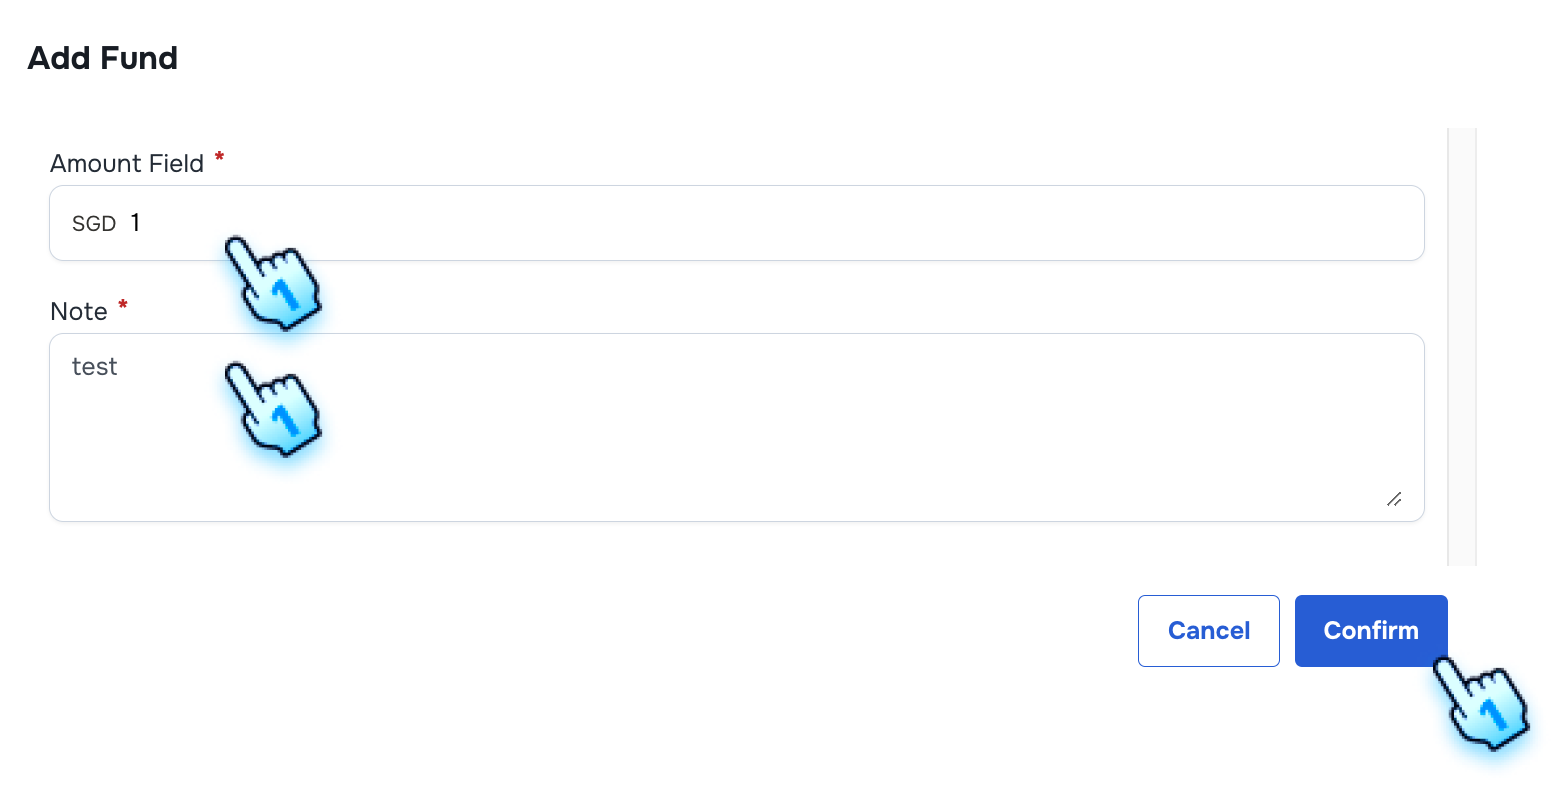
- Add Fund to Wallet
- Select "Add Fund" from the three-dot menu for each Wallet.
- Enter Amount and Note for transation
- Click "Process" button to complete
- Fund is added successfully to the Wallet
- Deduct Fund to Wallet
- Select "Deduct Fund" from the three-dot menu for each Wallet.
- Enter Amount and Note for transation
- Click "Process" button to complete
- Fund is deducted successfully to the Wallet
#
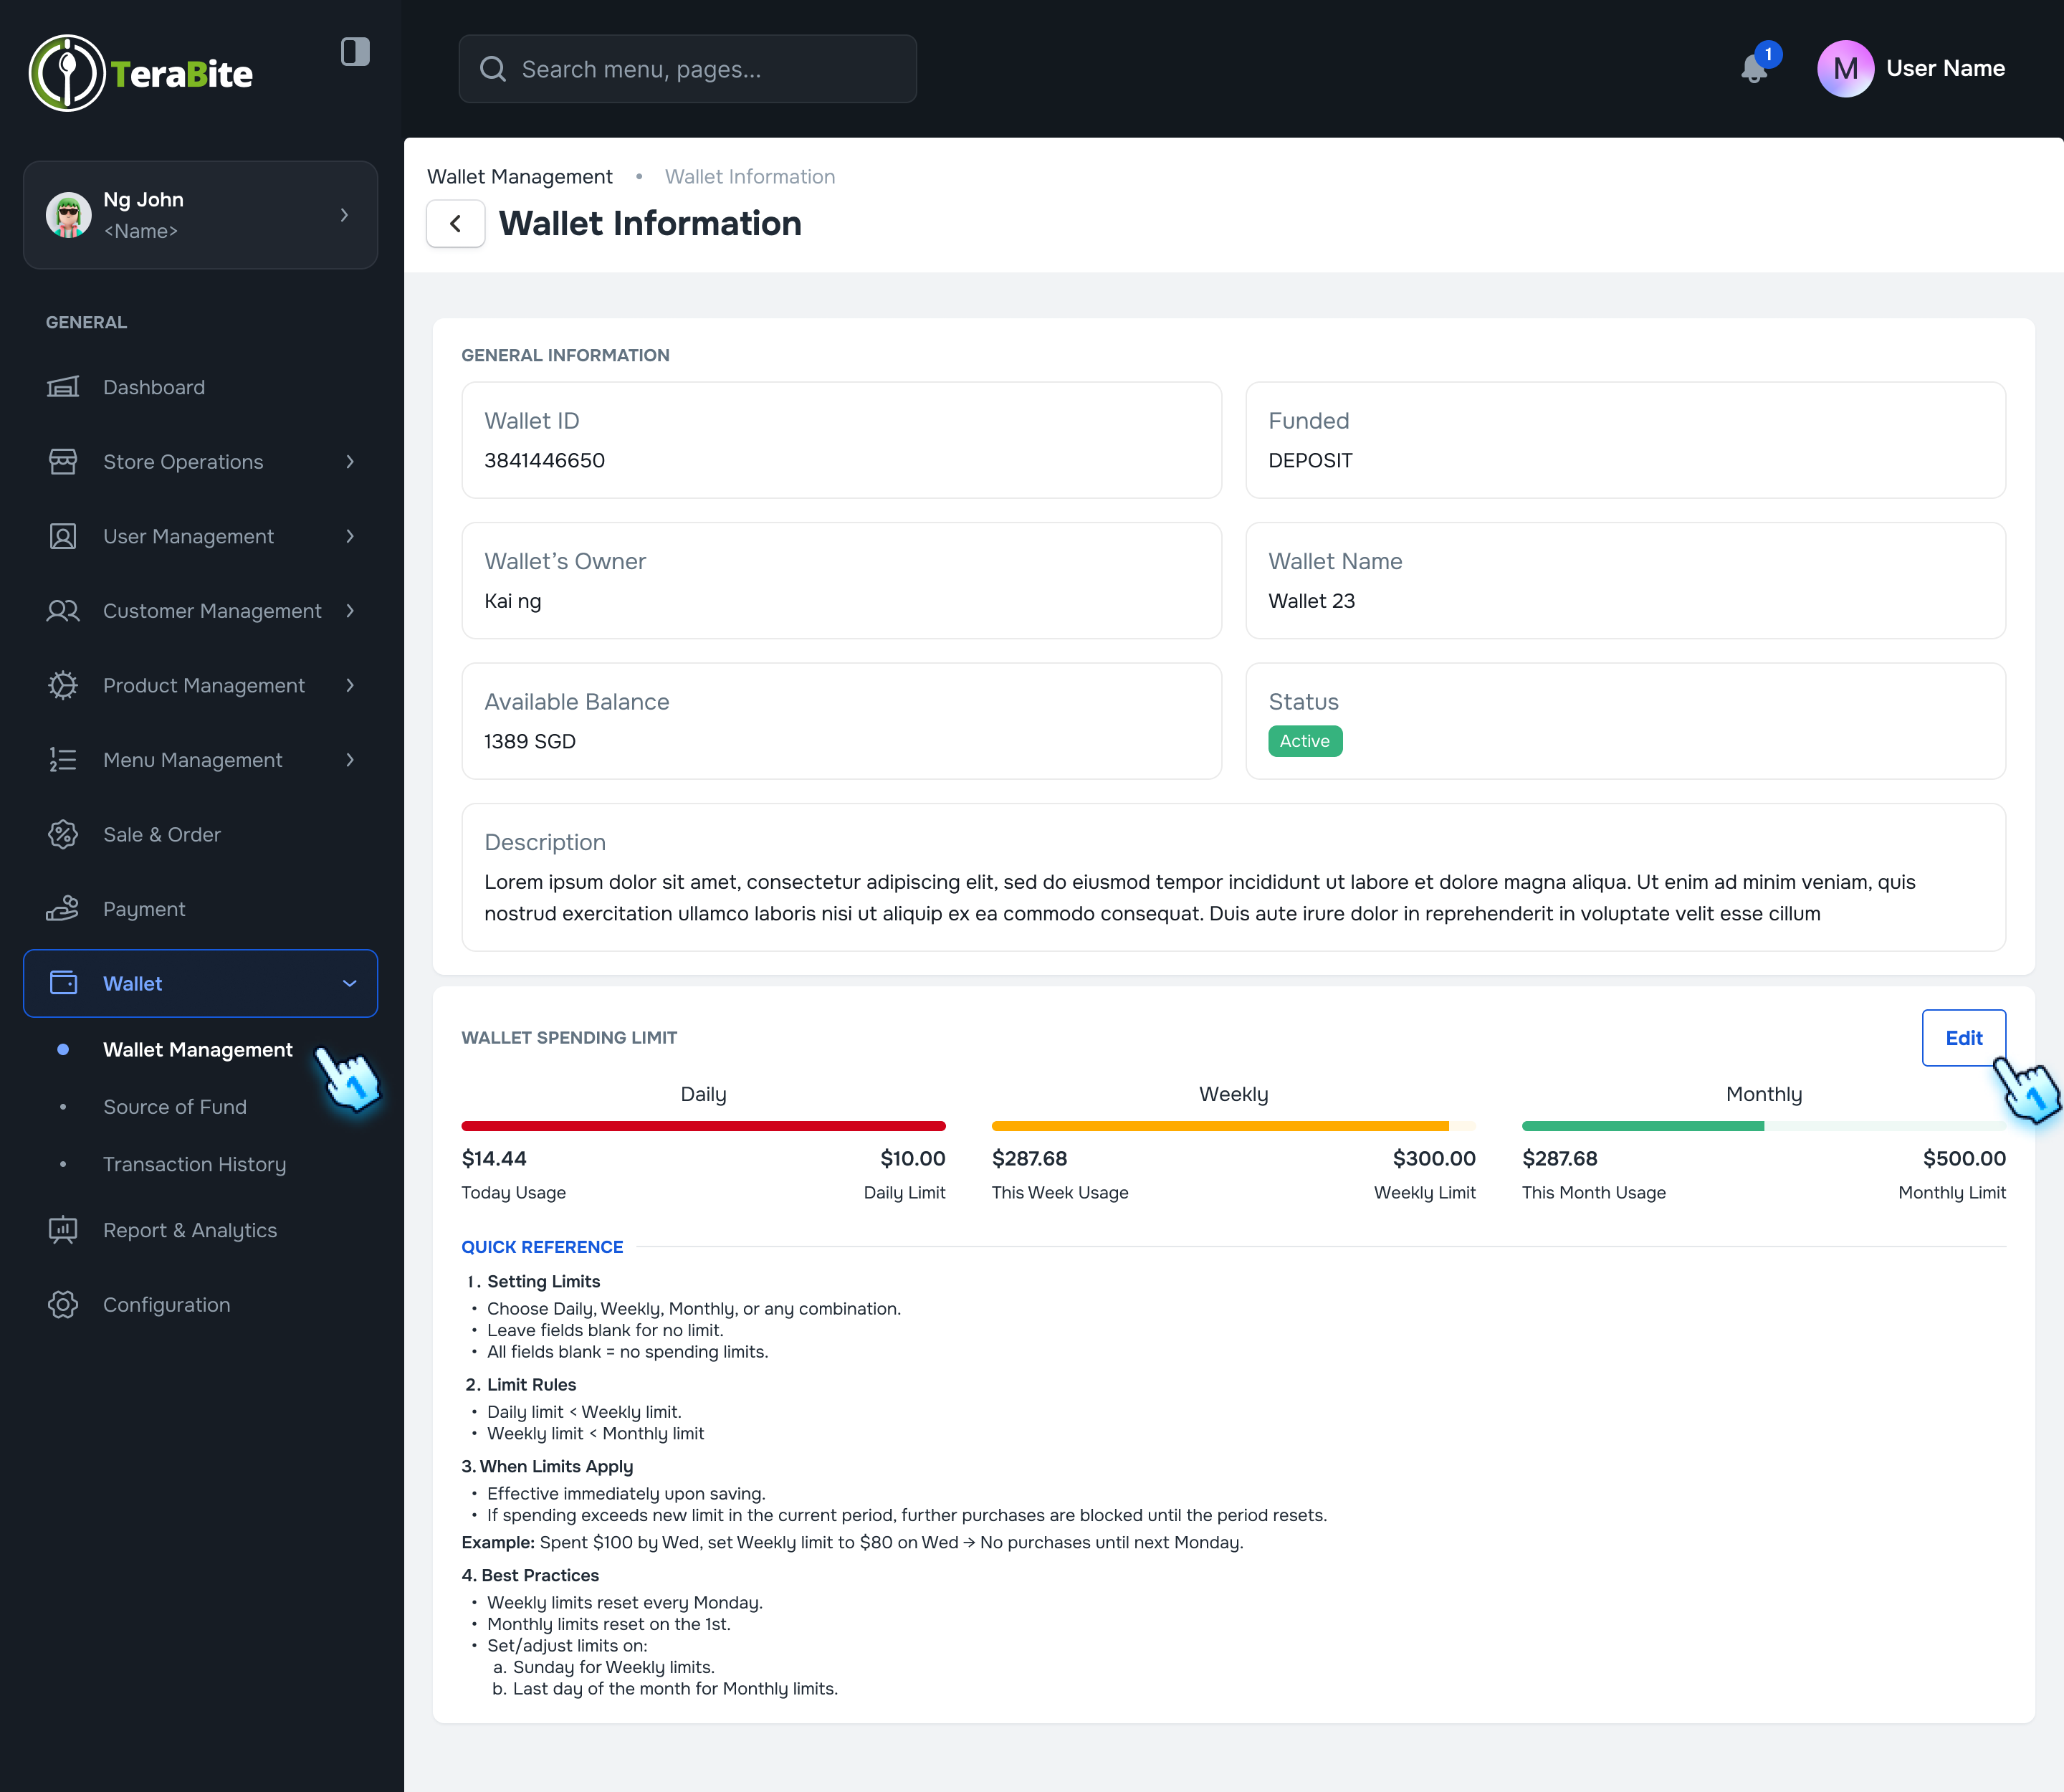
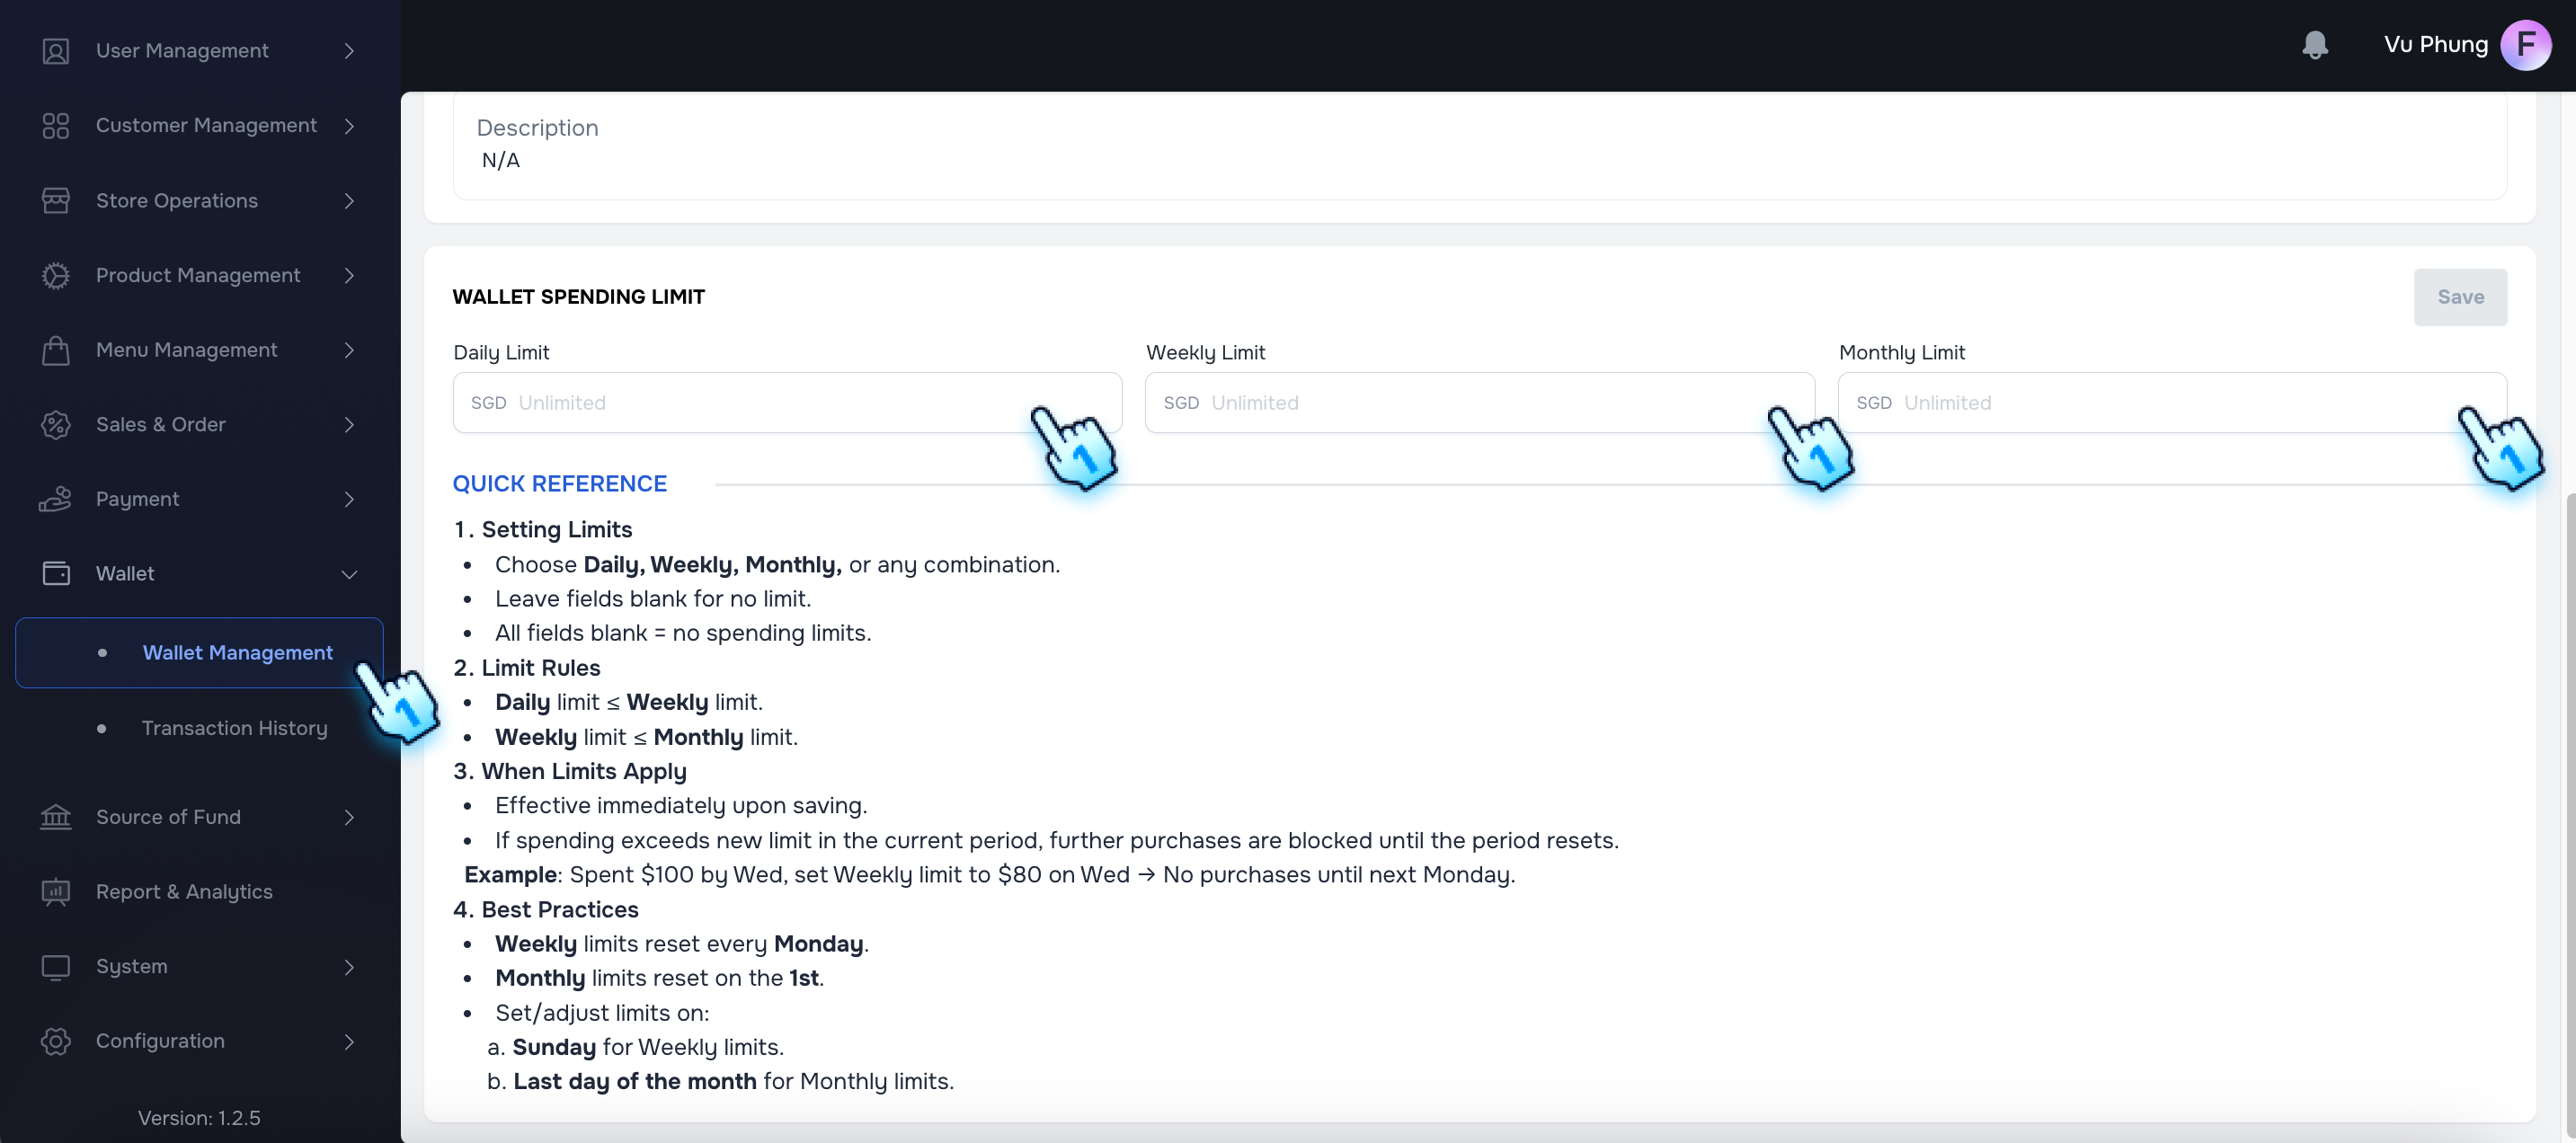
Access and Set Spending Limits
- Access Spending Limit for Wallet on Back Office
- Navigate to Wallet details via Wallet Management
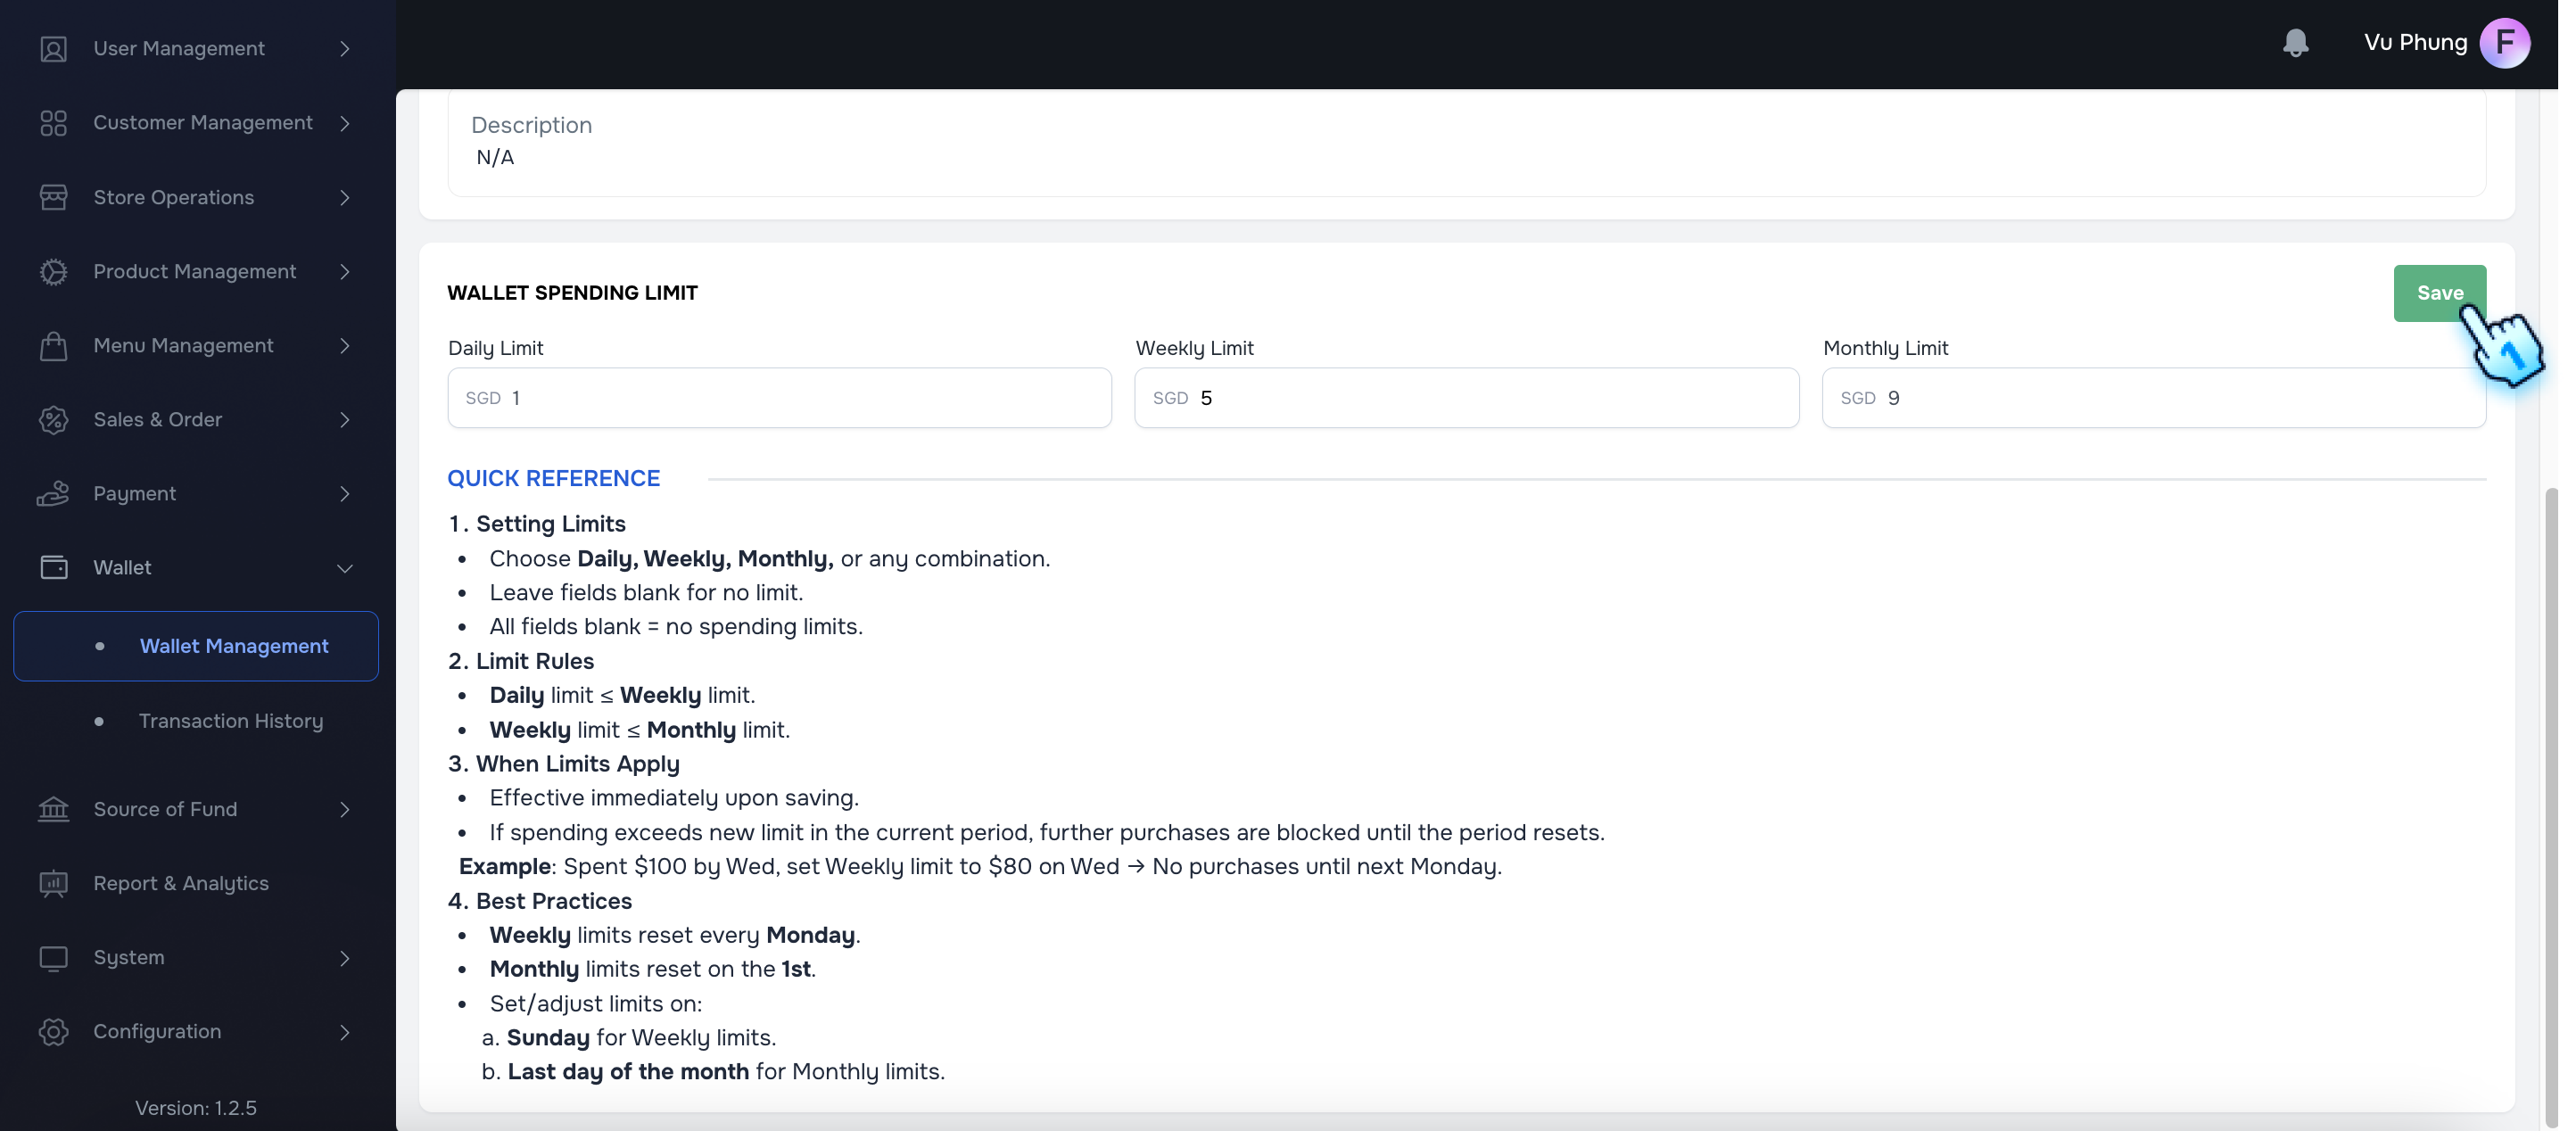
- Set Limit on Back Office
- Scroll down to Spending Limit section and enters Spending Limit options for Daily, Weekly, or Monthly and saves the changes successfully. Note:
- Setting Limits
- Choose Daily, Weekly, Monthly, or any combination.
- Leave fields blank for no limit.
- All fields blank = no spending limits.
- Limit Rules
- Daily limit ≤ Weekly limit.
- Weekly limit ≤ Monthly limit.
- When Limits Apply
- Effective immediately upon saving.
- If spending exceeds new limit in the current period, further purchases are blocked until the period resets. Example: Spent $100 by Wed, set Weekly limit to $80 on Wed → No purchases until next Monday.
- Best Practices
- Weekly limits reset every Monday.
- Monthly limits reset on the 1st.
- Set/adjust limits on:
- Sunday for Weekly limits.
- Last day of the month for Monthly limits.
#
Check Spending Limitation
- Check Spending Limit on POS
- Attempts to make a payment that exceeds this limit on POS, resulting in an error message.
- Check Spending Limit on Customer Portal
- Attempts to make a payment that exceeds this limit on the Customer Portal, resulting in an error message.
#
Conclusion
This document provides a structured approach for creating and managing wallets within the Wallet Module, ensuring efficient wallet management and user experience.
#
Screen flow
#
Create Wallet
#
View Wallet List and Perform actions

#
Access and Set Spending Limits