#
Setting
#
Description
This section outlines the procedures for configuring top-up settings, including transaction history, date and time format, and other system preferences.
#
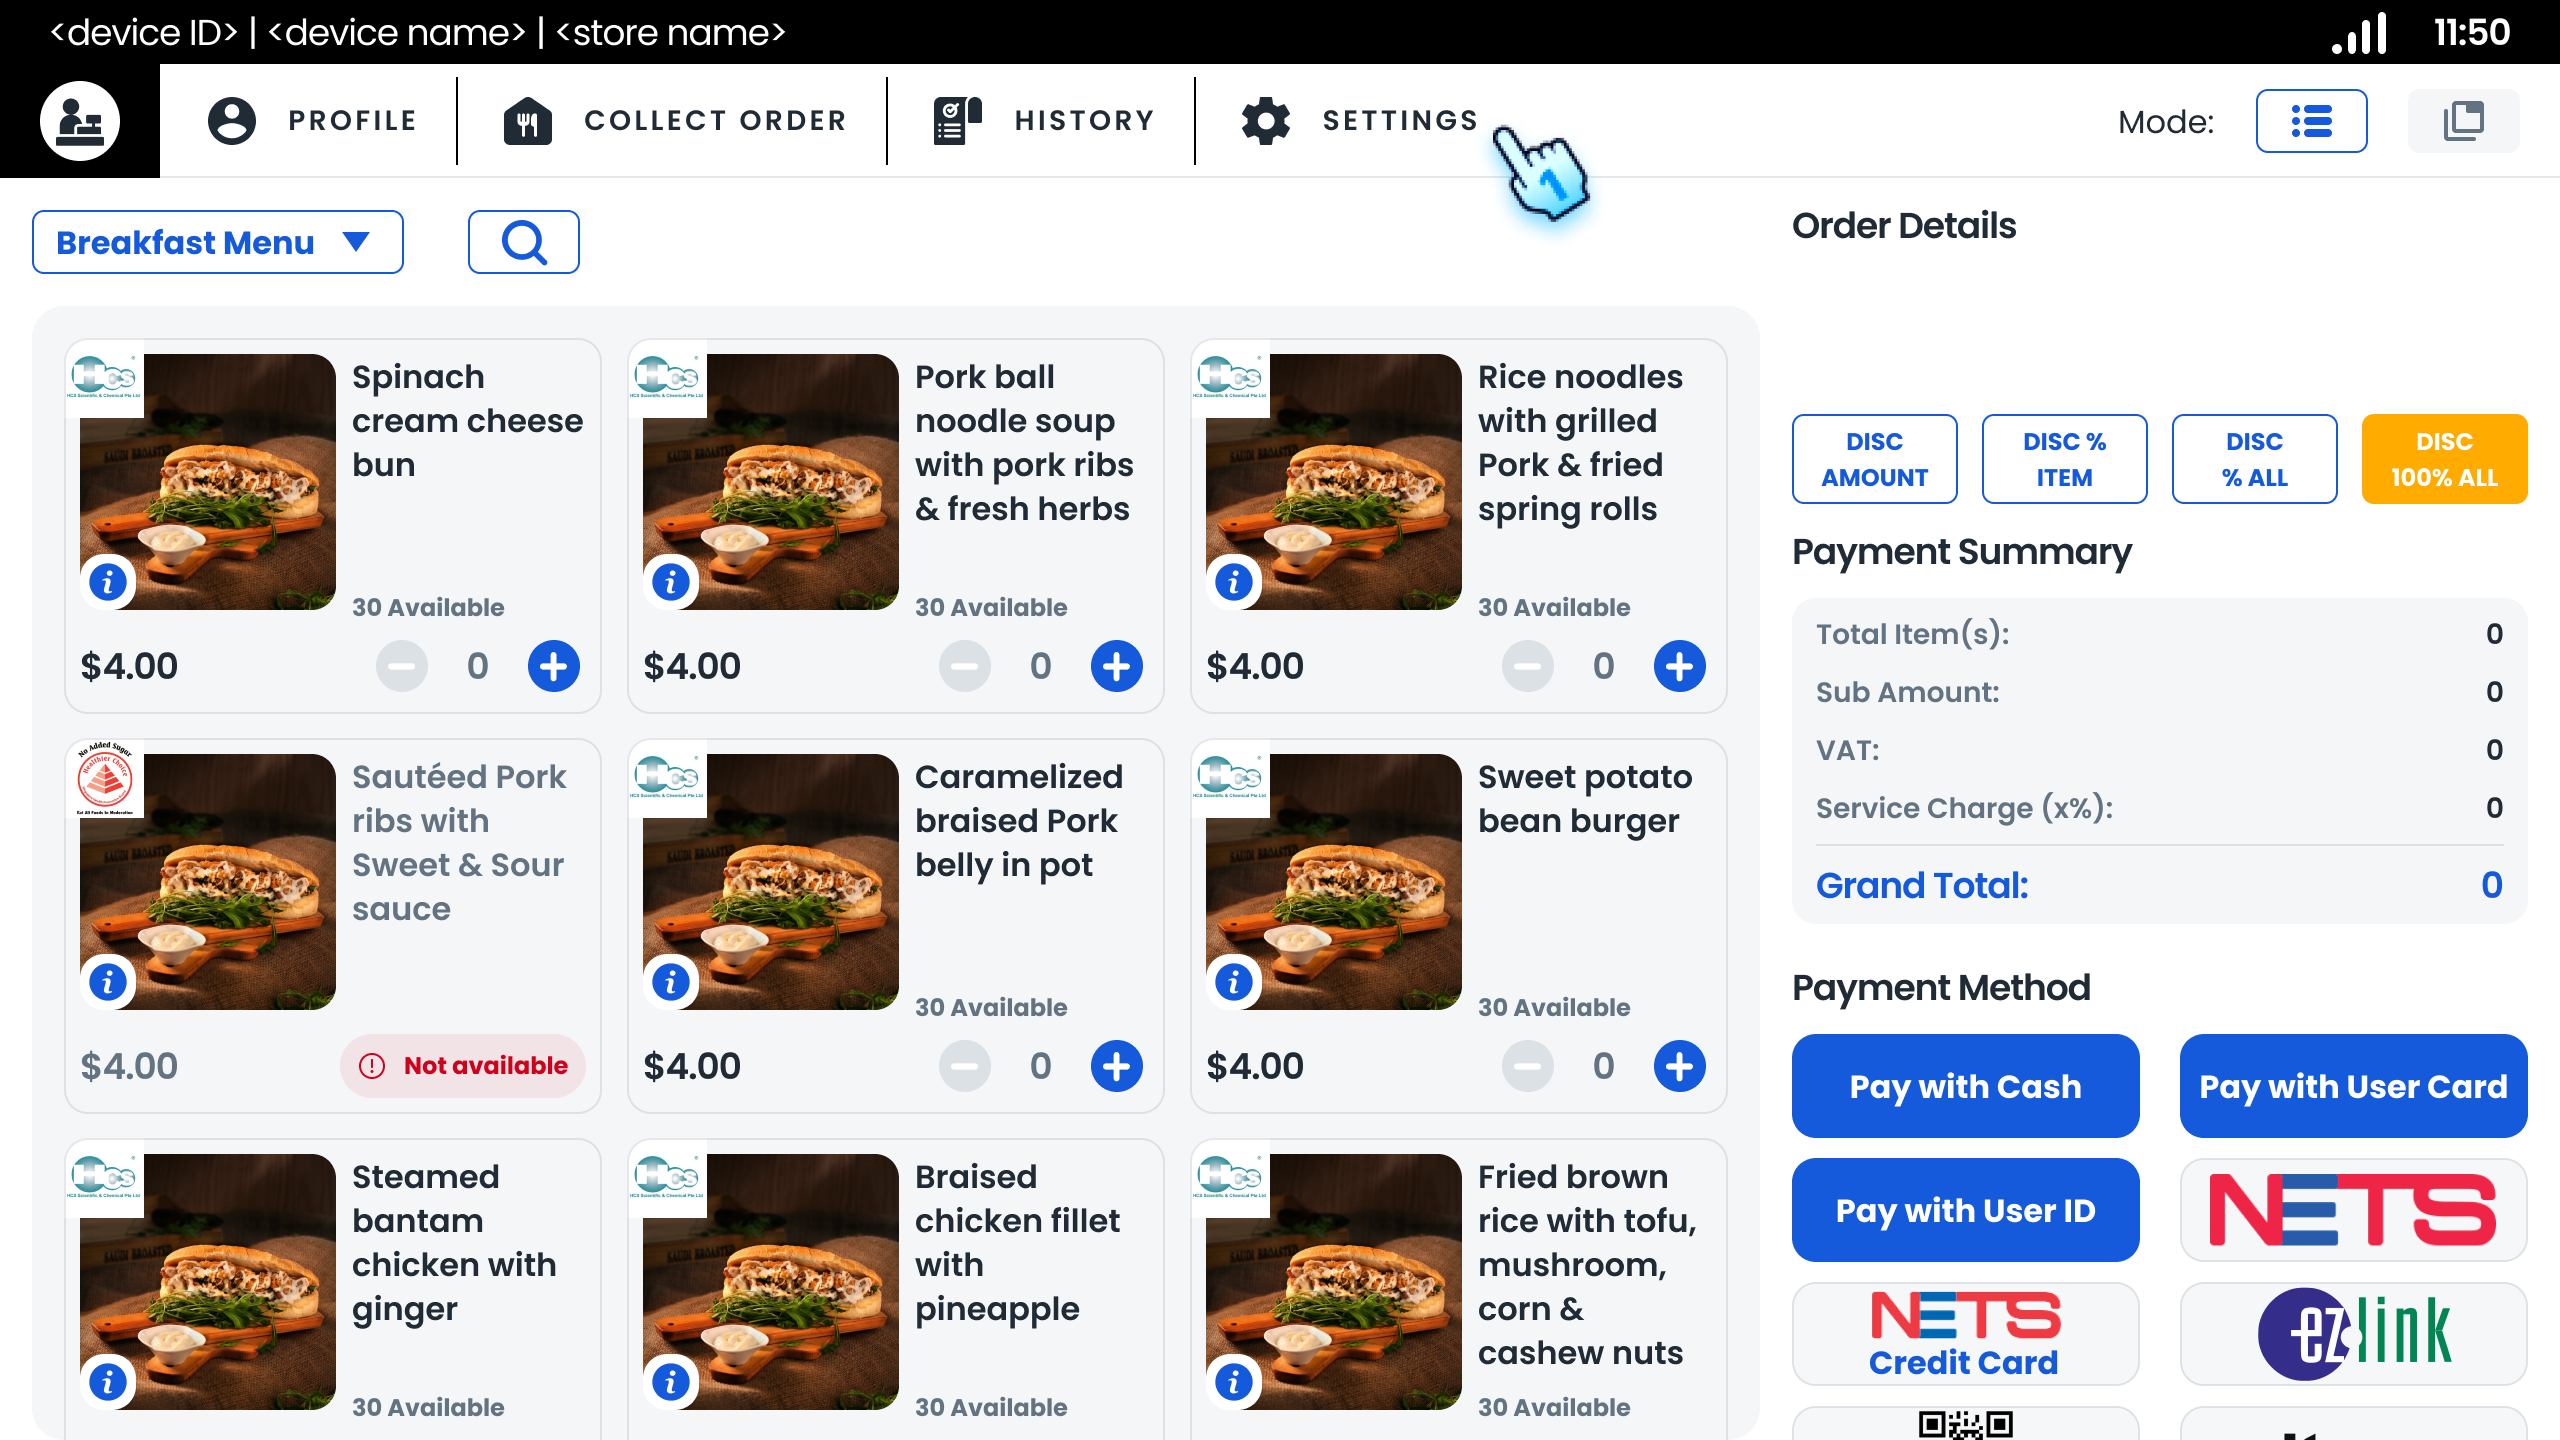
Accessing Top-Up Settings
- Open Top-Up Setting Page
- Navigate to the top-up page and tap the "Setting" button to access the top-up settings.
#
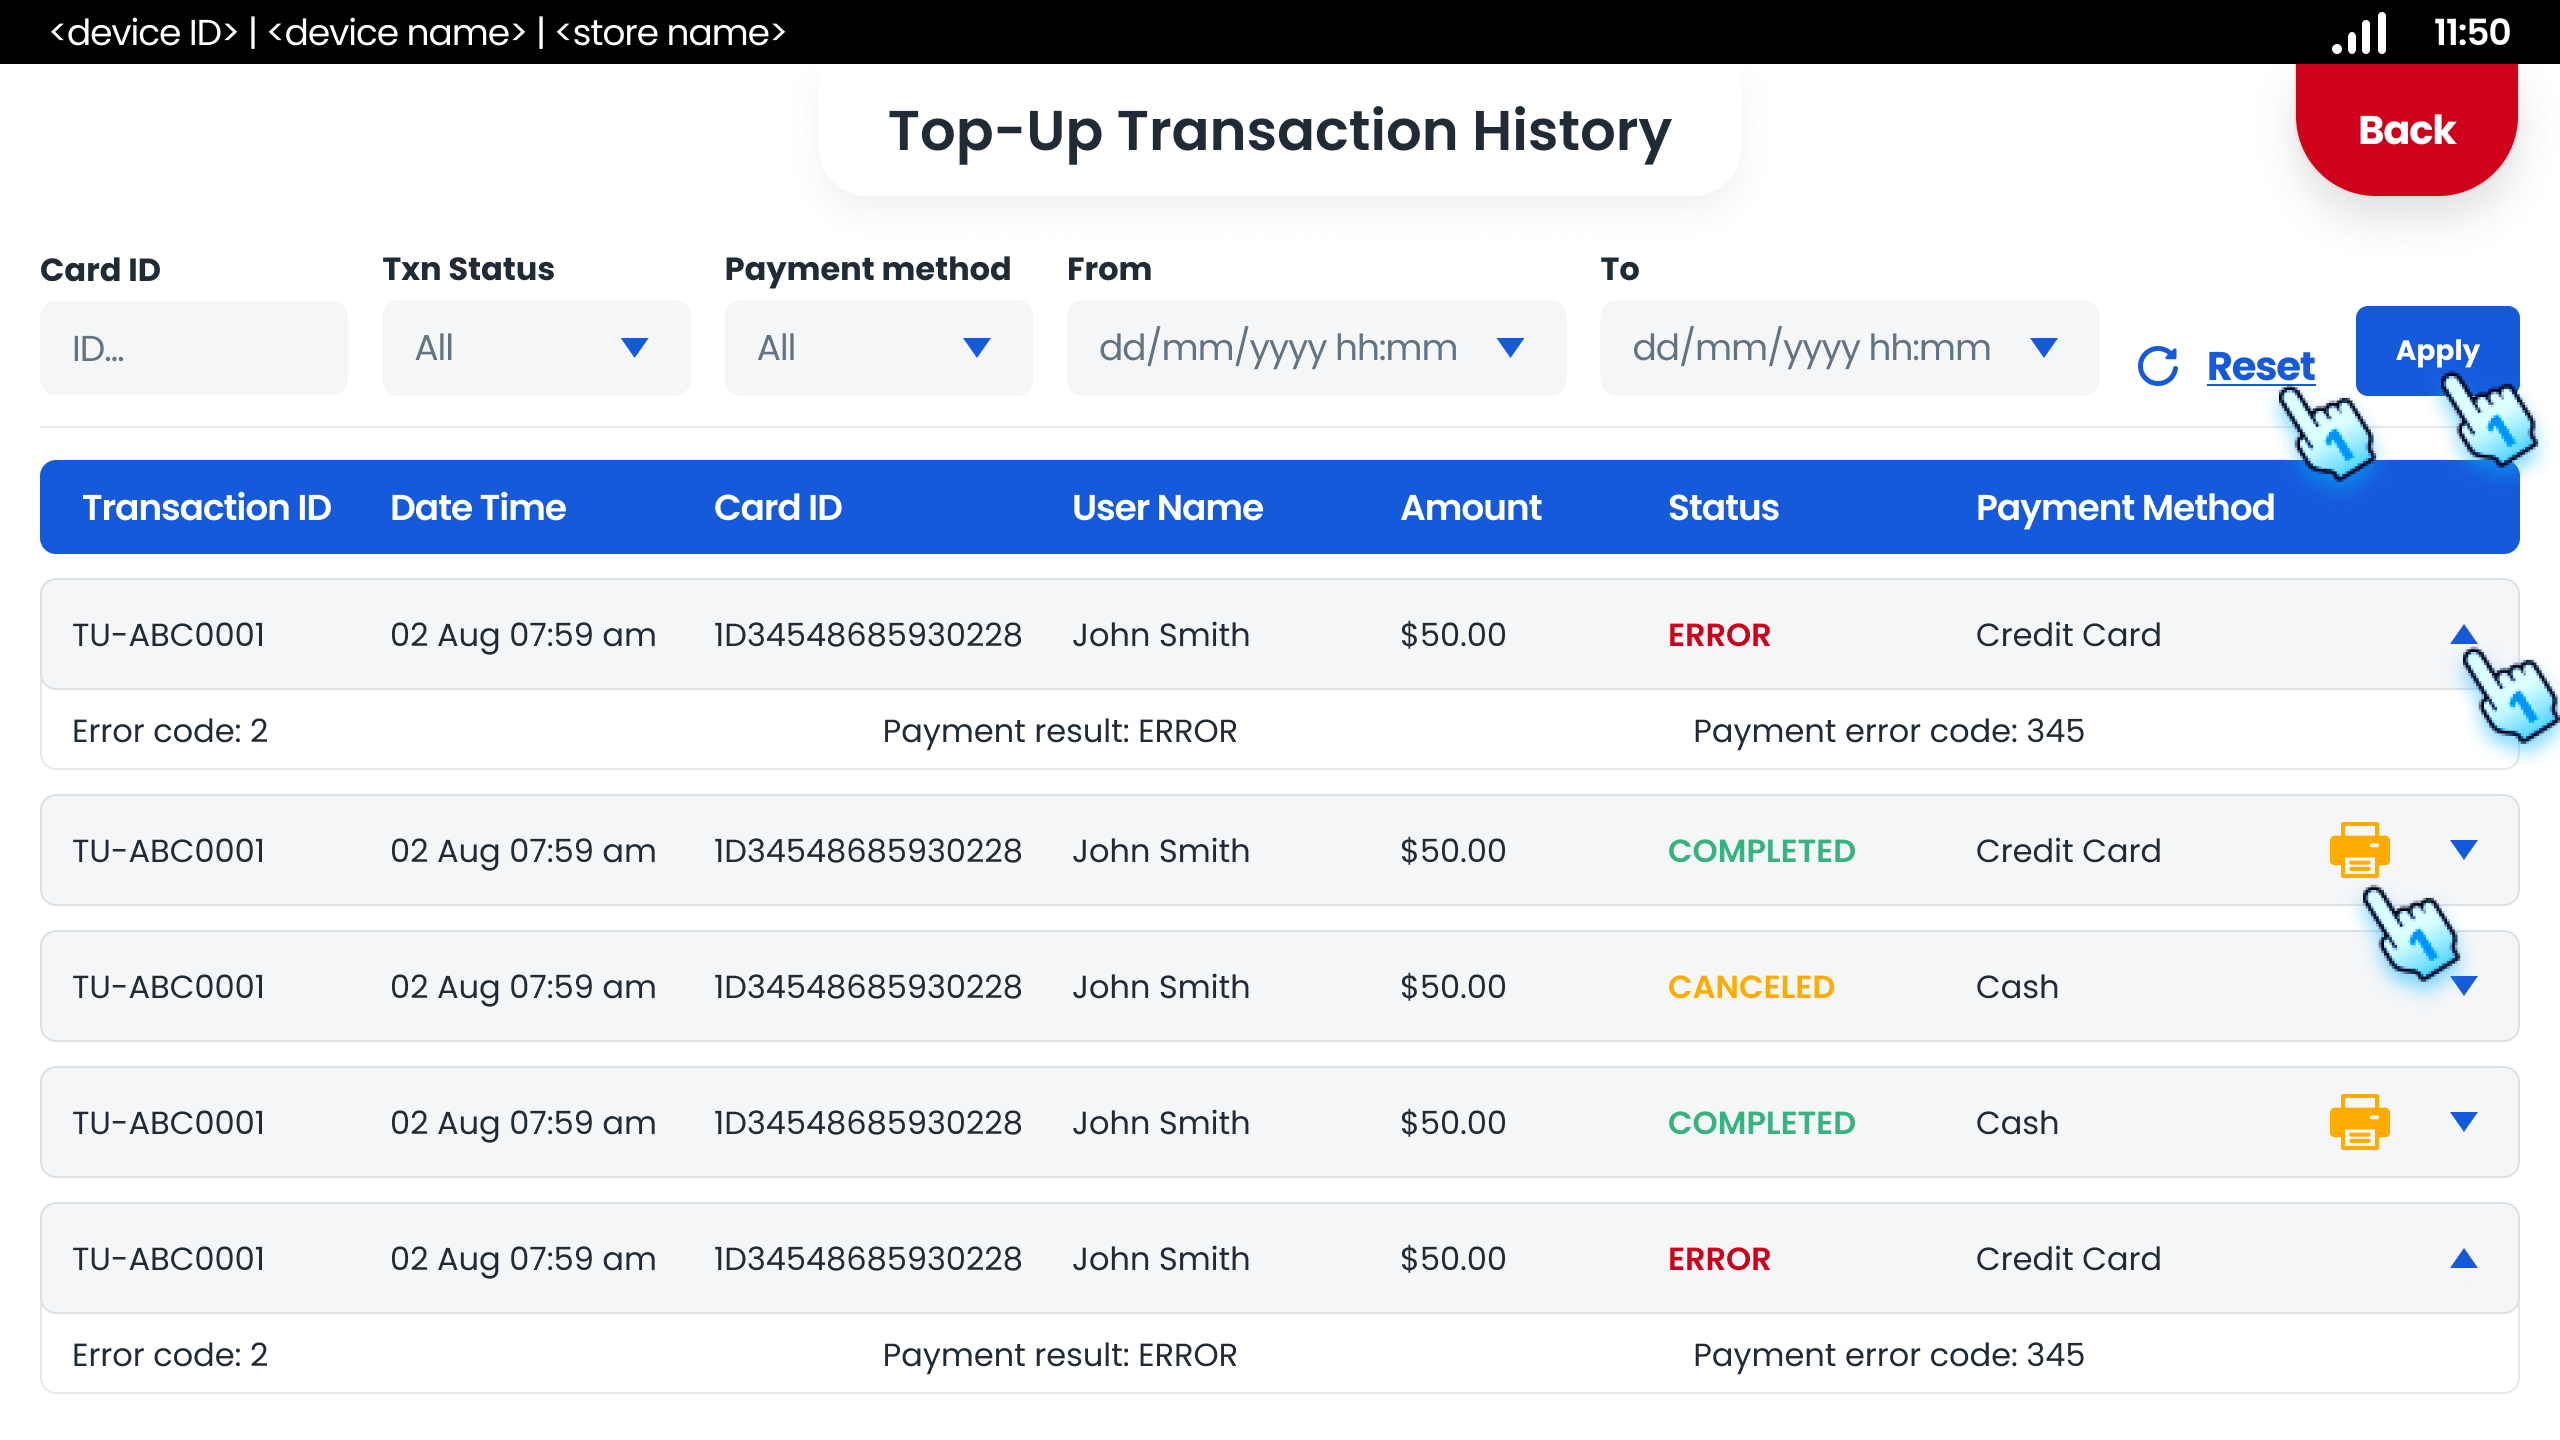
Managing Top-up Transaction History
- View Top-up Transaction List
- Access the Top-up Transaction to view a list of all payment transactions.
- Filter Transactions
- Apply filters by card ID, transaction status, or payment method, and period time to view specific transactions.
- Reset Filters
- Clear all applied filters to view the full transaction history.
- View more information of the transaction
- Tap on the expand button to view more information
- Reprint Receipts
- Reprint receipts for completed transactions by tapping the "Print" icon.
#
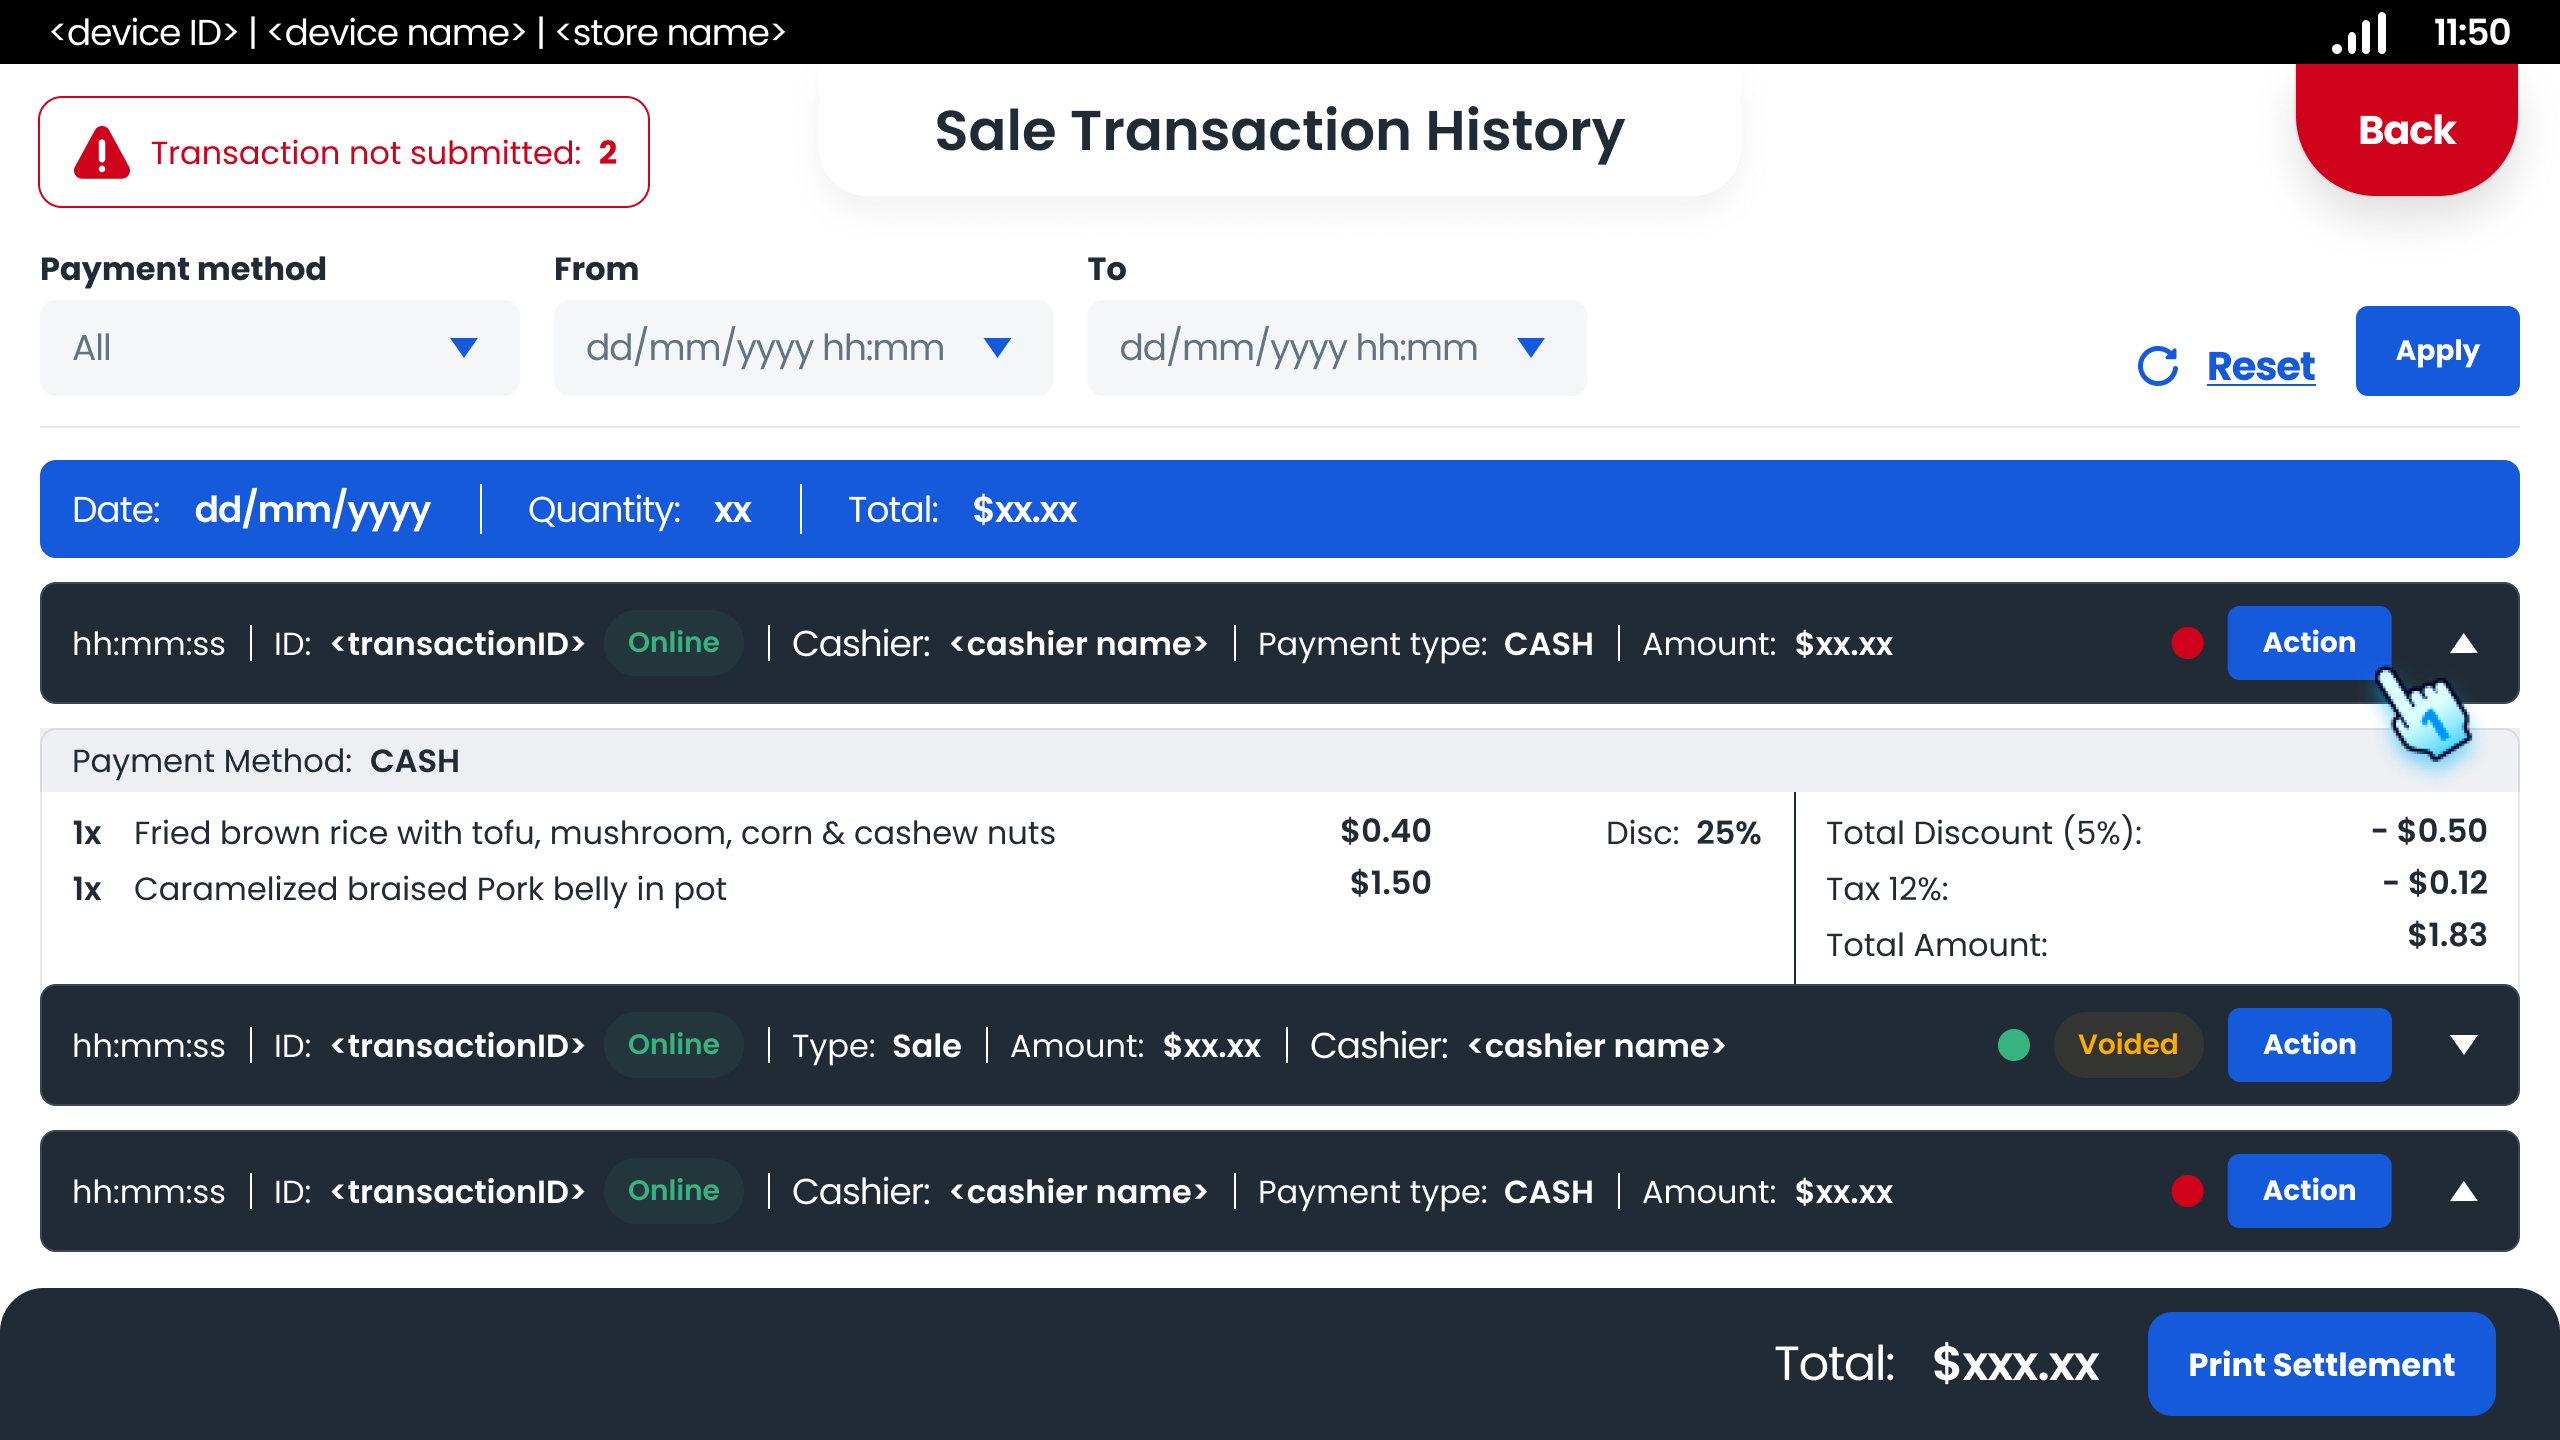
Managing Sales Transaction History
- View Sales Transaction List
- Access the Sales Transaction to view a list of all Sales transactions.
- Filter Transactions
- Apply filters by payment method and period time to view specific transactions.
- Reset Filters
- Clear all applied filters to view the full transaction history.
- View more information of the transaction
- Tap on the expand button to view more information
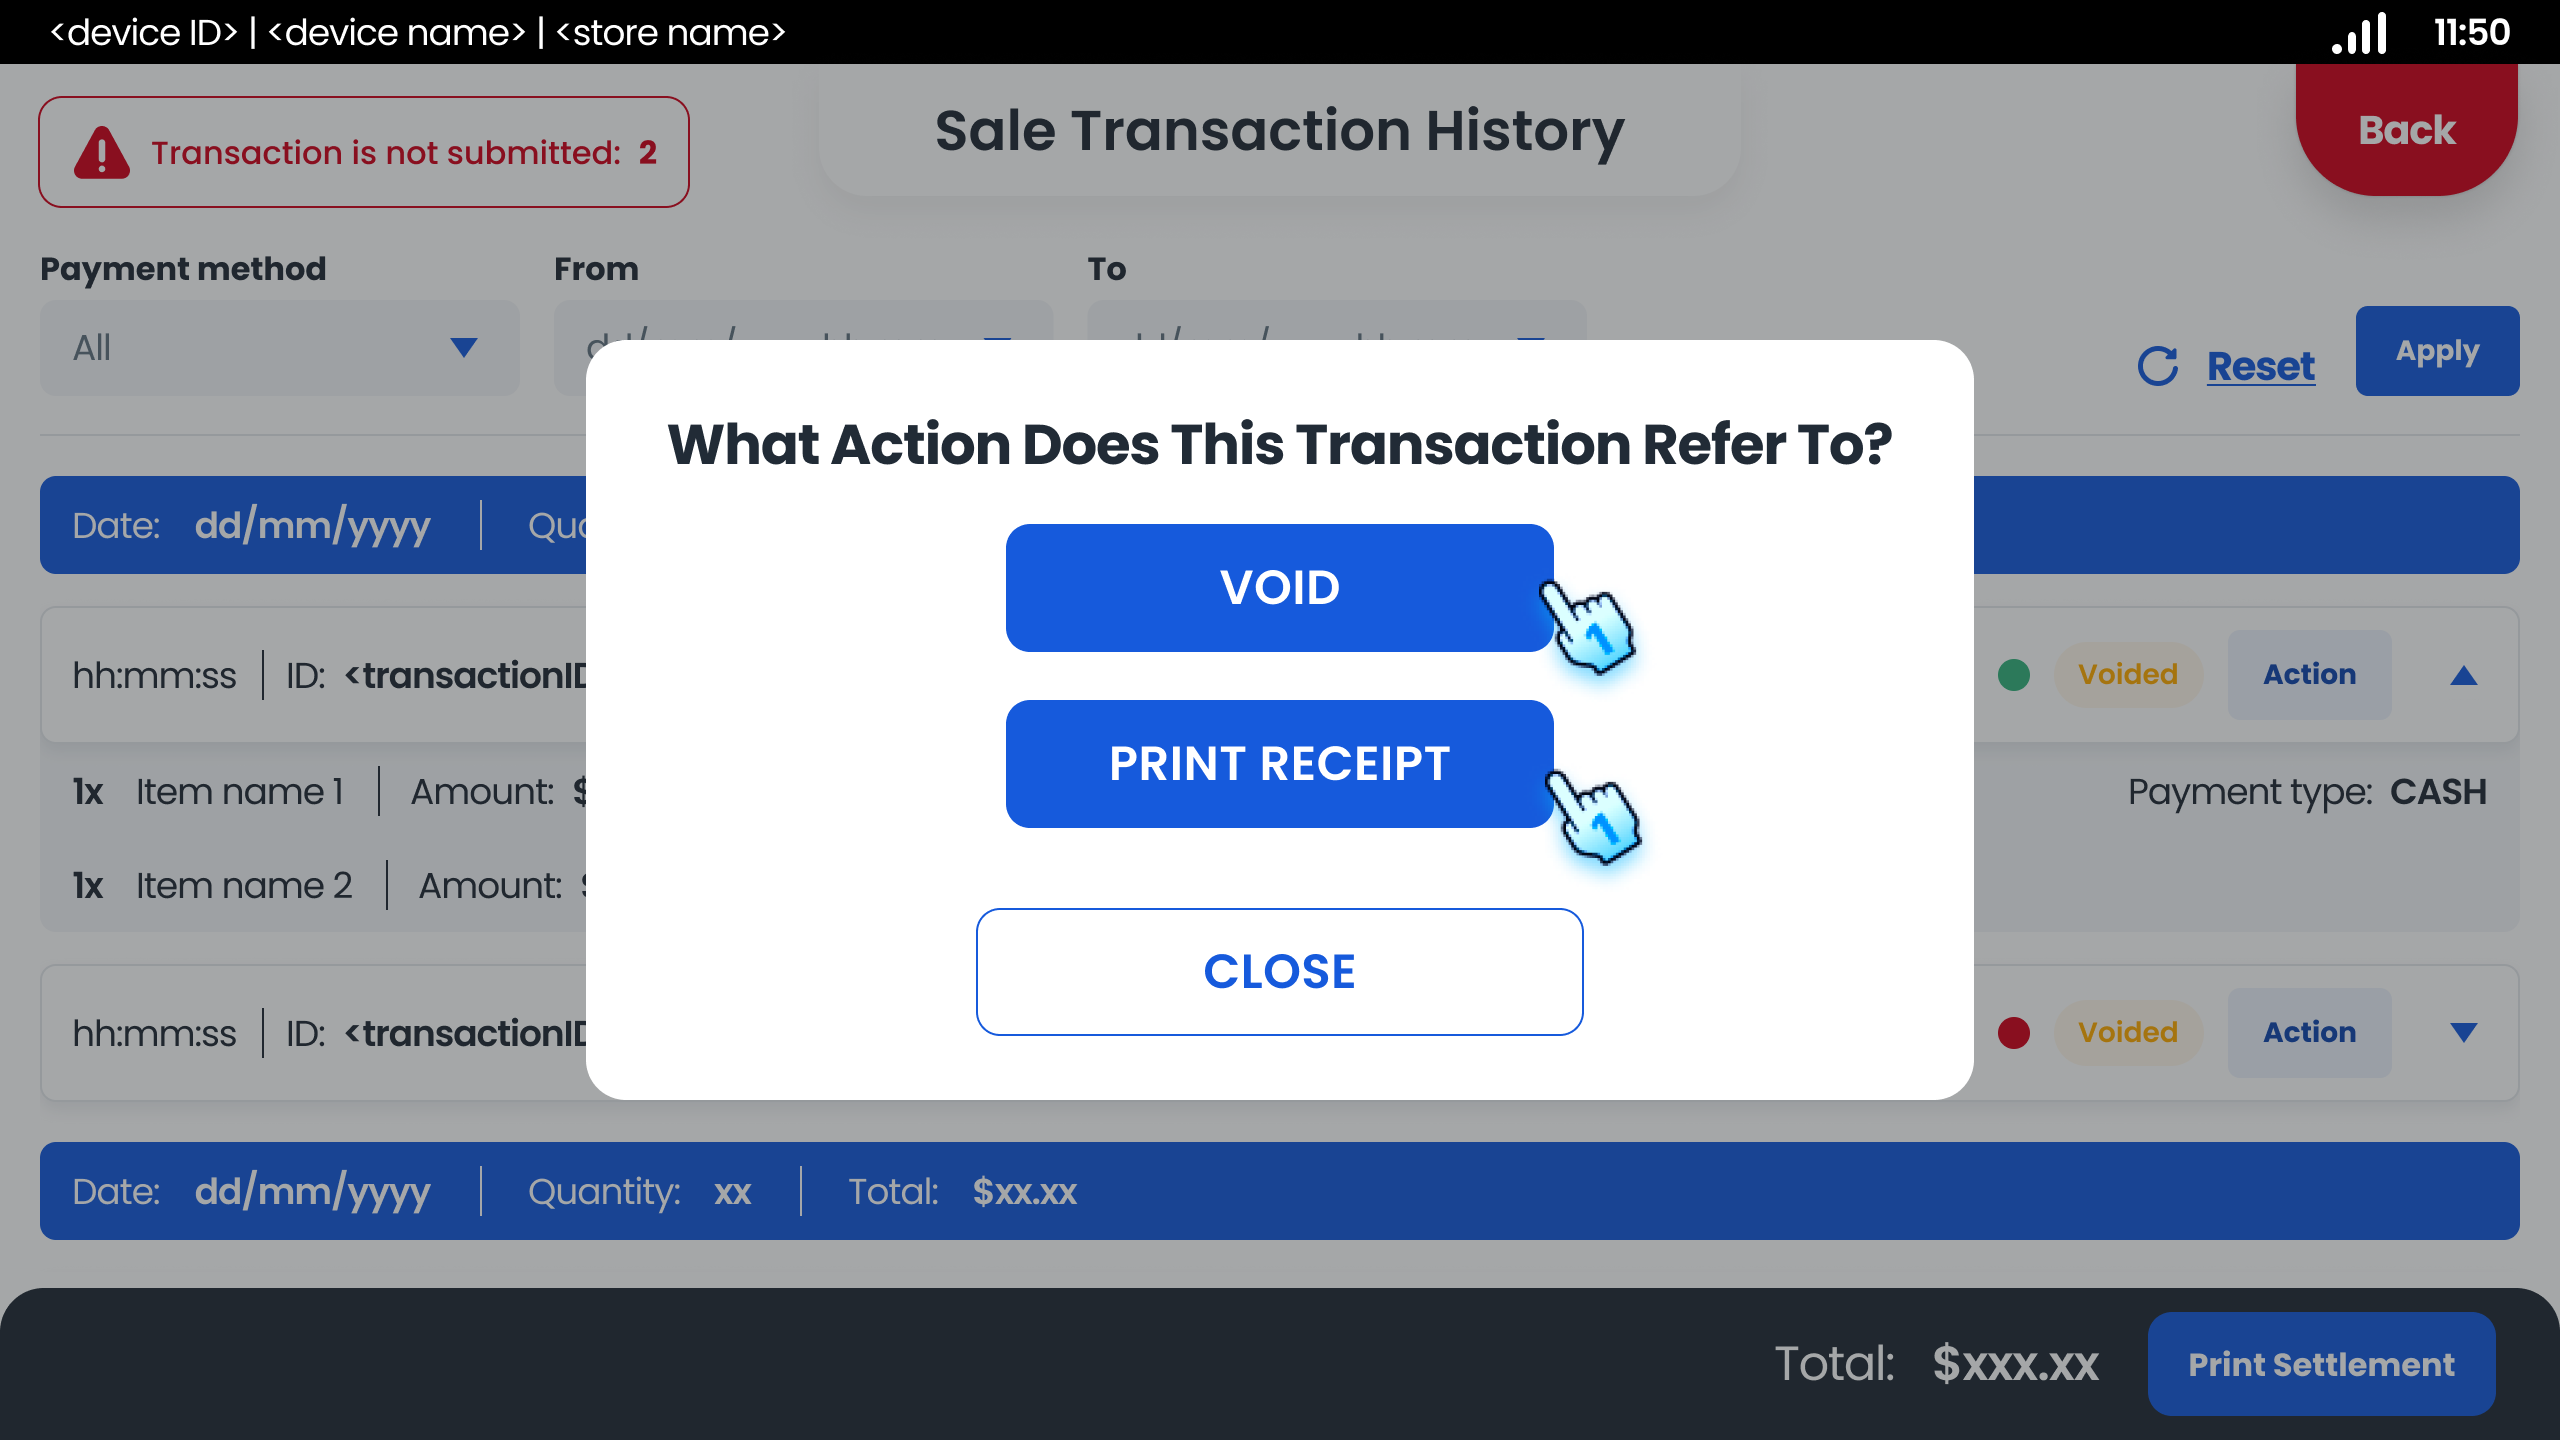
- Action for transaction
- Tap on Action button to display actions including:
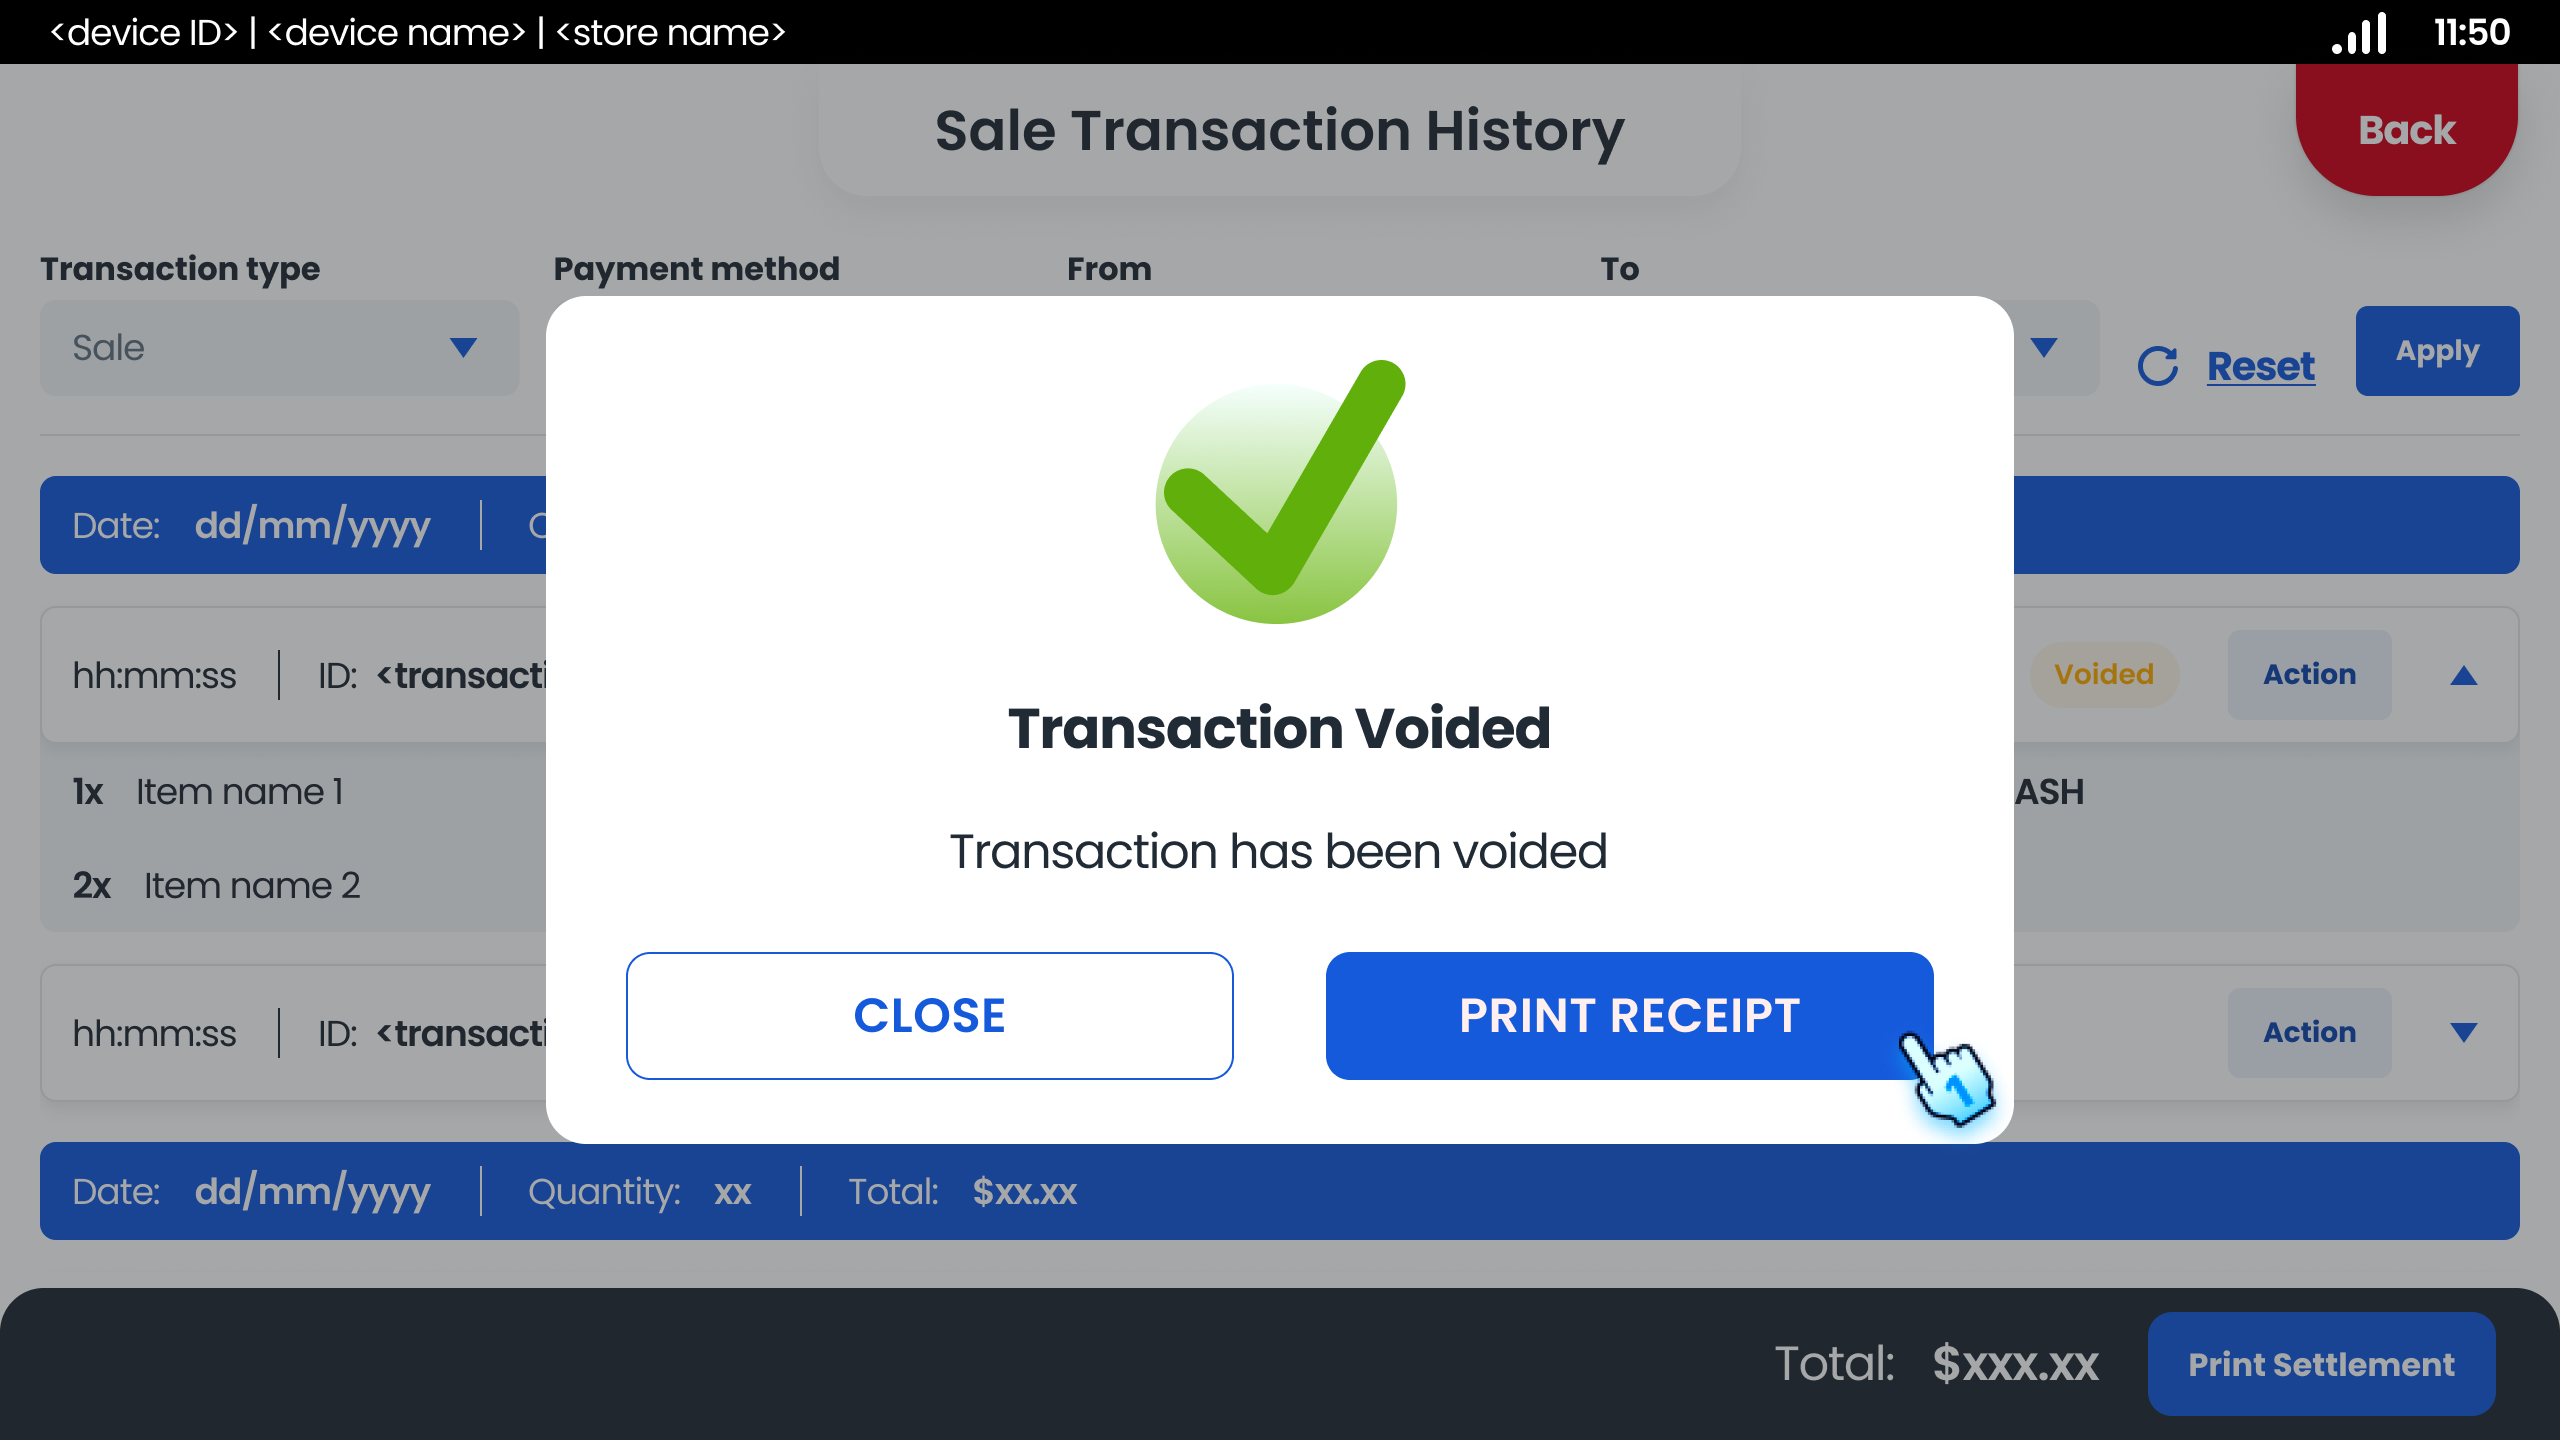
- Void: Void the completed transactions
- Print Receipt: Reprint receipts for completed transactions.
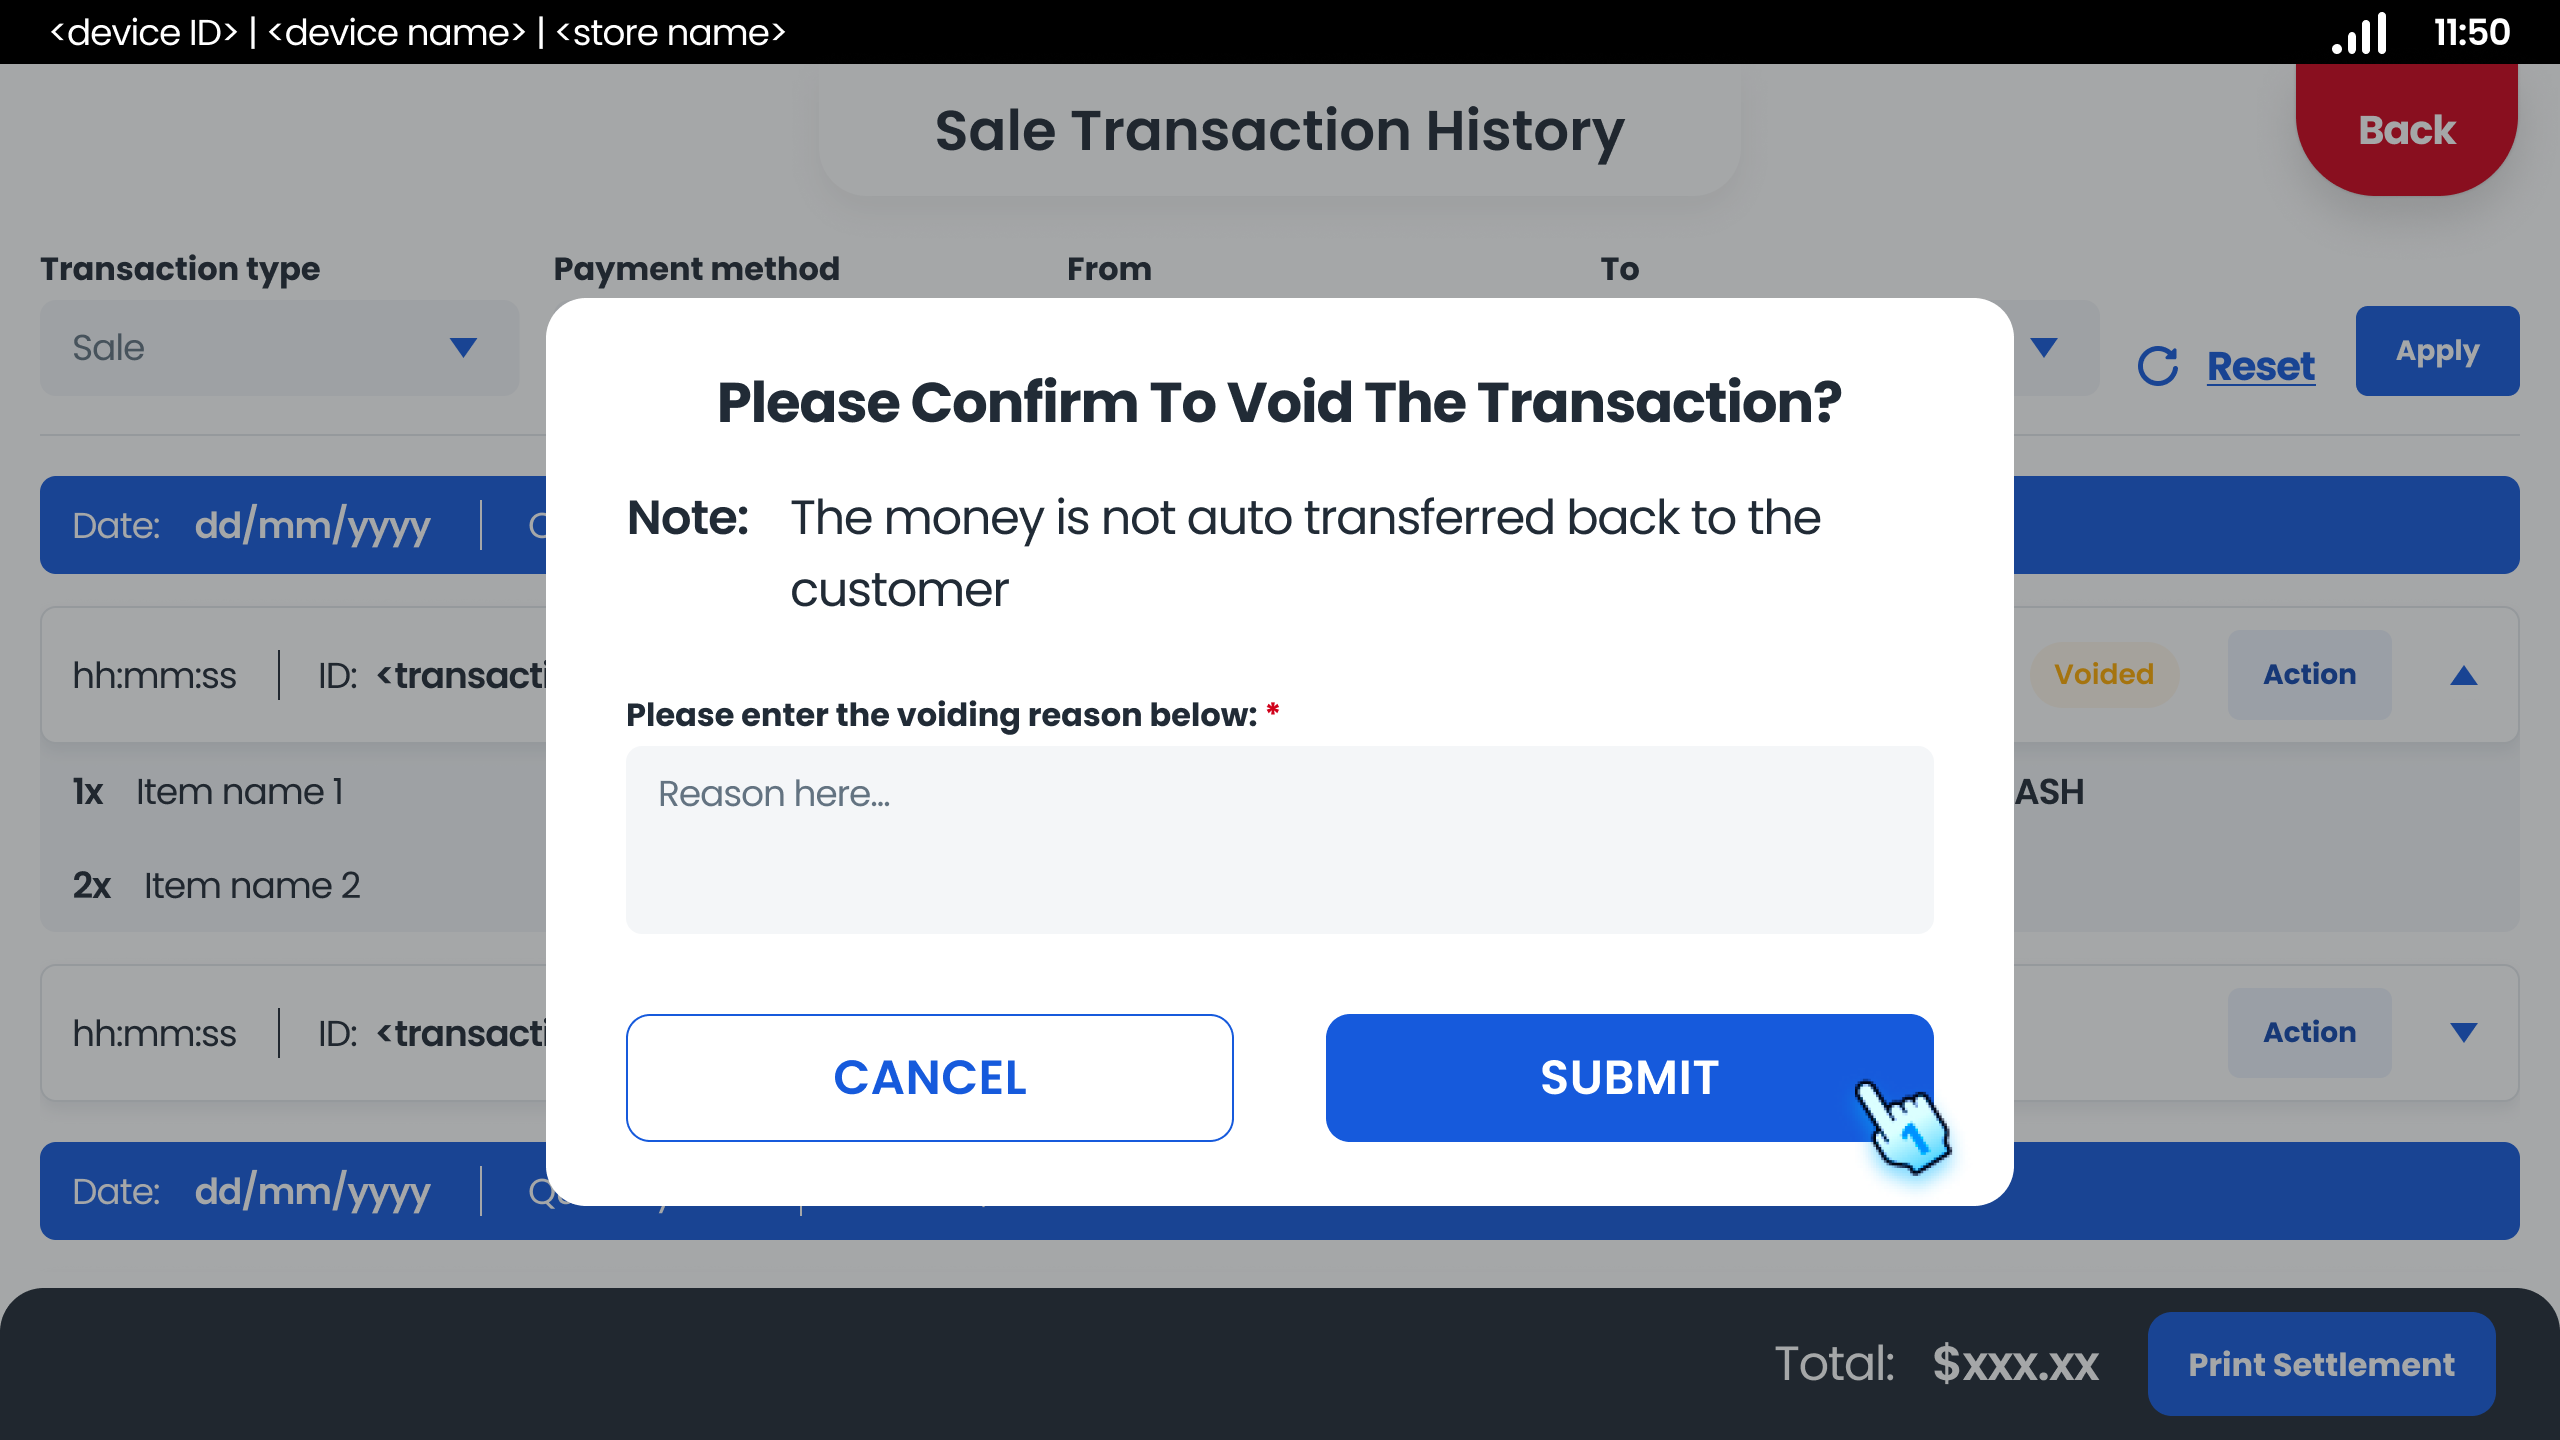
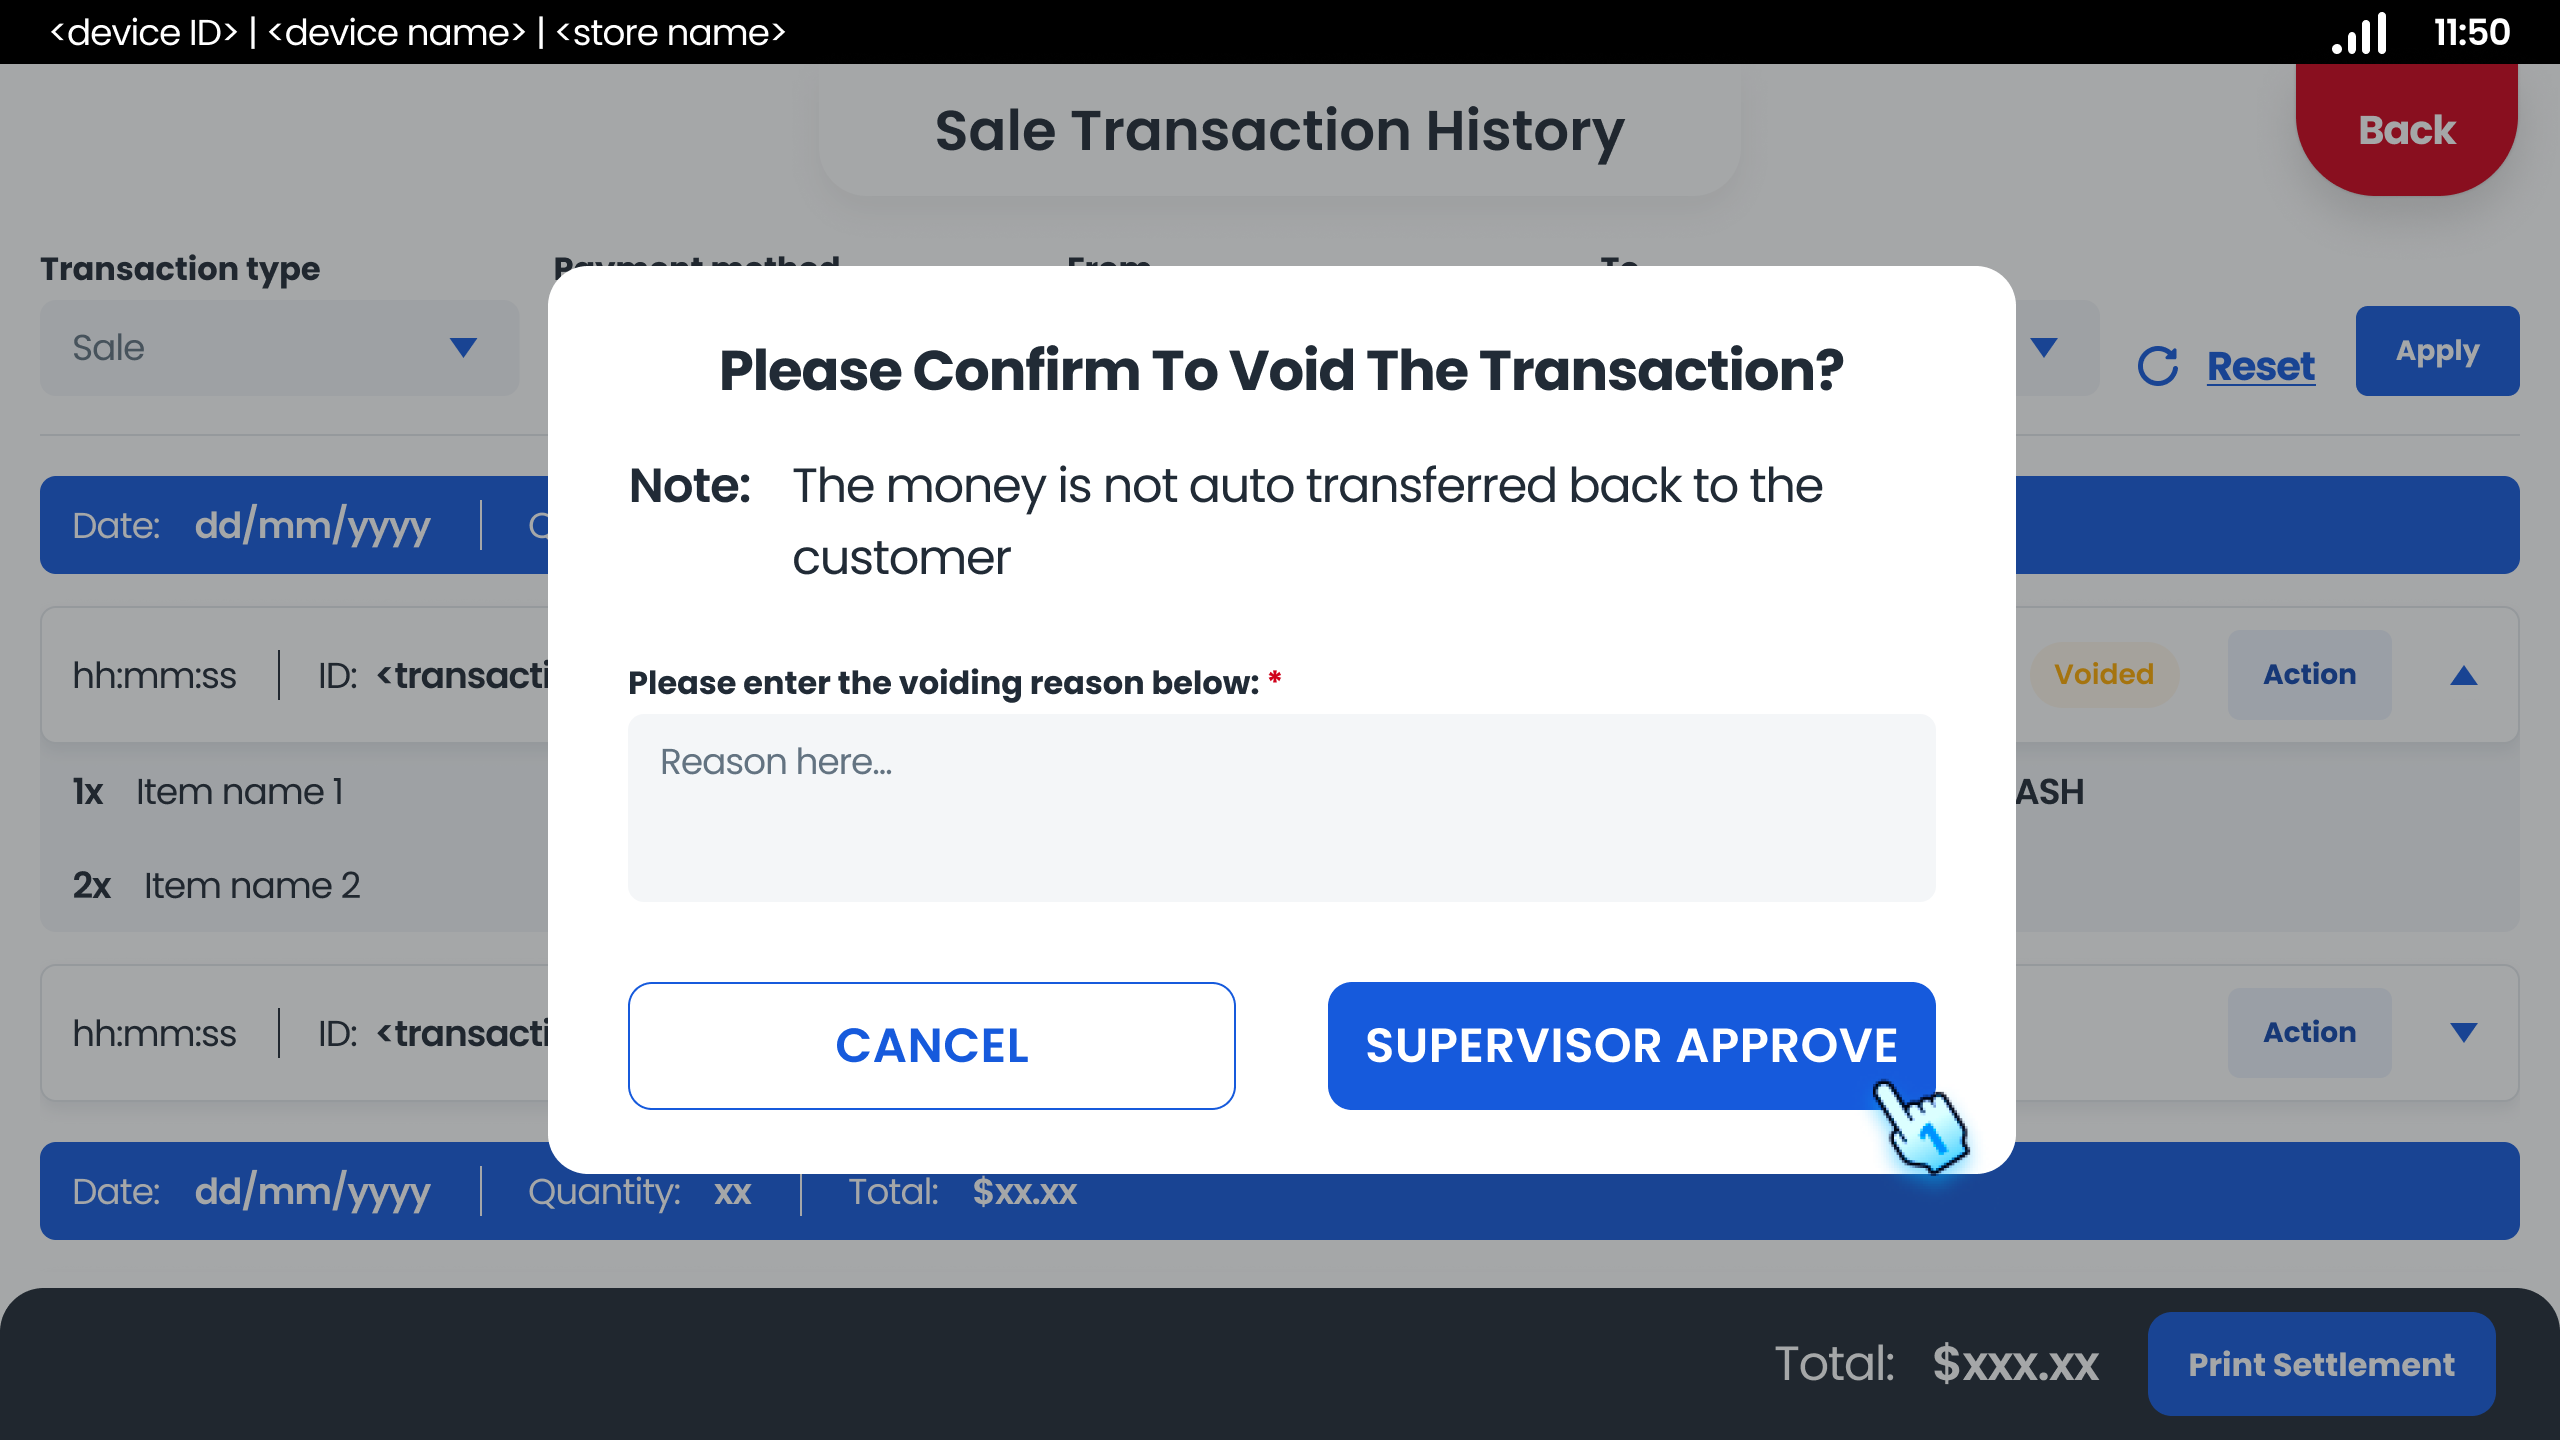
- Void as Supervisor
- Tap on Void button
- Enter the voiding reason and tap Submit
- Void as Staff
- Tap on Void button
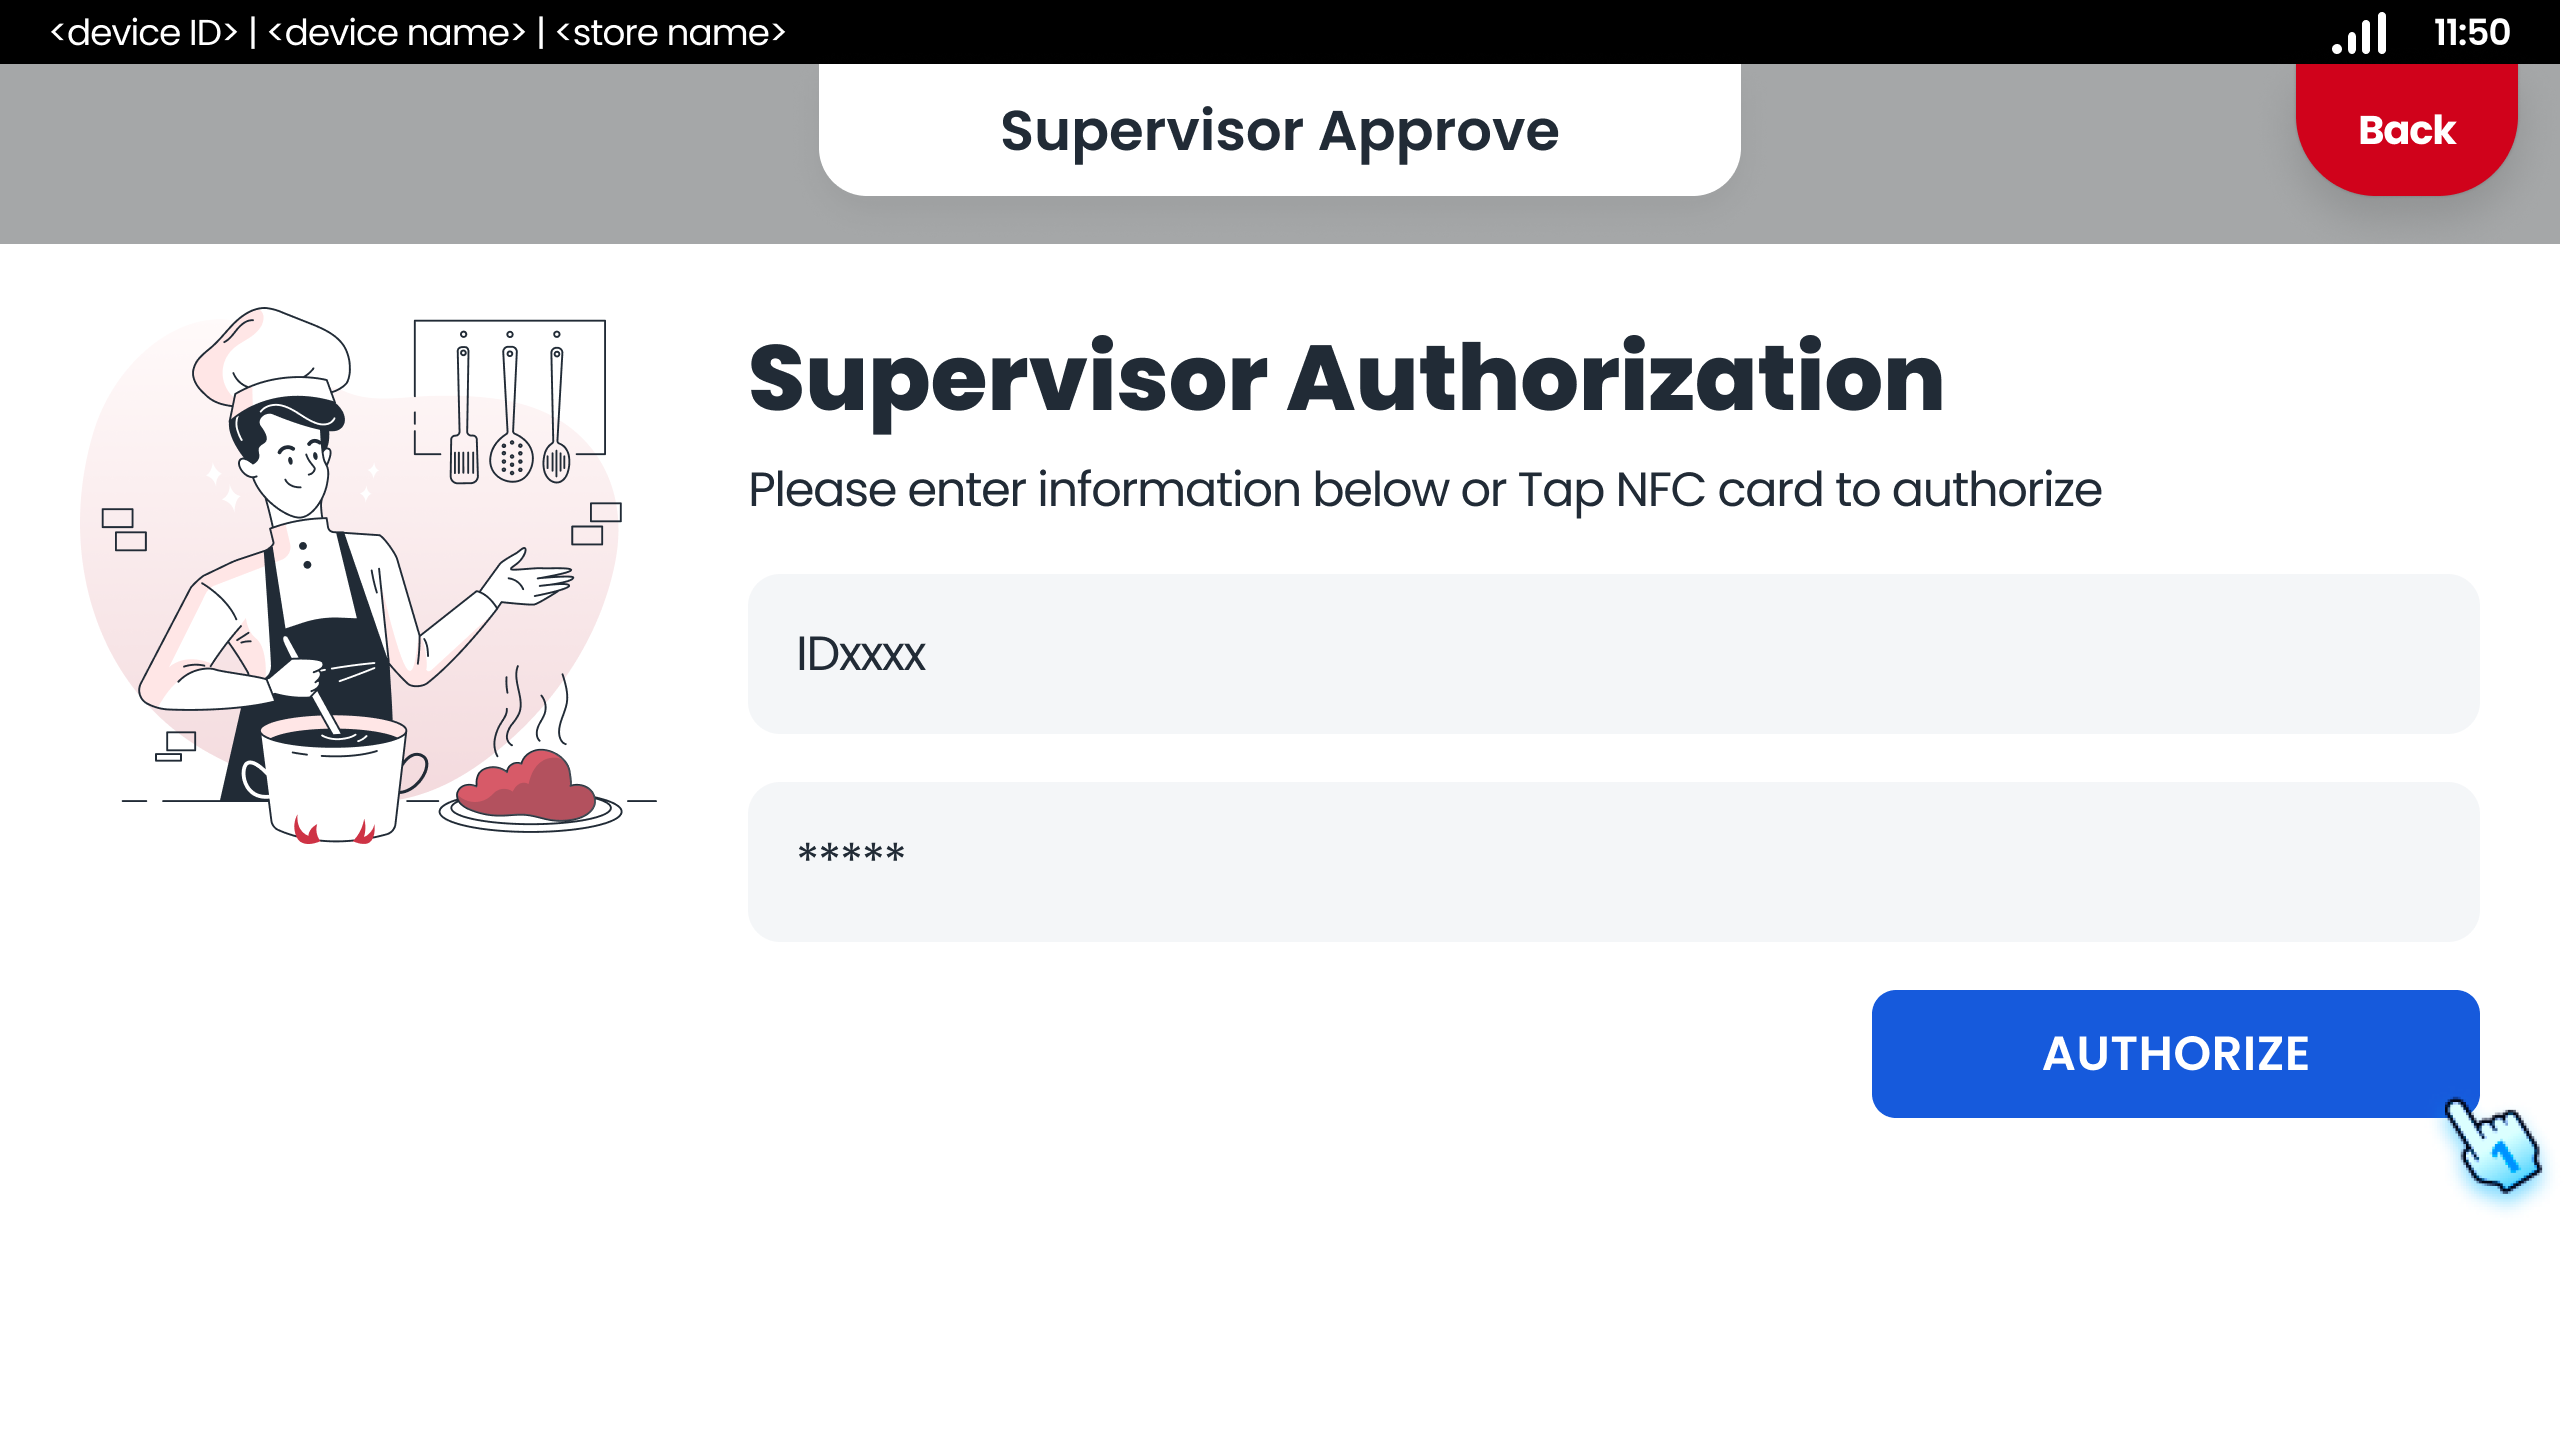
- Enter the voiding reason and tap Supervisor approve
- Get Supervisor Authorization *Note: After voiding, a voided transaction need to wait for about 5 minutes to be displayed in Transaction History of Wallet Management on Back Office
#
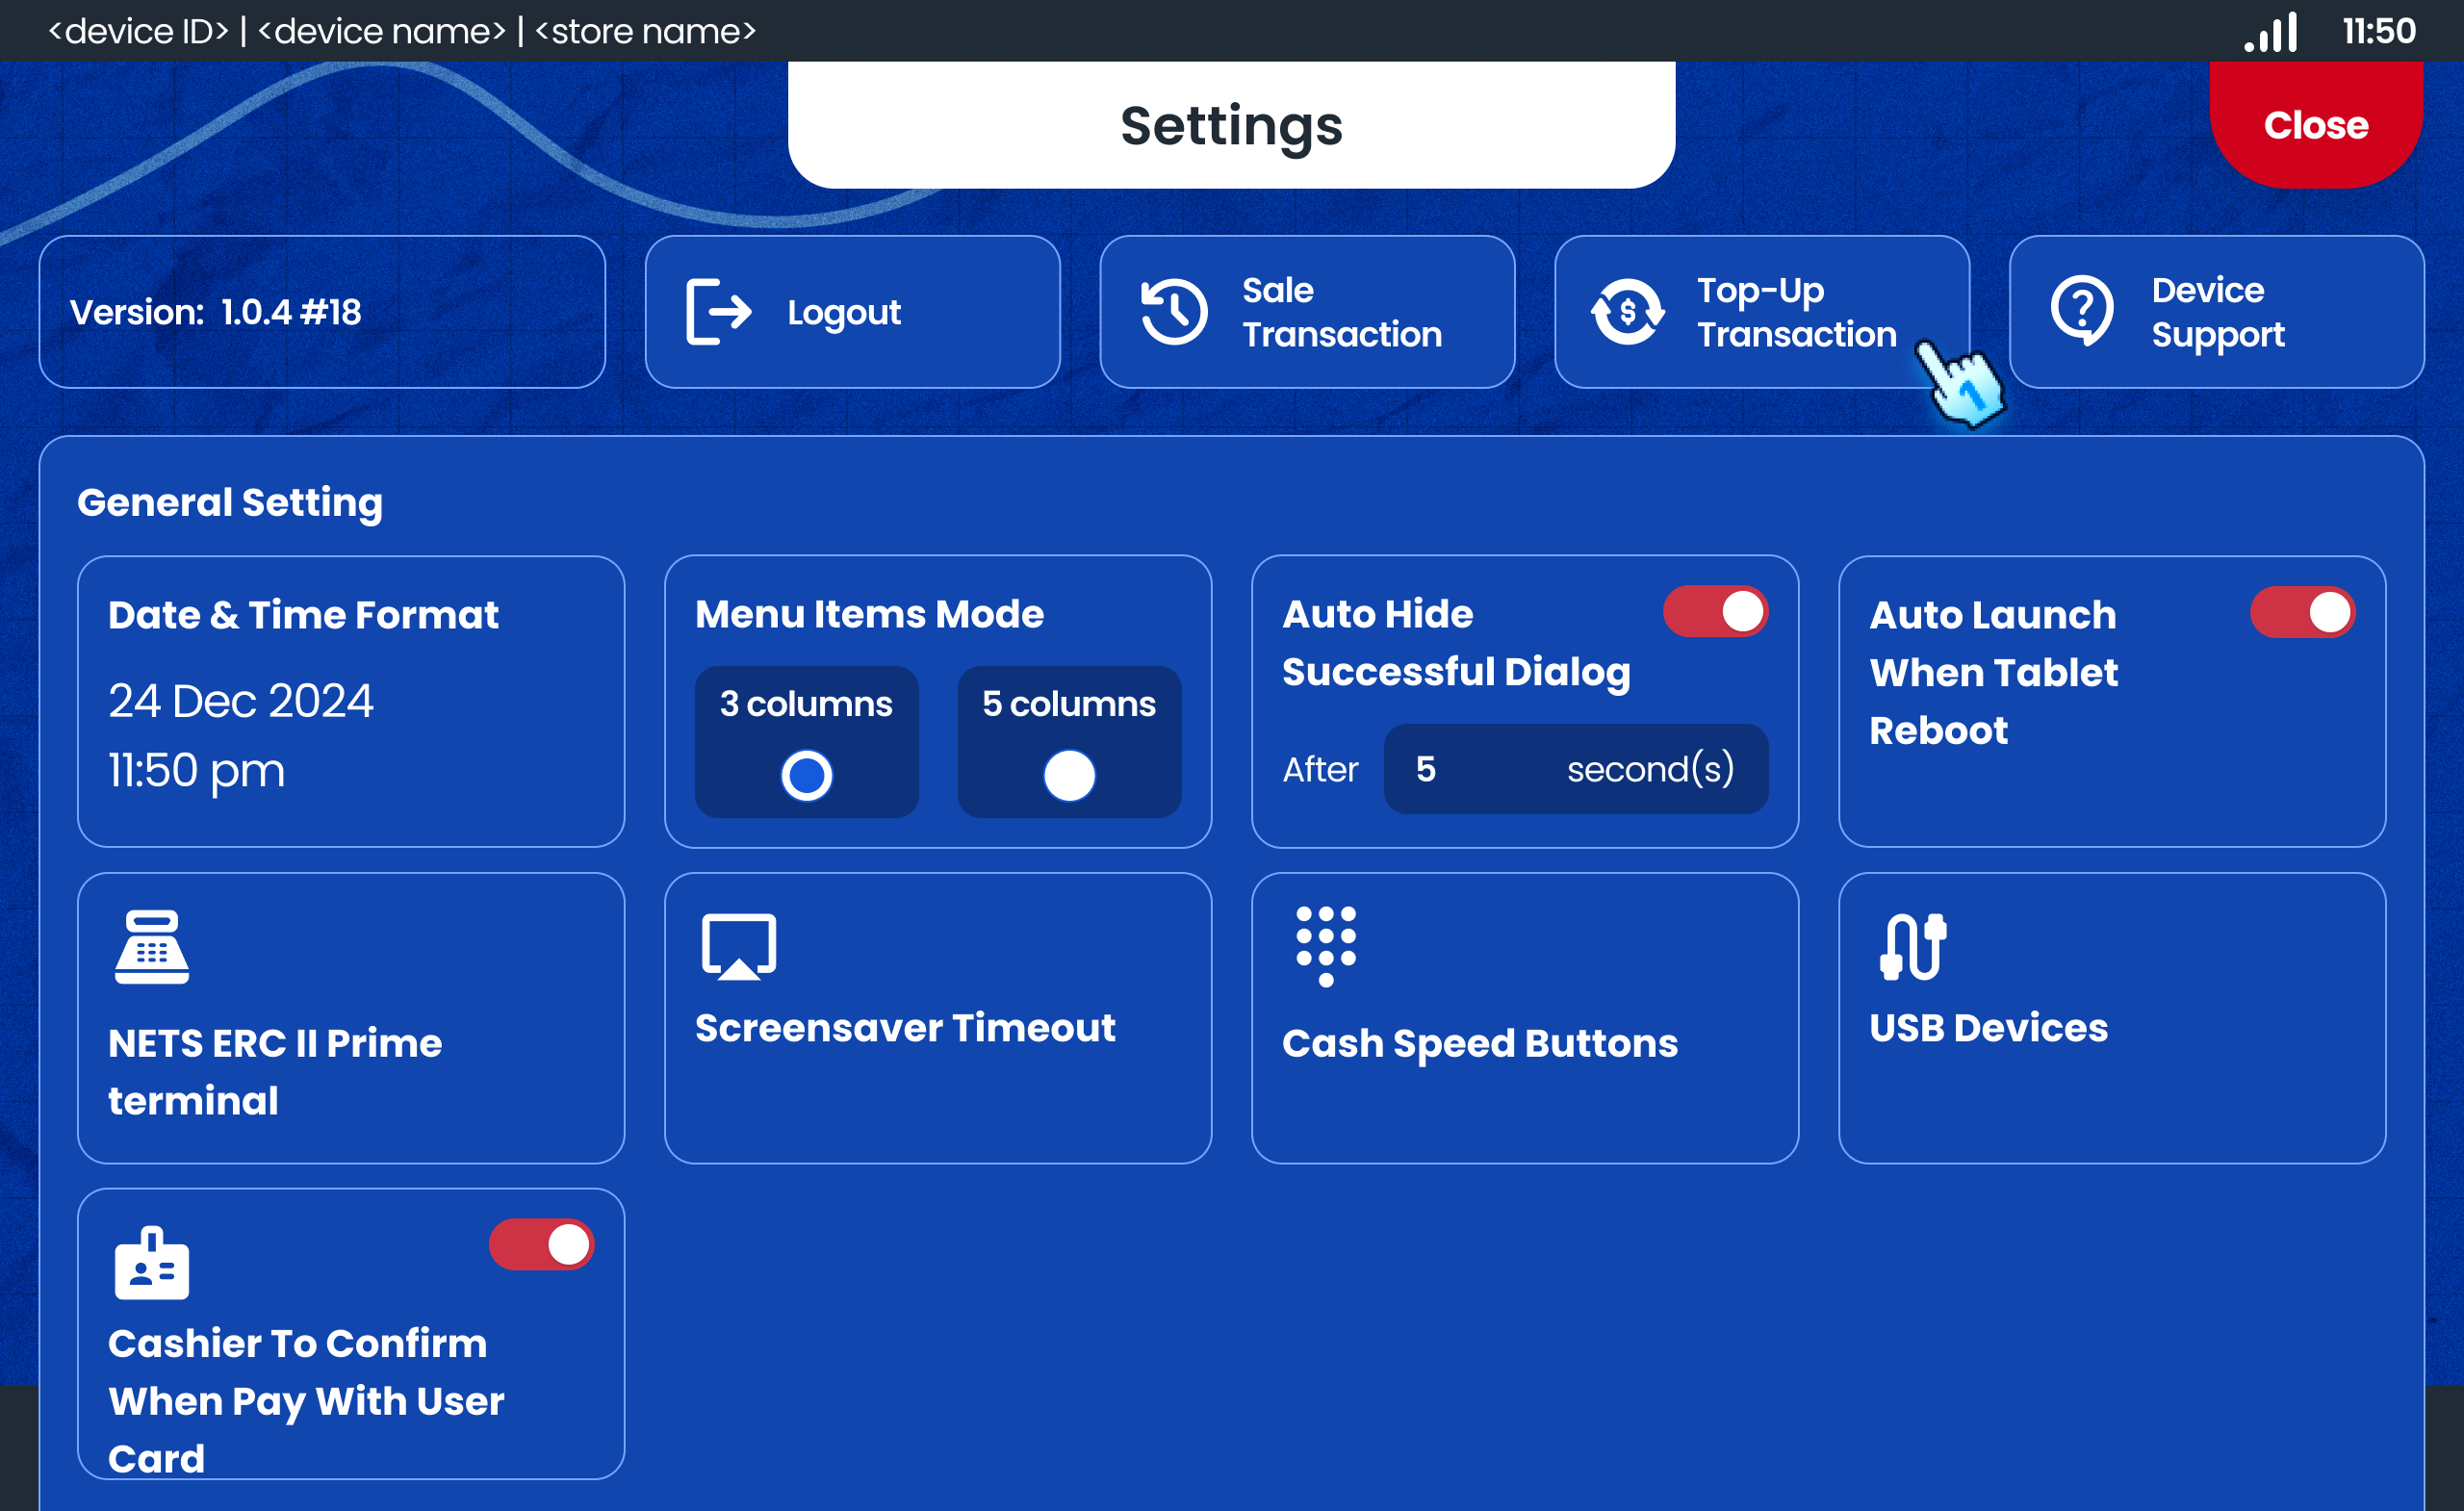
Configuring System Settings
- Change Date and Time Format
- Adjust the date (dd/mm/yyyy) and time (12 hrs or 24 hrs) format as needed.
- Set Menu Items Mode
- Change the menu items display mode between 3 columns and 5 columns.
- Enable/Disable Auto Hide Successful Dialog
- Toggle the auto-hide successful dialog option and set the duration in seconds.
- Enable/Disable Auto Launch on Reboot
- Toggle the auto-launch option to control whether the app launches automatically on tablet reboot.
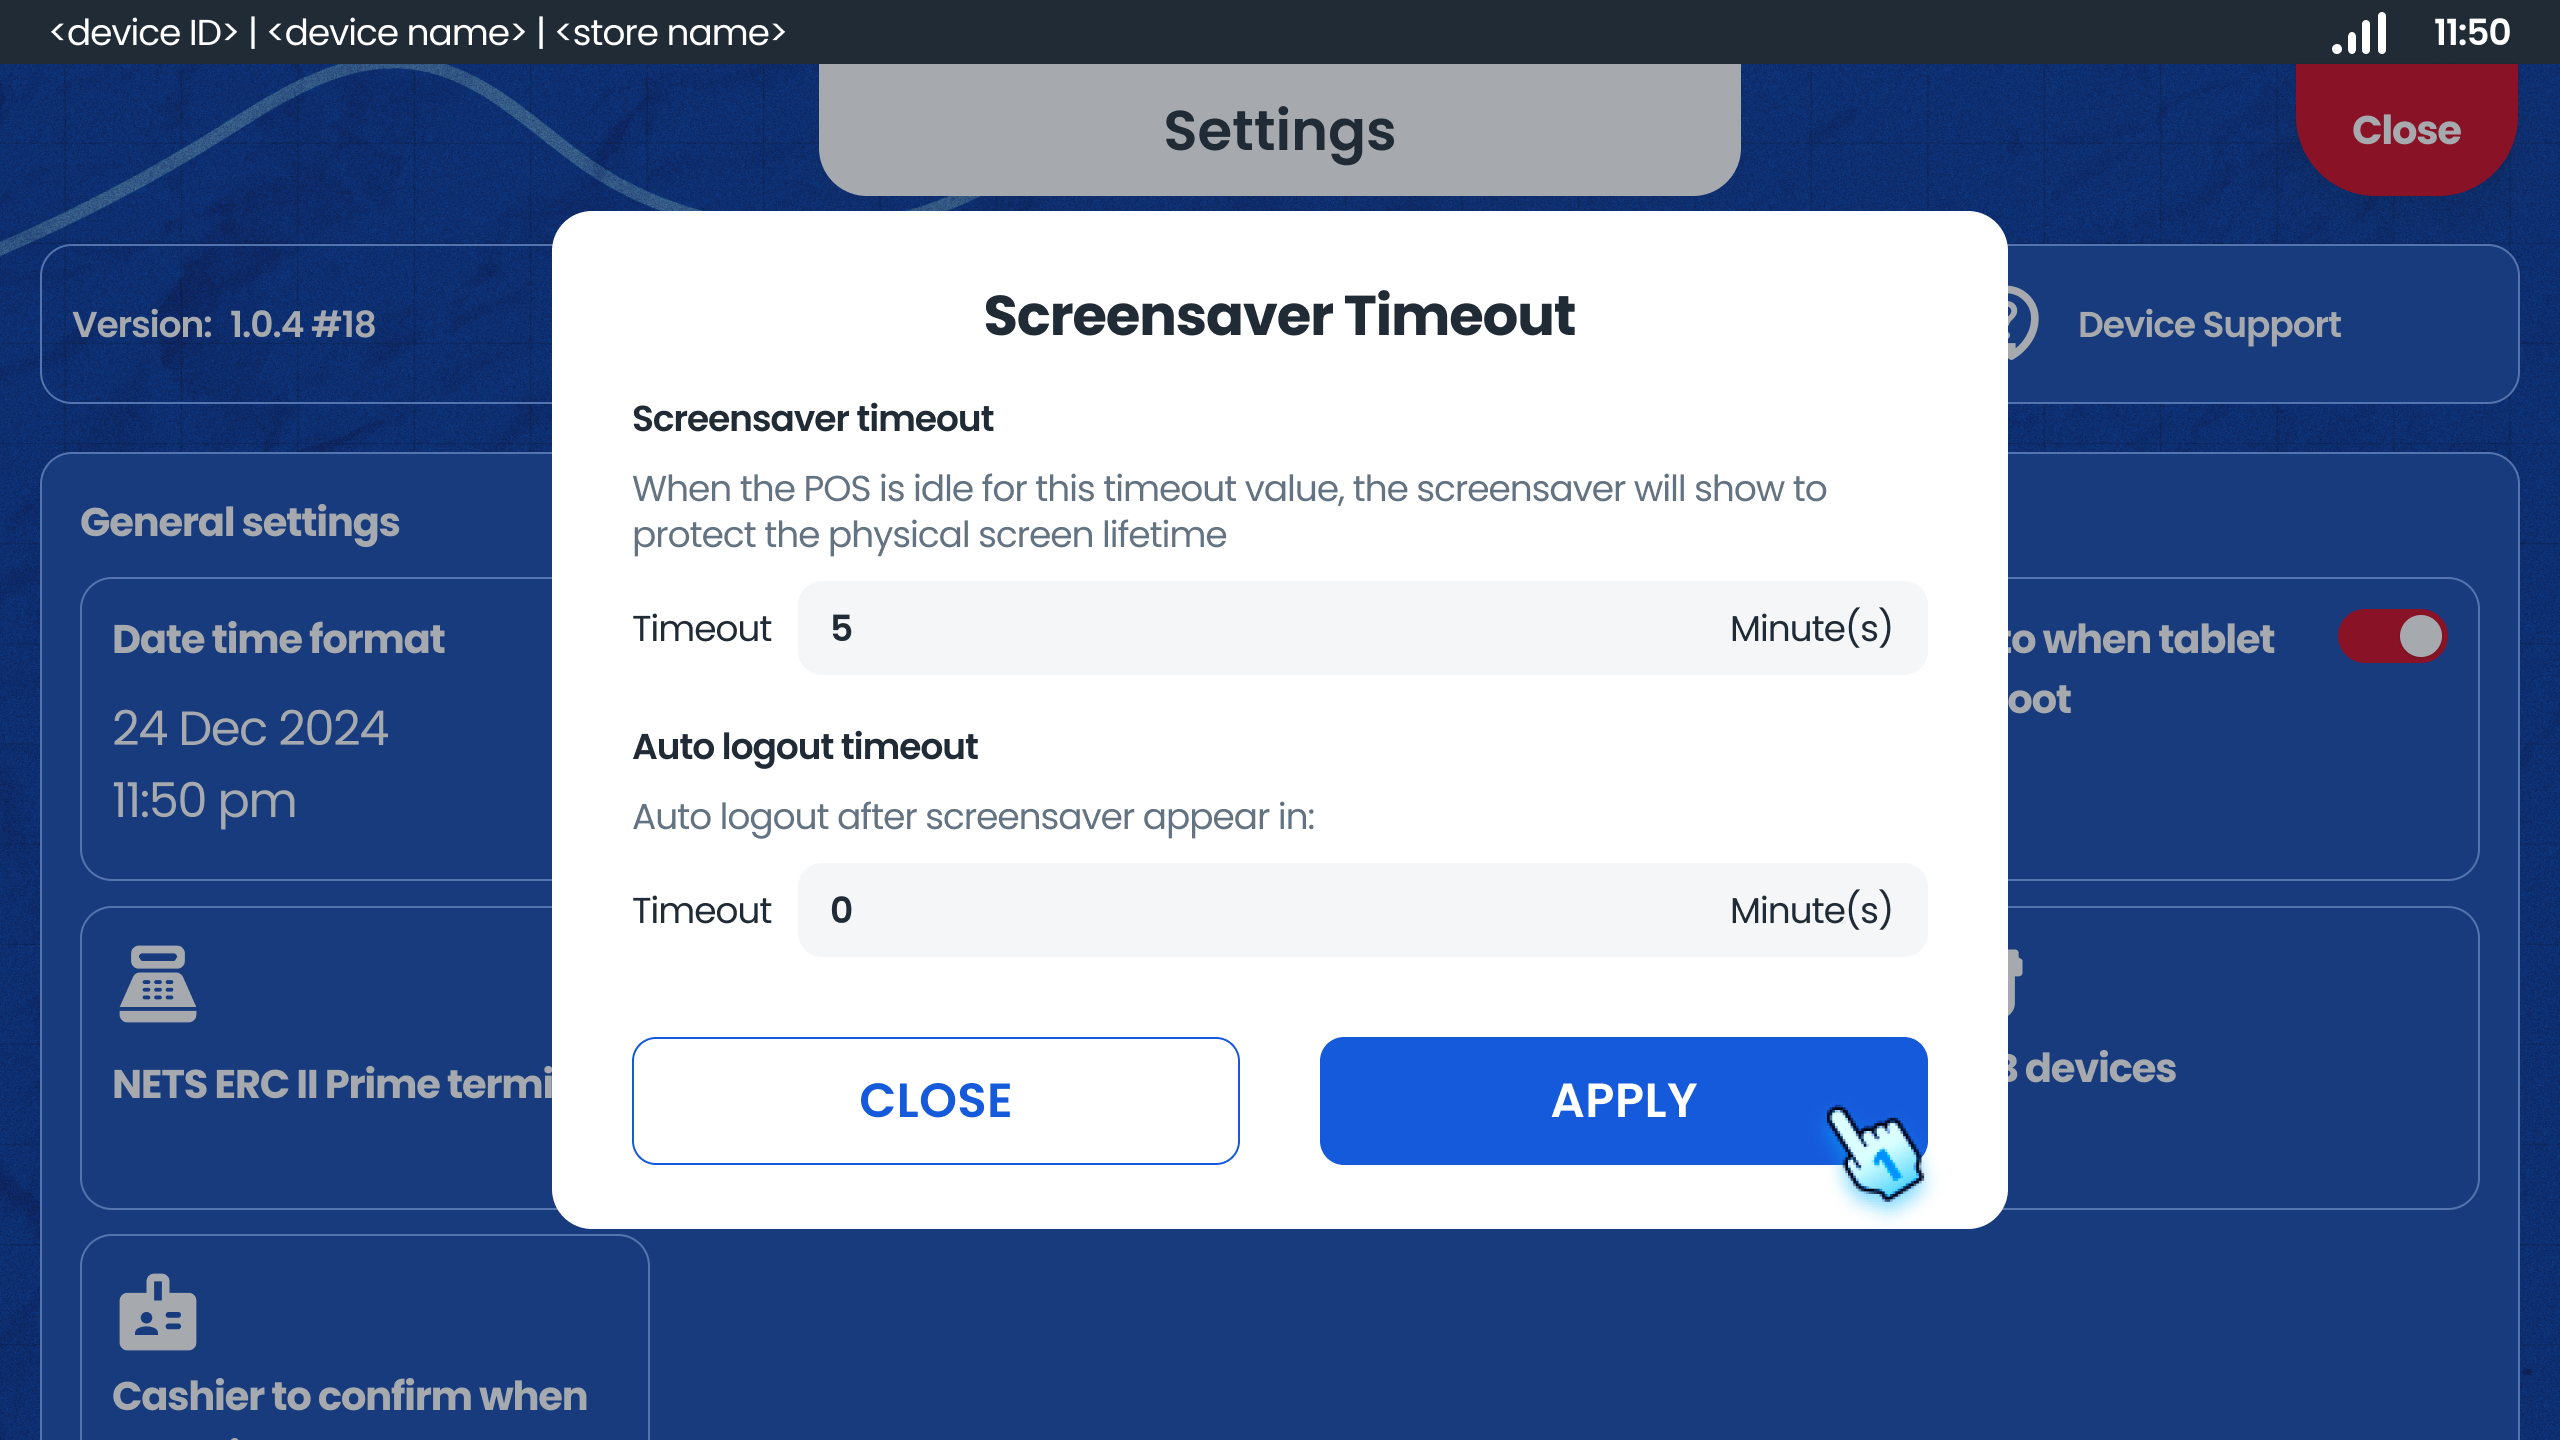
- Set Screen Saver Timeout
- Enter Timeout for Screen Saver and Auto Logout
- Tap "Apply" button to confirm to Configure the screen saver timeout duration to save power.
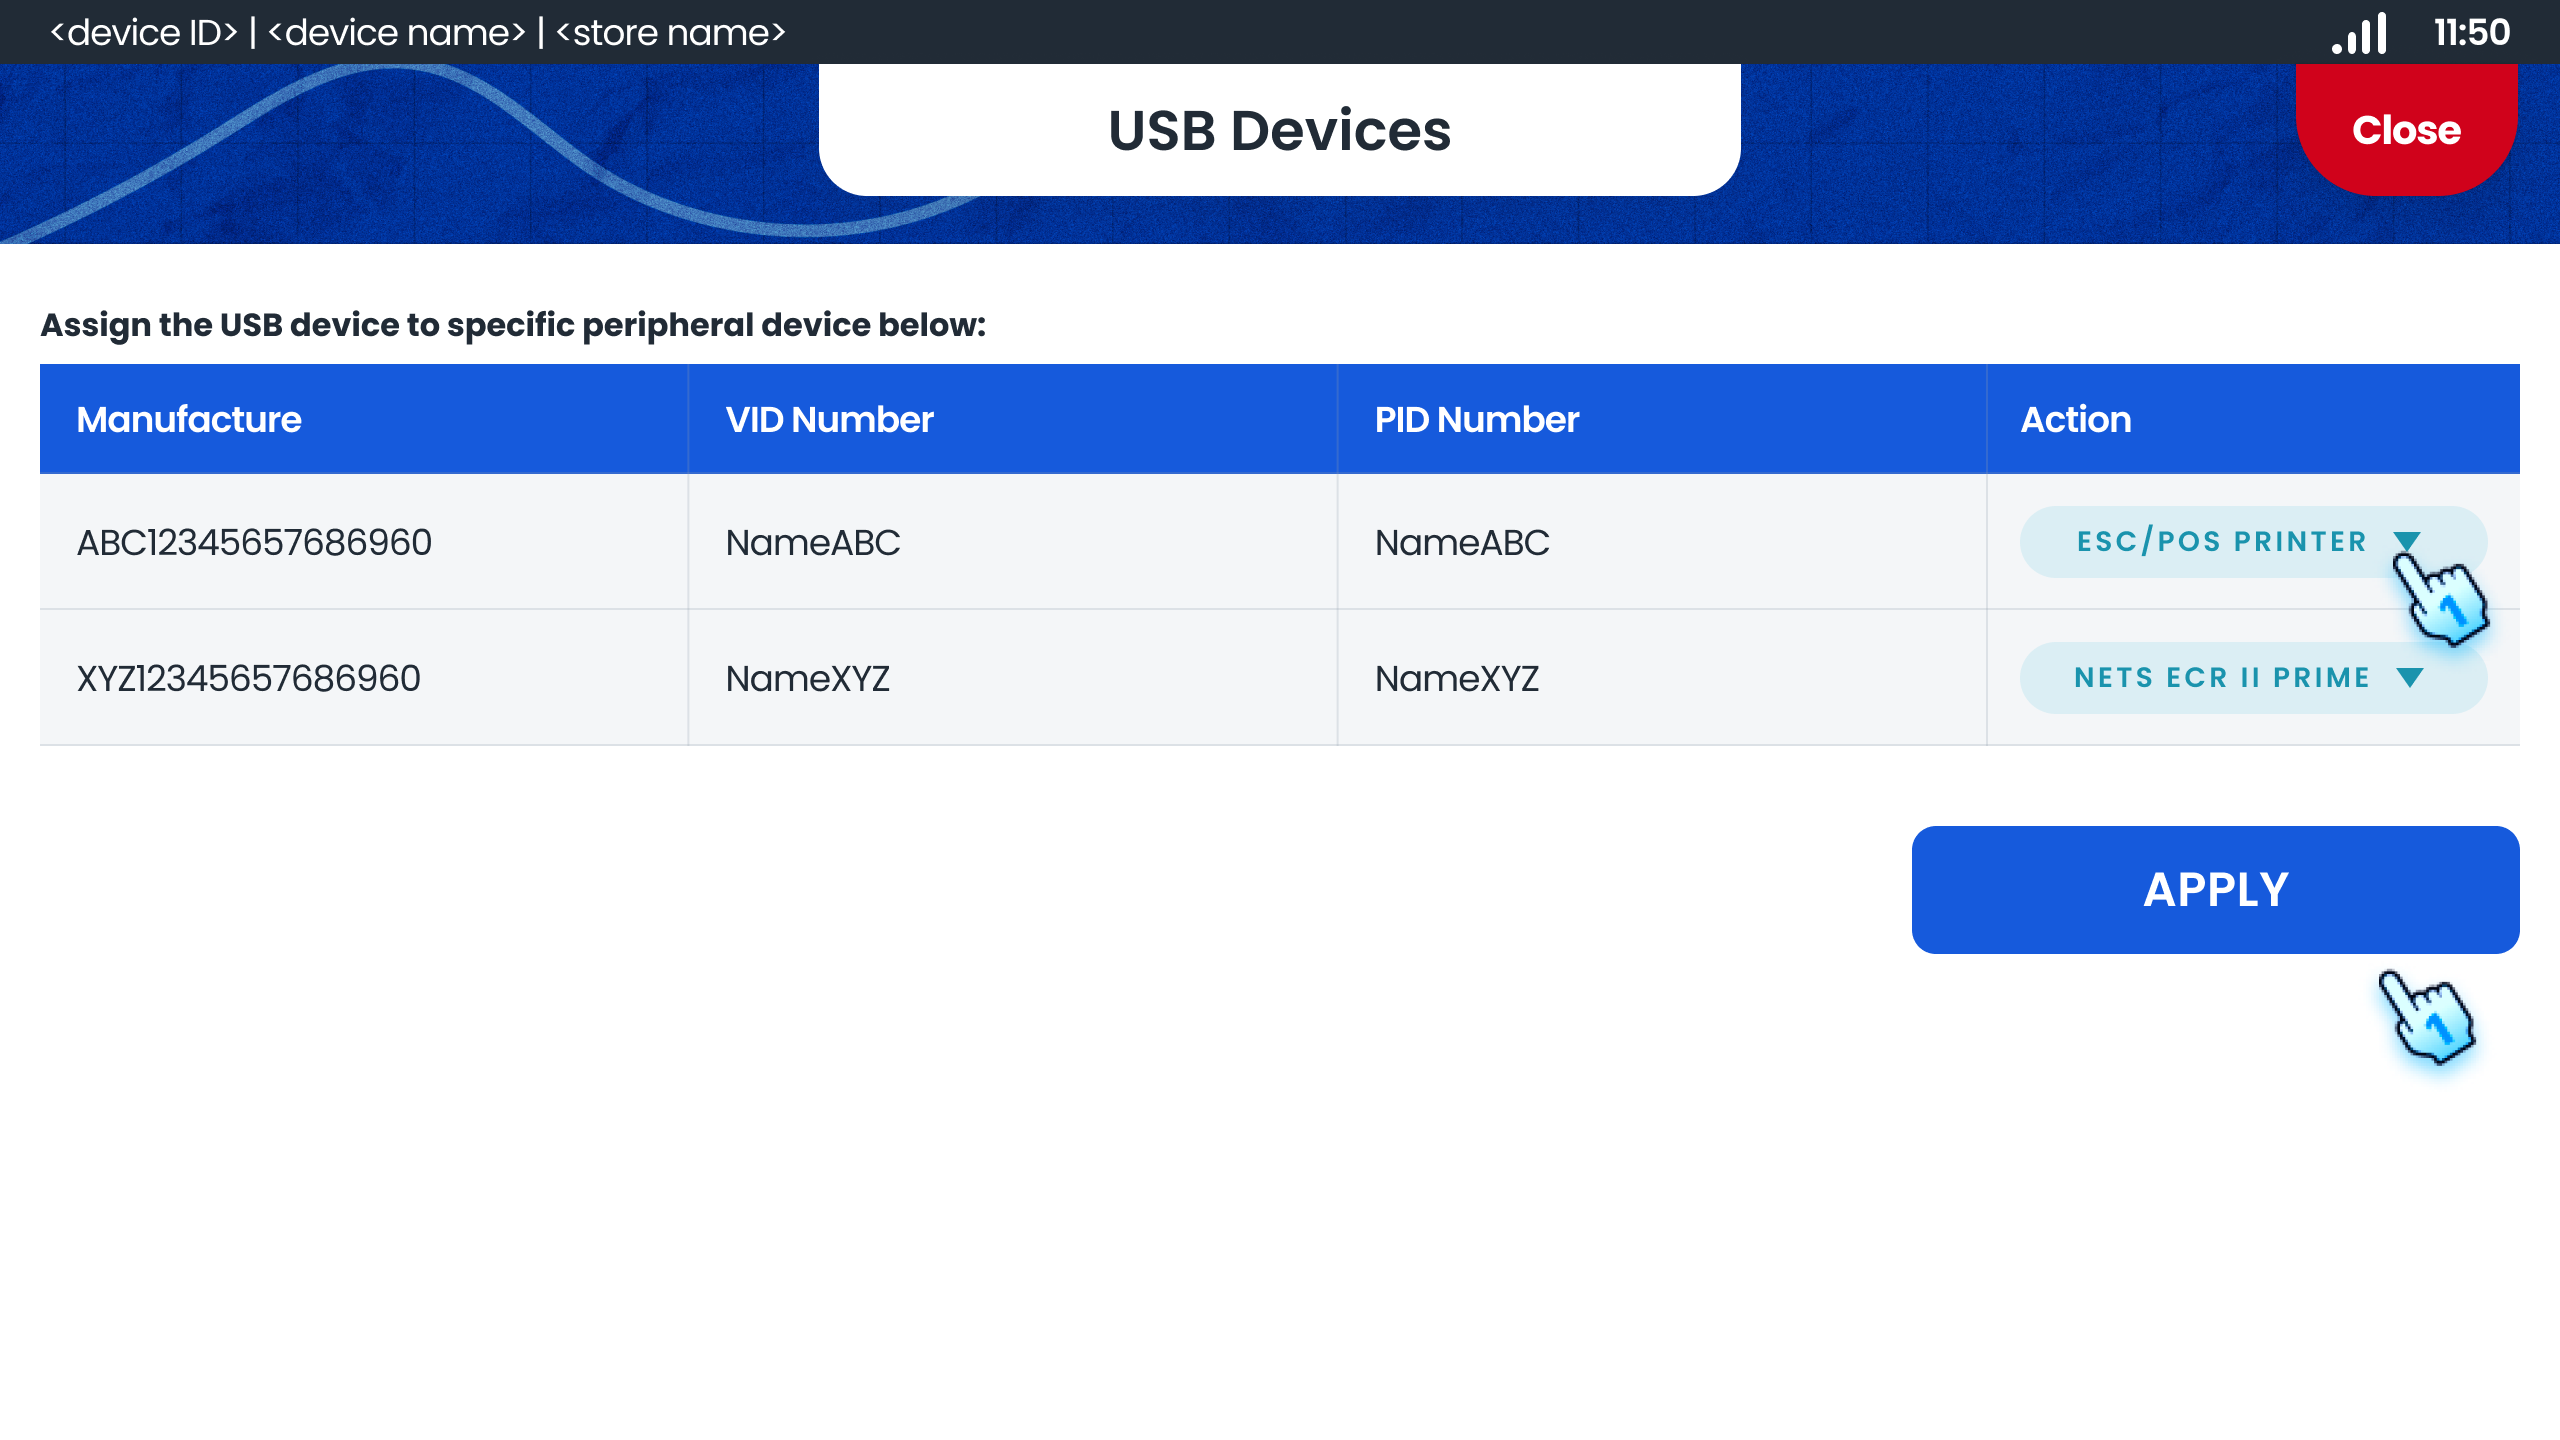
- Manage USB Devices
- Assign USB devices using the drop-down list for peripheral devices.
- Tap "Apply" button to confirm the assignment
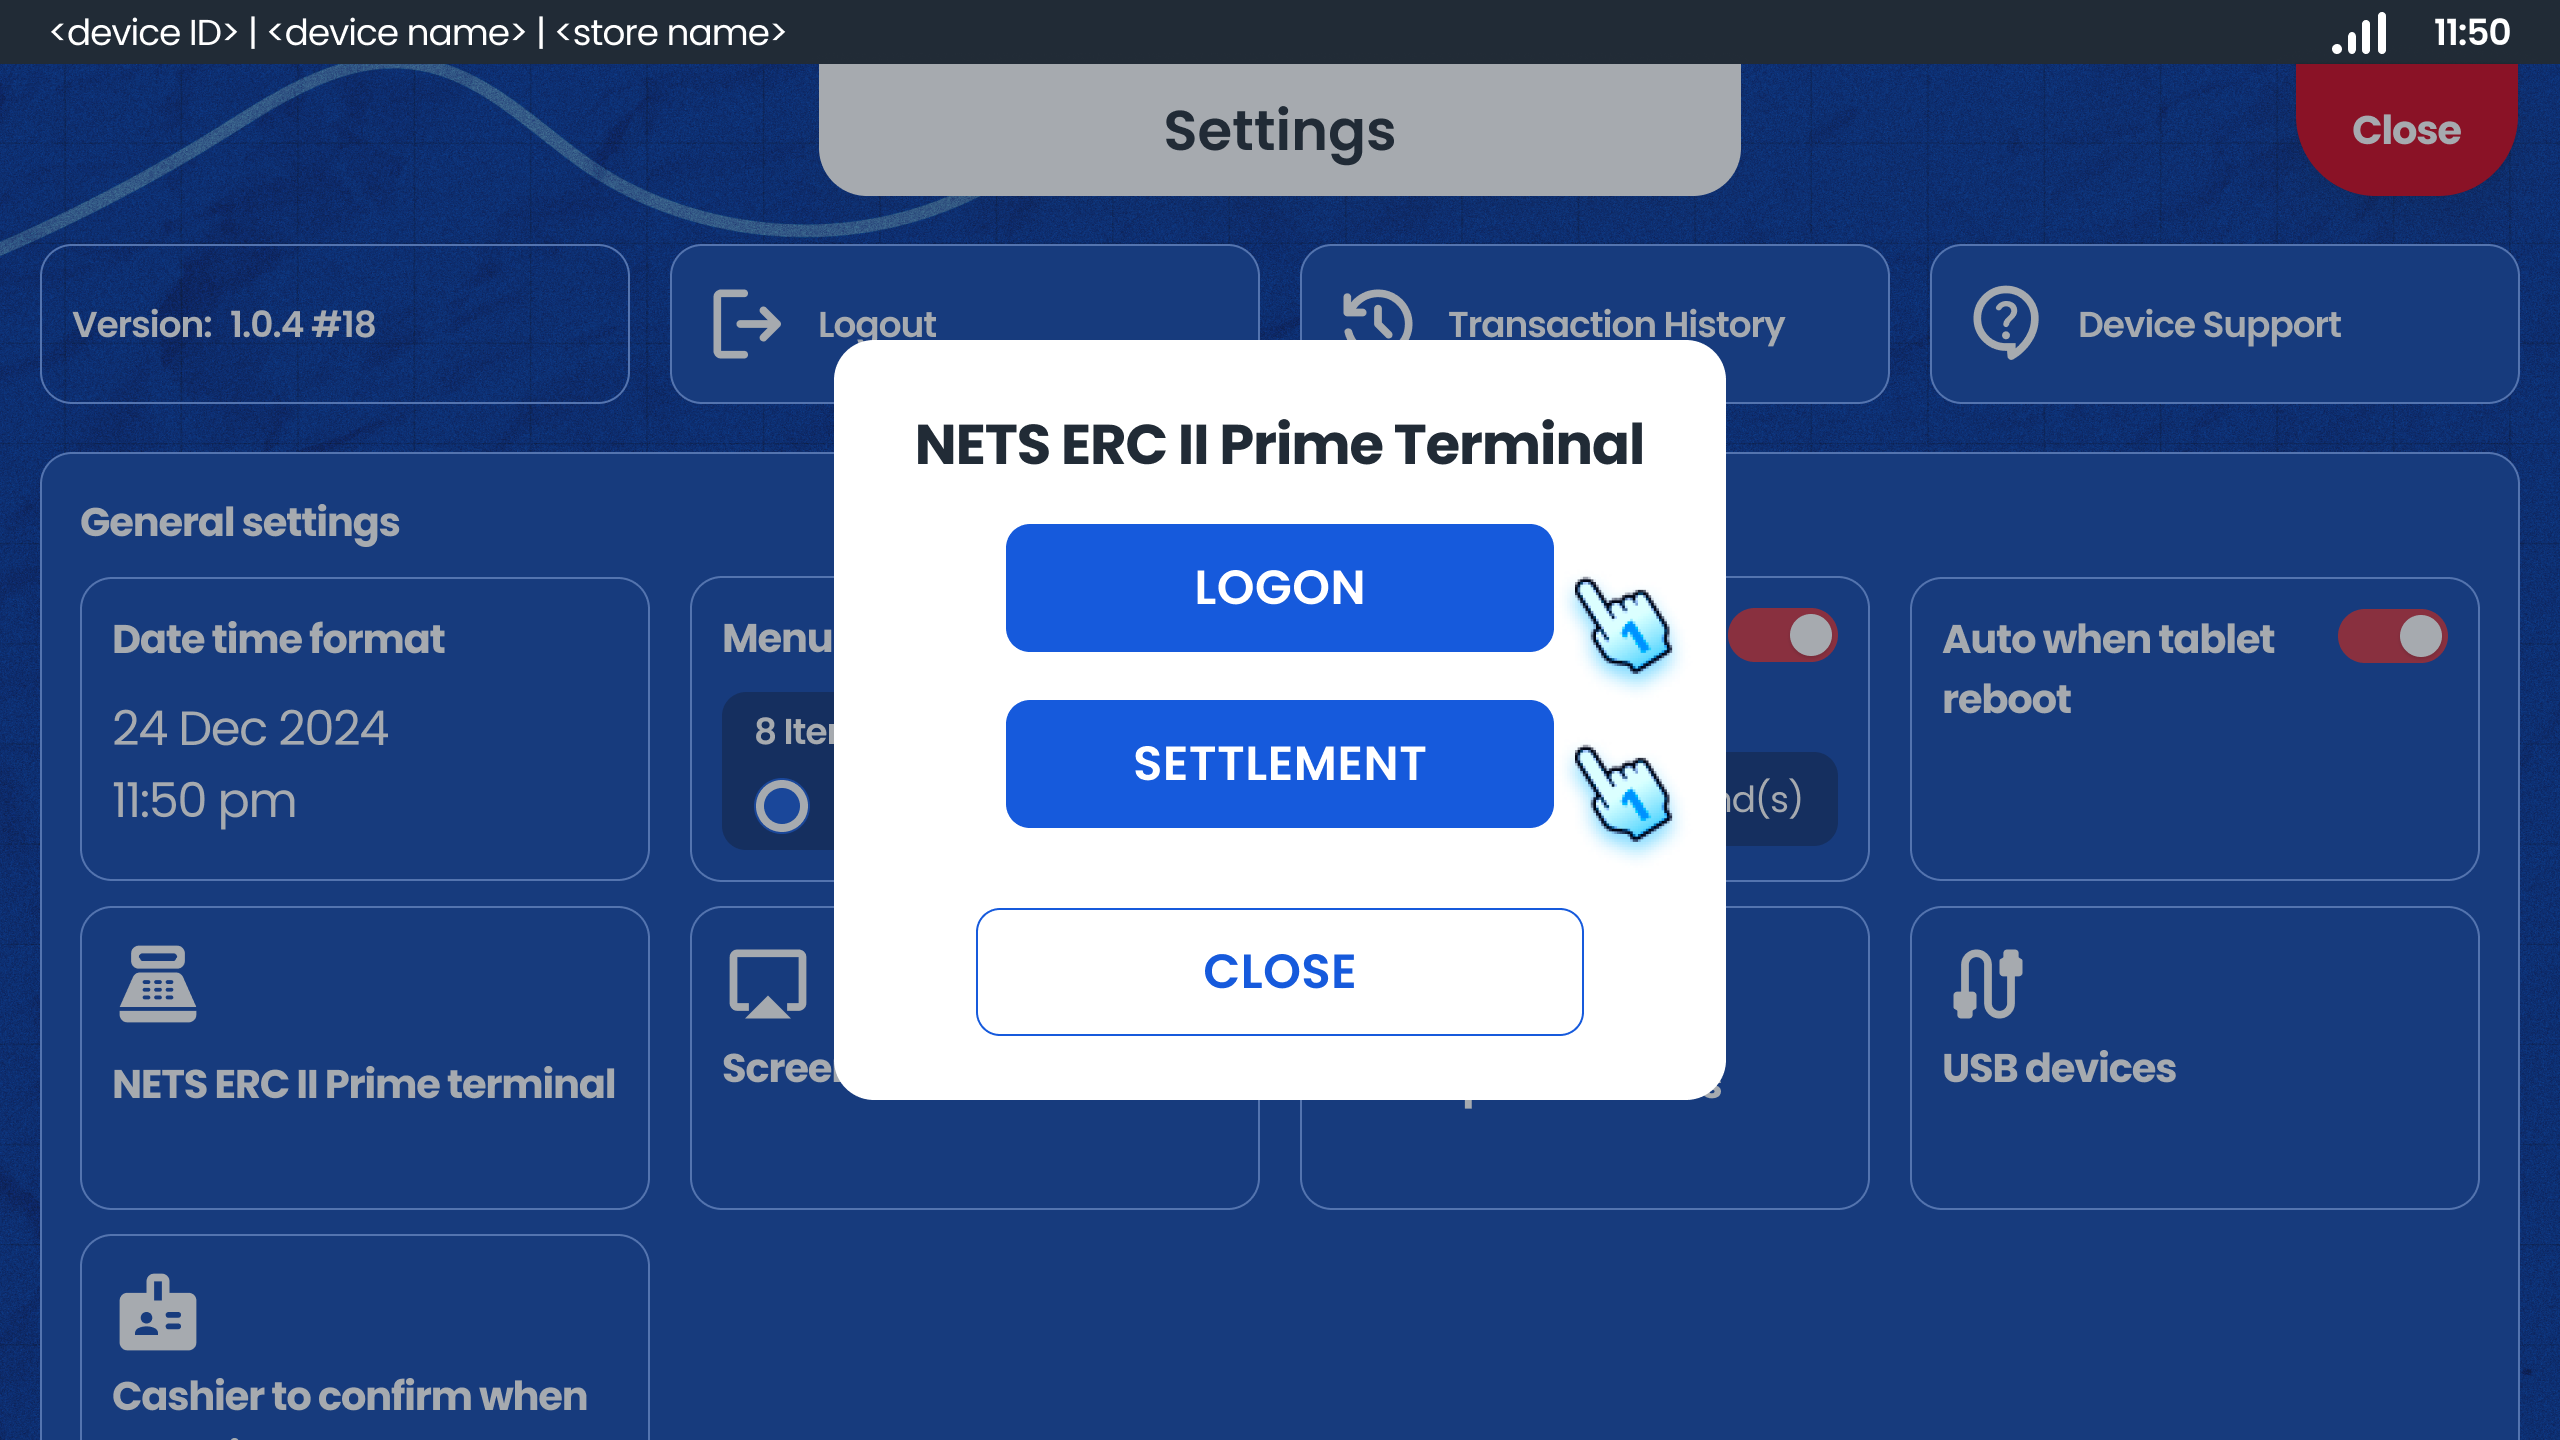
- NETS ECR II Prime Terminal
- Tap "Logon" button to connect NETS ECR II Prime Terminal
- Tap "Settlement" button to settle payment with Terminal
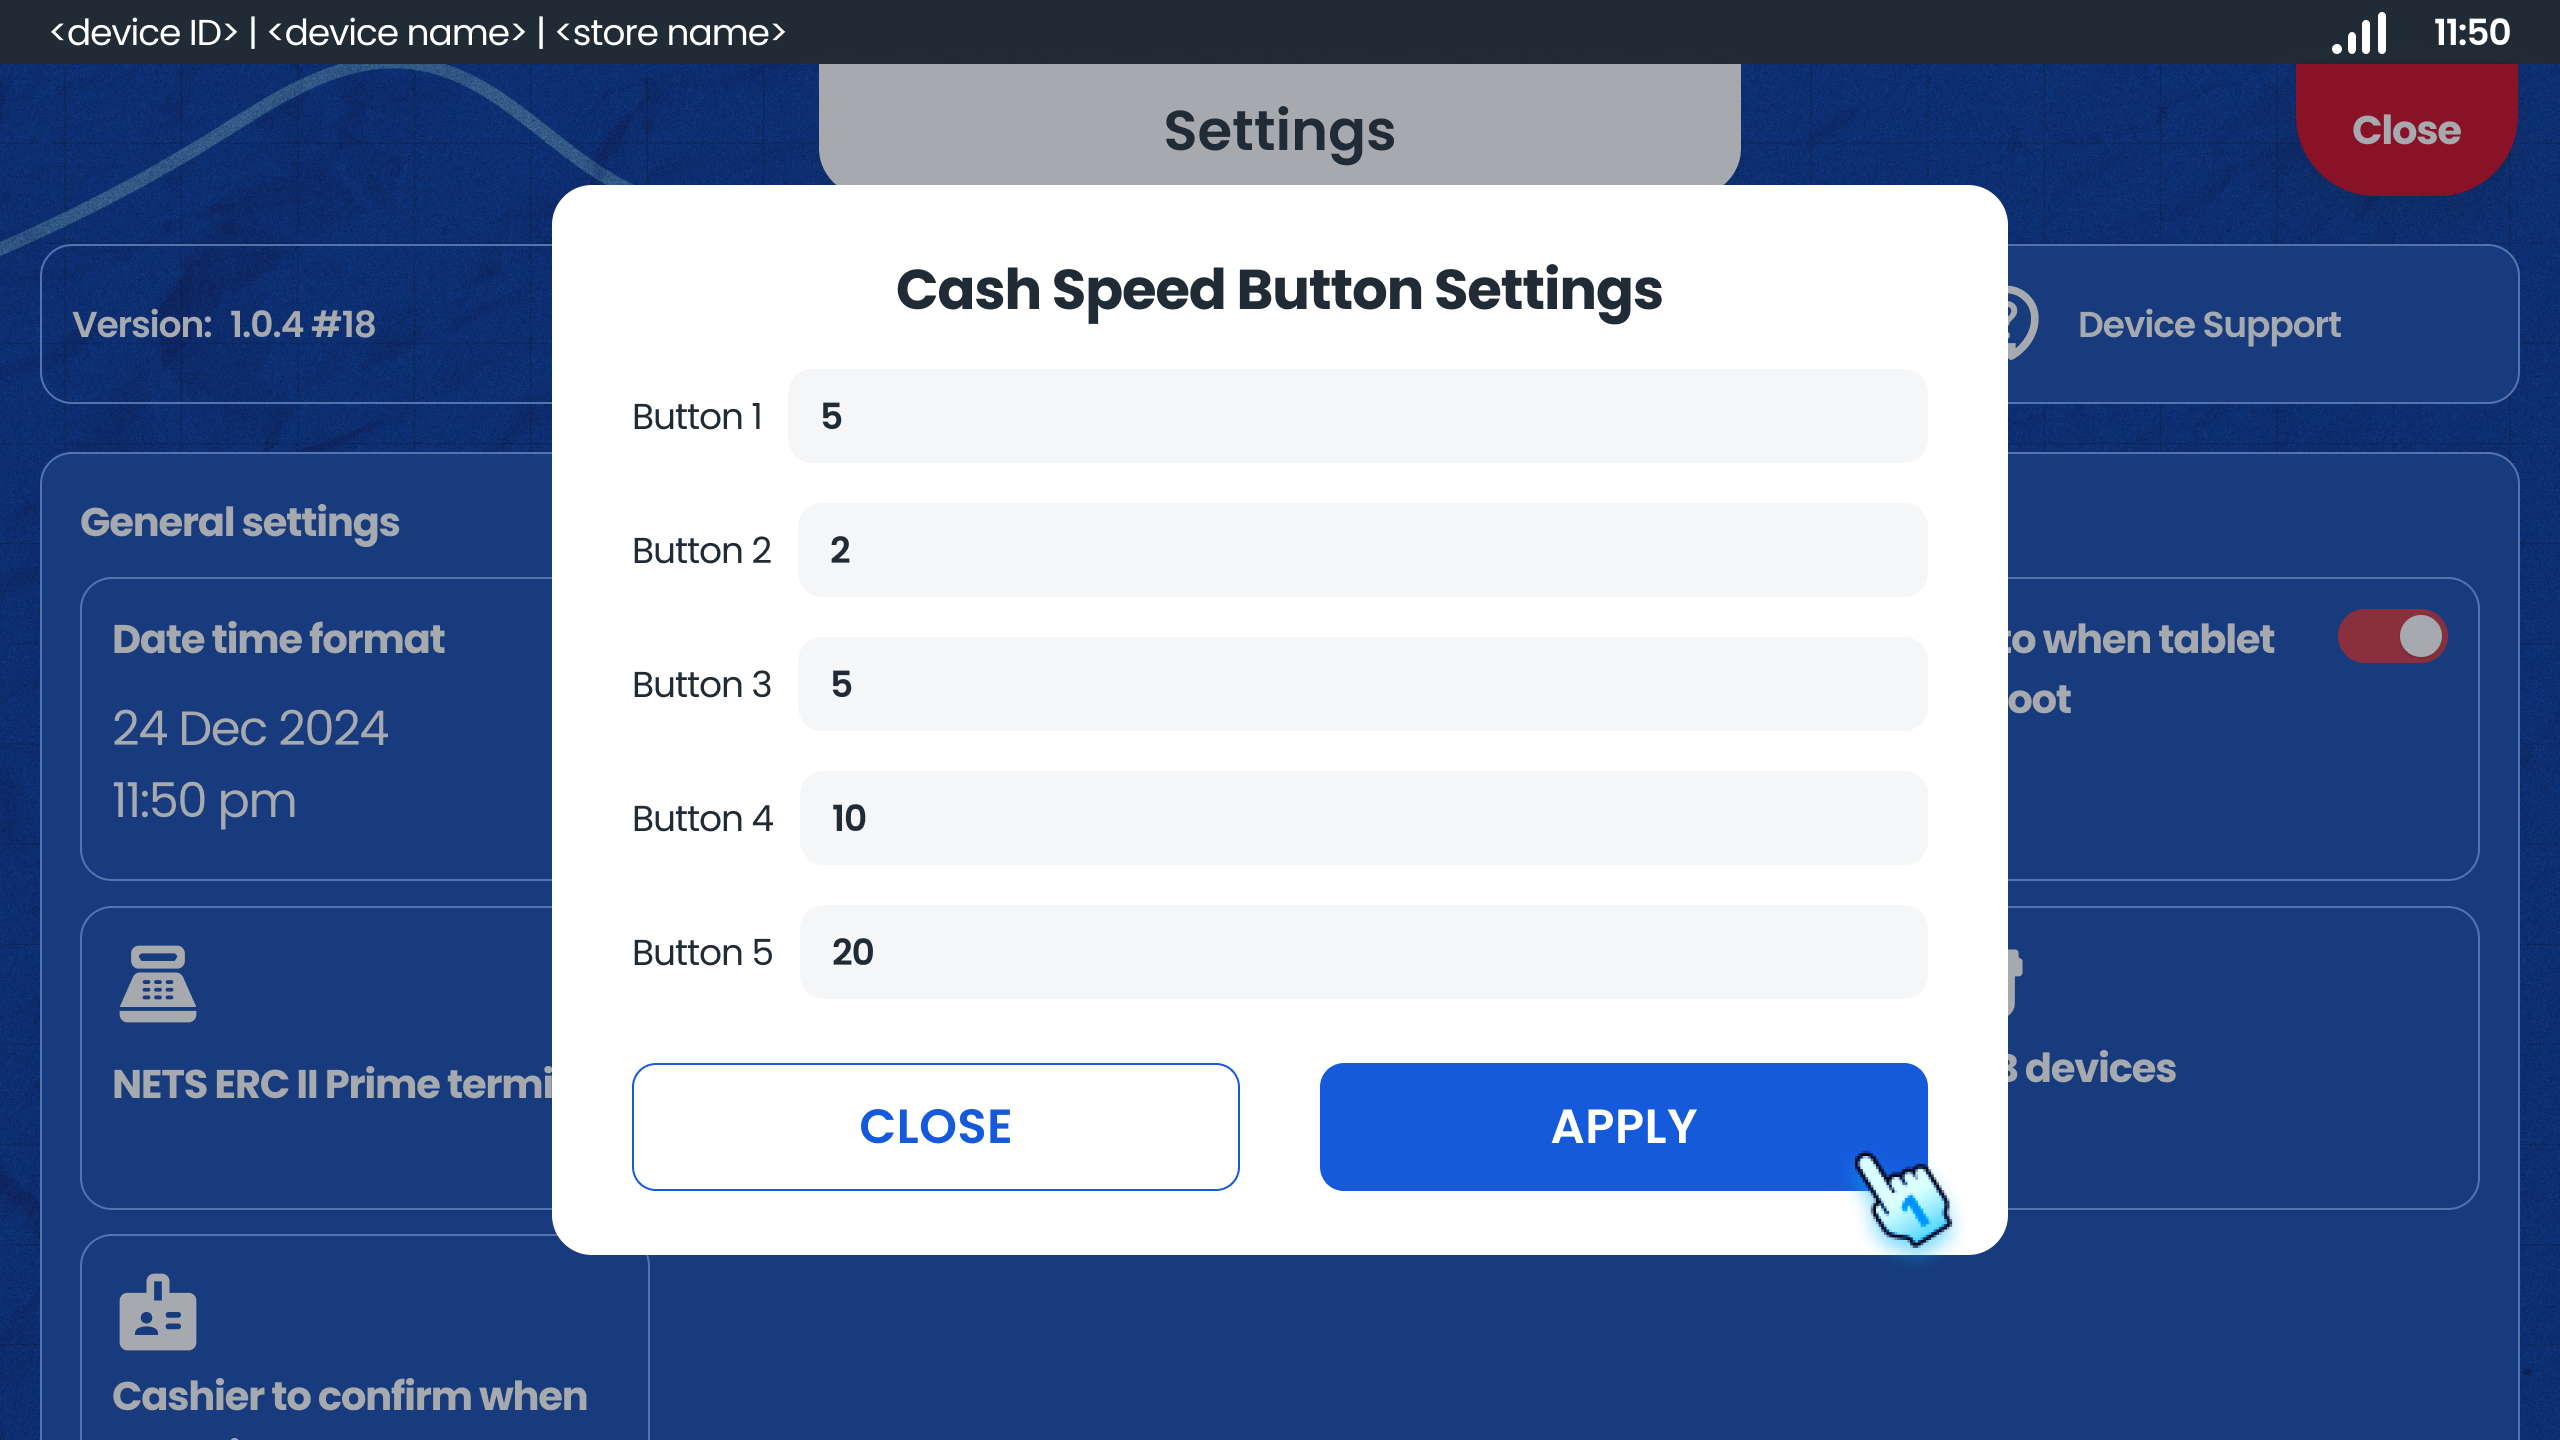
- Set Cash Speed Buttons
- Enter Amount and Tap "Apply" button to Configure cash speed buttons for quick cash transactions.
- Device status
- View the status of devices
- Tap "Send Log Files Now" to send the Log file to Server
- Tap "Refresh" button to refresh the record
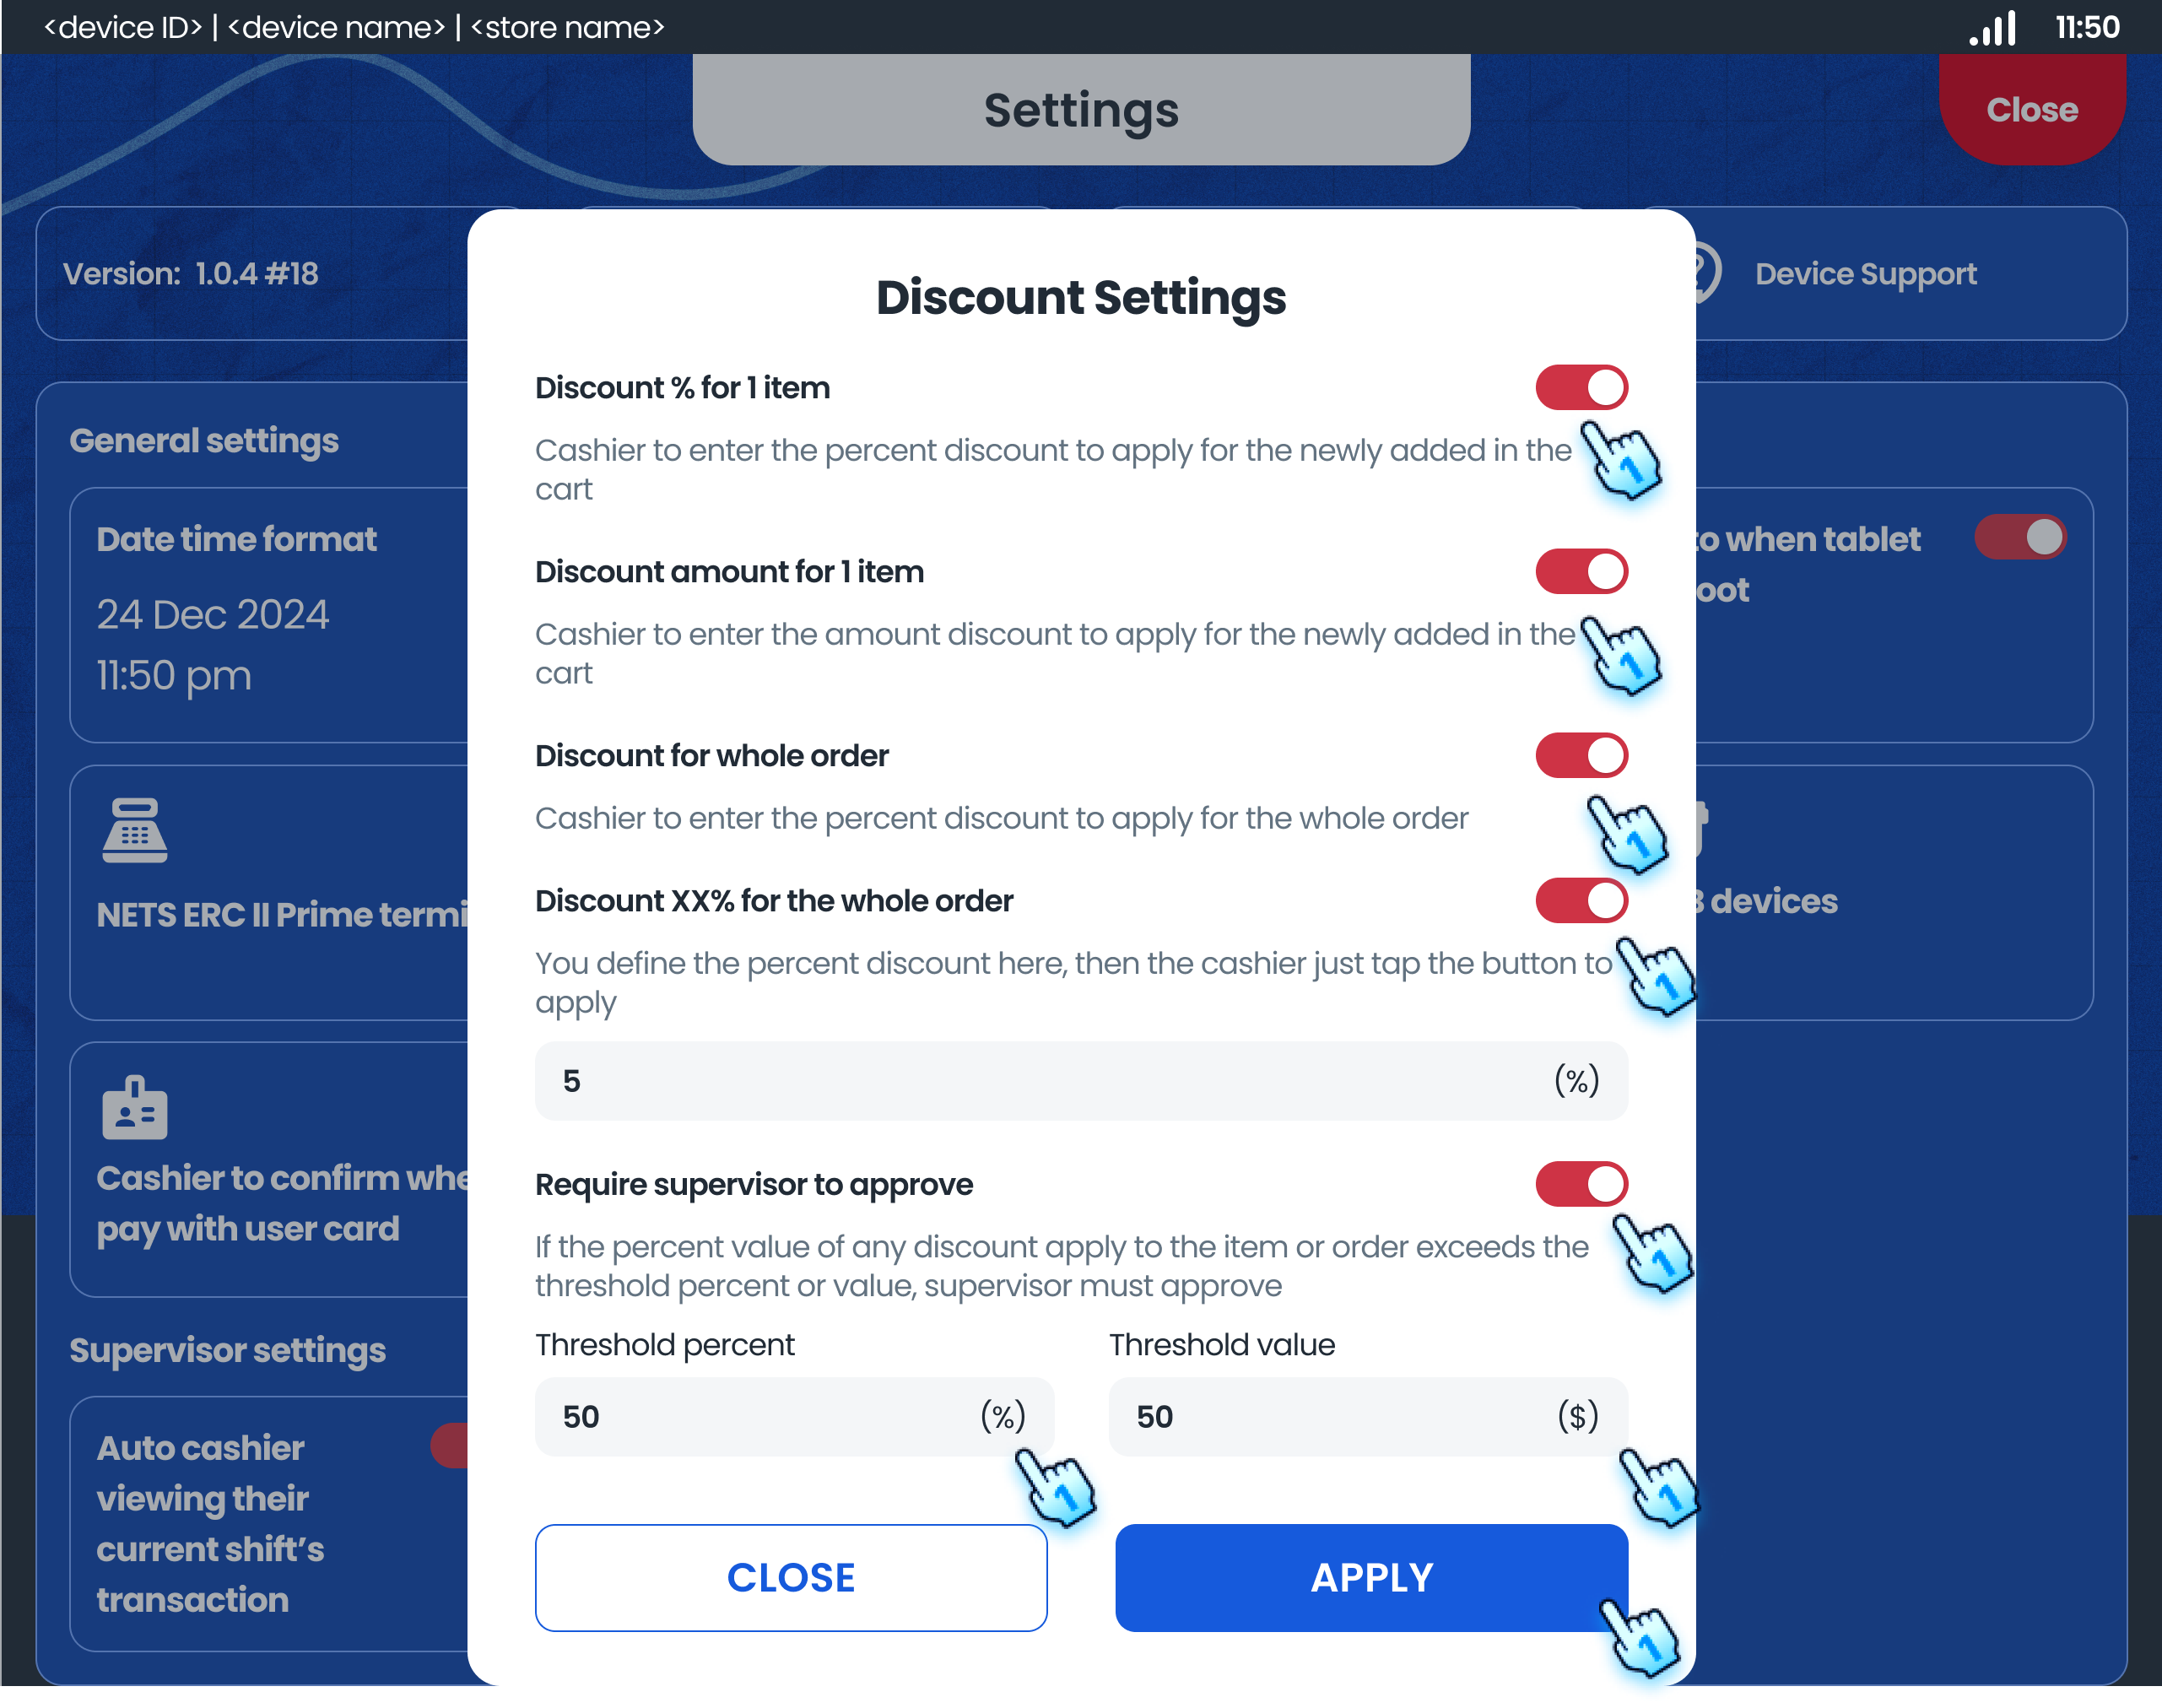
- Discount Setting
- Toggle the Discount Types which will be applied
- For discount XX% for the whole order, enter the discount value (%)
- Toggle Require supervisor to approve and enter Threshold percent and Threshold value for payments exceed threshold which need to have the approval
- Tap "Apply" button to confirm the setting
- Smart Buddy Offline Transaction Settlement
- Tap on the card will process settlement for Offline transaction from Smart Buddy
- Offline Mode Toggle
- Toggle On/Off to enable/ disable Offline mode
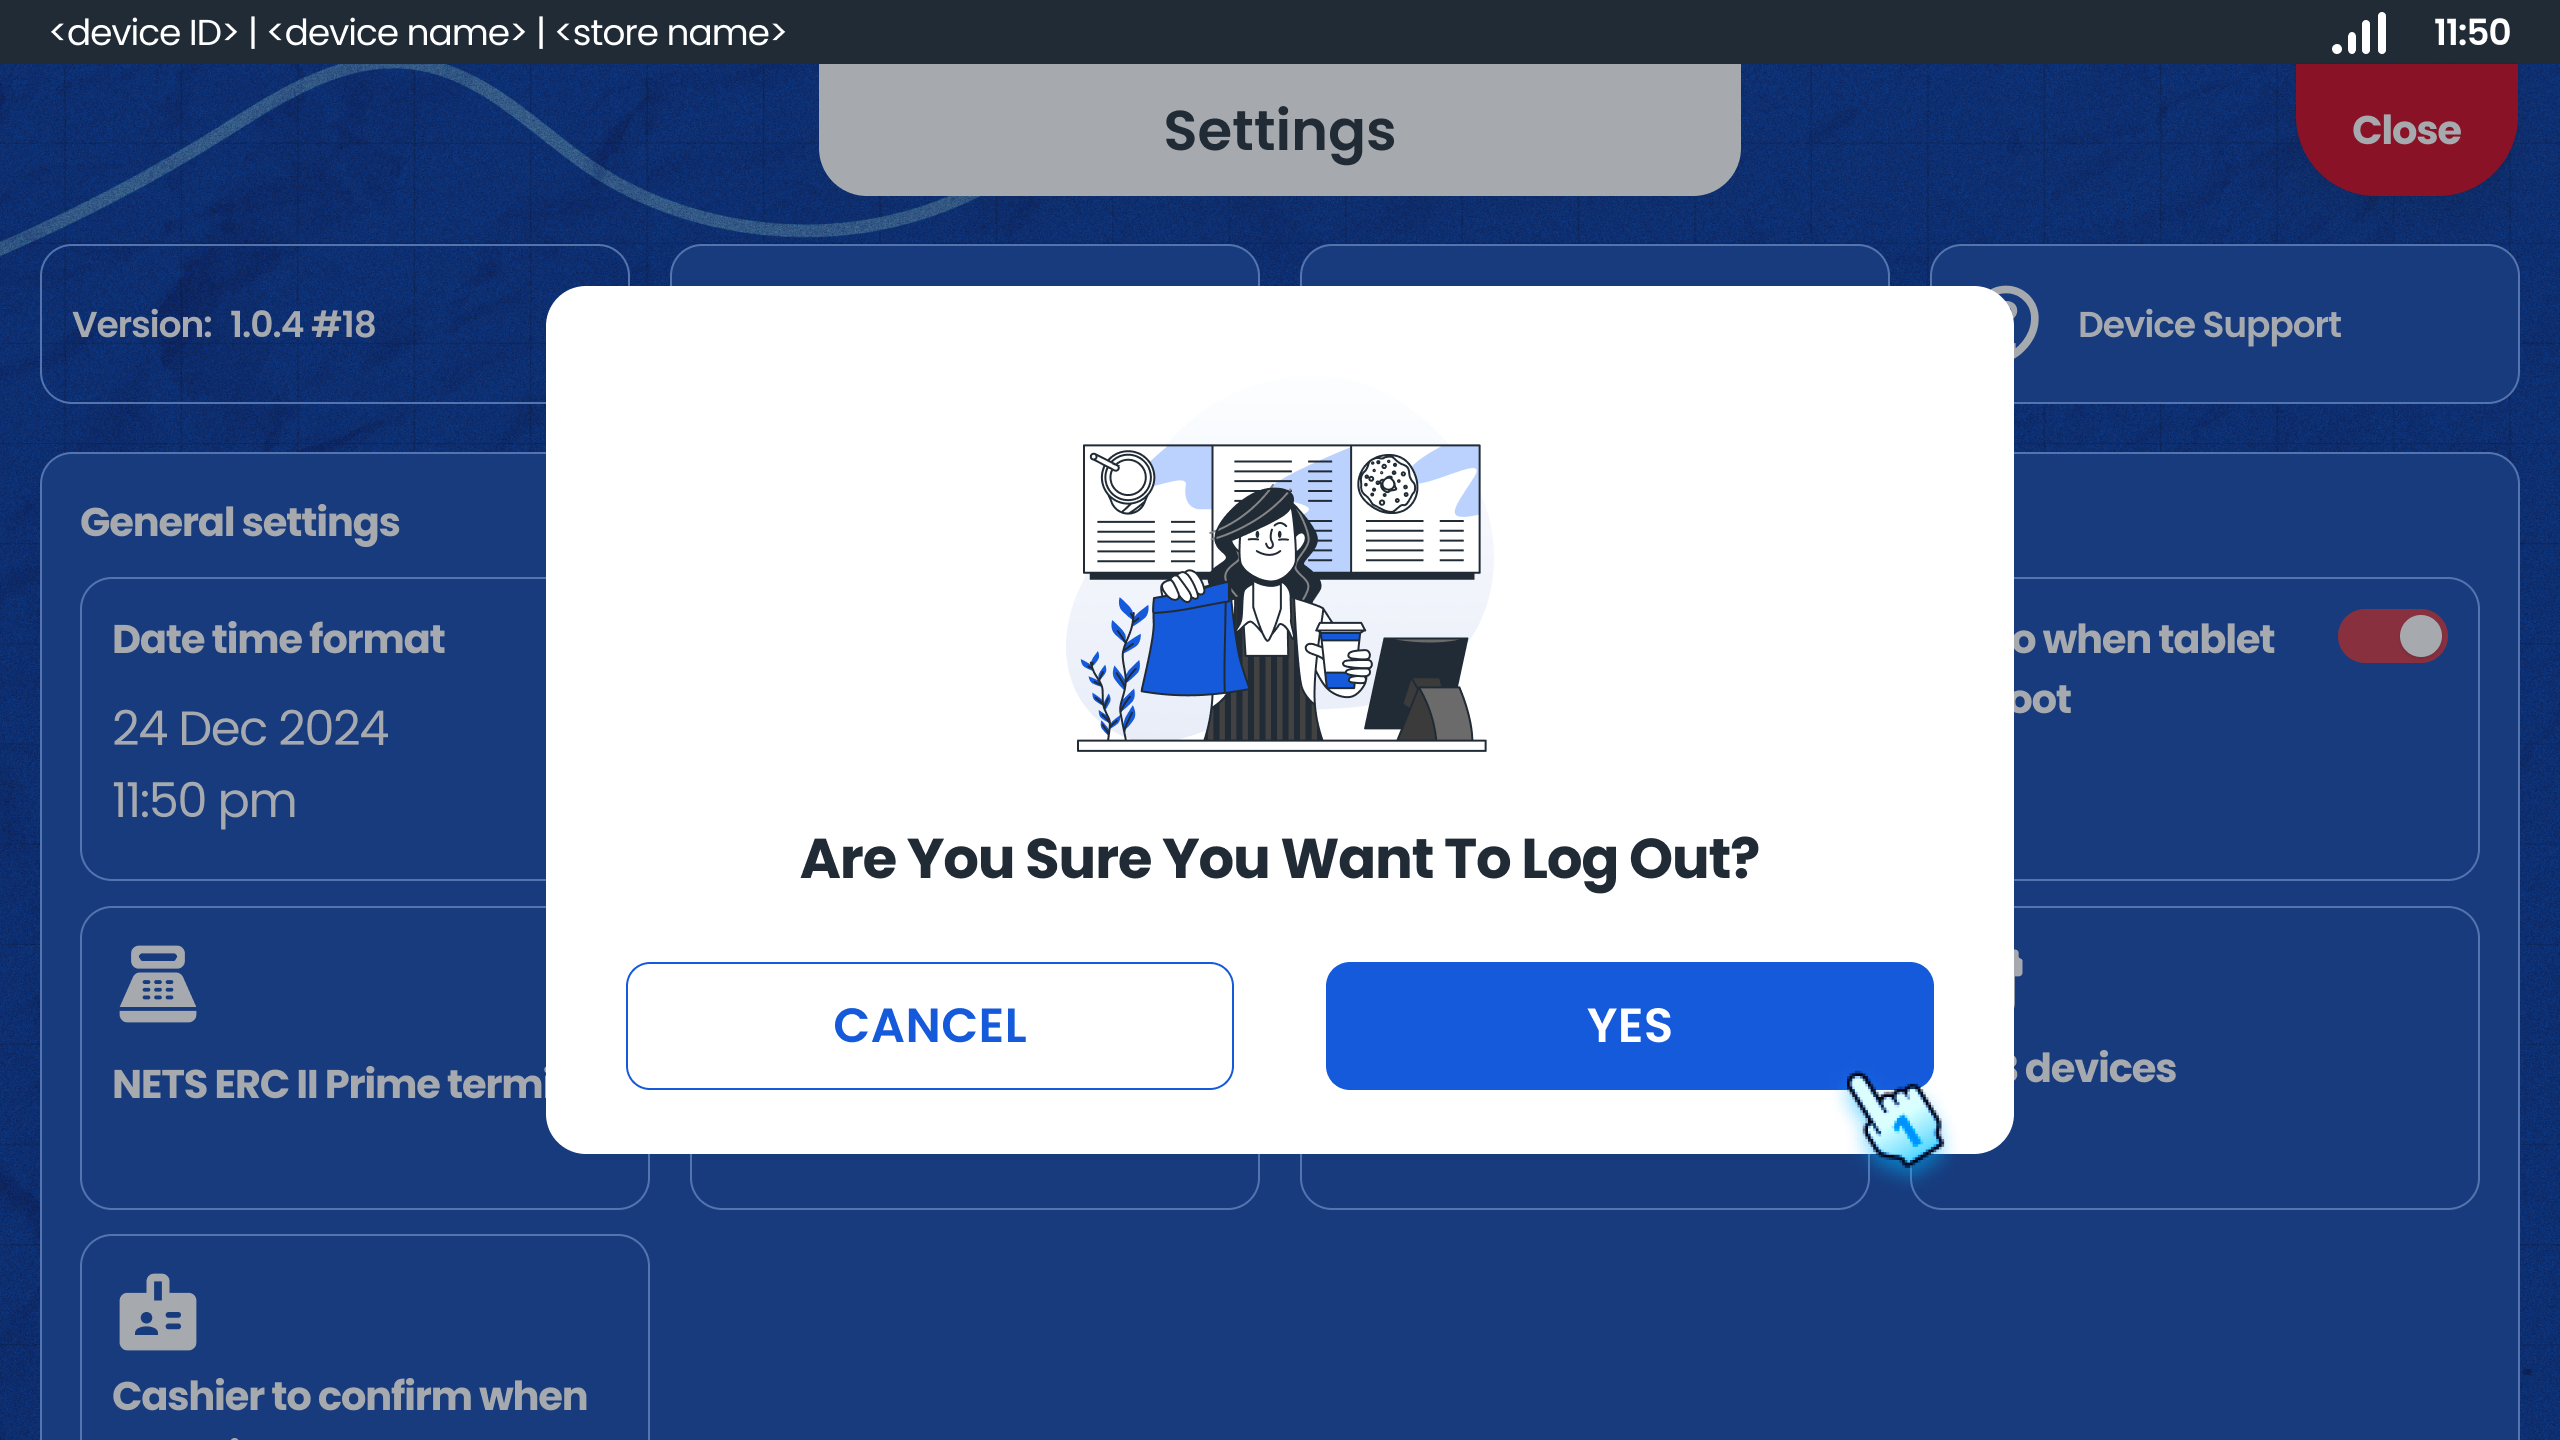
- Logout
- Tap "Yes" button in the pop-up dialog to confirm the Logout
#
Conclusion
The top-up setting module allows cashiers and supervisors to customize the system settings, manage transaction history, and configure payment preferences, ensuring optimal functionality and user experience.
#
Screen flow
#
Access Top-up Setting
#
Managing Transaction History
#
Managing Sales Transaction History


#
Configuring System Settings