#
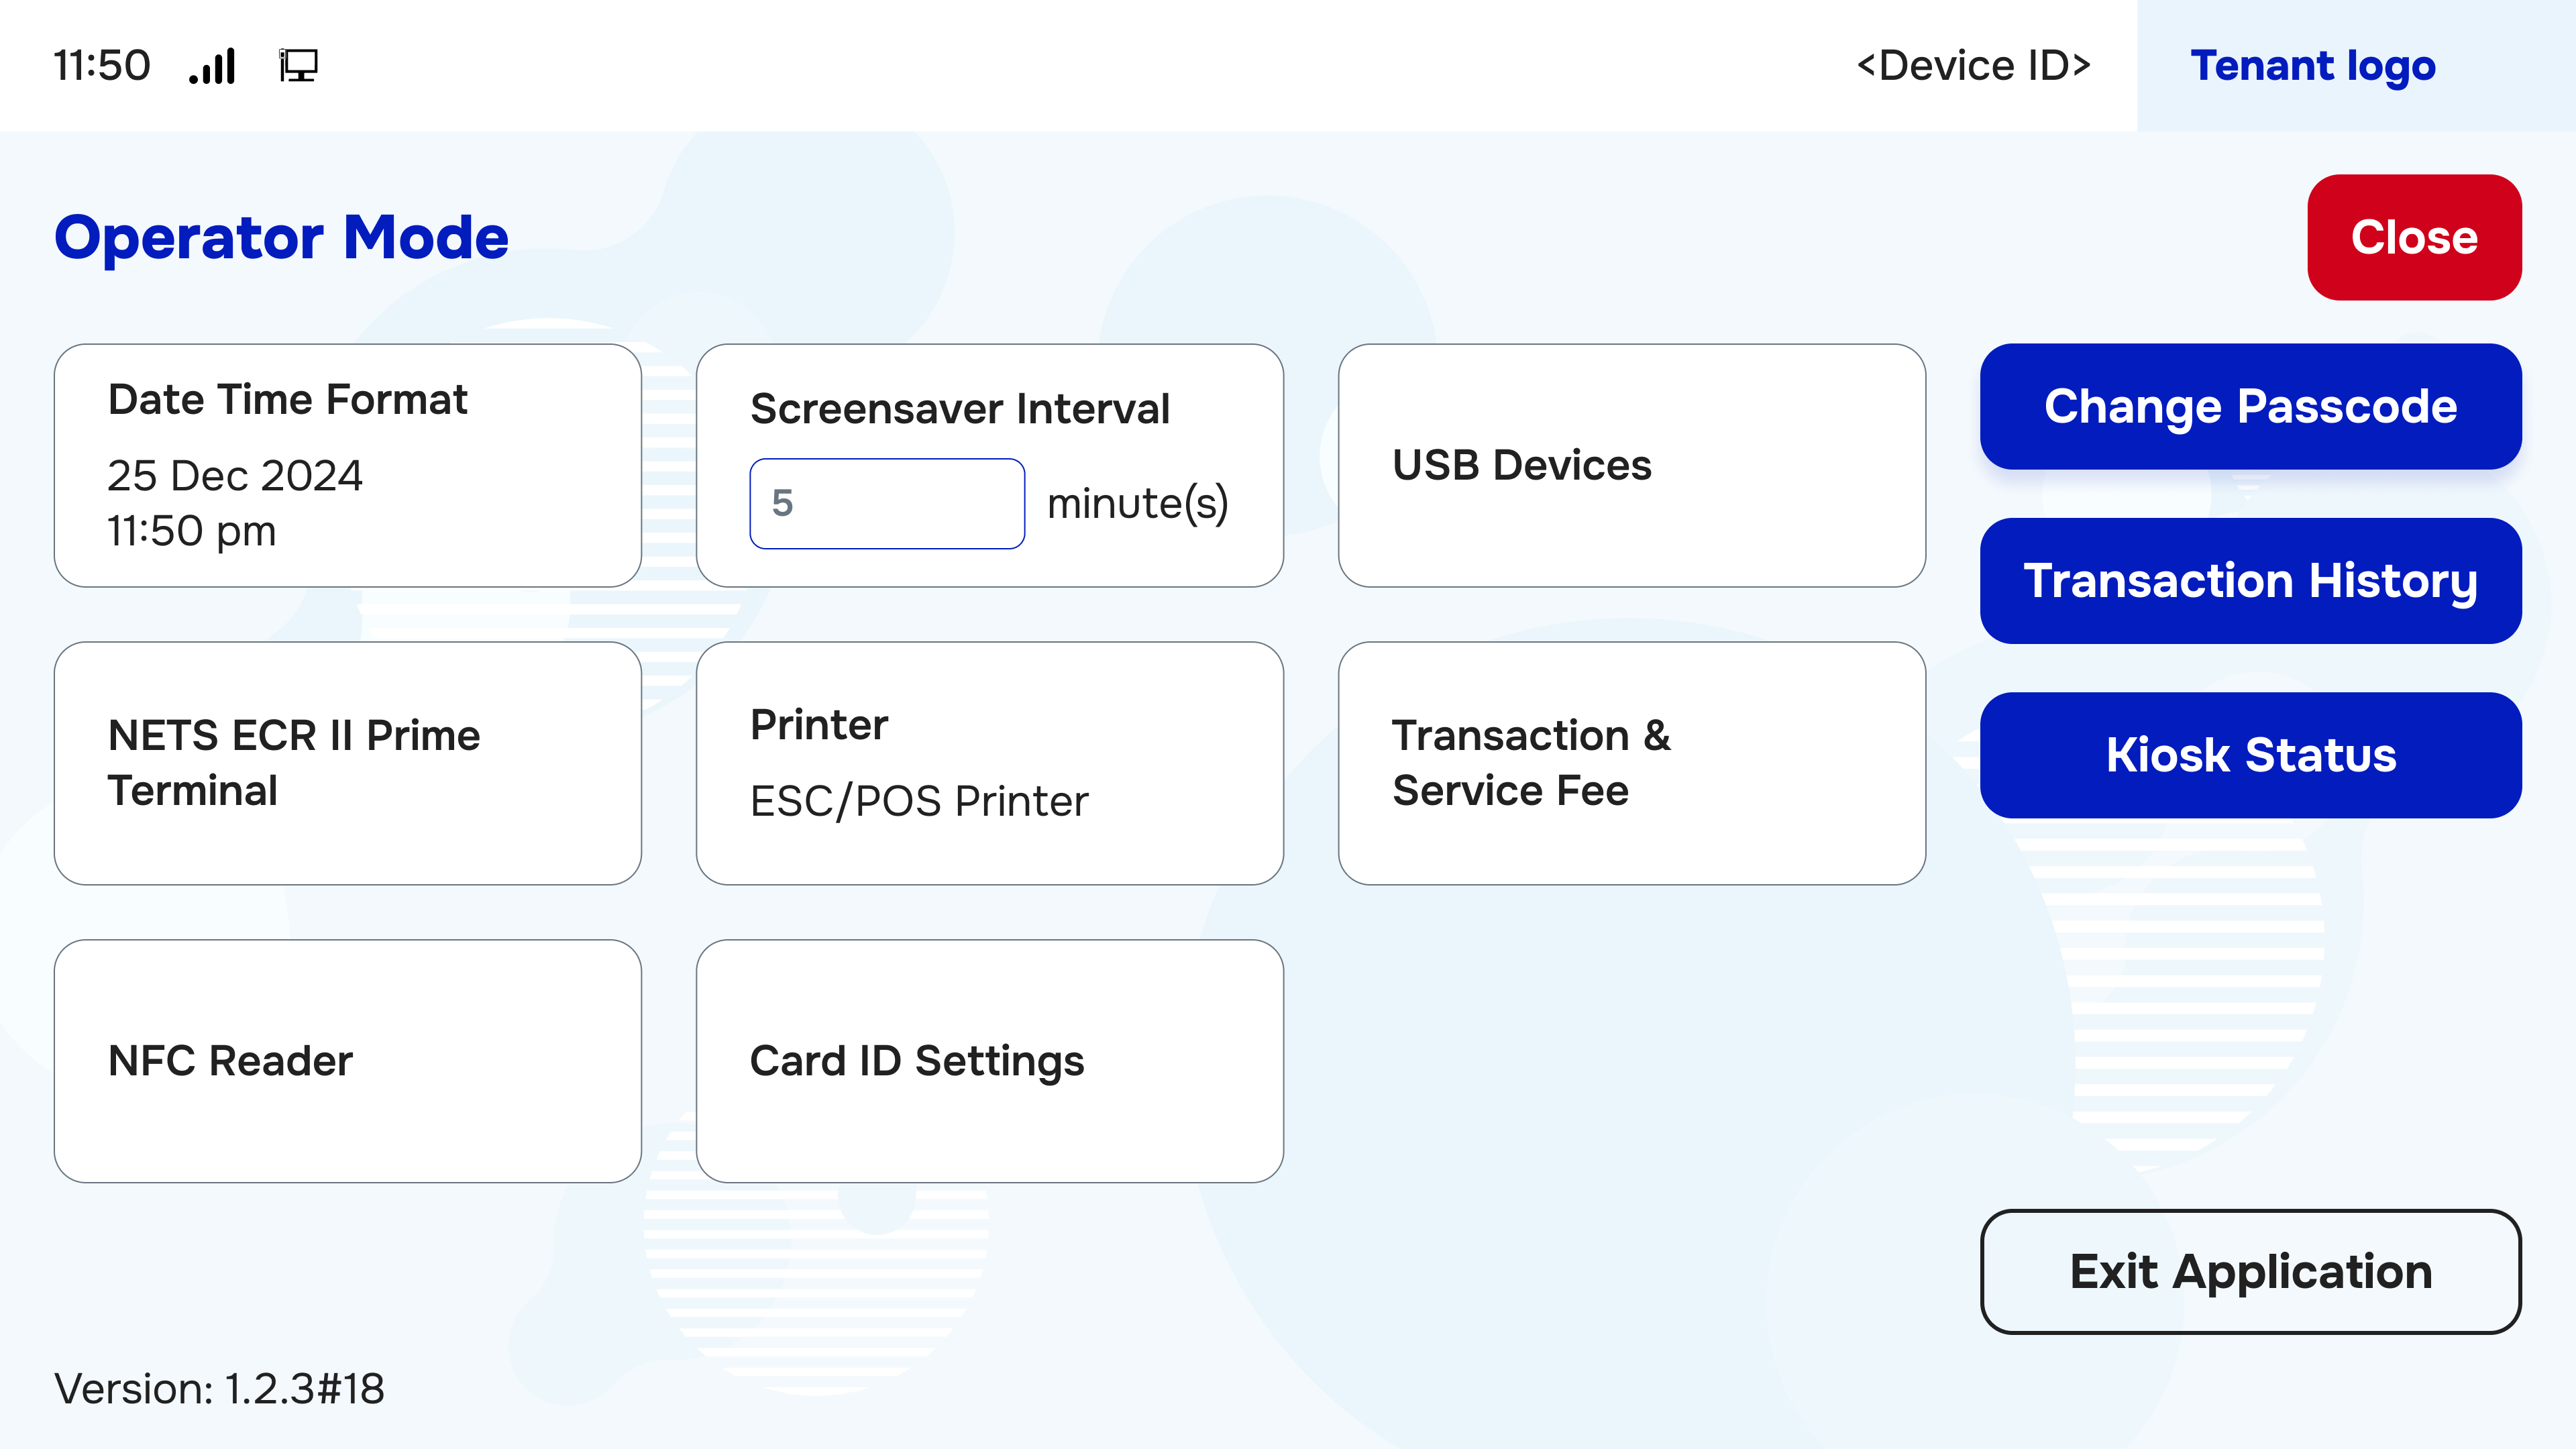
Operation Mode
#
Description
This document provides a comprehensive guide to configuring the Top-up Kiosk. It includes steps for accessing the kiosk, managing settings, and processing transactions effectively.
#
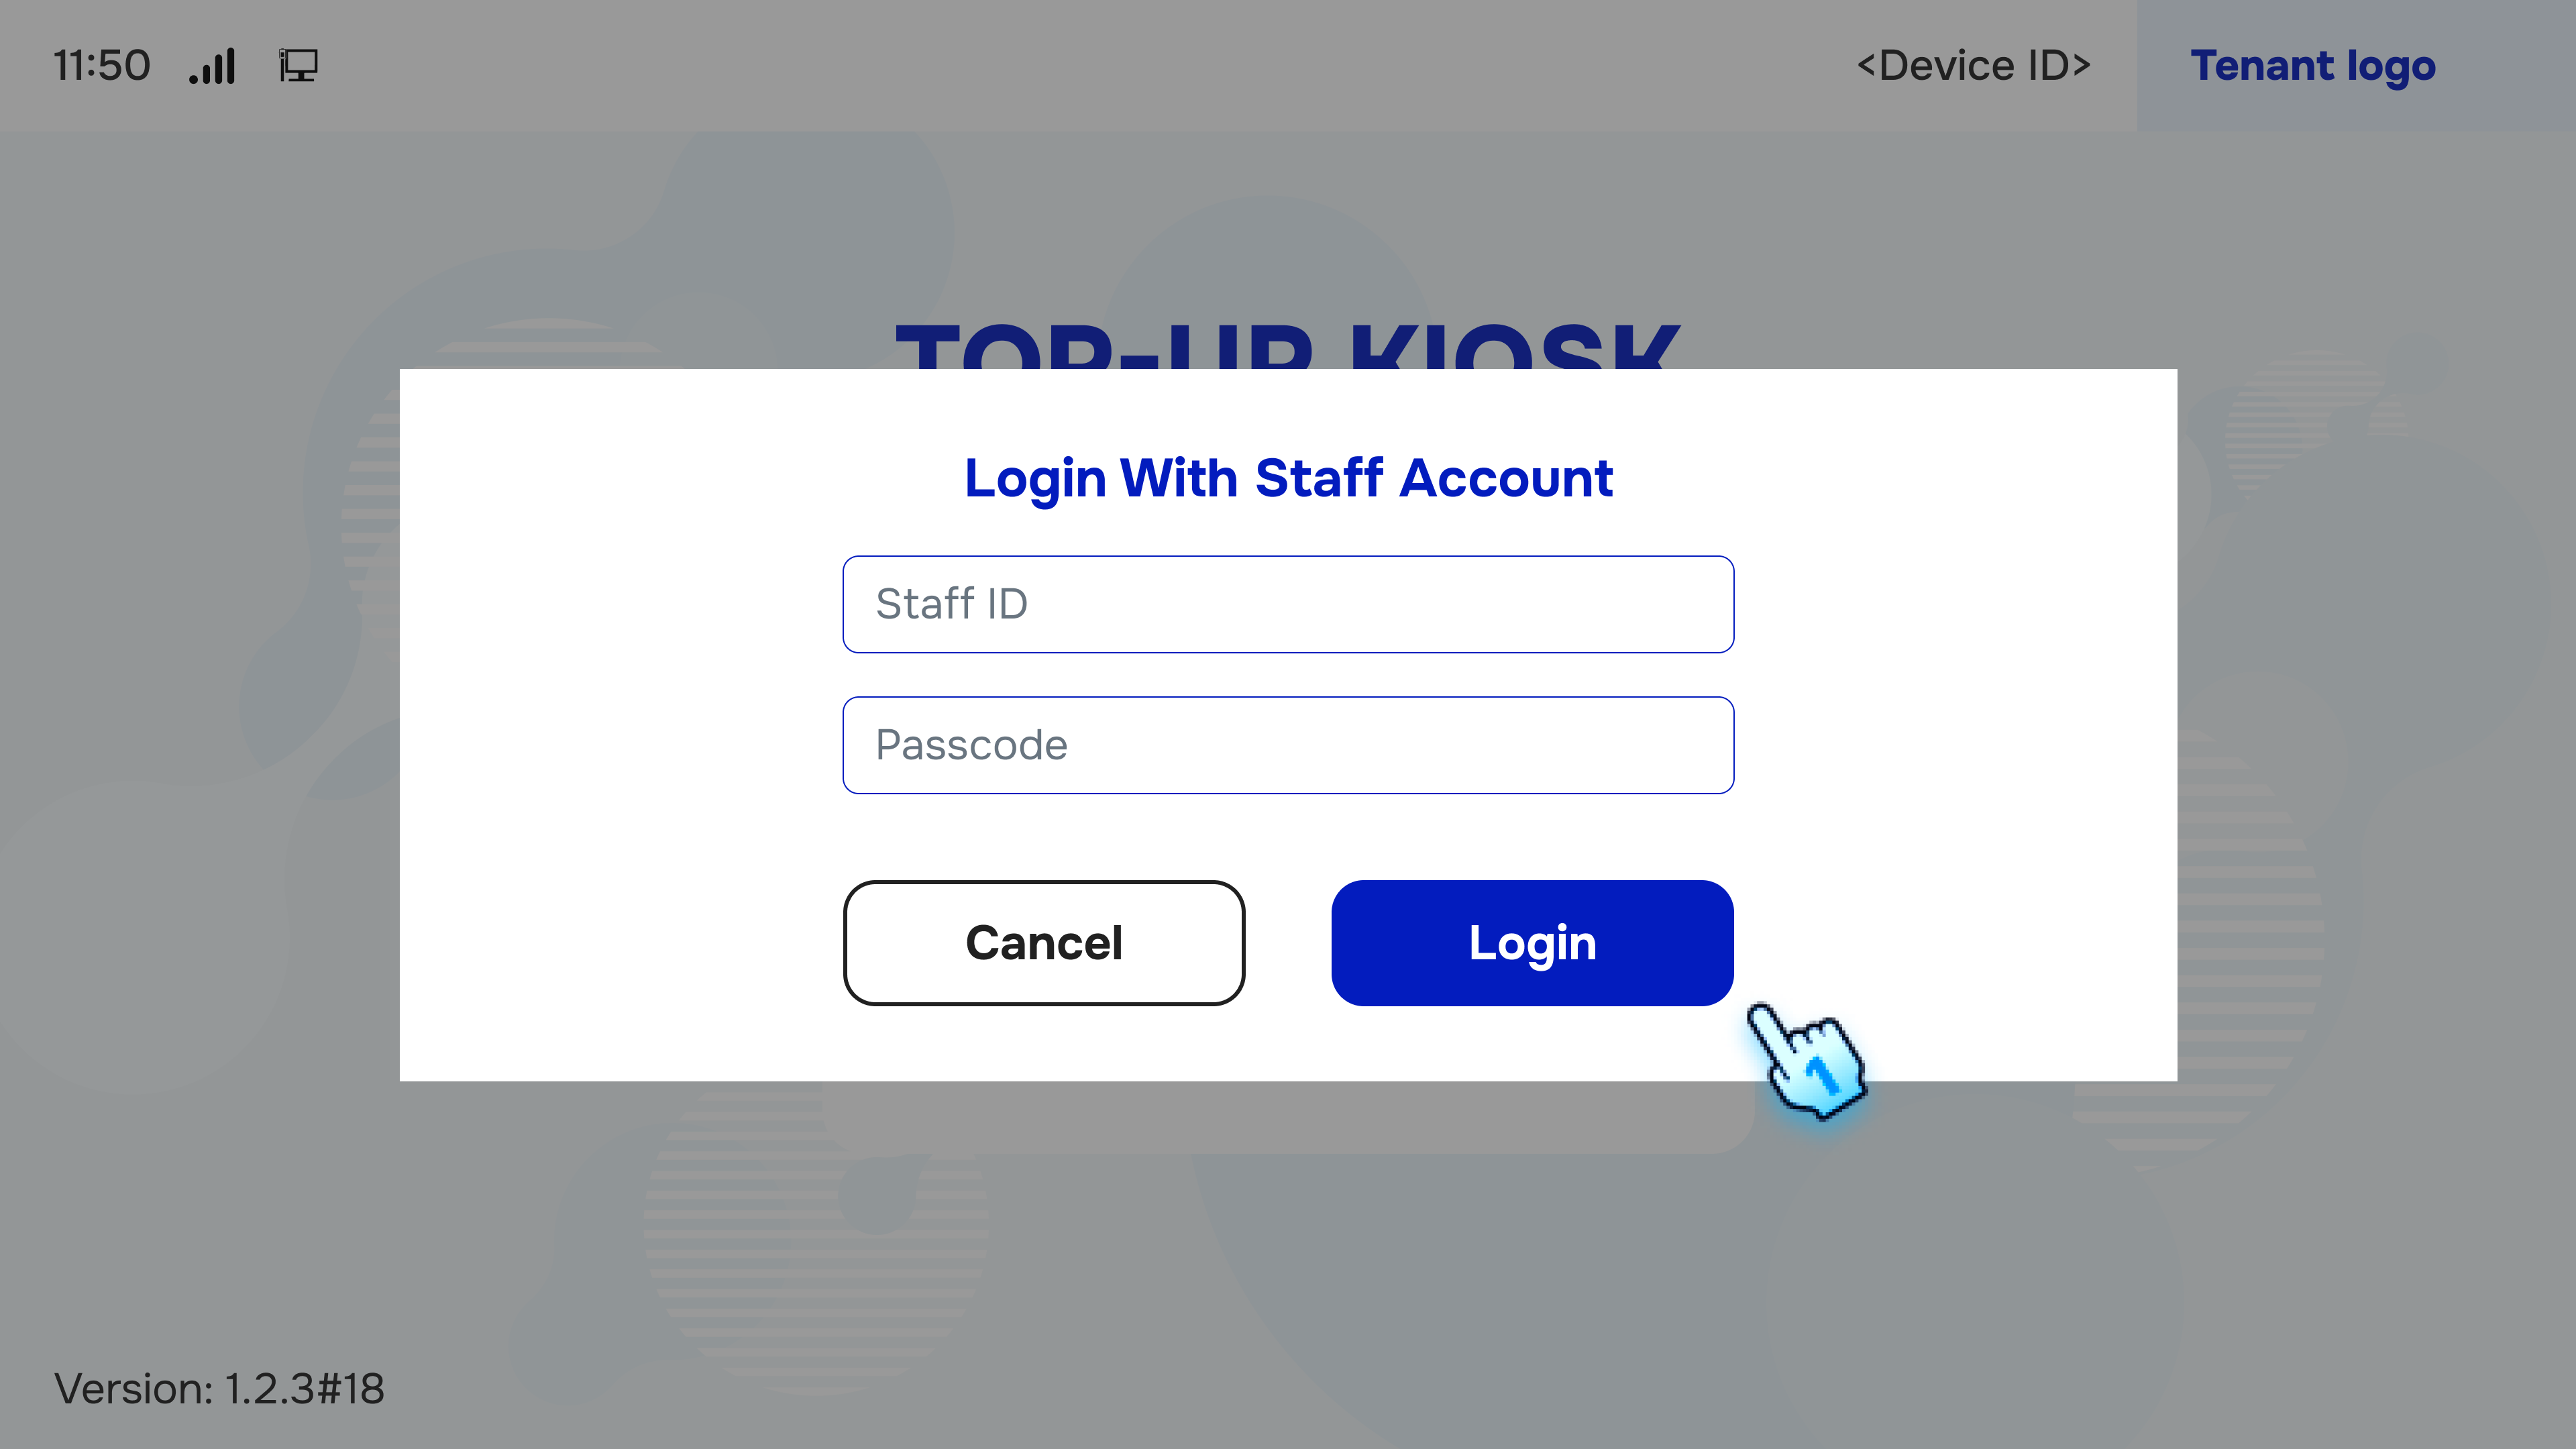
Access the Kiosk
- Login by ID and Passcode
- Enter your ID and passcode to log into the kiosk.
- Select the Topic to Configure
- Choose the relevant topic for configuration.
#
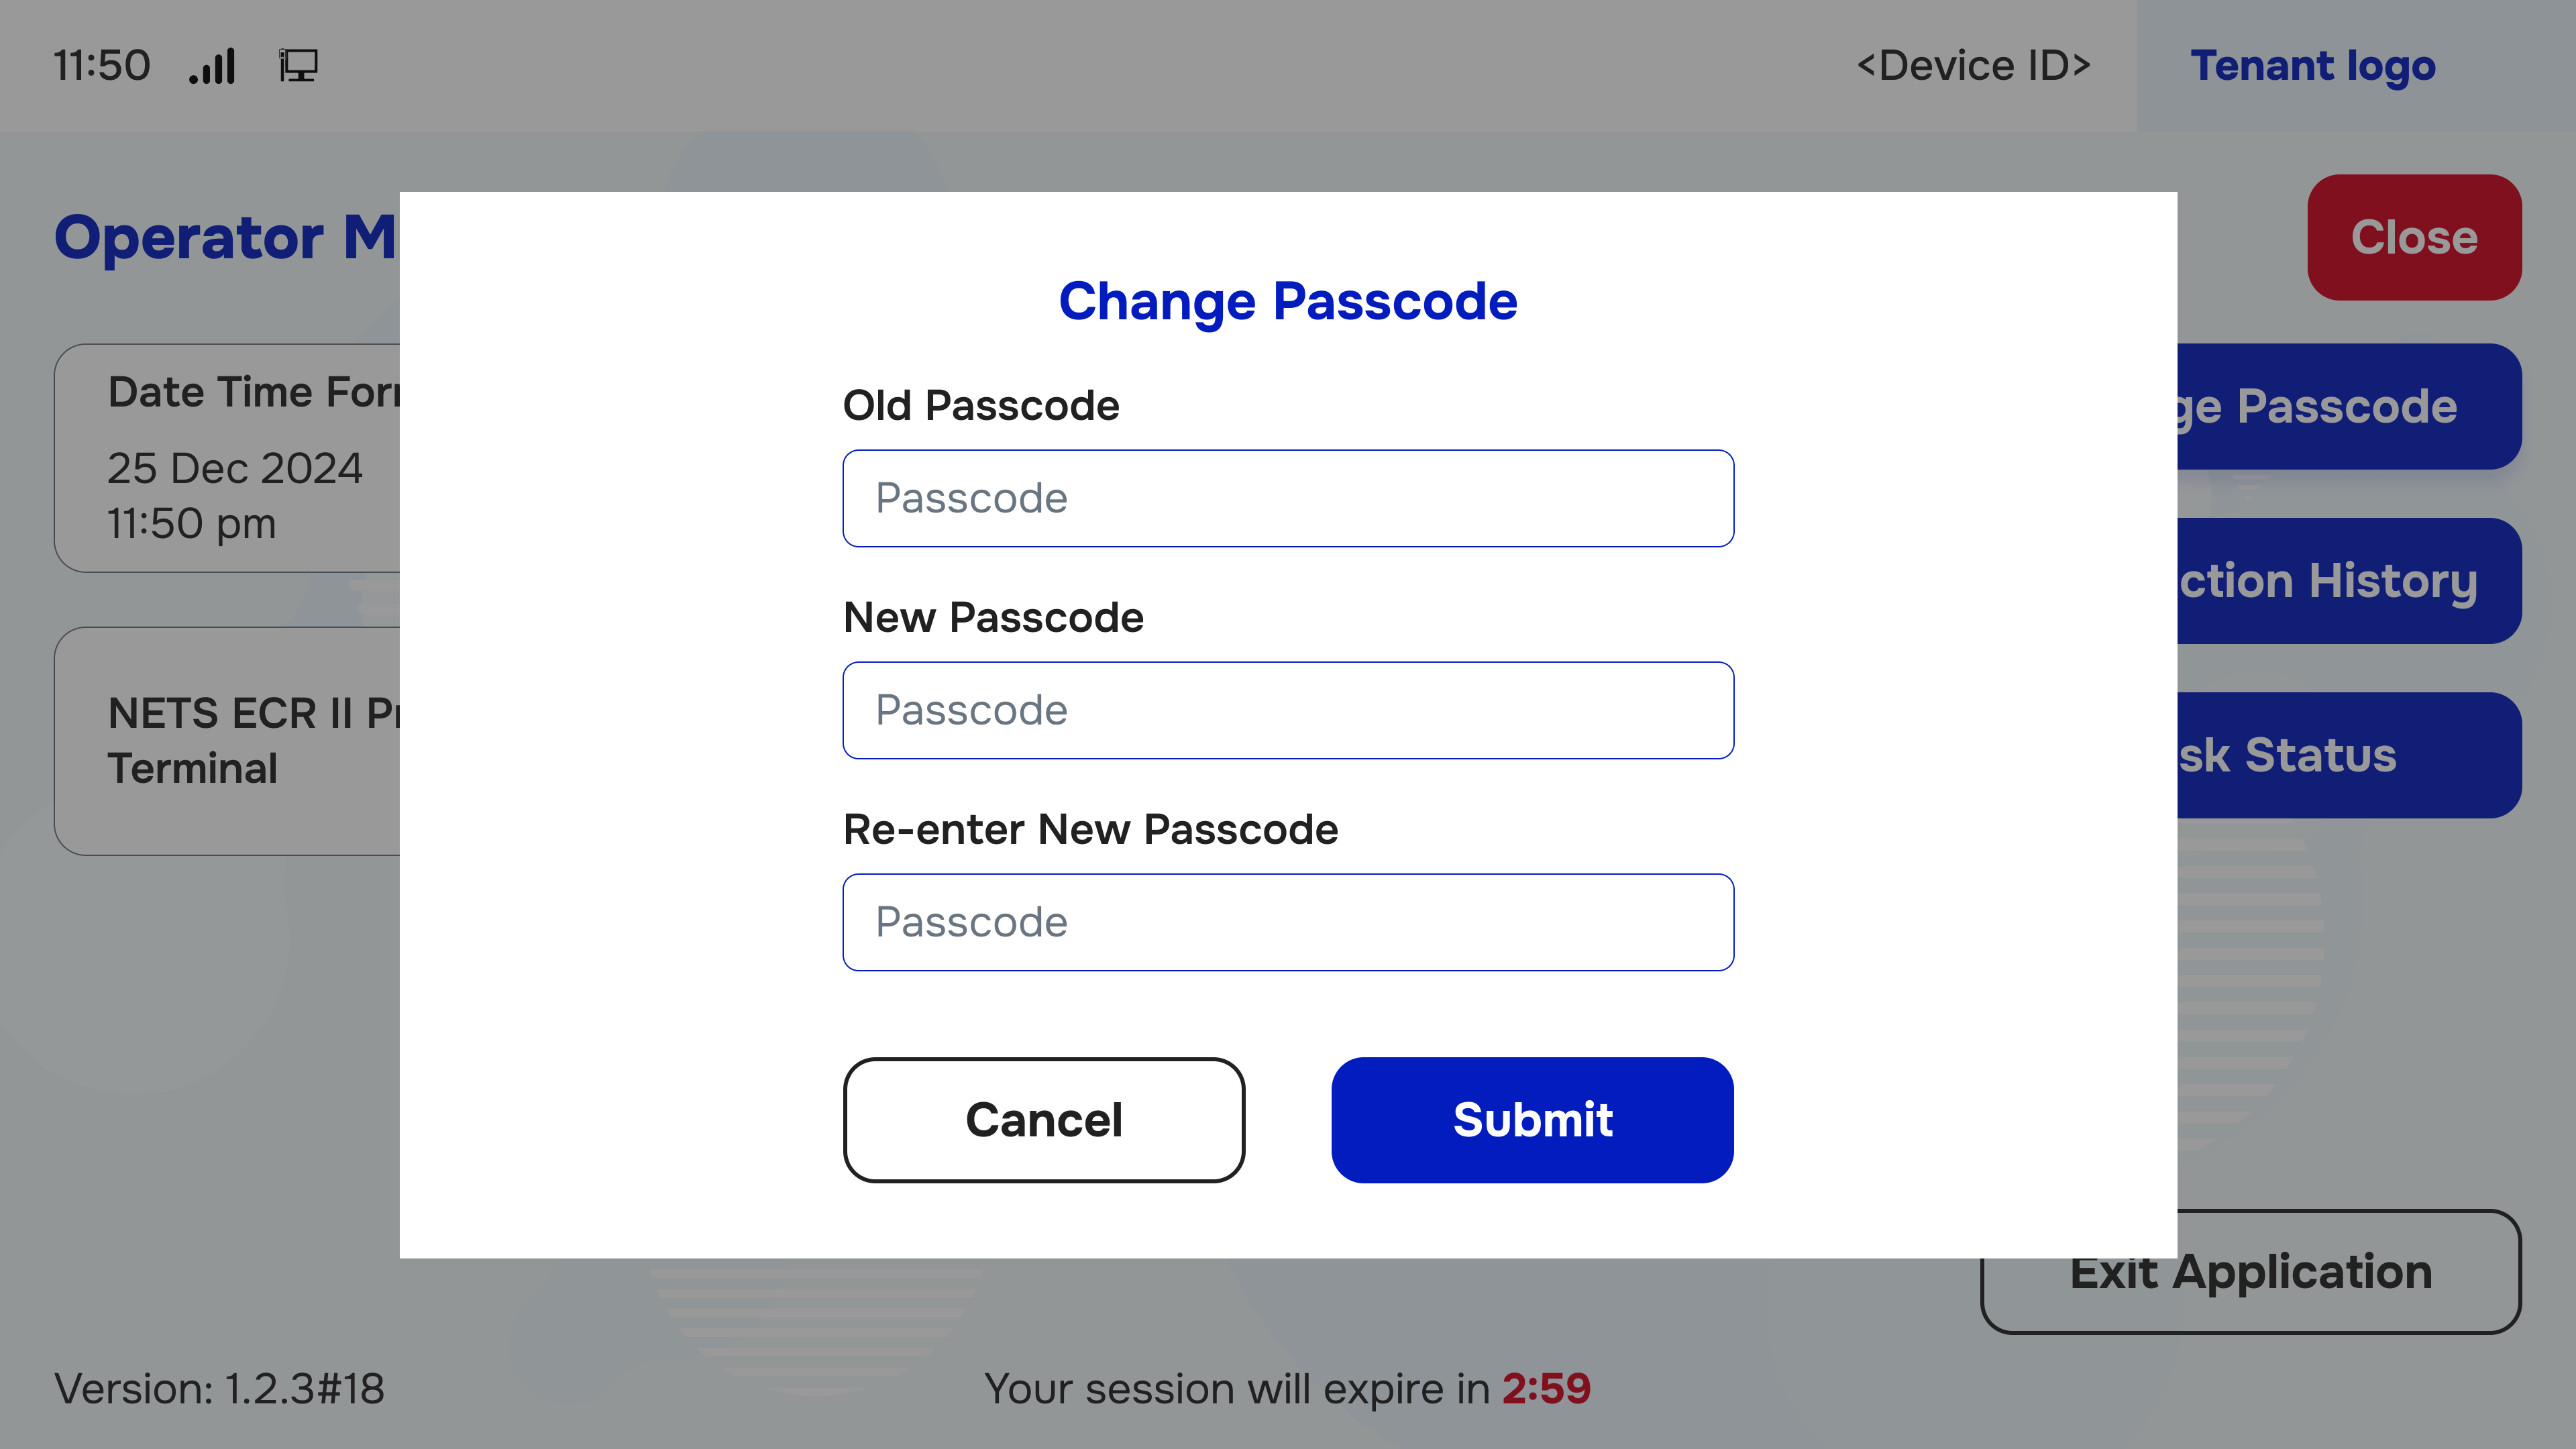
Change Passcode
- Enter Old, New Passcode, and Re-enter New Passcode
- Input your old passcode, followed by the new passcode, and confirm the new passcode by re-entering it.
- Click Submit Button to Finish
- Click the Submit button to update the passcode.
#
Transaction History
- Select the Filter
- Choose the desired filter criteria for transaction history.
- Click Search Button to View the Transaction List Accordingly
- Click the Search button to display transactions based on the selected filter.
- Click Expand Button to View More Details of Transaction
- Use the Expand button to access detailed information for specific transactions.
#
Kiosk Status
- View Kiosk Status for Internet Connection, NFC Card Reader, and Printer
- Check the status indicators for the internet connection, NFC card reader, and printer functionality.
- Send Log Files if Any
- If there are log files to send, click on "Send Log Files Now" button.
#
Exit Kiosk Application
- Click Exit Application Button on the Main Screen
- Locate and click the Exit Application button.
- Click "Yes" Button in the Confirmation Dialog to Exit
- Confirm your action by clicking the "Yes" button in the dialog box.
#
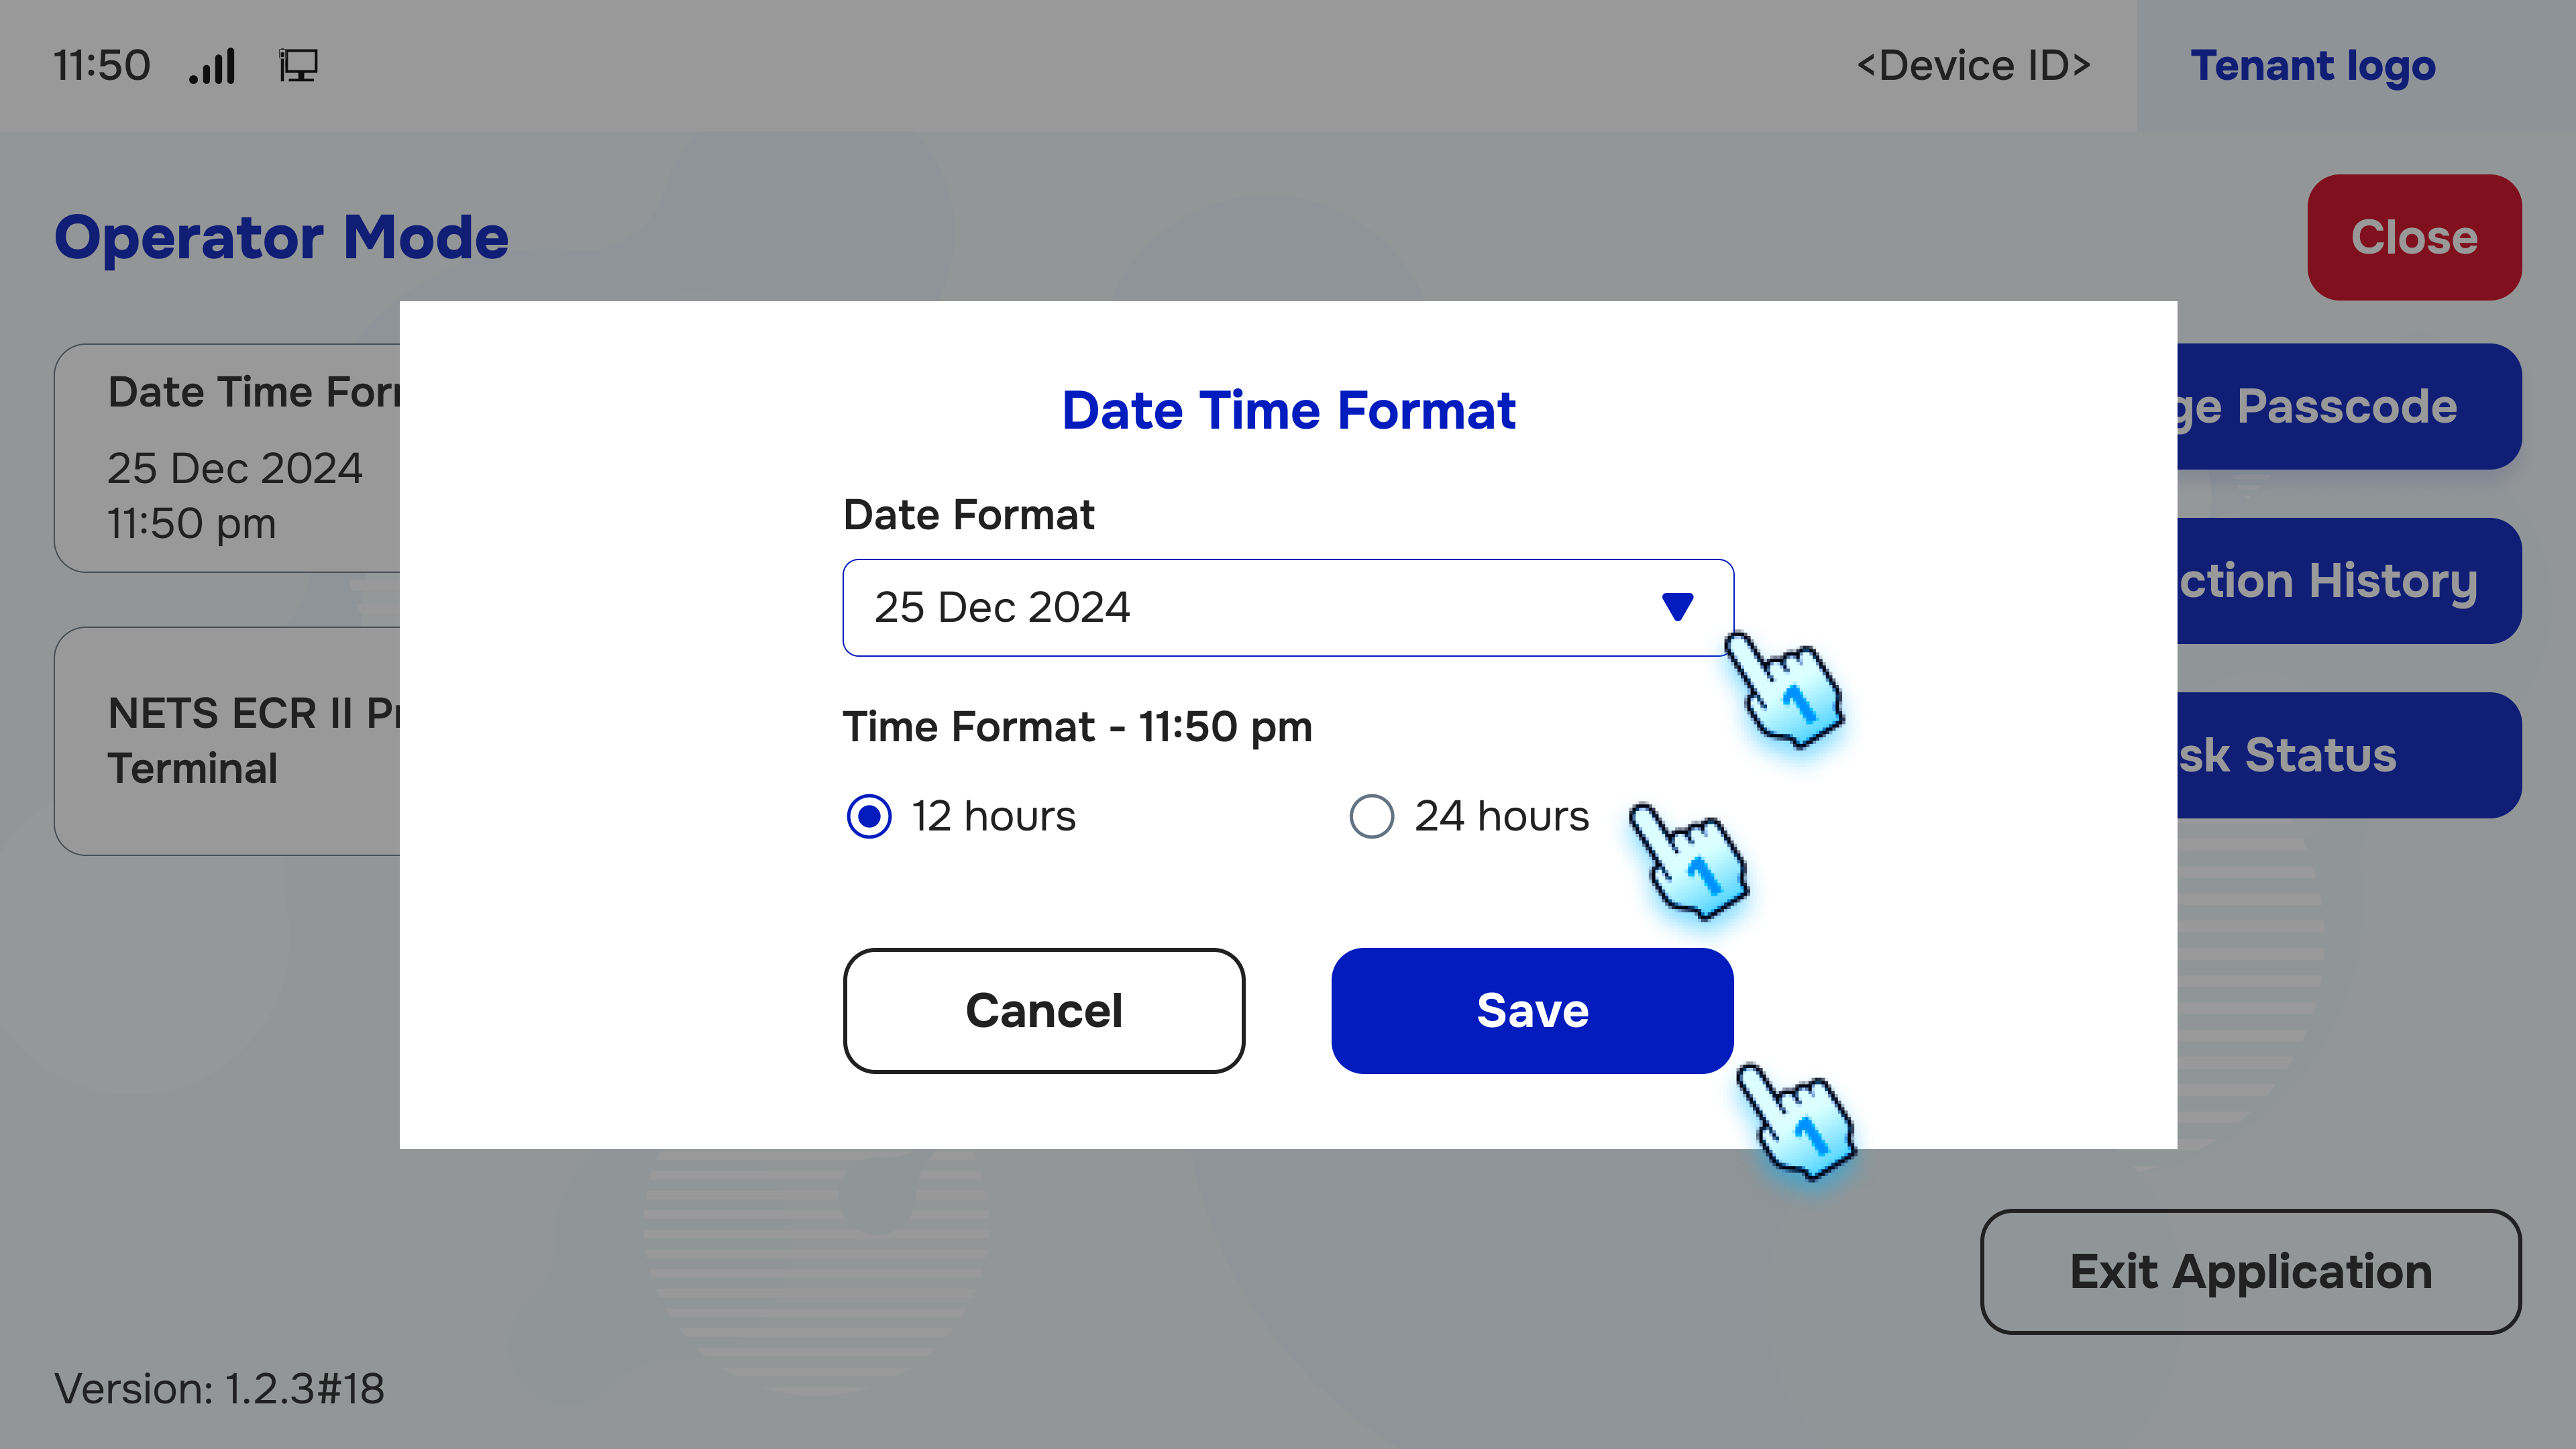
Date Time Format
- Select Date Format
- Choose your preferred date format from the available options.
- Select Time Format
- Choose your preferred time format from the available options.
- Click "Save" Button to Finish
- Click the Save button to apply the selected formats.
#
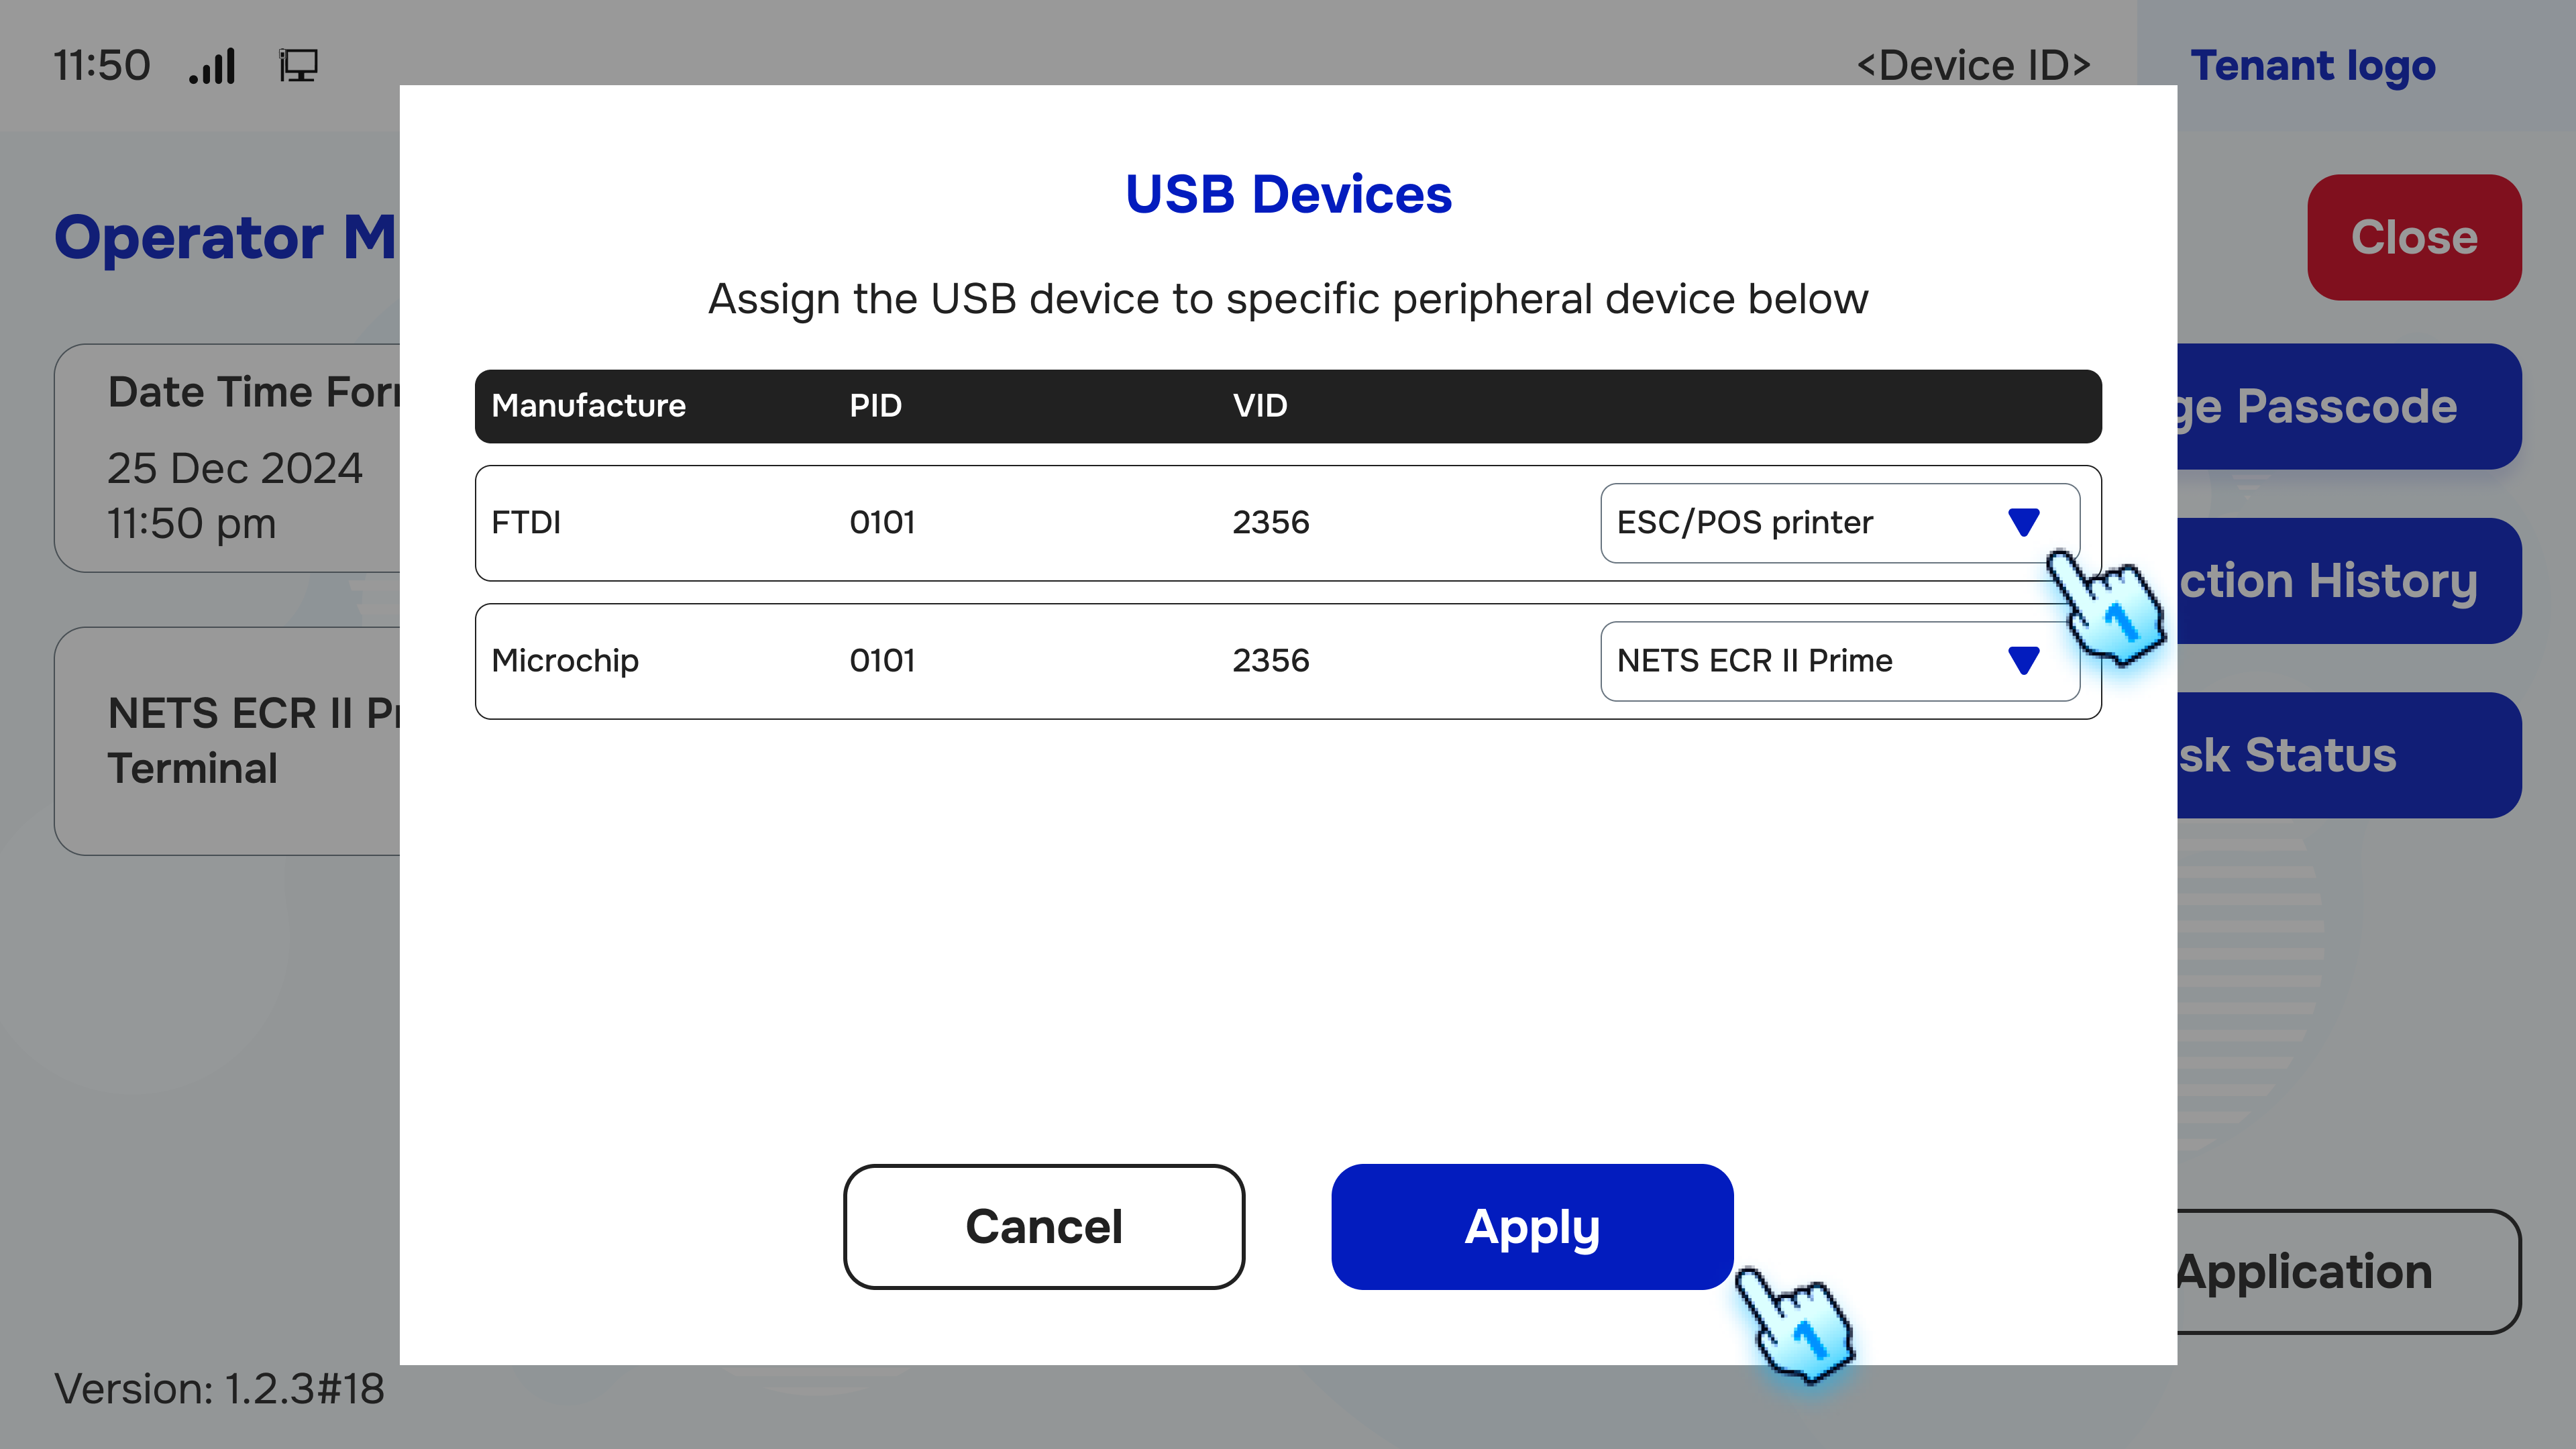
USB Device
- View the List of Devices
- Check the list of connected USB devices.
- Select Device Type
- Choose the type of device you wish to configure.
- Click "Apply" to Finish
- Click Apply to finalize the configuration.
#
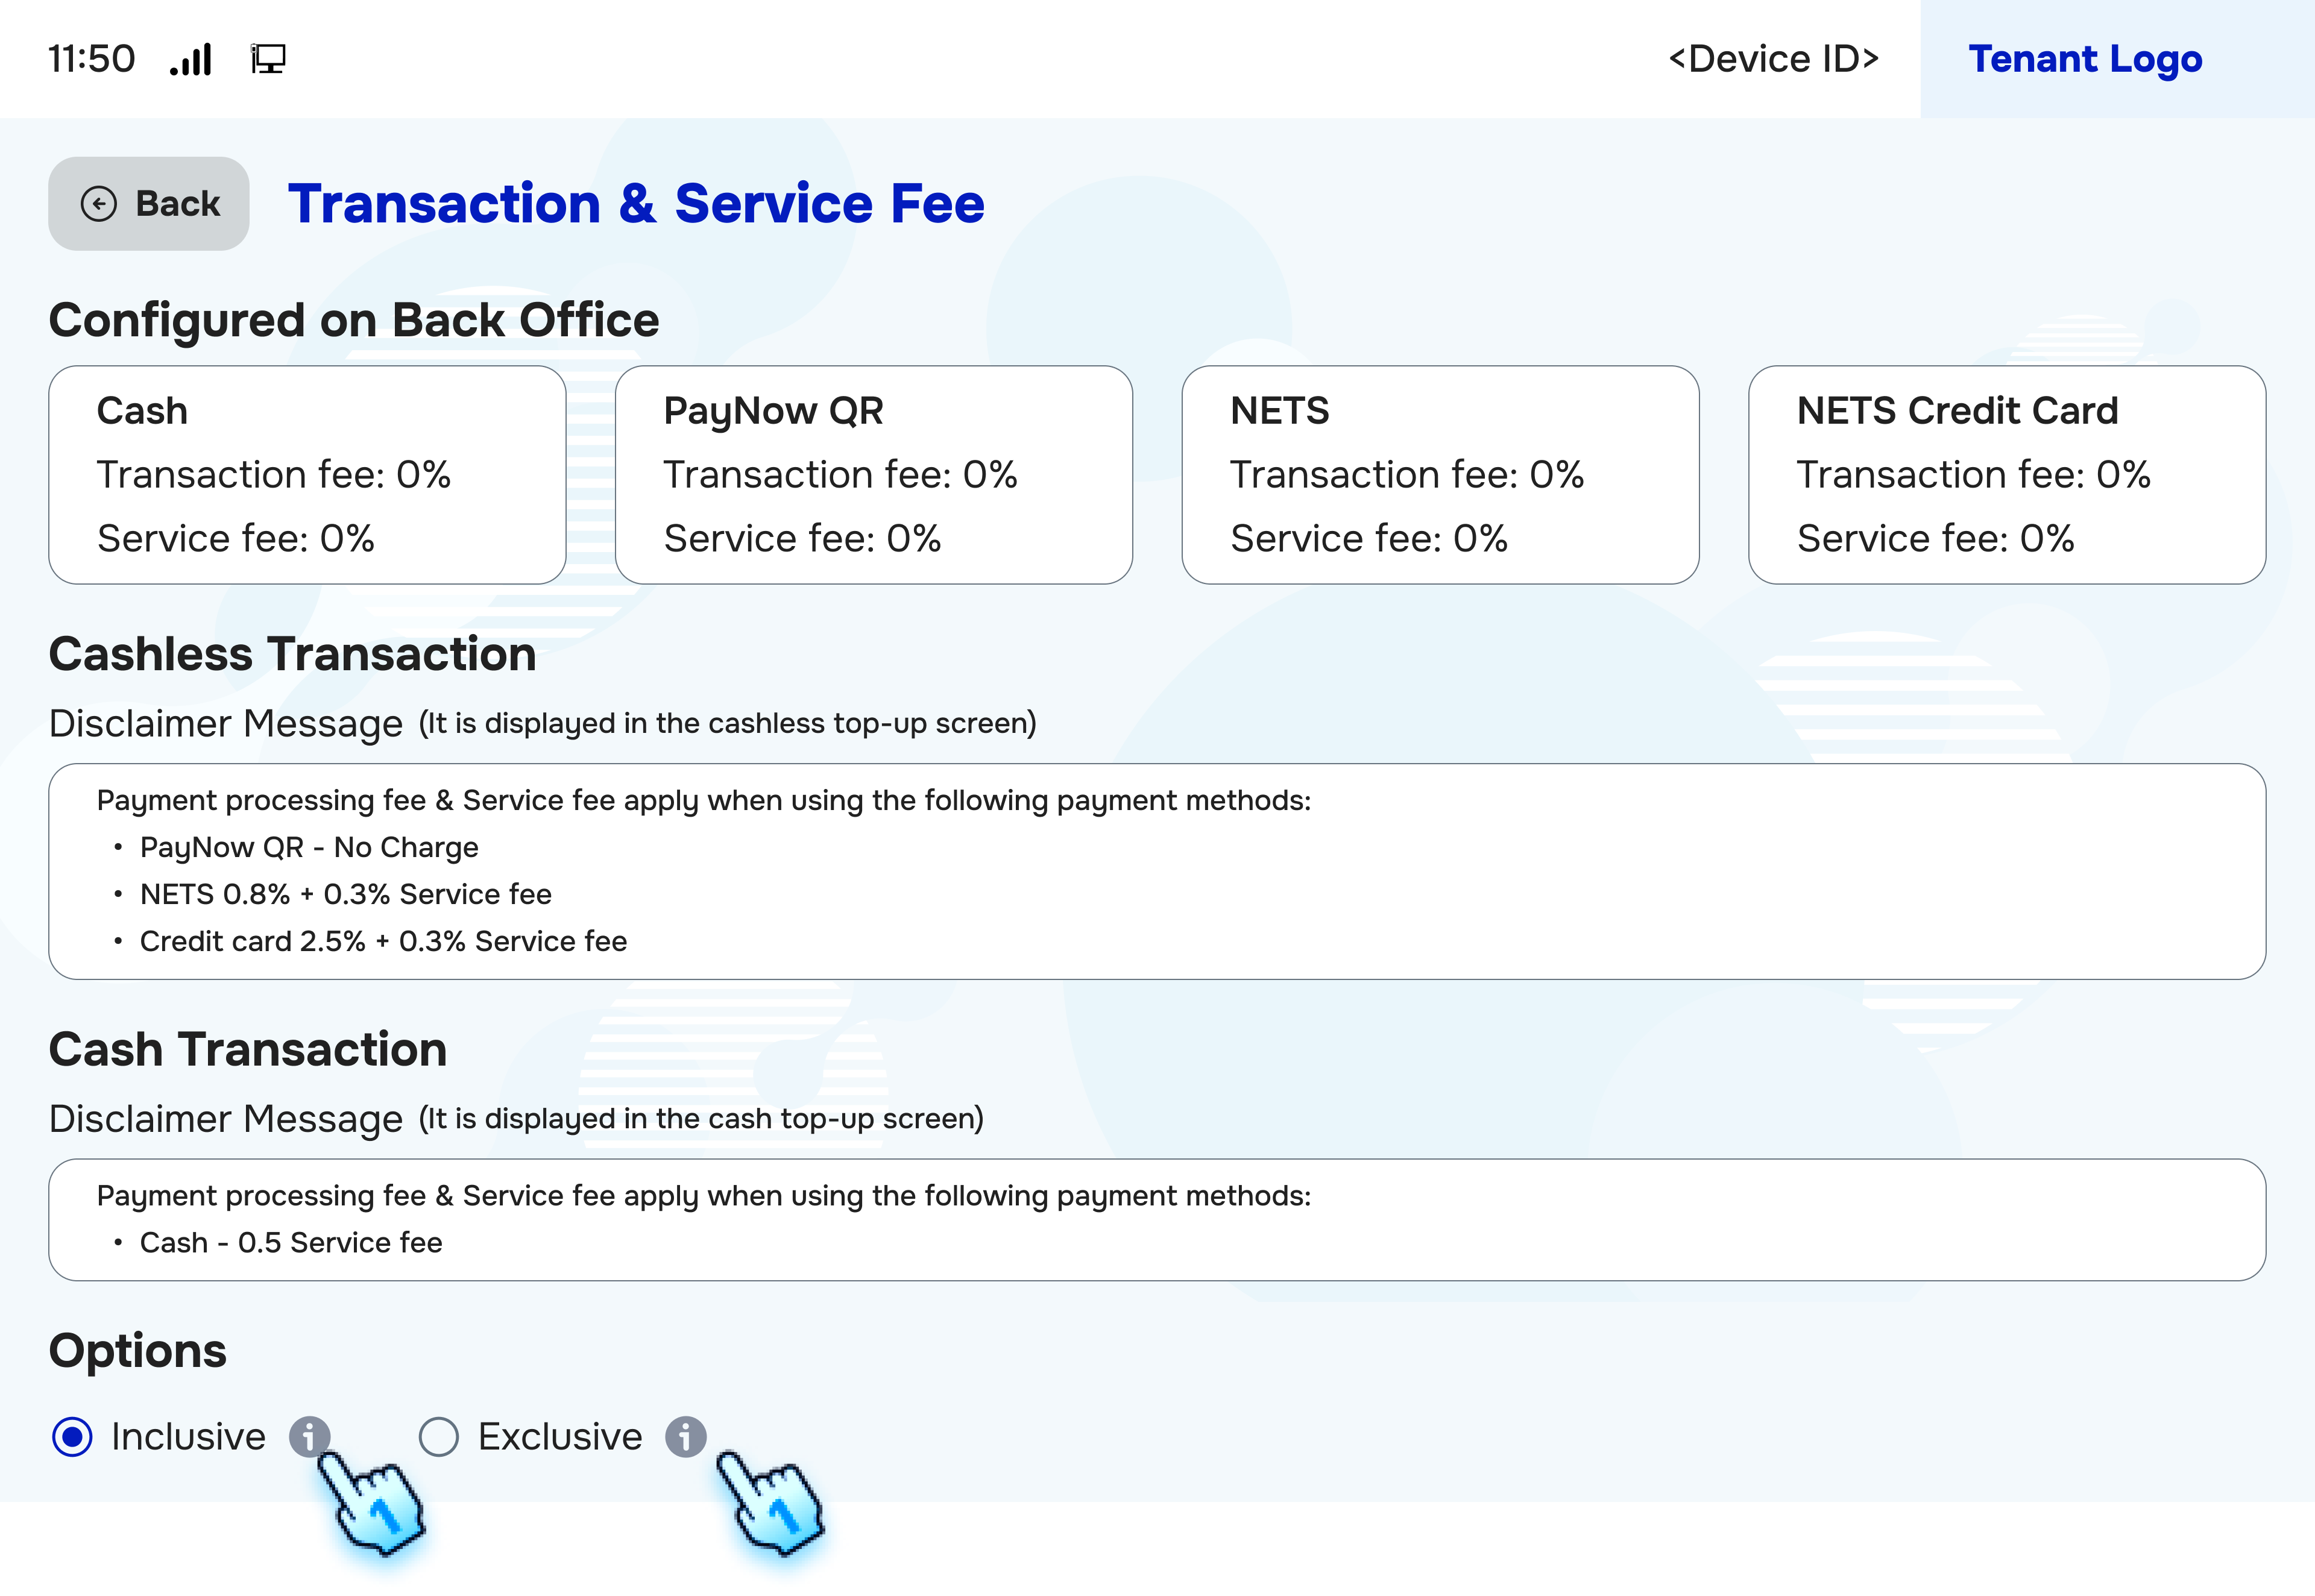
Transaction and Service Fee
- View Transaction Fee Parameter Configured on Back Office
- View the transaction fee parameters set in the back office.
- Enter Disclaimer Message for Both Cash and Cashless Transaction
- Provide a disclaimer message applicable to both cash and cashless transactions.
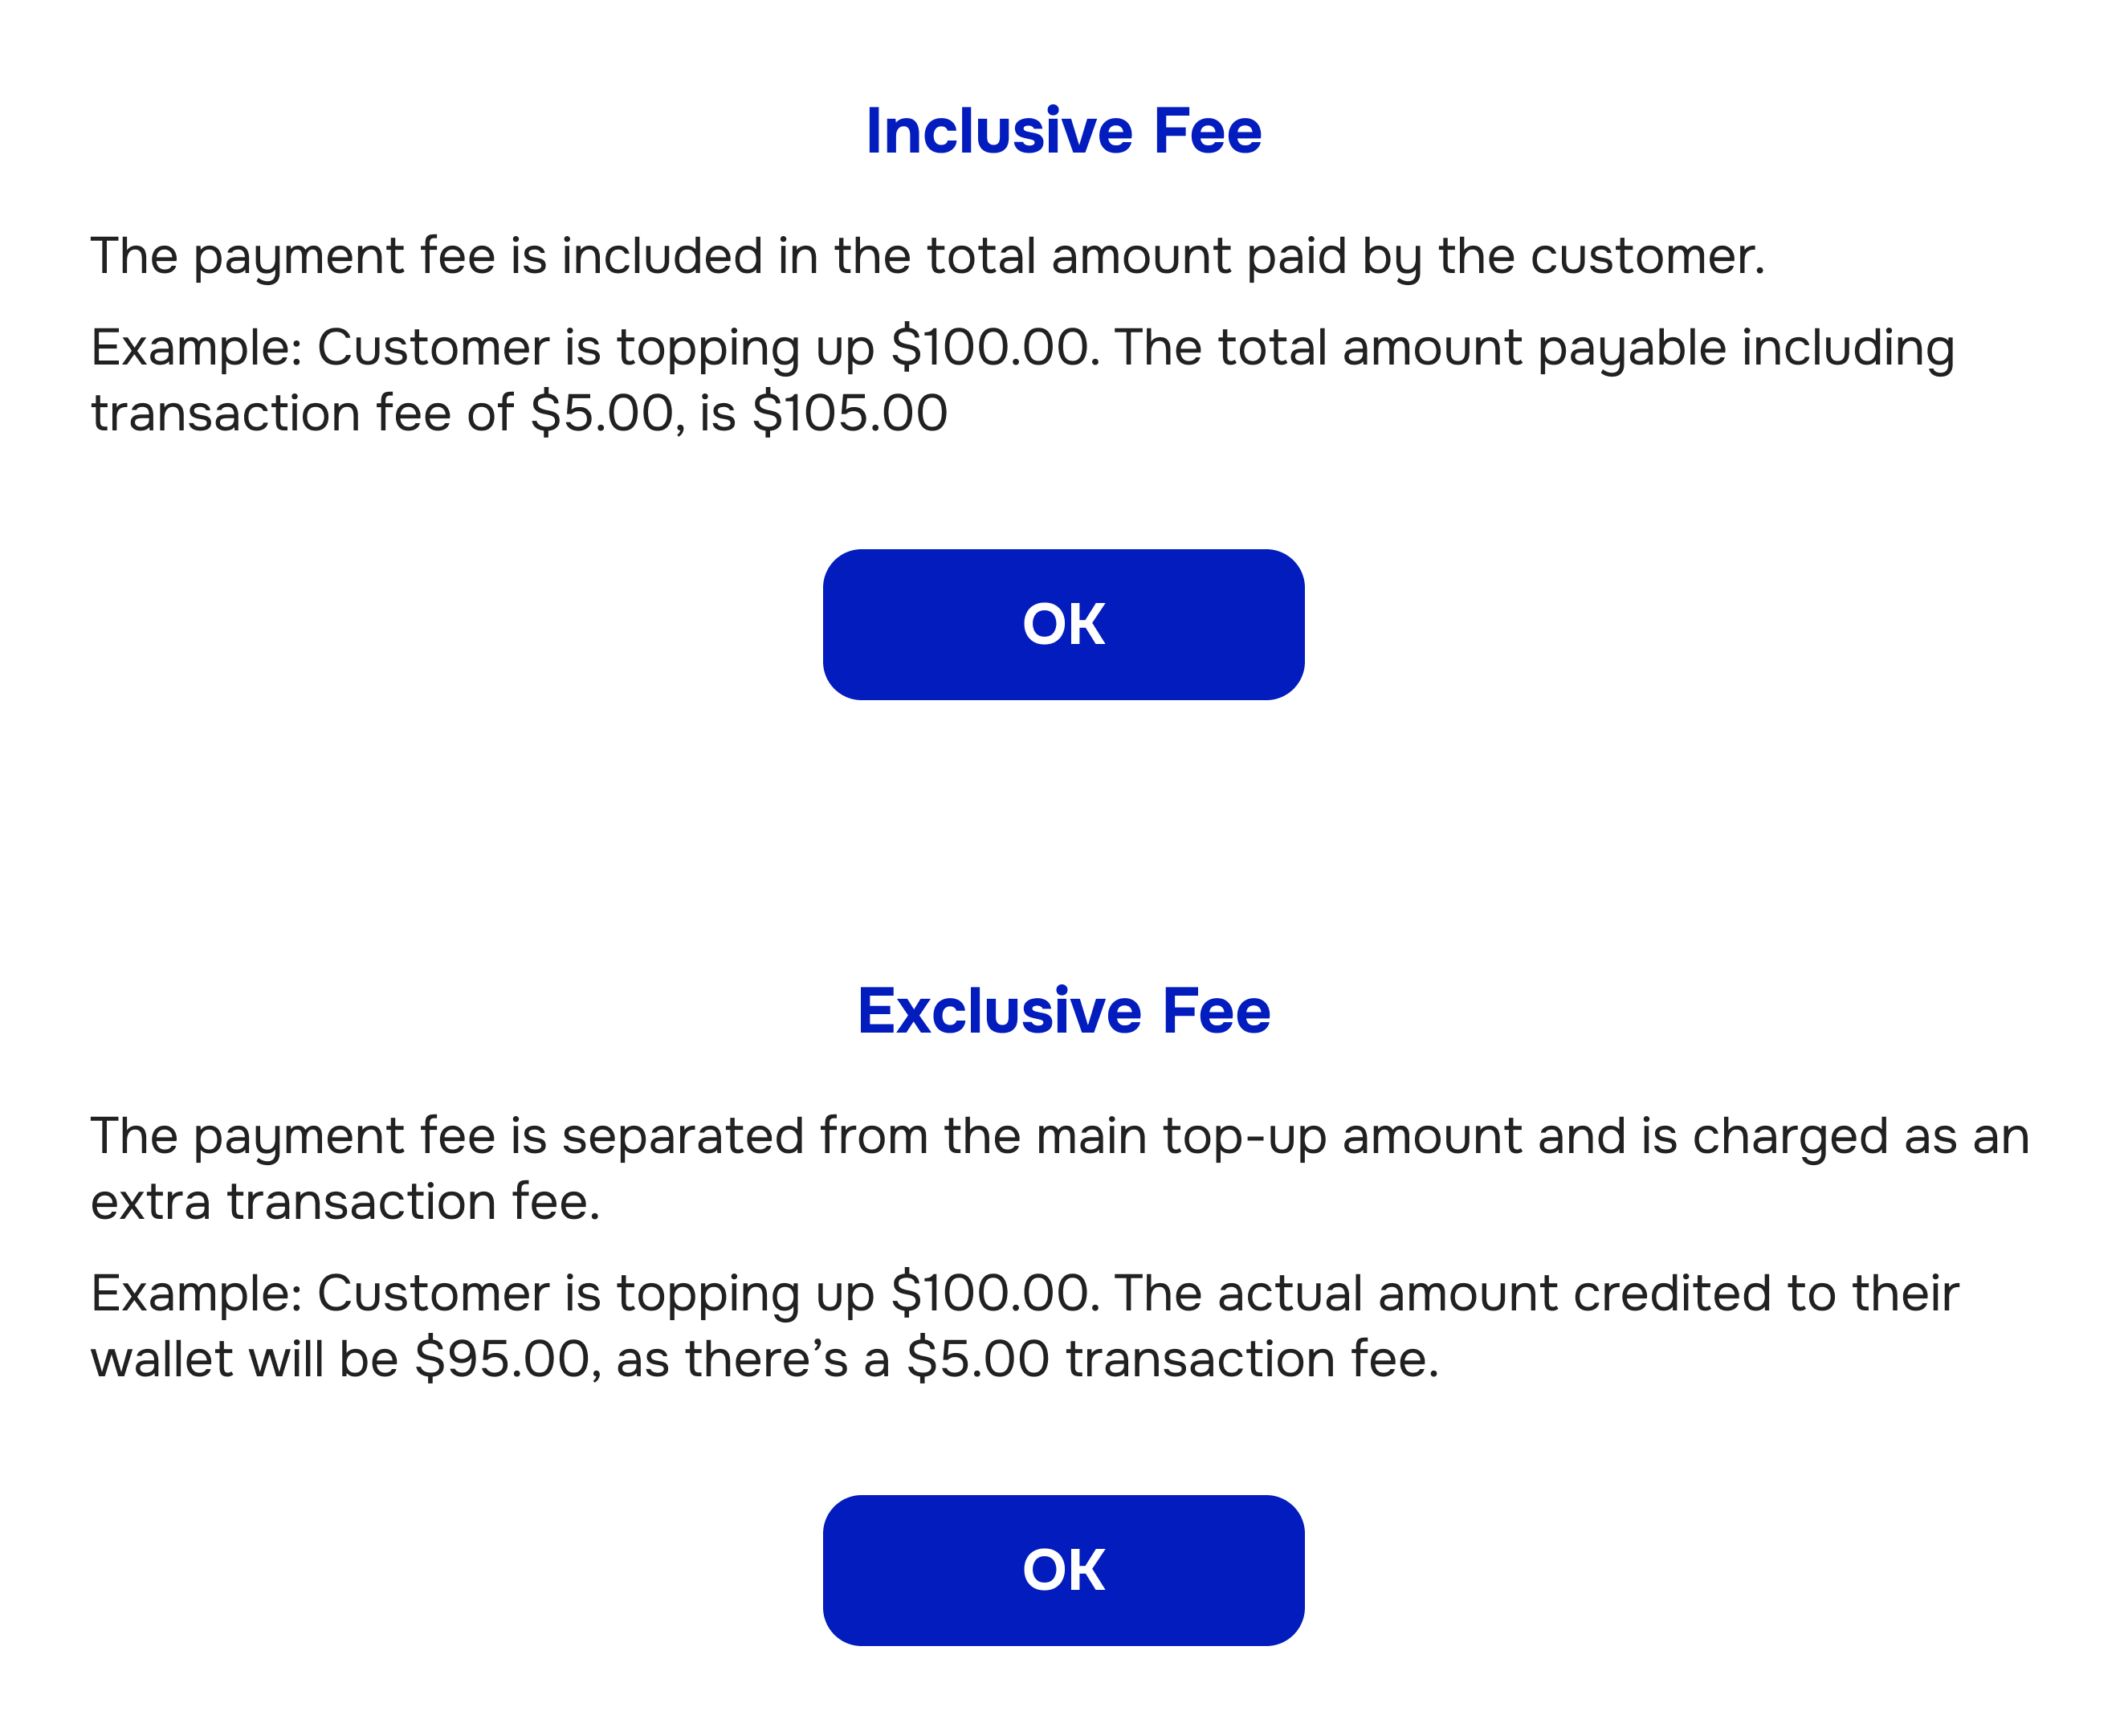
- Click on "i" Button to Review the Definition of Inclusive and Exclusive
- Click the "i" button to understand the definitions of inclusive and exclusive fees.
#
Printer Configuration
- Select Printer Required (Optional or Mandatory)
- Choose whether the printer is optional or mandatory for your setup.
- Select Printer Type
- Specify the type of printer to be used.
- Click to "Save" Button to Finish
- Click the Save button to apply the printer settings.
#
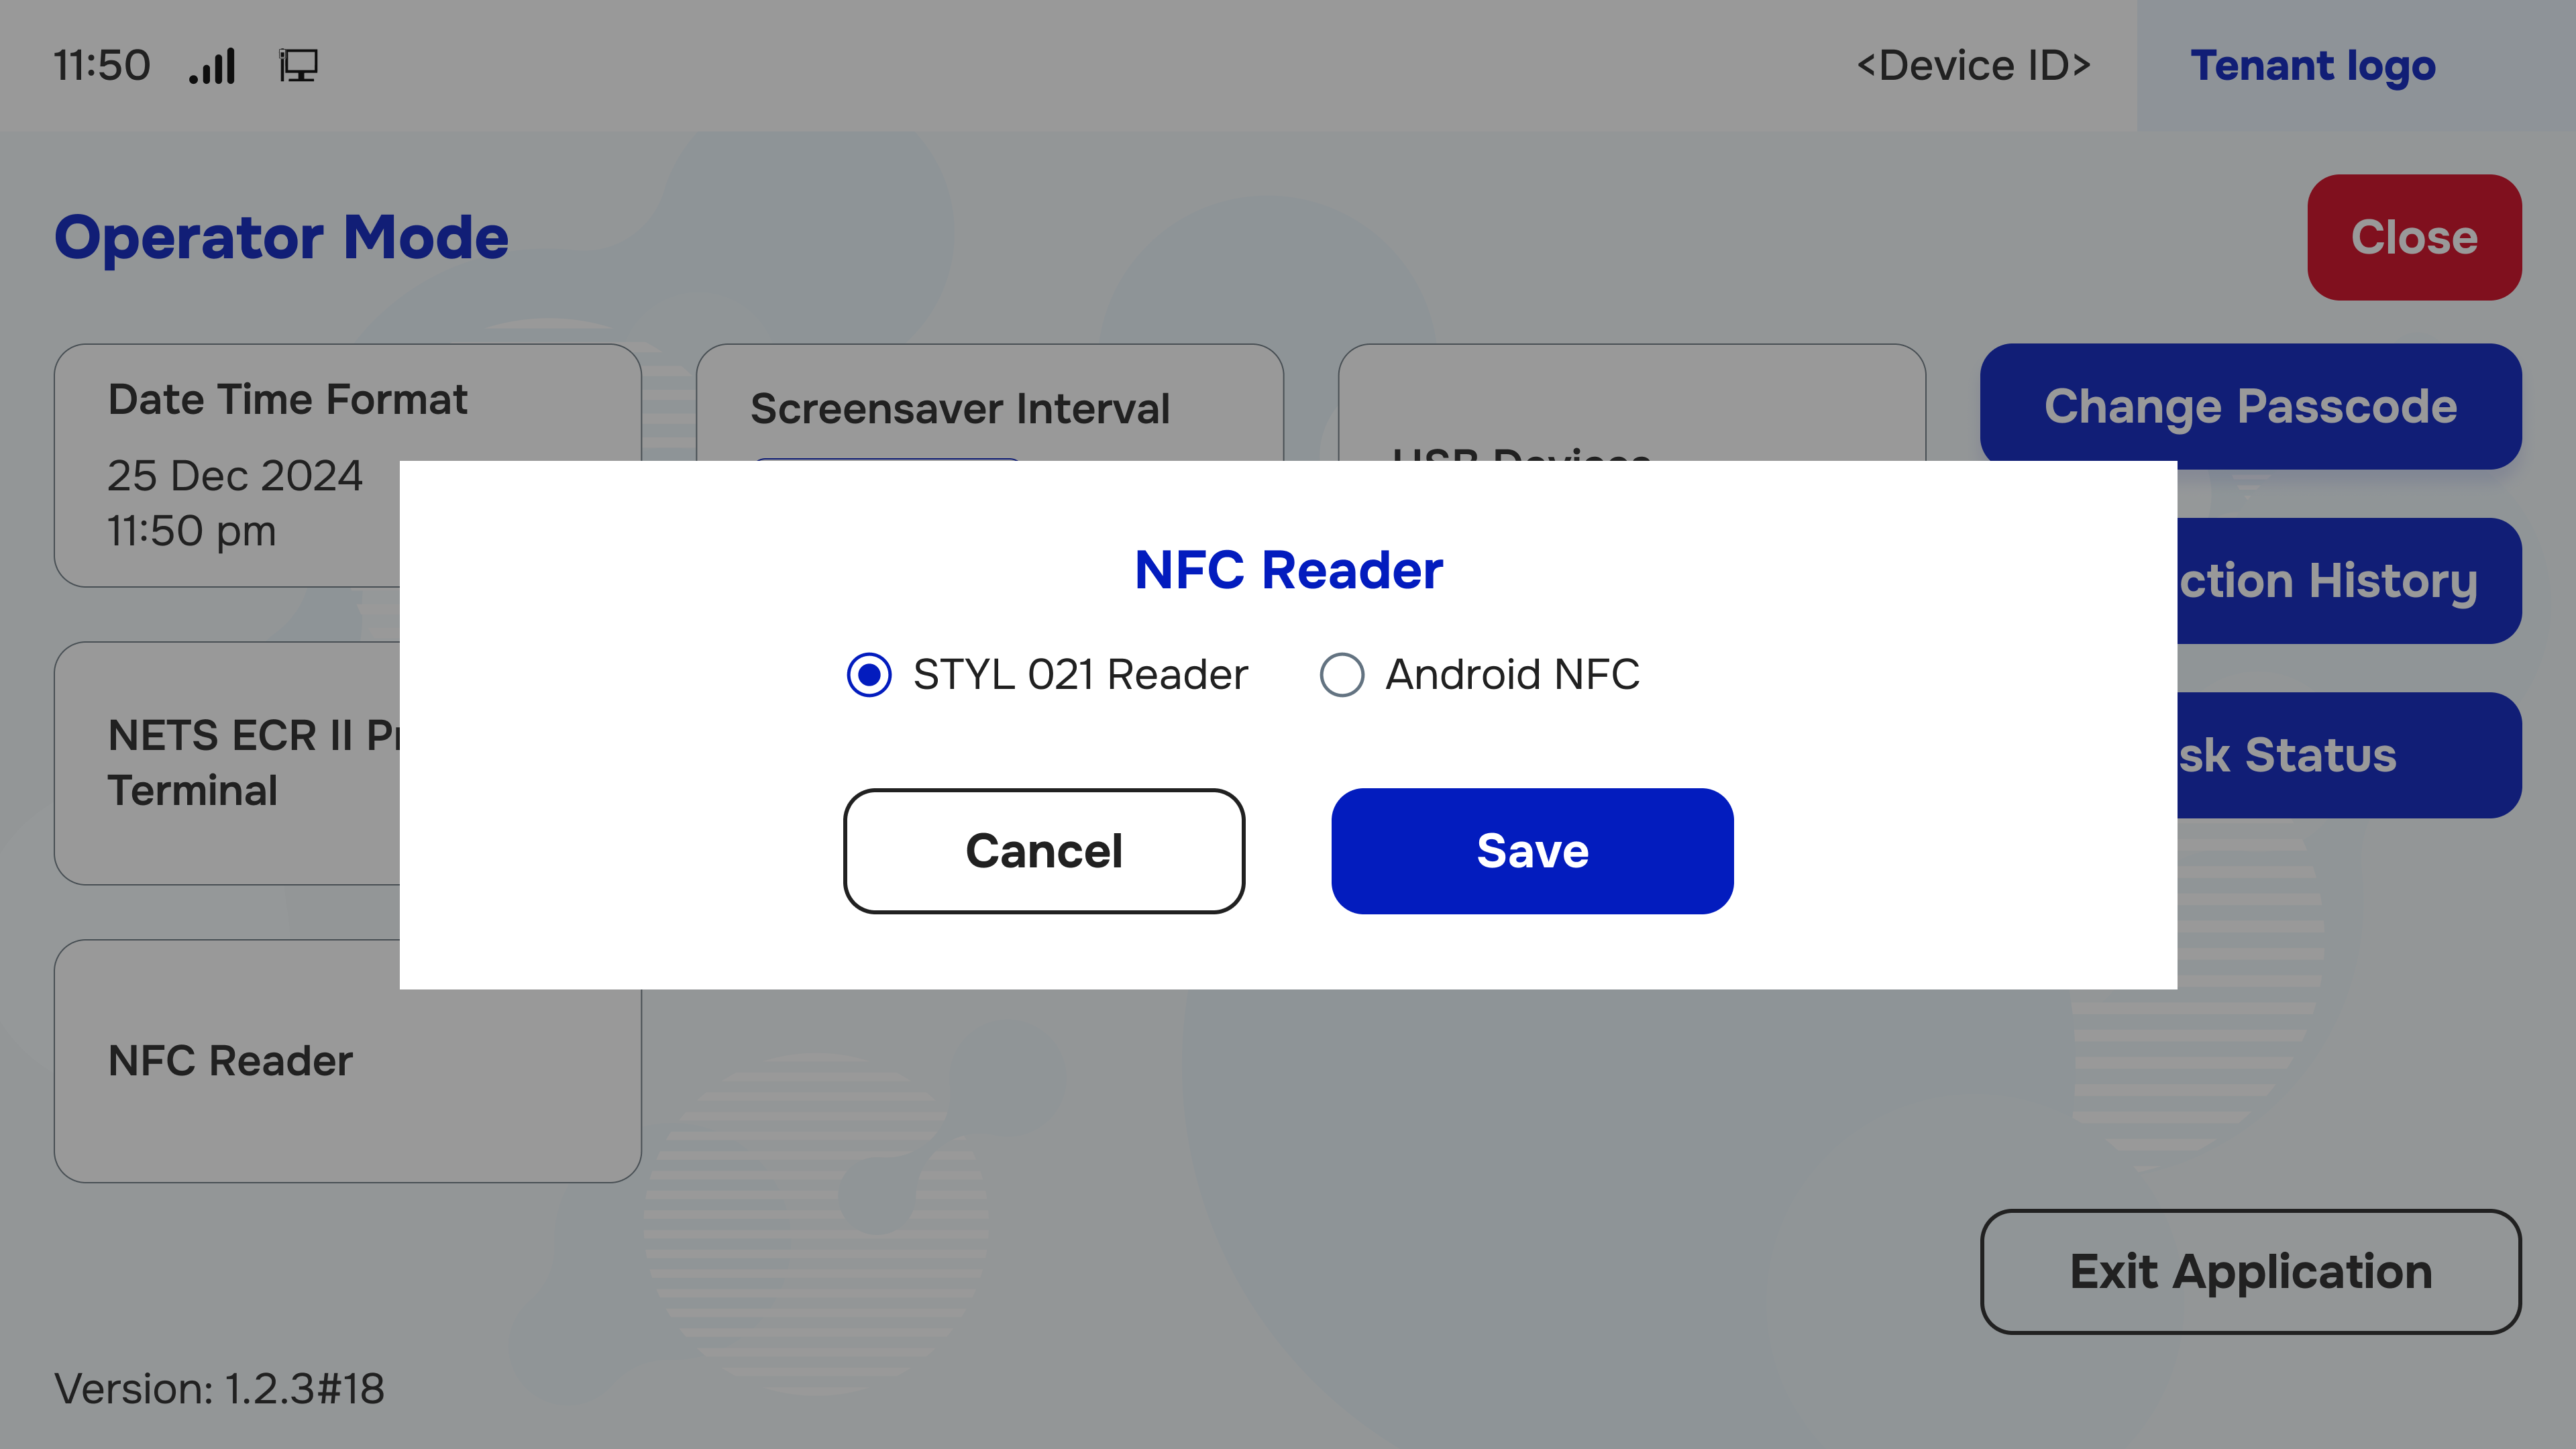
NFC Reader
- Switch Between NFC Reader
- Adjust settings to switch between available NFC readers.
- Click "Save" Button to Finish
- Click the Save button to confirm changes.
#
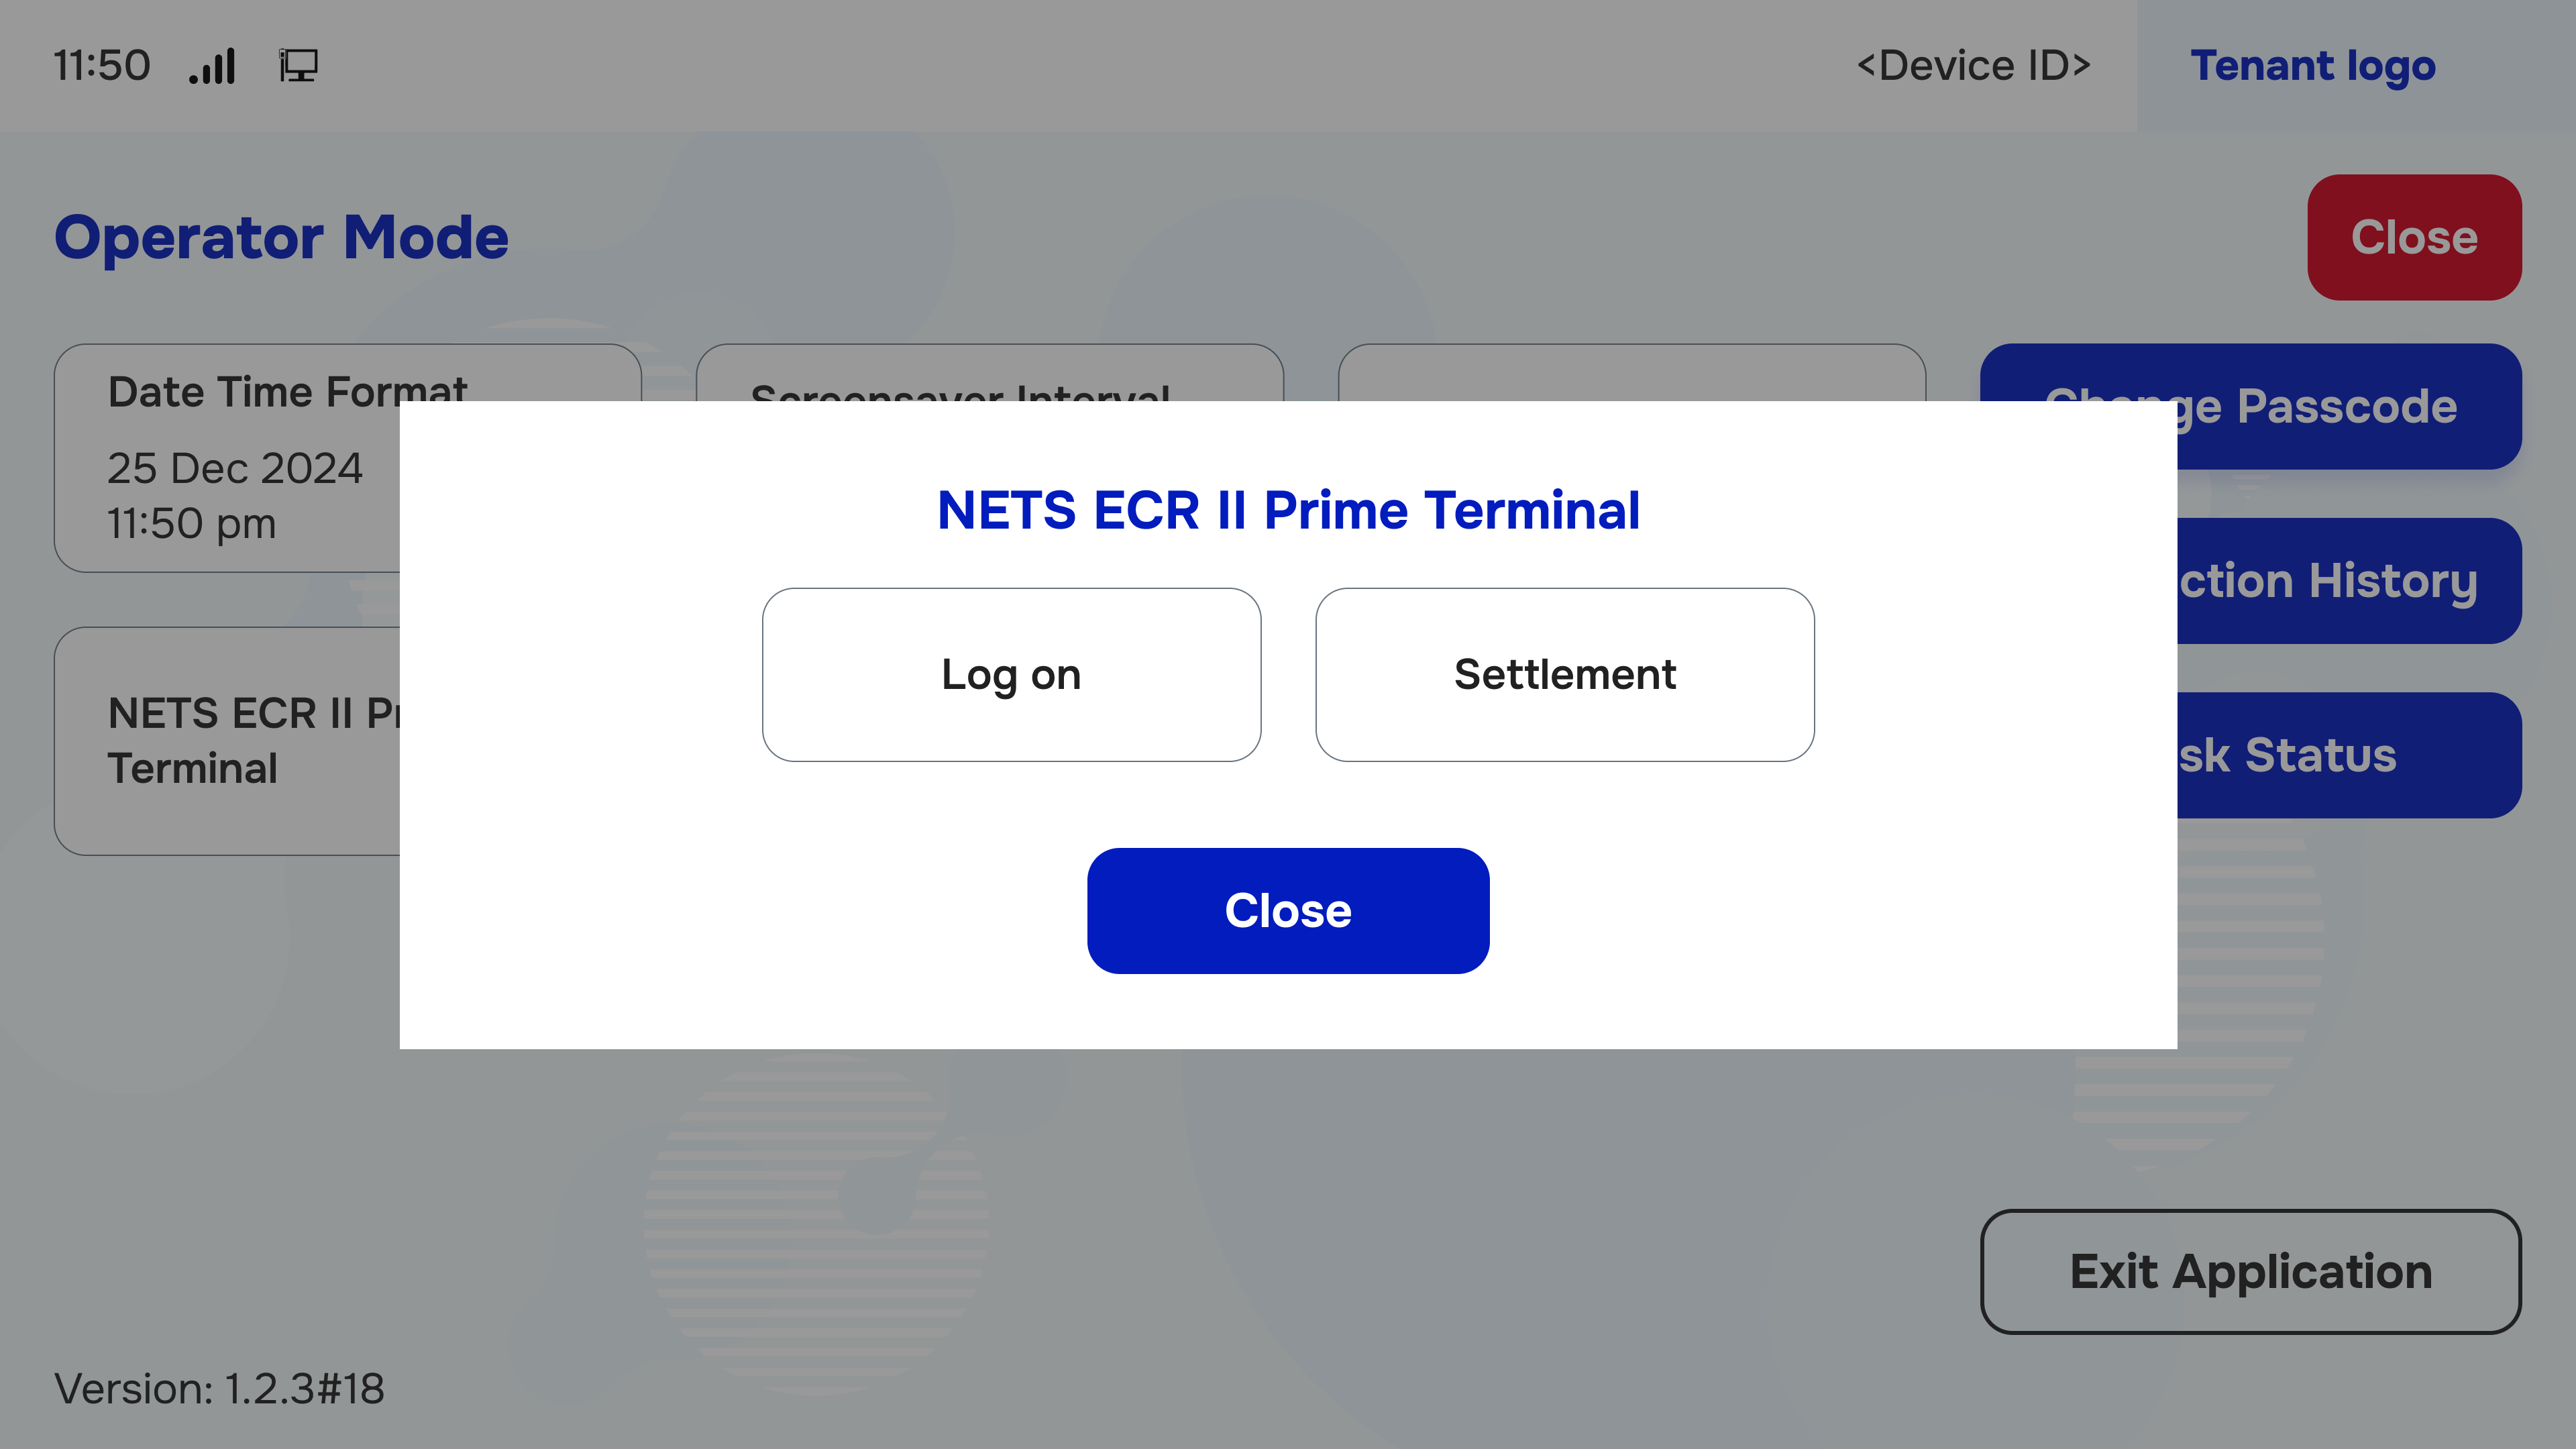
NETS ECR II Prime Terminal
- Click Logon or Settlement to Process the Action
- Select Logon or Settlement to initiate the respective action.
- Click Close if There is No Action
- If no further actions are required, click Close to exit.
#
Card ID Setting
- Select Card Type for the Kiosk (CEPAS or Mifare)
- Choose the appropriate card type for the kiosk.
- For Mifare Card, Select the Card Format
- If using a Mifare card, specify the card format.
- Click "Save" Button to Finish
- Click the Save button to complete the card ID configuration.
#
Conclusion
By following these steps, users can effectively configure the Top-up Kiosk to ensure optimal performance and user experience. For further assistance, please refer to additional documentation or contact support.
#
Screen flow
#
Payment method